.jpg.d60258221c476480a6e073a8805645bb.jpg)


Uwe
-
Posts
2,220 -
Joined
-
Last visited
Content Type
Profiles
Forums
Events
Blogs
Gallery
Everything posted by Uwe
-
You can post the PDF manual here even if it's over the size limit for uploads. Just contact one of the admins (e.g. @northmount) and they'll help you. It's WAY better to have manuals uploaded here for archival purposes and future inquiries.
-
For $50 you really can't go wrong. It'll be a great learning experience not matter what and if you're lucky you'll have a super nice machine. Even if you're not lucky you'll have a parts machine that is worth way more than $50.
-
And you're not interested in sharing what you figured out ... time to update my list.
-
I'm not really sure what what you mean by "keeping the bobbin thread to stay in the groove." What "groove" are you talking about? Post some pictures or a video snippet via YouTube. A picture and an arrow can make all the difference. A little bit of home work goes a long way towards remote, crowd-sourced problem solving. It also helps to use full names like "Cobra Class 4", to communicate more clearly and for the sake of future Google searches for the same problem. It may be obvious to you since you're looking at the machine, but others don't have the benefit of sitting in front of your machine.
-
The page Ron linked to shows the different sizes available. Not sure if I'm helping or enabling.

-
The bobbin does need to unwind evenly for best and predictable results. If the bobbin thread is catchy or jerky then your tensions and knot placement will be somewhat random and you will be very frustrated. Make sure your thread comes off the cone nice and smooth and that your thread guide hole is directly and far enough above the cone to provide even unwinding from the cone. Use a thread sock/net if the thread is springy and tends to unravel and fall down off the cone. I've also had thread cones that were sticky, usually old ones of unknown origin. Double check to your bobbin winding thread path and watch it as it winds (raise the feet and pull the top thread out of the needle when doing dedicated bobbin winding runs.) Try winding a perfect bobbin with very even winding tension and even windings. Or buy some pre-wound bobbins for testing or reference.
-
Did you install a larger needle when you switched from size 69 to size 138 thread?
-
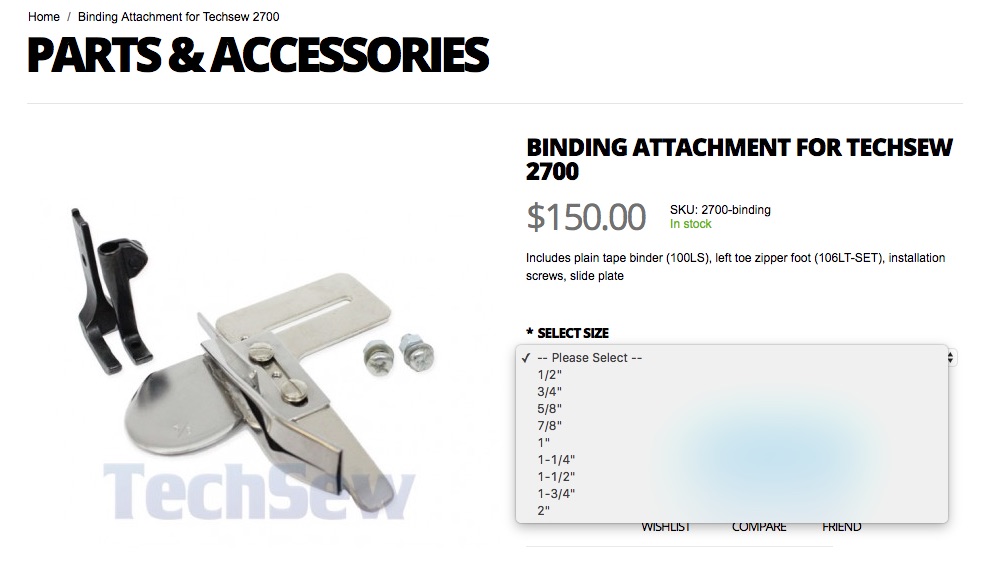
@Techsew Ron how does that binding attachment actually attach to the arm? Is there an additional part? I'd love to see a picture of that binder installed on the Techsew 2750.
-
On my Singer 111W155 it is the first set screws (as you turn the top of the handwheel towards you) that sits in the shaft groove. Same with the shaft collar that has the arrow on it. My machine also has marking "S" that indicate which of the two set screws should be in the groove on the shaft. I suspect it's really that small shaft collar with the arrow on it where this which-set-screw-in-shaft-groove thing matters the most. Here's a video snippet of my Singer 111W155 and its set screw alignment on the hook driving shaft:
-

COWBOY CB4500/441 NARROW FEED DOG + NEEDLE/THROAT PLATE???
Uwe replied to RockyAussie's topic in Leather Sewing Machines
@Darren Brosowski Do you have any pictures of it mounted to the machine or maybe a video clip of them in action? Price would be cool, too. It's hard to make out details with the strong shadows in that picture. I may have to take skinny inline feet off my to-do list. -
COWBOY CB4500/441 NARROW FEED DOG + NEEDLE/THROAT PLATE???
Uwe replied to RockyAussie's topic in Leather Sewing Machines
Got your order @RockyAussie - thanks! It'll go in the mail on Tuesday (Monday is a postal Holiday her in the U.S.) @LeatherLegion thanks for sharing your custom work and pictures! I get the sense there's a need for throat plates with a slim opening and matching feed dogs, especially for use with those skinny harness feet. I'd want to make the feed dog slim enough to leave a very thin wall of material on either side of the needle hole. I'll add it to my list of projects to work on if/when I get my current in-way-over-my-head project machine, a Chiron 5-Axis CNC mill, retrofitted with new motors and controls. -
I mentioned that feed rod alignment in my video as a workaround for machines where the opposing arrow plate is missing. If you have both arrows, use just them. I just checked five of my machines and on every single one of them the feed dog is in its front-most position when the take-up lever is at its highest point. I doubt that the correlation is a coincidence and have a strong feeling that the correlation is one of those general, if unwritten, rules that apply to many sewing machines. It's a quick sanity check, if nothing else. Your machine may well have multiple issues that need to be corrected. Following Eric's advice is your best bet.
-
COWBOY CB4500/441 NARROW FEED DOG + NEEDLE/THROAT PLATE???
Uwe replied to RockyAussie's topic in Leather Sewing Machines
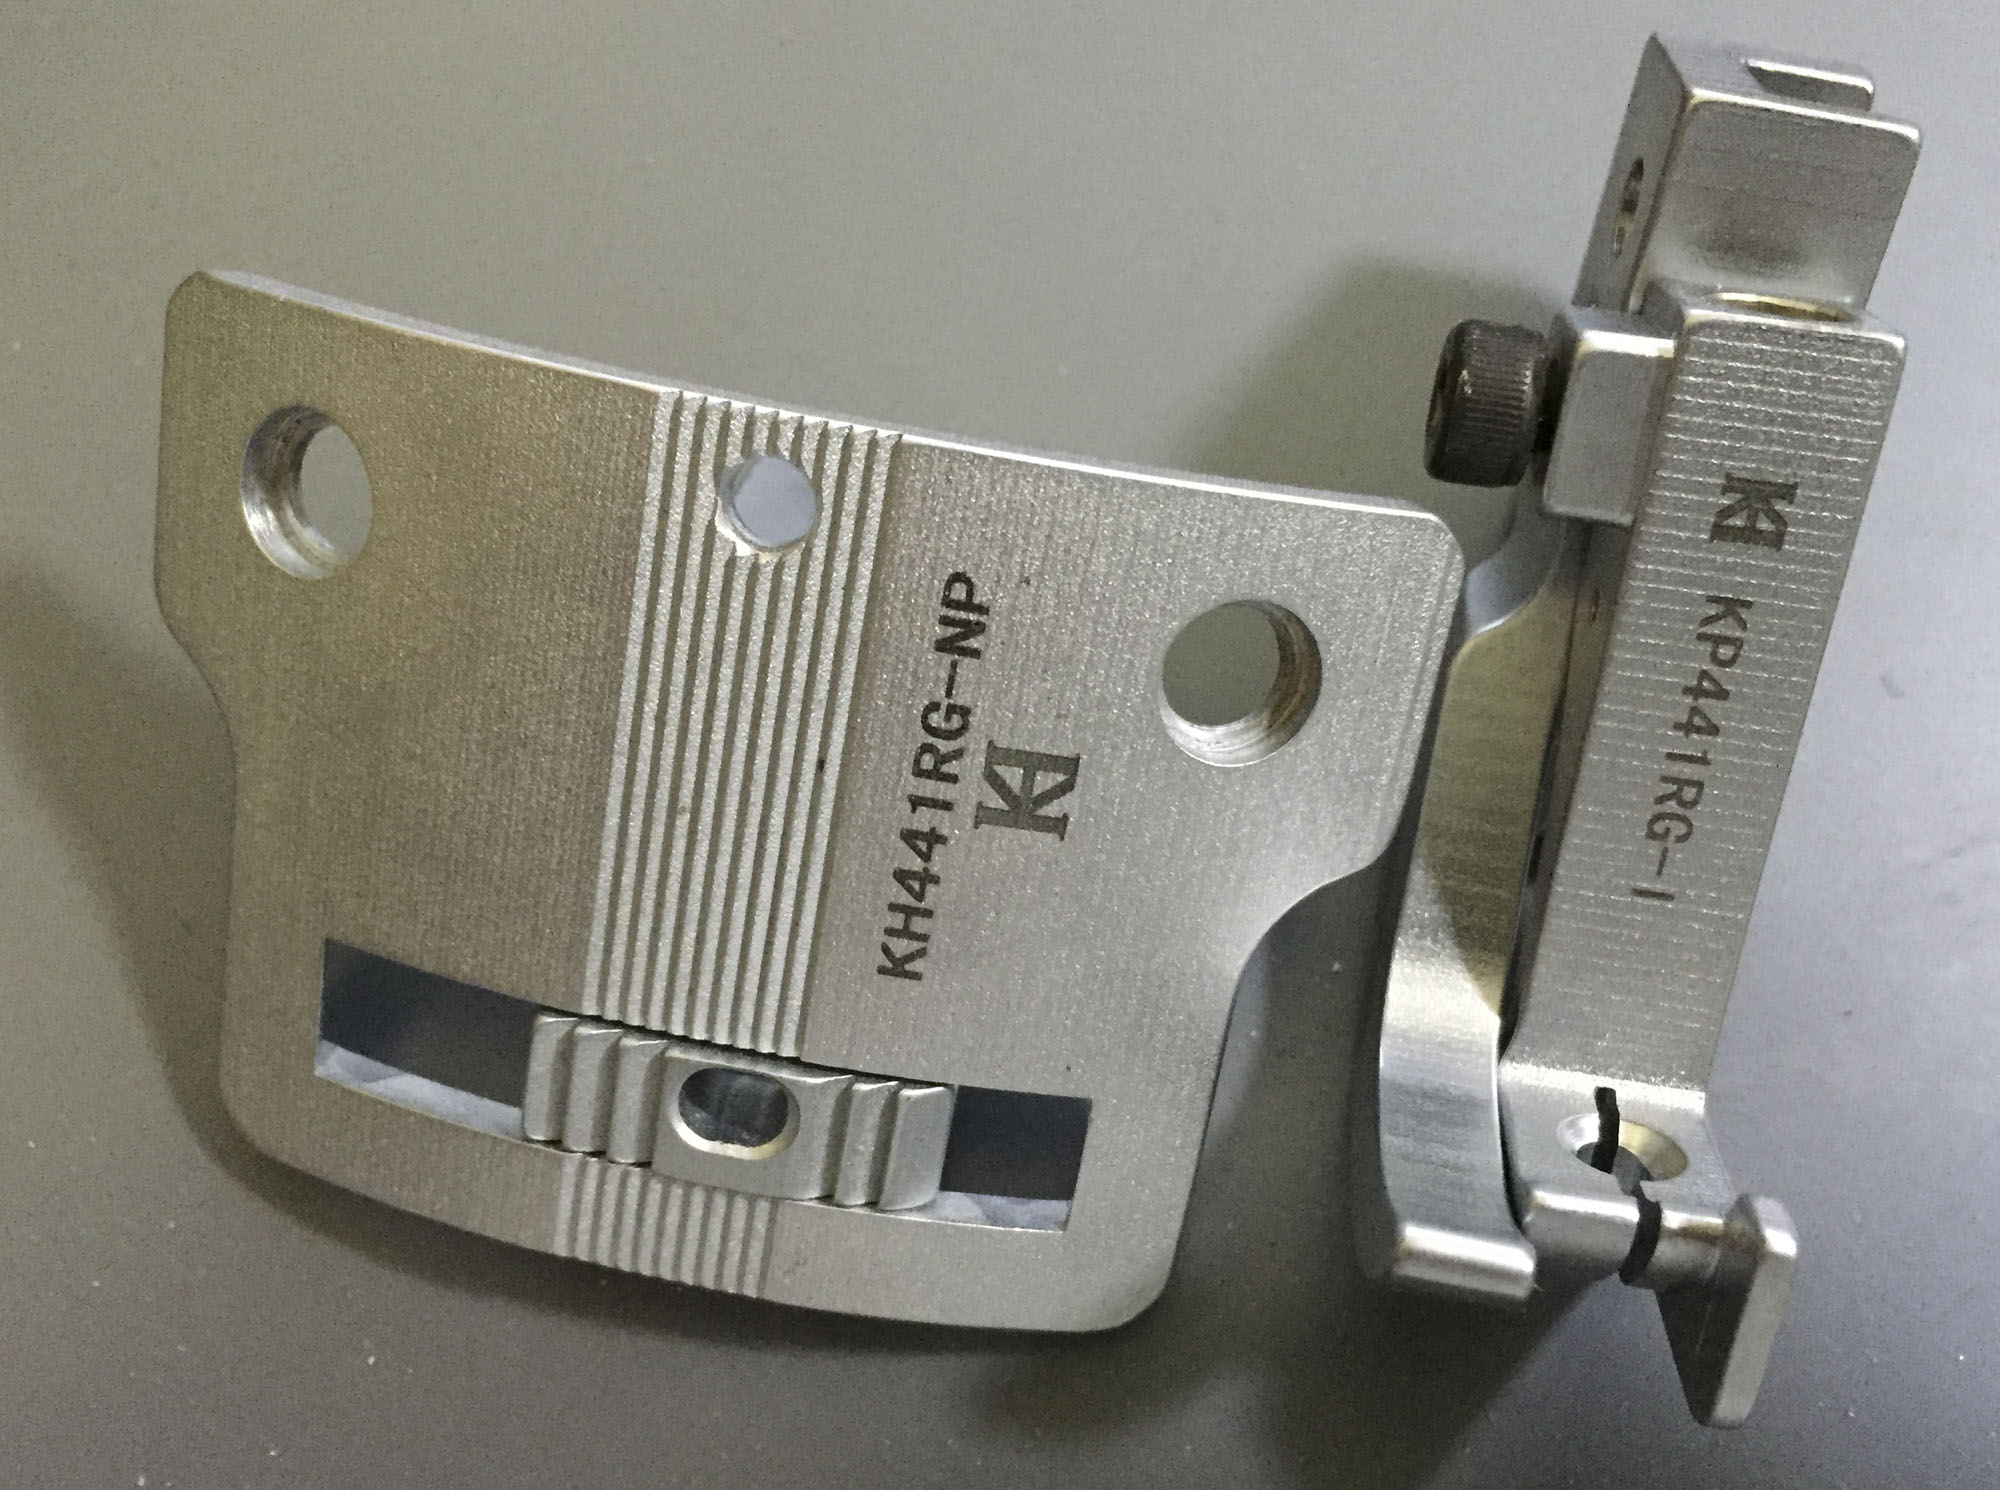
My KH441RG set has been collecting virtual dust in my ebay store for over a year. I just put it on clearance for half price ($99) a week ago. I didn't notice the timing dial when I first looked the pictures . Glad you could use it! The stitch length matching is a balancing act and may indeed need some fussing with the cover plate to make both timing and reverse perfect. -
COWBOY CB4500/441 NARROW FEED DOG + NEEDLE/THROAT PLATE???
Uwe replied to RockyAussie's topic in Leather Sewing Machines
@brmax the feet are smooth on the bottom. All four pieces are a matched set, you'd have to get them all together. But you can mix and match with other pieces, obviously.
-
COWBOY CB4500/441 NARROW FEED DOG + NEEDLE/THROAT PLATE???
Uwe replied to RockyAussie's topic in Leather Sewing Machines
That is a hard seam to stitch. There's no room on either side, really. In the short term to get the order out you'll have to use what you have on hand, no time for ordering stuff, really. I'd give the slotted plate (or perhaps raised stirrup plate) another shot and just ignore the reverse lever. Manually position the needle to back up a stitch or two (without turning the material) or finish the seam by hand. Youtube dude Chechaflo is a master of the manual backstitching technique - his machine has reverse, but he almost never uses it to lock a stitchline. I'd also tack the layers together with a few drops of superglue and binder clamps - do a bunch and let them sit for half an hour before stitching. No struggle to keep the edges aligned while stitching, allowing you to focus on the stitchline. The arm-mounted standard edge guided becomes a nuisance when the guide wheel is over the feed dog. Long-term, consider a drop-down guide that is height adjustable and floats above feed dog (or above the bottom layer when attaching that snap flap). I've never seen the narrow feed dog and throat plate parts referenced in that manual in pictures or real life - they may be hard to source. I did order a specialty KH441RG kit last year which is a dedicated 3mm right edge guiding 4-piece set with special feed dog, throat plate and presser feet. It might be an improvement, but you you won't know for sure until you try it. The feed dog on that set is about 6.5mm wide, compared to the standard 8mm wide feed dog.

-
I just made a correction in my previous comment. The Techsew 2800 is not really based on the Pfaff 335. I'm not what it's based on. Perhaps a Seiko, but I'm not sure. The Paff 355 and its various copies are very popular and capable binding machines. The Pfaff 335 comes in two versions - old casting and new casting. Prices range from $1,500 to $3,000 The Adler 205 is capable of the same type of synchronized binding (binder arm moves back and forth with the needle) as the smaller Pfaff 335 and Techsew 2800, but the cost of the Adler 205 binding setup is high. You're looking at around $500 just for binding parts kit. The Adler 205 class machines run well over $3,000 , whether it's a new clone or a workable original Durkopp Adler. But there are things the Adler 205 will bind (like in that video) that none of the smaller machine will do. It all depends on what type of materials, material thickness, and thread size you need to work with on your projects. There's no point in pretending a smaller machine will do when it won't - when you need a big machine, you need a big machine. I actually custom-built an Adler 205 binding workstation for one customer who needed to bind thick, tough, fireproof bag with a leather edge using Kevlar thread. That was several weeks of prototyping, testing, and development. That is the same machine from the video, by the way. Binding, in general, is an art and science and it has frustrated many people for years. I'm not really an expert in binding (aside from that one custom workstation project). People like @Hockeymender have been doing binding on Pfaff 335 and other machines for years, and may be able to offer suggestions. Oftentimes when a binding machine finally does what it is supposed to do, and well, people dedicate them as binding workstations and never use them for anything else.

-
@Techsew Ron is your main resource for TechSew machines. The Techsew 2750 and the Techsew 2800 are actually very different machine designs - it's much more than just an added binder. The Techsew 2750 is based on the Juki LS-341 design, the Techsew 2800 is based on the vintage casting Pfaff 335 some mystery machine, perhaps a Seiko. Both are nice and capable designs, but they have little in common beyond being cylinder arm machines. Between the two, the Techsew 2800 design is better suited for binding operations, but also more of a narrow-range specialist. The 2800 also has a very slim cylinder arm, which is great if you need it, but it also requires a few engineering compromises like a feed dog that only moves back and forth but not up and down. The Techsew 2750 on the other hand is less suited for binding (binding parts are hard to find, actually), but it has other advantages like bigger bobbin, vertical axis hook (and thus a thicker cylinder arm) which accommodates a larger material and needle range, and a full feed dog motion.
-
Which feet should I have for a Pfaff 335?
Uwe replied to GeorgiaK's topic in Leather Sewing Machines
Edge guiding feet are popular for making seams very close along a straight edge with good precision and repeatability. Slim feet are a good option when you don't have much room on either side of the seam. The come in left, right, double toe versions. College Sewing probably carries these, too.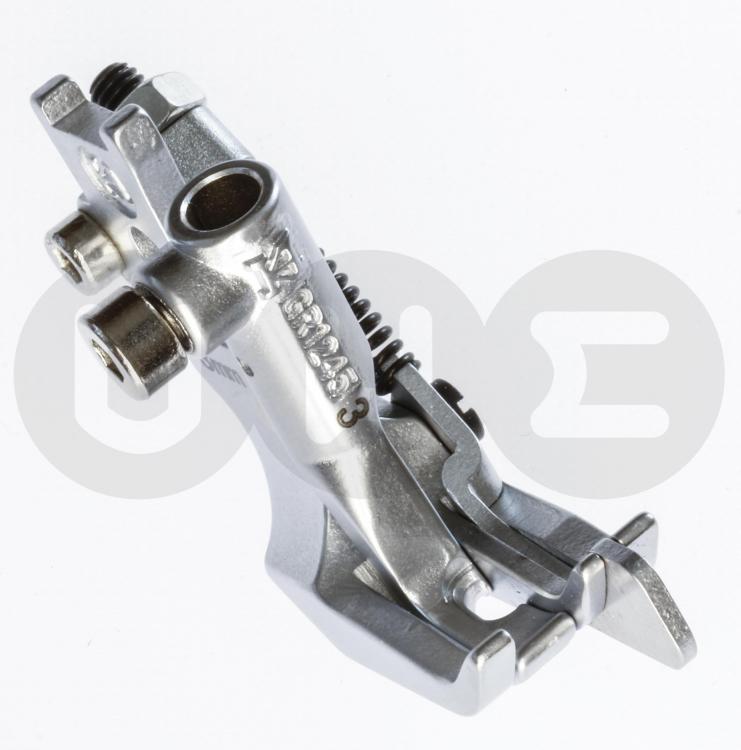
-
top thread shredding.... tried a few things to fix but no luck
Uwe replied to beltbuckles's topic in Leather Sewing Machines
There's your next step -find out what causes that. Tilt the machine back and hand-turn a few stitches with material under the foot while carefully observing how the thread wraps around the hook. Perhaps your bobbin case opener arm is not doing its job. The thread apparently snags somewhere and that is very likely the cause for your thread shredding business. -
top thread shredding.... tried a few things to fix but no luck
Uwe replied to beltbuckles's topic in Leather Sewing Machines
Make sure you take removable parts like throat plate or feed dog off the machine before smoothing them with a dremel tool, diamond file, or abrasive cord. You don't want the abrasive grit falling into your machine or hook. -
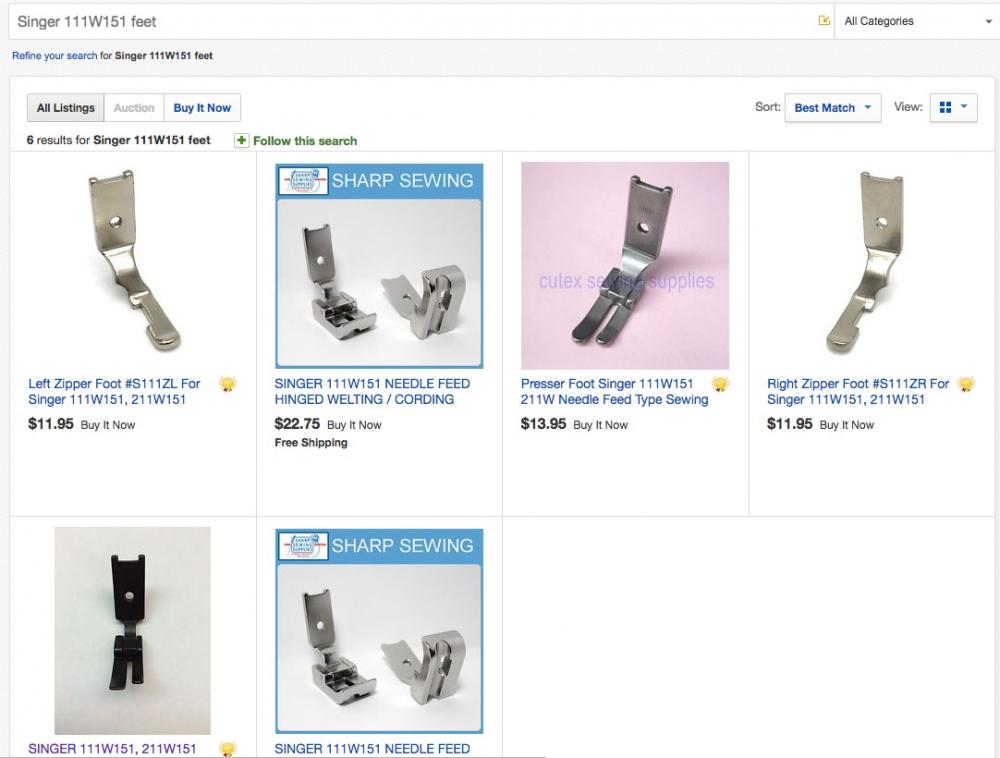
I've had good results searching for feet by compatible, more popular machine names. Since the (bottom+needle feed) Singer 153W100 apparently shares feet with the more common (also bottom+needle feed) Singer 111W151, doing a search on Ebay for "Singer 111W151 feet" yields a small collection of useful looking feet that should all work on your Singer 153W100:
-
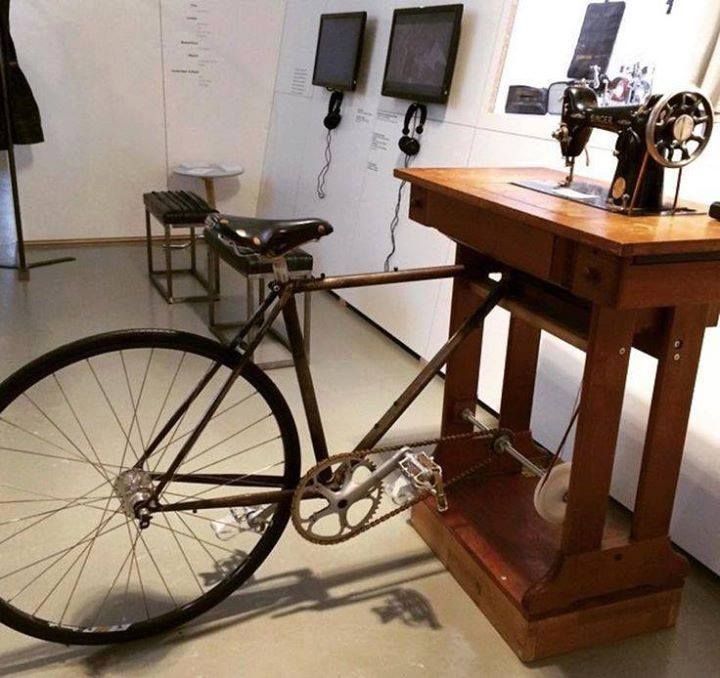
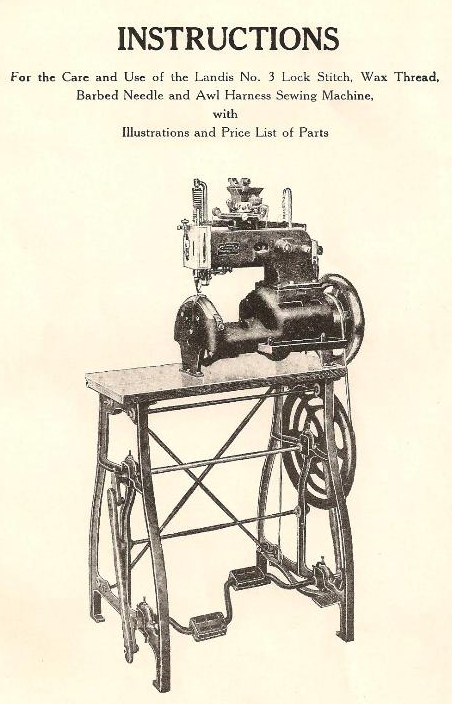
A Landis (some call it a "Landis 1") comes to mind: This Landis 3 has an interesting pedal drive mechanism: You can also retrofit many machines with a custom-engineered pedal drive solution: There was another thread discussing off-grid sewing options:
-
One suggestion would be to show us a picture of your current foot and a link to what you found online, and elaborate on what you learned. It's obvious to you what you're looking at but nobody here has a crystal ball. It's much more economical that you make the effort once upfront, rather than dozens of people reading this all spending time individually looking up part numbers and parts lists. You'll have a better shot at meaningful replies if you show us your homework so that others can learn from it as well.
-
My Cowboy CB-4500 also had some adjustment issues which caused the top thread to occasionally be pulled into the hook's race and snagged enough to cause hang-ups and loops at the bottom in reverse. You troubles may have a different cause, but it may be worth checking hook timing movements. There was a detailed thread a few weeks ago about this and it prompted me to make an adjustment video for the Cowboy CB-4500. On my machine it was a few very subtle adjustments that made the machine cooperate again. Here's the thread: Here's the video that shows the problem on my machine (at the 2:17 mark): Here's the adjustment video I ended up making:
-
Atlas is Atlas Levi's house brand. A double needle post bed sounds like a good candidate for making bags with french seams. The Atlas AT20T53 is only $1,200 almost too cheap even for a clone - you'll be hard pressed to find anything cheaper in that configuration that still makes a stitch. The ATlas may work just fine, though - I have no first -hand experience with them. Just for reference, I have a nice used Durkopp Adler 268 double needle post bed that I won't let go for under $2,000. My general rule is that a good used original is worth as much as a decent new clone. The Atlas machines are NOT clones of Durkopp Adler machines, just to make that clear.