.jpg.d60258221c476480a6e073a8805645bb.jpg)


Uwe
-
Posts
2,221 -
Joined
-
Last visited
Content Type
Profiles
Forums
Events
Blogs
Gallery
Store
Everything posted by Uwe
-
The short answer is a general "no", I'm afraid. Here's a thread that talks about just that:
-

Why Does My Consew 226 Need so Much Upper Tension?
Uwe replied to Pintodeluxe's topic in Leather Sewing Machines
That's a habit you should discontinue. It's like resting your left foot on the clutch (or the brake) while you drive - nothing good can come from it. Your foot lift thread tension release mechanism may be engaging too early or not releasing properly. The pin (no. 20) that pushes from the back of the machine against the plate behind the tension unit should have a little bit of play during normal sewing. Perhaps this mechanism is gummed up or sticky and never really lets go properly, thereby always working against the tension spring. One way to check this is to remove the pin 20 altogether for testing. To do this remove the tension unit, pull out pin 20, and the reinstall the tension unit. This will disable the foot lift activated thread tension release mechanism and lets you verify if the thread tension unit itself is working properly. If the machine sews fine without pin 20, then the problem is in your foot lift thread tension release mechanism. If you still cannot adjust thread tension properly, then it's time to carefully check how the thread gets wrapped around the hook. It may snag somewhere or your bobbin case opener may not work properly. -
You really need to call the (Leather Machine co. ) Cobra folks for info and a sales pitch. There is virtually no information published on either of theses machines, no specs, no manuals, only one postage stamp size picture on their website and a price. They say they do this on purpose so that you call them. That approach must appeal to some subset of the market - it certainly doesn't work for me.
-
The Kenmore is a domestic machine and the Singer is a domestic machine pretending not to be a domestic machine. Neither of them will do what you want to do well, if at all. Save your money towards a proper industrial leather sewing machine Read the sticky note near the top of this category : Watch canvas bag master @AlexanderDyer sew a heavy canvas bag and note what types of machines he uses:
-
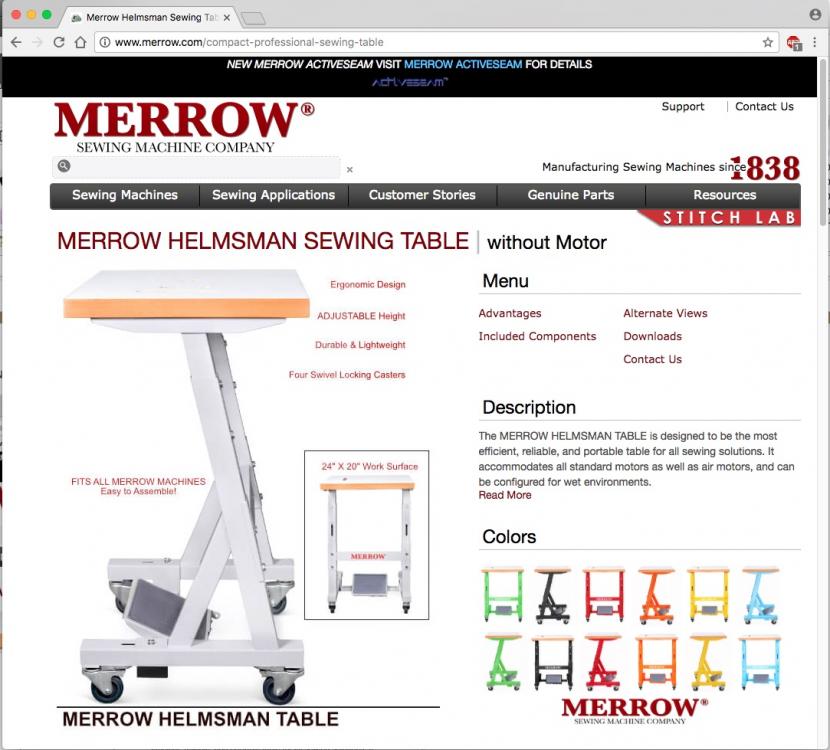
$279 according to the Merrow.com website. Not really big bucks, but in the USA, any table over $100 is considered big bucks. I wish there were more Merrow and Kessler tables out there.
-
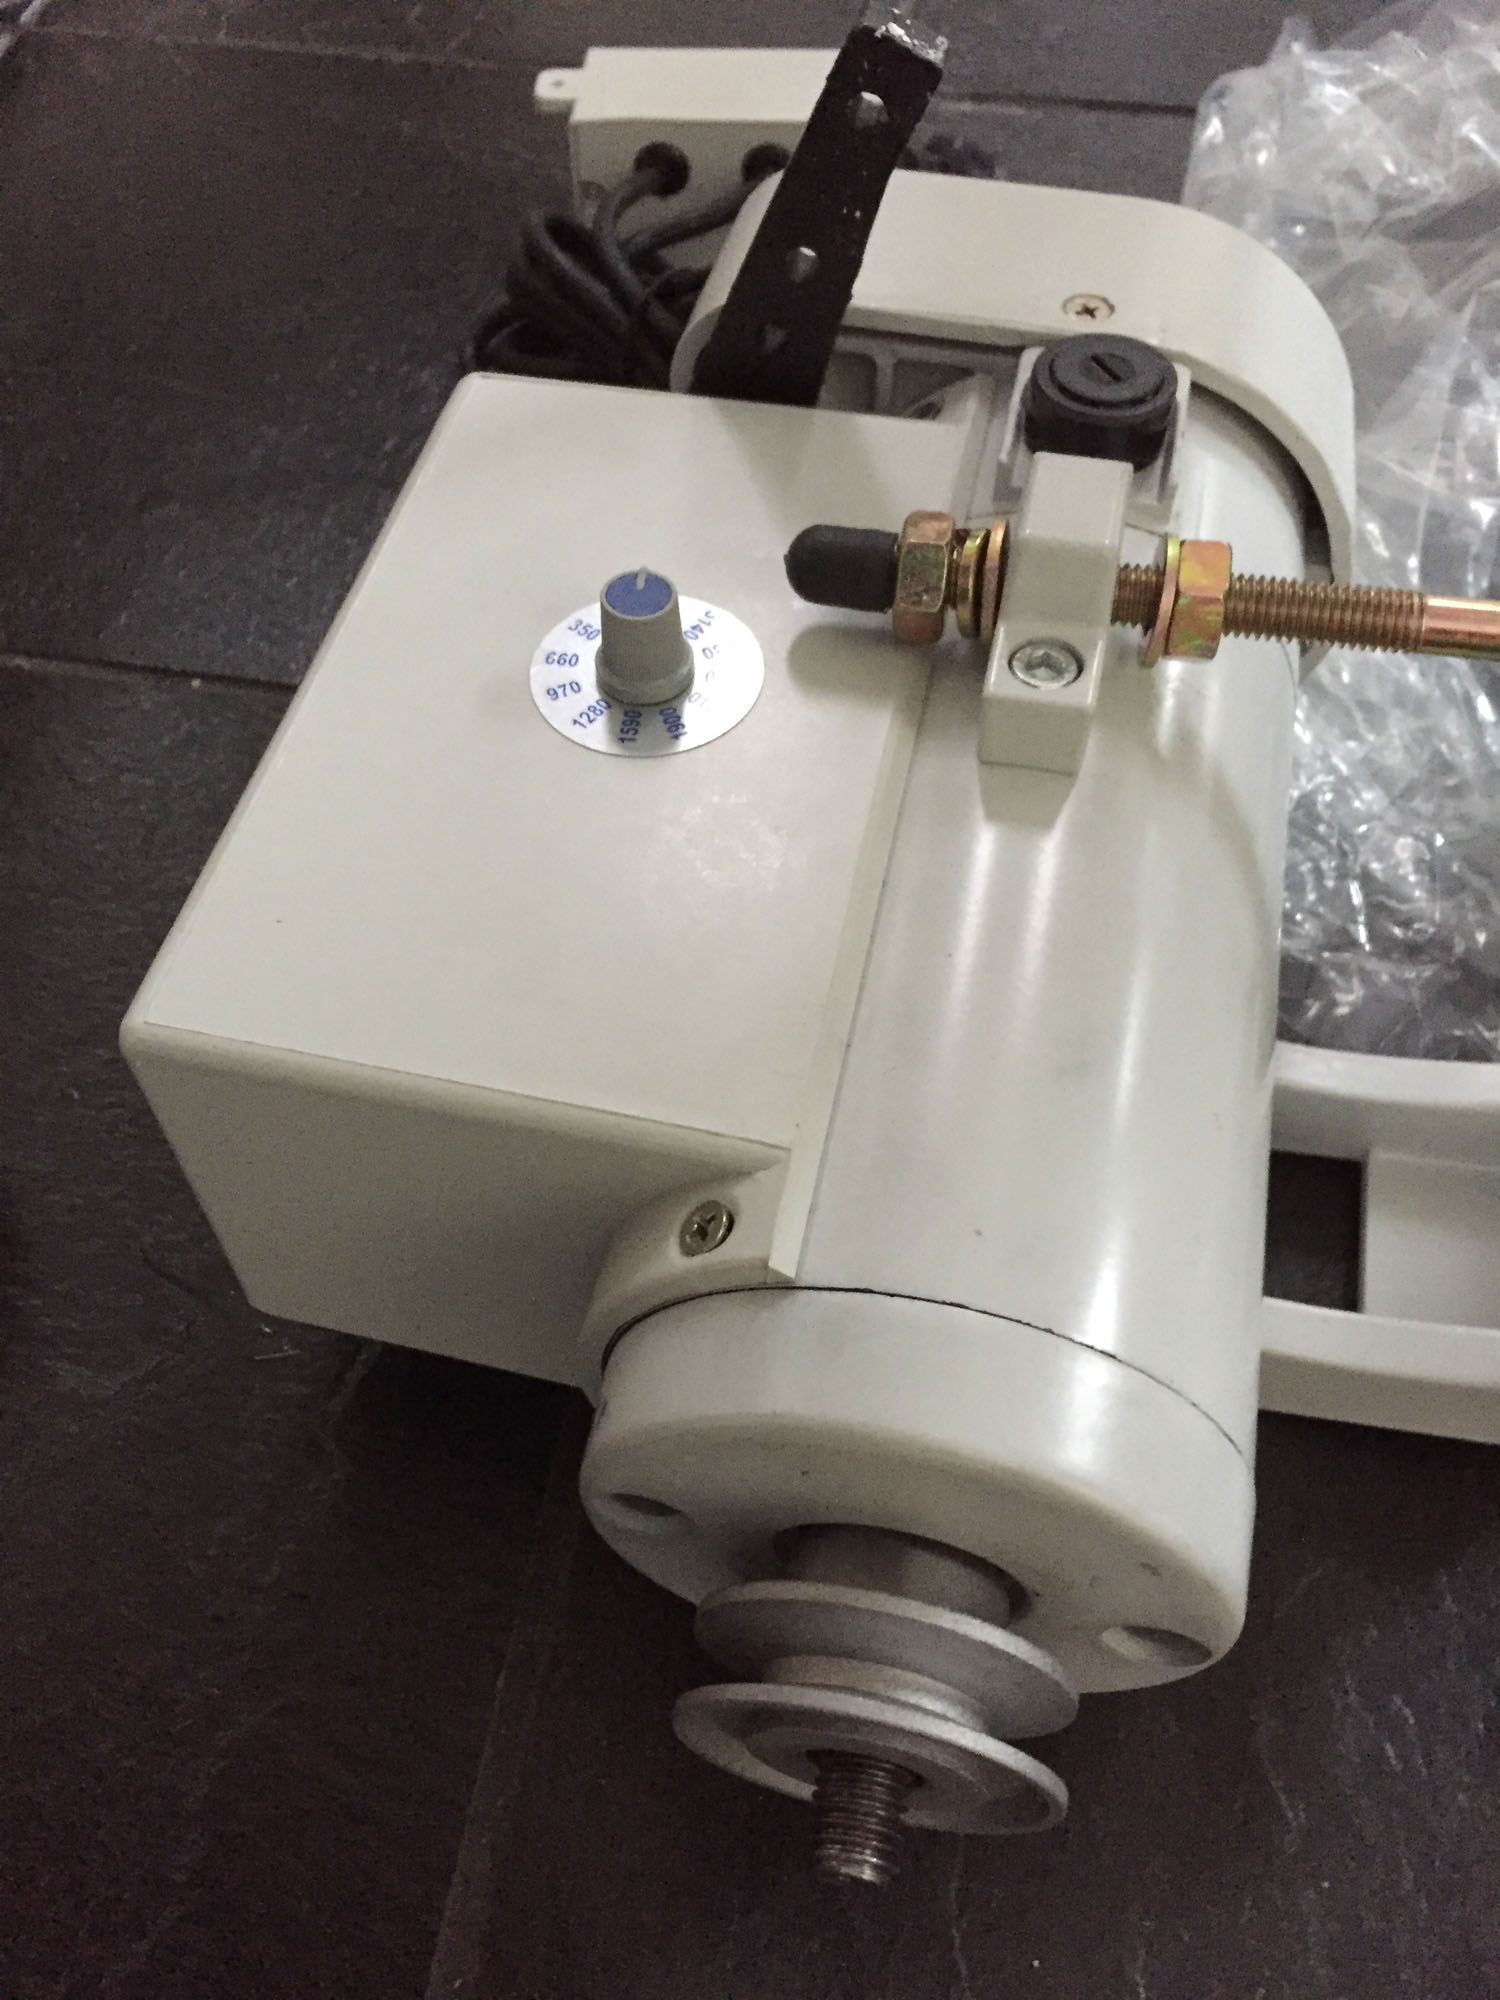
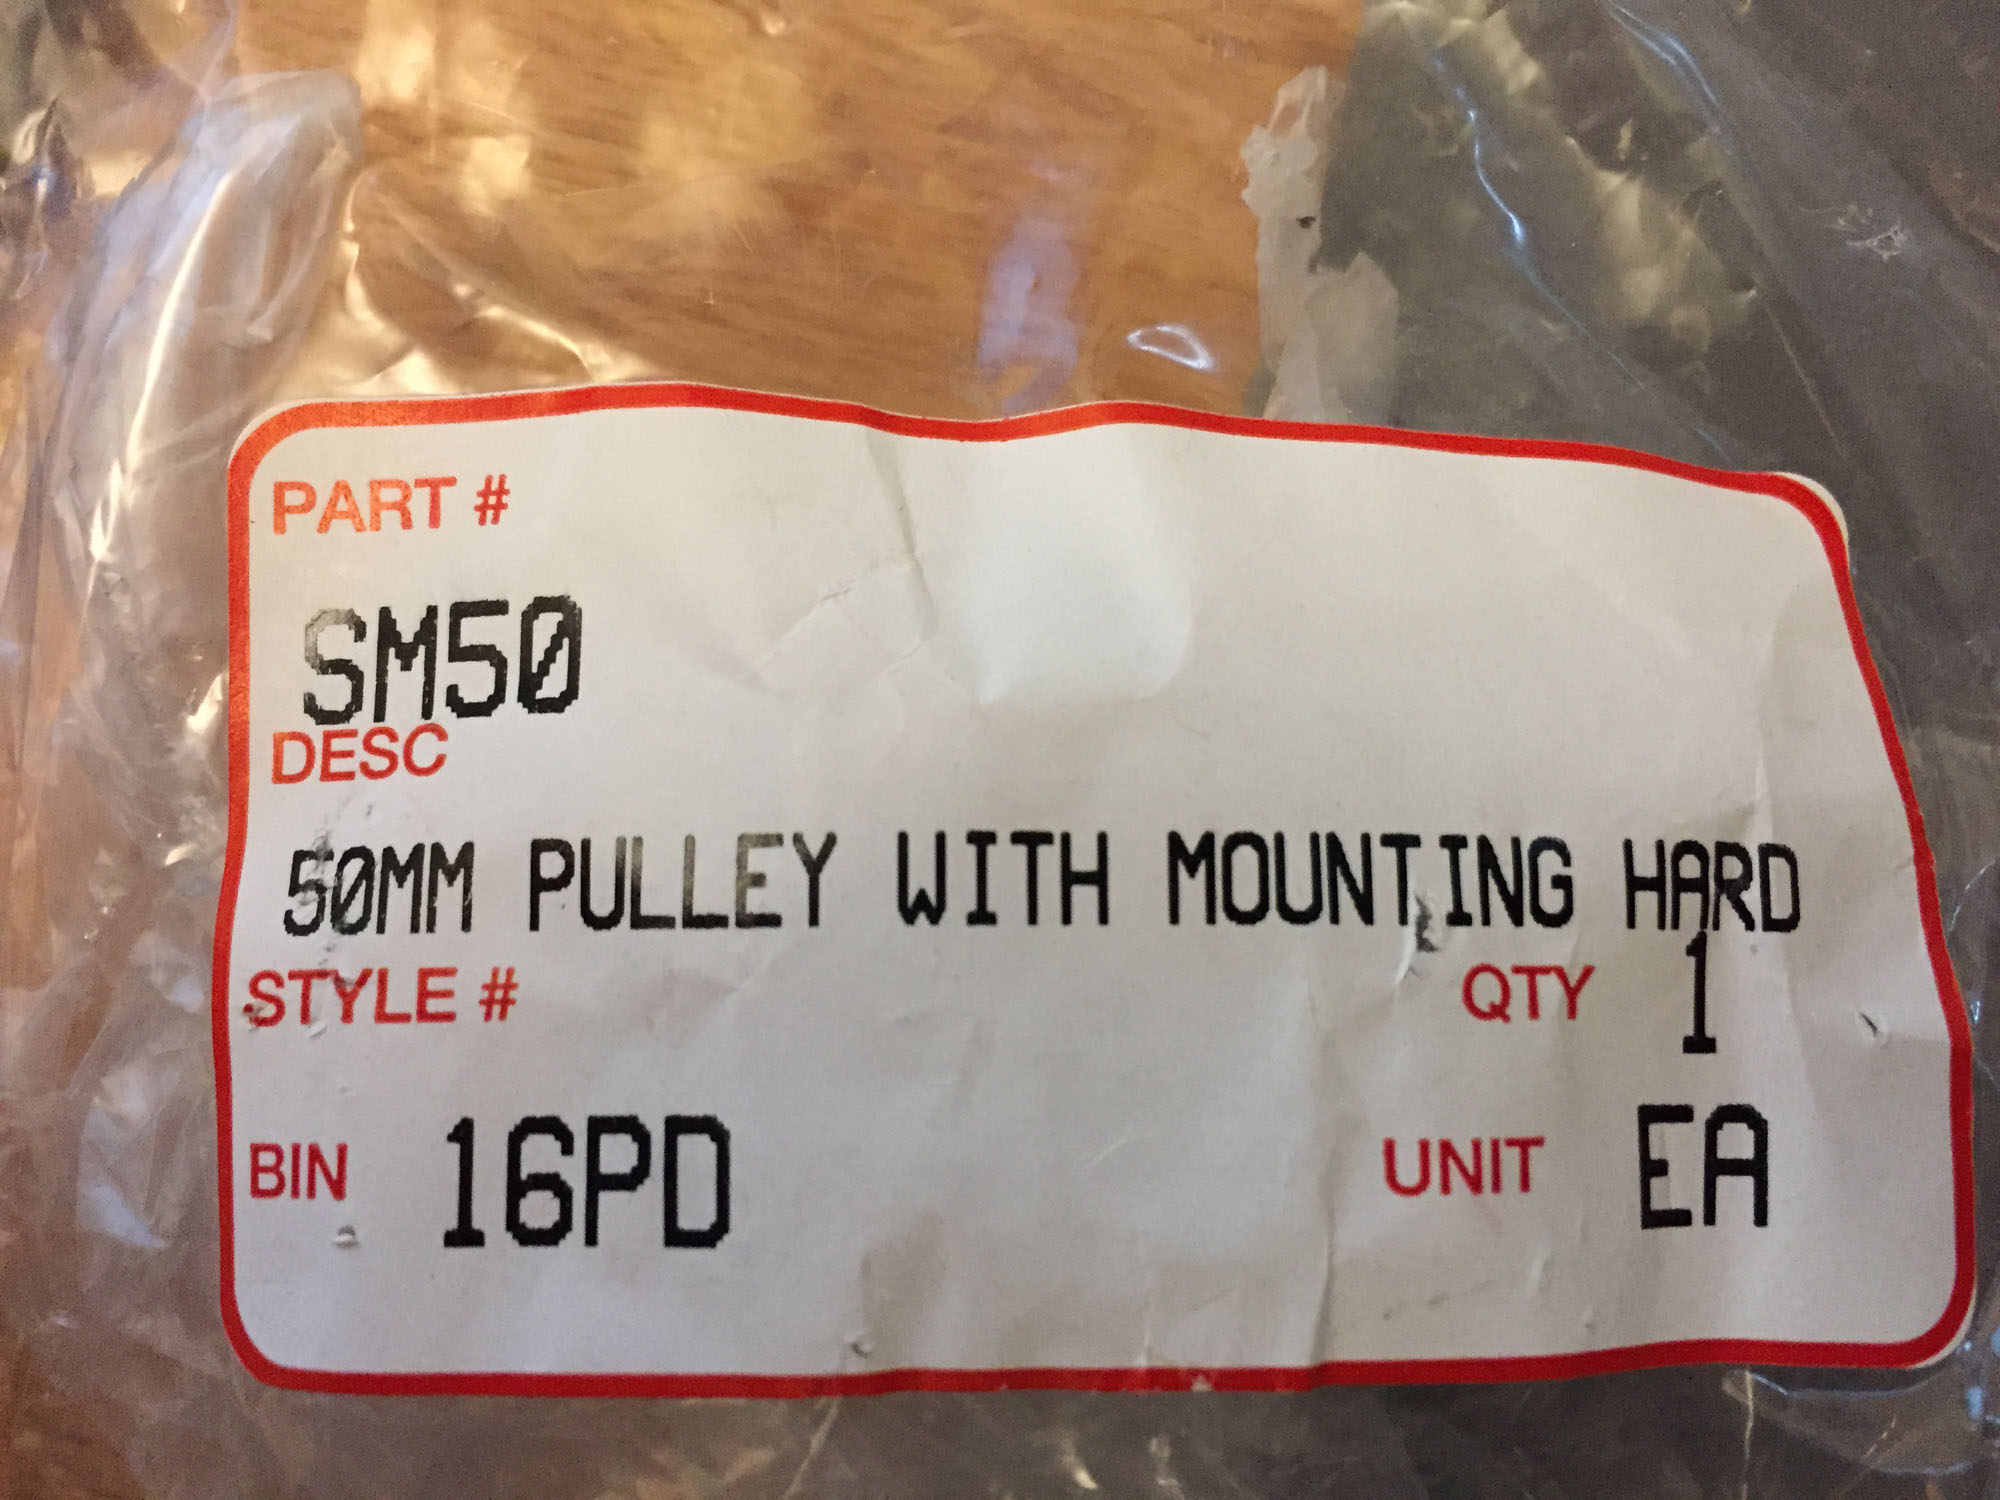
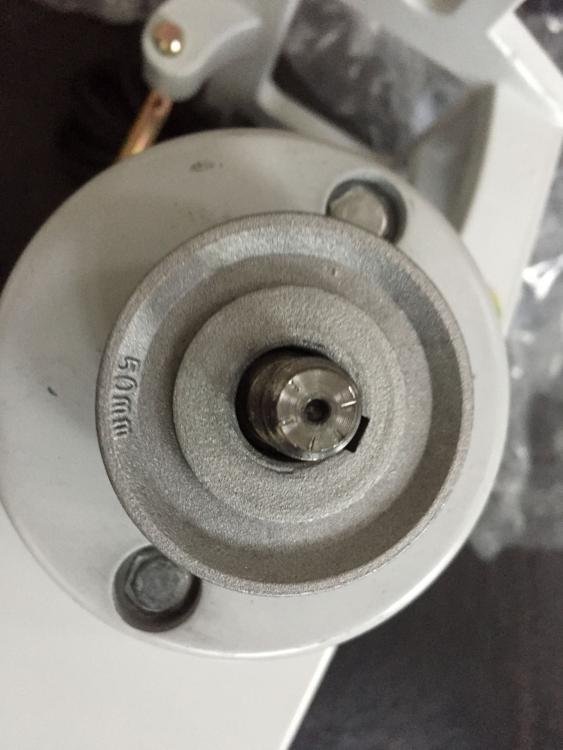
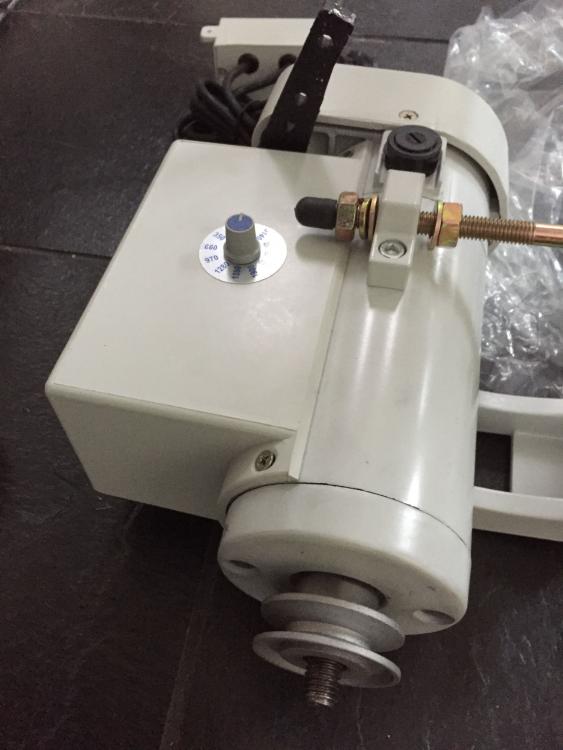
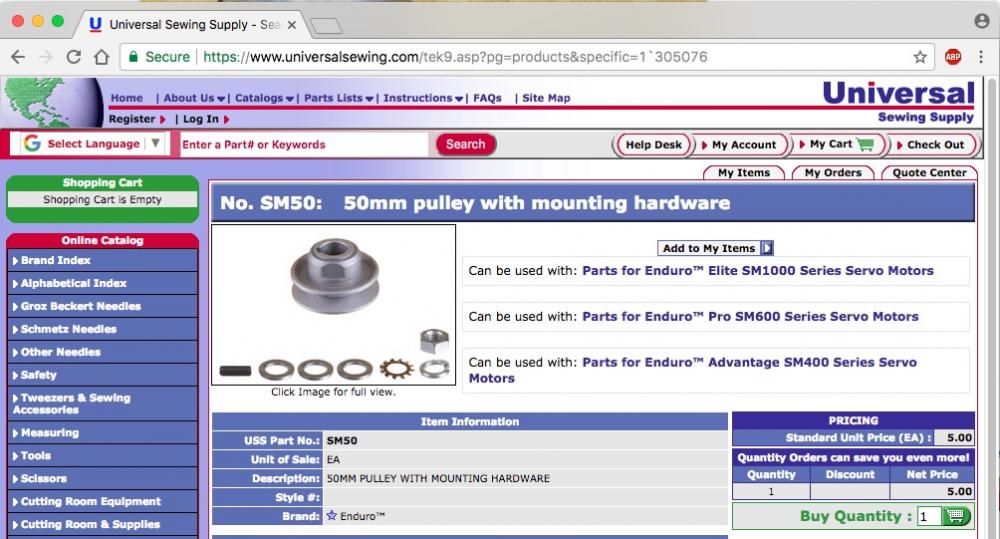
That Rex motor looks very much the Family Sew variety. Your main problem may be that these motors originate in the metric part of the universe and you're trying to match up an imperial pulley. My Family Sew motor has a 15mm shaft and I got some SM50 50mm pulleys at UniversalSewing.com a while ago that fit nicely.

-
$600 a good deal on Pfaff 1245 with servo?
Uwe replied to SheltathaLore's topic in Leather Sewing Machines
I'm normally a Pfaff fan, but I'm getting bad vibes from that CL ad. To me it looks like it's been driven hard by uncaring people, and then suffered a botched paint job. It ranks on my desirable-o-meter scale right up there with a once-fabulous 80's BMW that now has a body by Bondo®, a window held up with duct tape, and a spray can paint job. It may also just be a clone, not a genuine Pfaff, like Joe suggested. $600 for a serviceable genuine Pfaff is okay, but $600 for a worn-out clone is too much. It may look better in person, but normally it's the other way around. For the archive:
-
The problem with links to Ebay ads and their pictures is that they will disappear very soon. That link will be useless a few months from now. Only images that get uploaded directly here on LW stick around for a long time for future reference (site admins willing.) It would be great if some motivated person with an interest in vintage decals (yay Tony!) could download the pictures from the ebay ad and then upload them here.
-
Yes, Ebay vendors will often do all the research for you. For LW archiving purposes, I copied the list of suitable industrial zig-zag machines from the Ebay ad below. I have a feeling that just about any of these machines can join two pieces of hair-on-hide leather: Artisan : 457 Brother : B851, B852 Consew : 175RB, 275R, 276R, 347 Juki : LZ-271, LZ-391, LZ-582, LZ-583, LZ-583, LZ-1280, LZ-1285, LZ-1286, LZ-1287, LZ-1290, LZ-2280, LZ-2282, LZ-2284, LZ-2286, LZ-2290 Mitsubishi : LZ-710, LZ-720, LZ-760, LZ-780, LZ-790 Singer : 107G, 107W, 143G, 143W, 457W, 457U Stager : DZ-S31 Toyota : AD550
-
There are modern day versions of the Singer 20Uxx series (e.g. Singer 20U43 from Techsew for $800). The knee-operated zig-zag width adjustment is probably not an essential feature for patchwork rugs. Other vintage zig-zag machines might be good candidates as well, examples: Singer 107W3, Pfaff130, Pfaff 138-63, and others. These folks also appear to be using a vintage industrial zig-zag, but I can't quite tell what model that is just from the foot:
-
Yes, you can. See page 31 of the Juki LU-1508N user manual (Juki LU-1508N Instruction Manual.pdf) Be sure to read the rest of the manual, too.
-
If you come across another machine that meets your requirements, I'd like to know about it. We live in an age where a Toyota Camry is more of a true American car than a Jeep. For "true German" machines designed and made in Germany while the company was still a German owned company, you have to go back a few decades. I have two very nice Durkopp Adler 268 post bed machines that meet that criteria. I might be willing to part with them to fund my Durkopp Adler M-Type H868 Classic piggy bank.
-
The only machine in I'm aware of that meets your requirements is the Durkopp Adler M-Type H868 Classic, which is on my list of machines to own before I die. Make sure you sit down before you open that quote.
-
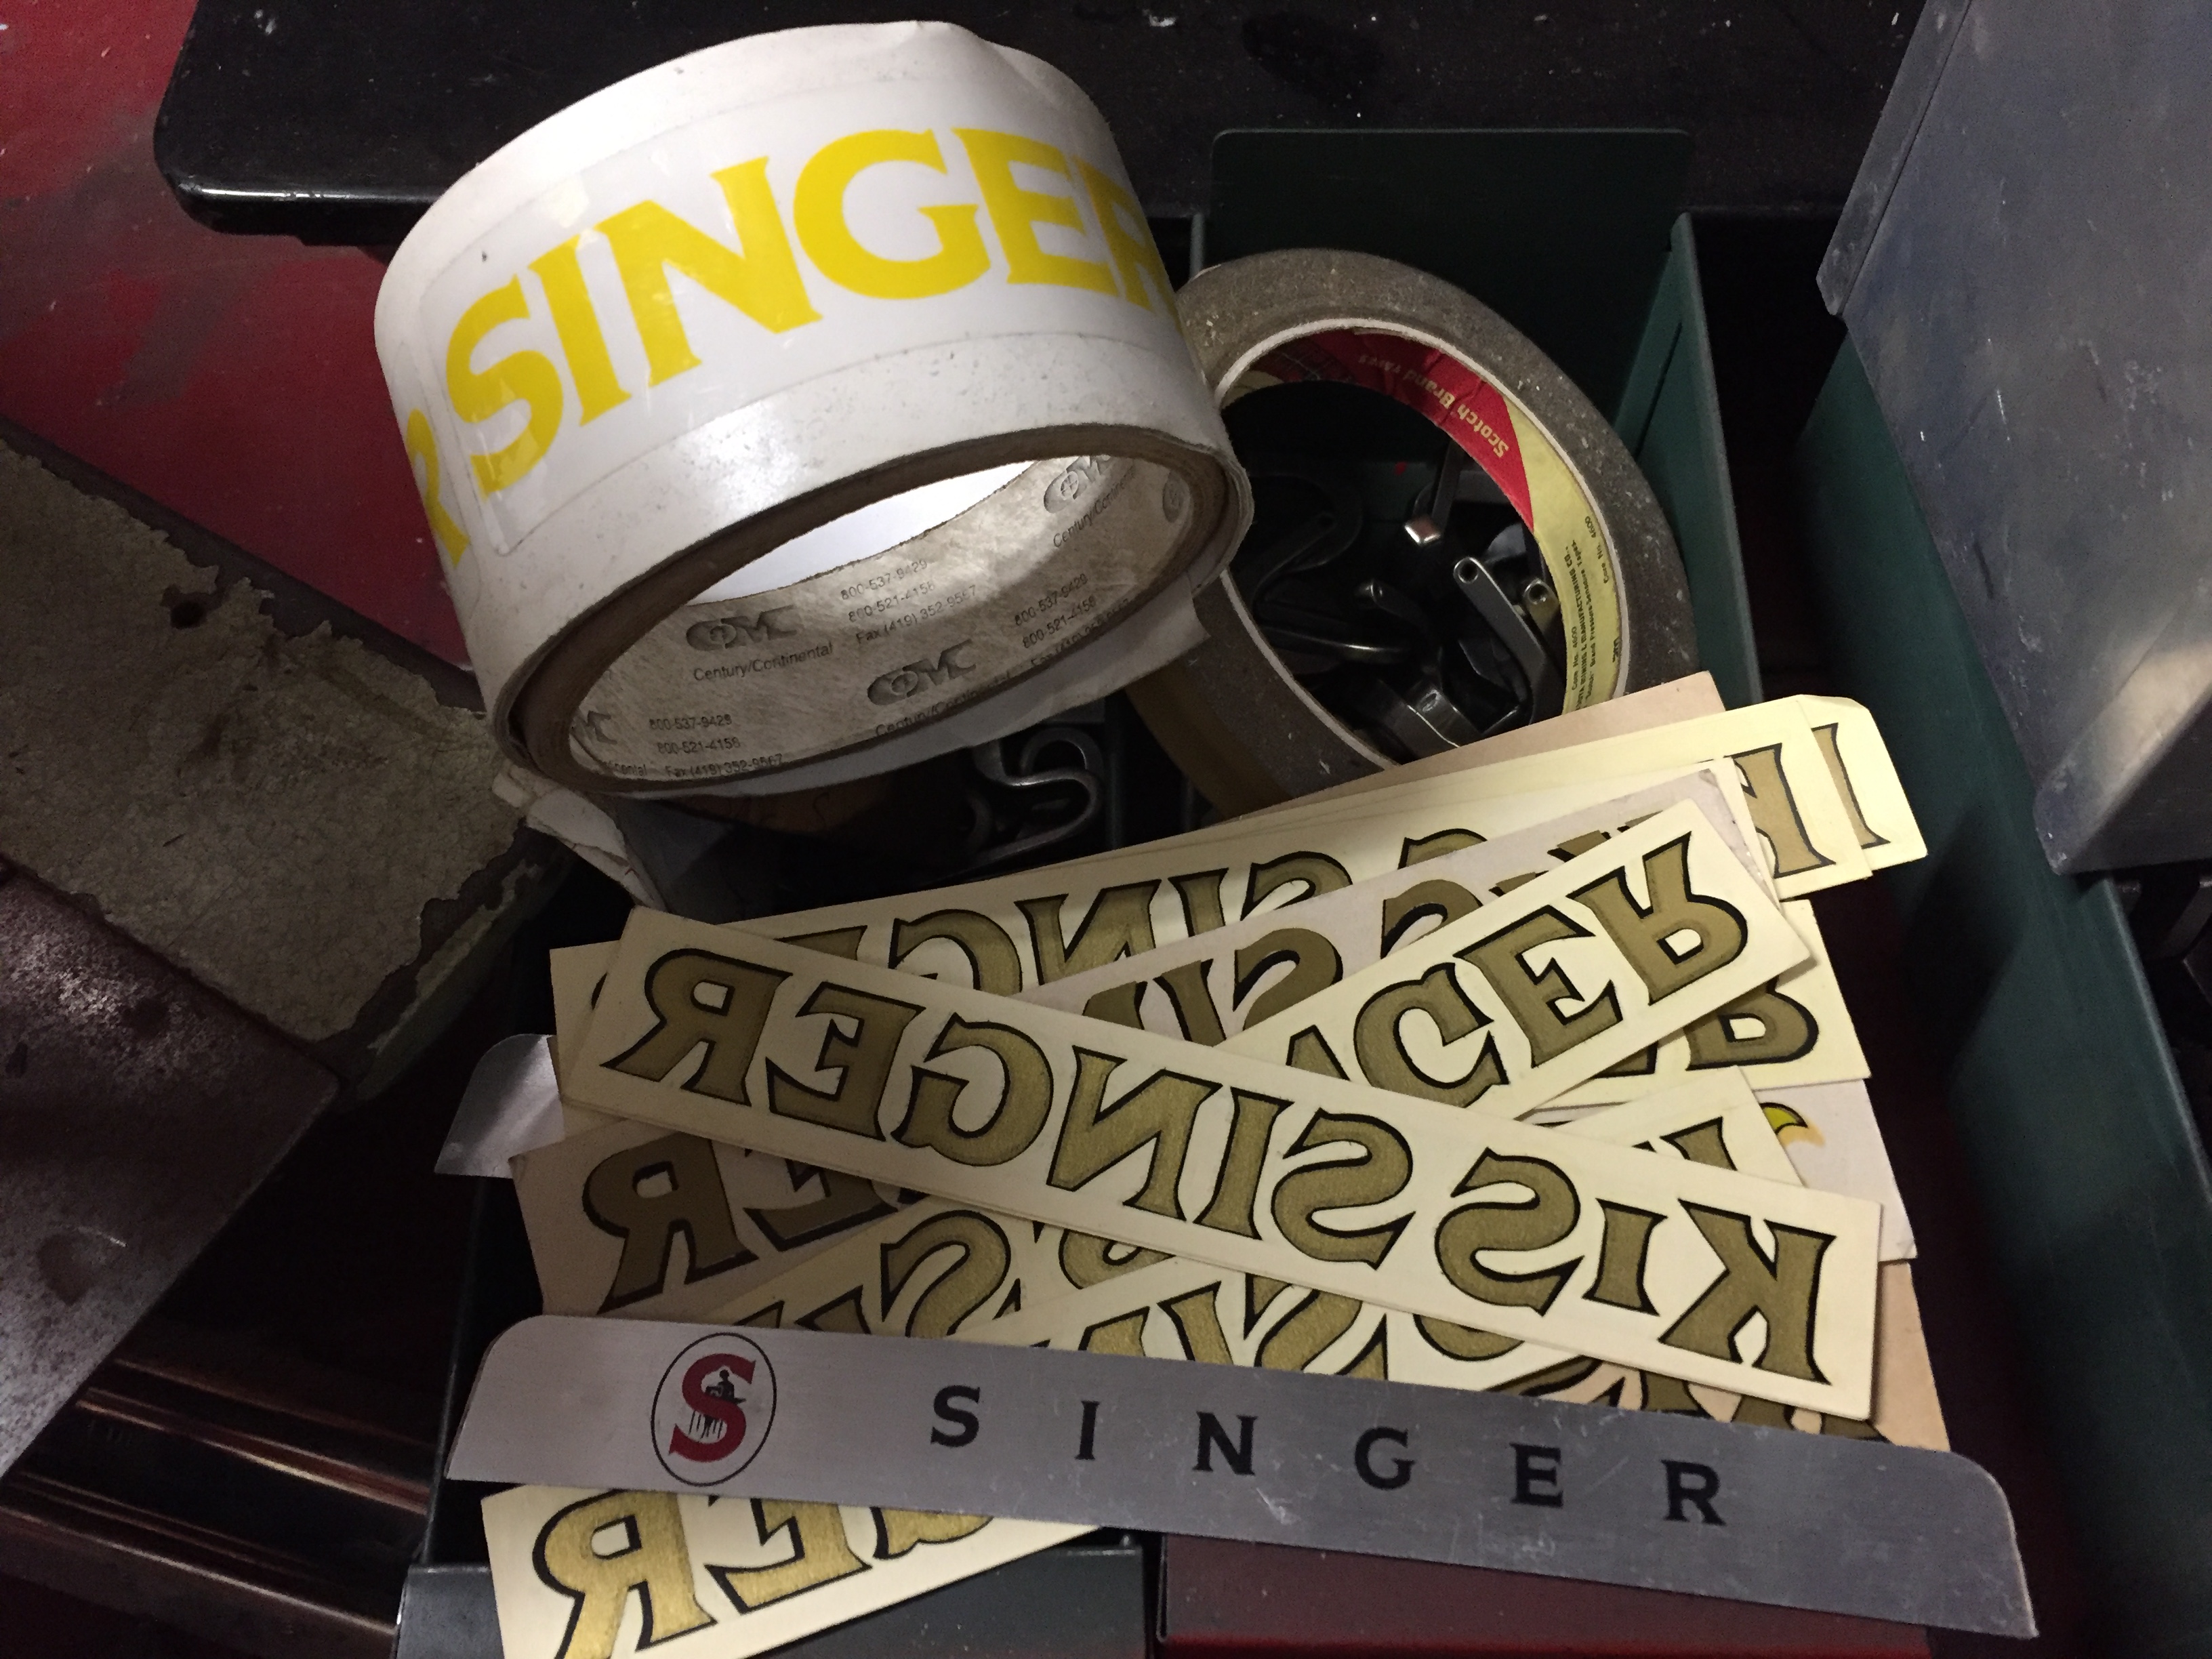
@Parfektionisto No, I didn't make the decals myself - they were part of a larger sewing parts inventory I bought last year. Sorry, I don't have a decals reference.
-
To be fair to Juki, I don't think the Juki LS2342-7 and the Pfaff 335 are in the same class capability wise (the Juki is about 50% larger, offers 9mm stitches and 20mm foot lift, the Pfaff 335 has 6mm stitches and 14 mm foot lift). When you sit in front of it, the Juki will appear HUGE compared to the Pfaff 335. The Juki also has features you can't get on a Pfaff 335 for any price (e.g. dual stitch length mechanism). You're not really comparing apples to apples. Comparing the Pfaff 335 to a Juki LS-1341 would be more meaningful. I also doubt that phone quote for the Pfaff 335 included a modern servo motor and control system that's comparable to the Juki's integrated drive system. Ask for pricing on the Pfaff 335 with the P40CD drive control system and all available options. I suspect the price gap will narrow somewhat.
-
I found some Singer decals in my stash including some water transfer gold lettering decals. Apparently, making aftermarket decals that say "KISSINGER" avoids certain trademark issues. All you have to do is snip off the "KIS" and you're left with "SINGER"

-
Pfaff 145 H4 upper tension won't loosen, too tight
Uwe replied to seamsperfect's topic in Leather Sewing Machines
If you can manually press on the backplate of the tension unit to separate the thread tension discs, then the thread tension release bits on the tension unit itself are fine. If the pin that pushes through the body of the machine from the back to press against the backplate on the front is not making contact or is not pushing far enough, three possible causes come to mind: 1: The big tension release pin itself is missing altogether or worn and not long enough (unlikely) 2. The thread tension release mechanism on the back of the machine is worn, incomplete, or broken (more likely, lots of parts involved) 3. The manual foot lift lever is worn or incorrect, thus not lifting the feet high enough to fully actuate the tension release mechanism on the back (also likely, wrong lever is hard to spot) The Pfaff 145 H4 versions have special manual foot lift levers that lift the feet higher than the standard foot lift levers, because, H4! Check to make sure you have the right manual foot lift lever installed on your machine. My Pfaff 545 H4 actually had no manual foot lift lever when I got it, so I had to order one. The Pfaff 545 is essentially a Pfaff 145 with a large hook. My part Pfaff 145/545 parts manual ( PFAFF-145-545.pdf) does NOT have a 145 H4 listed. I had ordered the 545 H4 version of the manual foot lift lever, and it works fine for lifting feet and releasing thread tension on my Pfaff 545 H4. The manual foot lift lever may be interchangeable between Pfaff 145 H4 and Pfaff 545 H4 versions, but I've not verified this. This is the Pfaff 545 H4 manual foot lift lever (part No. 91-010 736-15 for the google bots) If you have the big lever across the back for knee-operated foot lift installed, check if you can use it to lift the feet all the way and see if the thread tension release works that way. I made a video to better show how my Pfaff 145 H4 does thread tension release during foot lift. You can compare the video to your machine and see if anything is different on yours.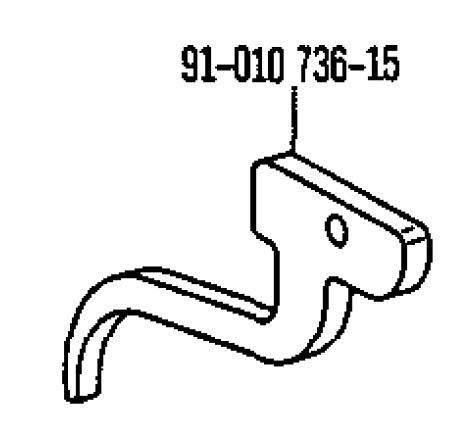
-
Pfaff 145 h4 and New Tech servo motor
Uwe replied to seamsperfect's topic in Leather Sewing Machines
It might be harder to figure out what needle system the machine was adjusted for than to revert the meachine back to the original System 190 setting. To convert the machine back to System 190: insert a System 190 needle and adjust the needle bar height to bring the eye of the System 190 needle into the exact same position as the old needle. Done. One way to do this in a practical manner is: 1. Rotate the hand wheel until the eye of the current needle is exactly level with the throat plate. 2. Mark the position of the hand wheel with a method of your choice. It just needs to be repeatable with precision. ( tape a paper arrow on the machine pointing at the hand wheel and then mark a sharpie dot on the hand wheel) 3. Loosen the needle bar clamping screw(s) to move the needle bar up a little and insert the System 190 Needle. 4. Adjust the needle bar height to line up the eye of the needle with the throat plate at the exact same hand wheel position you marked earlier. Tighten the needle bar clamping screw again. The machine should now sew just as it did before, but now with the proper System 190 needle. At least that is how it plays out in my head while typing this in my hotel room. -
In general, industrial sewing machines are designed to sew whatever thickness you can fit under the raised feet. Maximum foot lift is the material thickness the machine should be able to handle. According the Duerkopp Adler 269 Brochure the machine is designed to sew material up to 10mm thick. By comparison, the Duerkopp Adler 205-370 Brochure Is designed to sew material up to 20mm thick. The 5/8" (16mm) thickness you mentioned is way above the range the DA 269 can handle, but well within the range the DA 205 can handle.
-
None of the machines in your list are designed to sew 5/8" of glued leather. You really need a Durkopp Adler 205-370 or a Juki TSC-441 class machine to sew material that thick and hard. Out of the machines in your list, the Durkoppp Adler 269-373 is the most capable in terms of material handling and it would make a great companion to a Durkopp Adler 205-370.
-
You'll have to elaborate on this part, ideally with pictures or a video (shared via YouTube). It's not at all clear what you actually do when you "retime" the machine. Does the machine have a safety clutch and if yes, is it properly engaged? The solution may very well be to take the machine to a mechanic to have it fixed and then have somebody show you basic operation of the machine. Without more background info it all sounds very much like "I bought a new car and the damn car won't take me where I need to go. Every time I fix the transmission, the car stalls again." Where to begin?
-
Pfaff 145 h4 and New Tech servo motor
Uwe replied to seamsperfect's topic in Leather Sewing Machines
Congratulations, you got yourself a very nice machine at a great price! A few basic rules: don't take things apart unless you have to and you understand how they go back together. Don't turn a screw unless you know what it does. Try to keep LW topics simple and separate and don't be afraid to start a new topic for a specific task or question. Keep using meaningful topic titles that include the machine model. Some of the topics in your list have been discussed at length before. Try a Google search specific to LW for a little homework (e.g. "site:leatherworker.net remove bobbin case" or "site:leatherworker.net Pfaff 145") If the machine sews nicely as it is, don't change anything unless you have to - just oil it well and use it for while to get a feel for things. It's too easy to inadvertently change something important and cause endless frustration and grief. When I get a new vintage machine, I remove the motor belt and oil the machine and turn it over by hand very time I walk past it for few days, while I collect information about the machine. It's temping to remove a bunch of things for cleaning, but the machine may simply not be the same after you put it back together. Be patient, sew a little, read manuals, study the parts diagrams and watch YouTube videos until you're comfortable with a certain task before you pick up a screw driver. There's no real rush since the machines sews as it is. Knee lift and bobbin winder are non-essential and fair game. You can remove rusty parts and soak them in Evapo-Rust for a few hours. Rinse under water and scrub off residue with a plastic brush, dry and wipe with clean, oily rag. The Pfaff 145 Manual should be your main operating guide. The Pfaff 1245 is a few generations newer and some adjustments, measurements, or details may be significantly different. The "190" is the needle system, not the length. Don't use a needle unless you personally removed the needle from a new package that was marked with the correct needle system. Discard ALL loose needles now. If the machine is adjusted for System 134 or the seemingly-the-same-but-not-really-and-definitely-not-interchangeable System 134-35 needles the needle bar has been lowered to accommodate the shorter needle system. The bottom of the needle bar may touch the presser feet if they are raised - don't run the machine with raised feet to wind a bobbin unless you're certain the needle bar does not bind/touch the raised feet. It's possible to adjust needle bar height for a different needle system without affecting hook timing, but that's worth a separate topic. Get a $3 eye glass repair kit at the local drug store and that screw driver for the tiny screws in the hook gib. Don't loose the screws. The bobbin case will come out and insert easily in exactly the right position, and be impossible to remove or insert in all other positions. The PDF works okay, but for archival purposes, directly attached pictures are the gold standard. Find a way to downsize pictures or donate a few bucks to LW and they'll make a you a contributing member with larger upload limits. Sorry about the long reply. I'm violating my own rules about keeping things concise and on topic. A year from now, nobody will want to wade through pages of meandering replies to find the nugget of info they need. -
COWBOY CB4500/441 NARROW FEED DOG + NEEDLE/THROAT PLATE???
Uwe replied to RockyAussie's topic in Leather Sewing Machines
I'm surprised the throat plate's mounting holes don't line up perfectly. I suspect the holes line up perfectly on an original Juki TSC-441. Ideally, the mounting holes in the throat plate would be elongated/slotted to allow for slight variability in mounting hole location. I don't know what type of coating Kwok Hing uses on these parts, but it's definitely their high-end surface treatment. Not all of the Kwok Hing parts have this special coating. @Wizcrafts: I'm not sure the throat plate and feed dog are available separately as a two-part kit. The four-part kit I had ordered included specialty edge guide feet and was not cheap, even by Kwok Hing standards. I don't plan to order any more, especially since the mounting holes don't line up perfectly. -
Problem sewing multiple layers with 211g165
Uwe replied to jrbeasley's topic in Leather Sewing Machines
Make sure you have maximum alternating foot lift dialed in when you have to make big steps up and down. The alternating foot lift adjustment is described on pages 22/23 of the Singer 211G165 Service manual. Many leatherworkers adjust their machine for maximum alternating foot lift and never change it after that. Normally, both feet are adjusted to lift an equal height as they walk. In some instances it makes sense to purposely make the alternating foot lift uneven to allow the machine to take a bigger step up or down. For a big step down, you actually want to make the rear presser foot lift higher than the inner walking foot (it may sound counter-intuitive, but it works). Taking a big step down is often harder than stepping up. ,This is because it takes just one step/stitch to step up, but usually takes several step/stitches to step down again from a ledge (until the rear presser foot clears the high part.) The rear presser foot only lifts up if the inner walking foot presses down on the material. If the inner walking foot cannot step down far enough to press against the material the rear presser foot will not lift up and the material will not advance properly. -
Cowboy 3200 issue with tension adjuster HELP
Uwe replied to CarlosURSUS's topic in Leather Sewing Machines
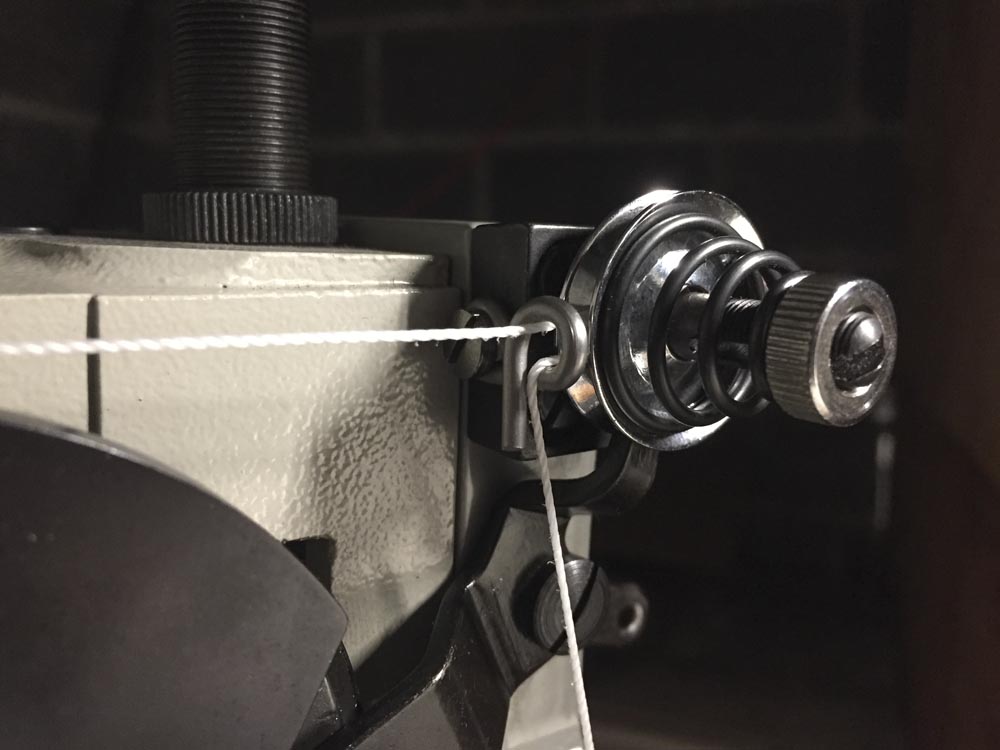
We also had a discussion recently where folks suggested a variation of the top threading, looping back through the same thread guide loop after going between the tension disks.