


bikermutt07
-
Posts
5,016 -
Joined
-
Last visited
Content Type
Profiles
Forums
Events
Blogs
Gallery
Store
Everything posted by bikermutt07
-

My new bag
bikermutt07 replied to bikermutt07's topic in Purses, Wallets, Belts and Miscellaneous Pocket Items
Thanks everyone, I produce so little annually I'm usually afraid to share because I feel like my chops may have slipped. It's nice to know I'm still doing ok at this stuff. -
My new bag
bikermutt07 replied to bikermutt07's topic in Purses, Wallets, Belts and Miscellaneous Pocket Items
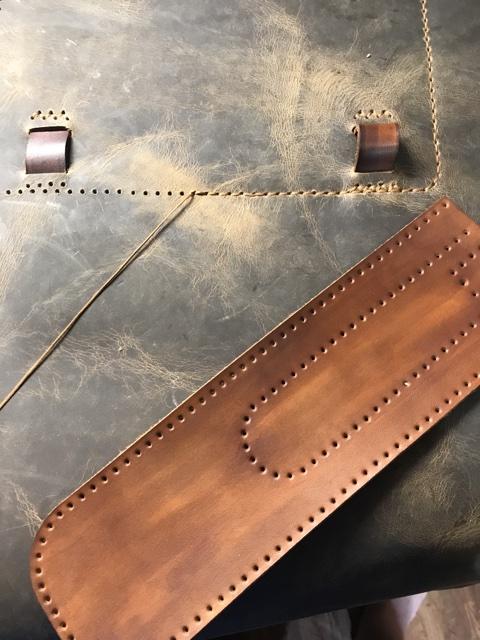
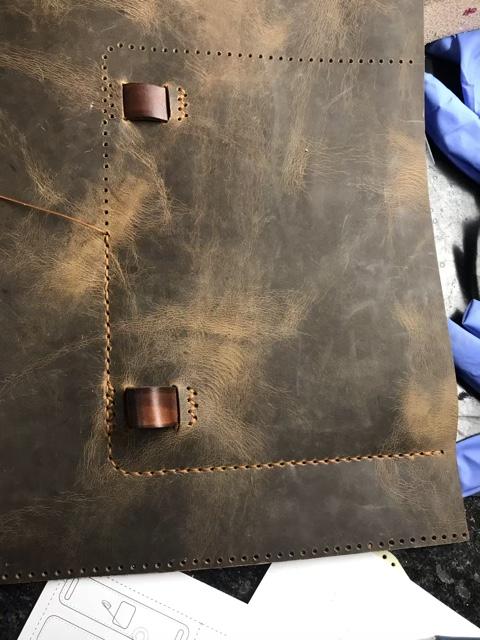
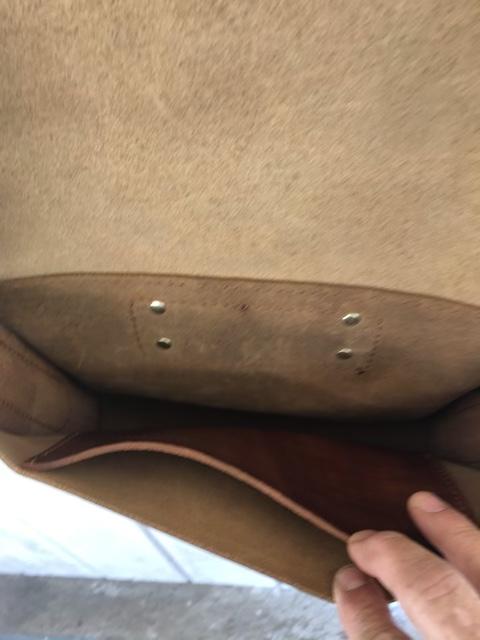
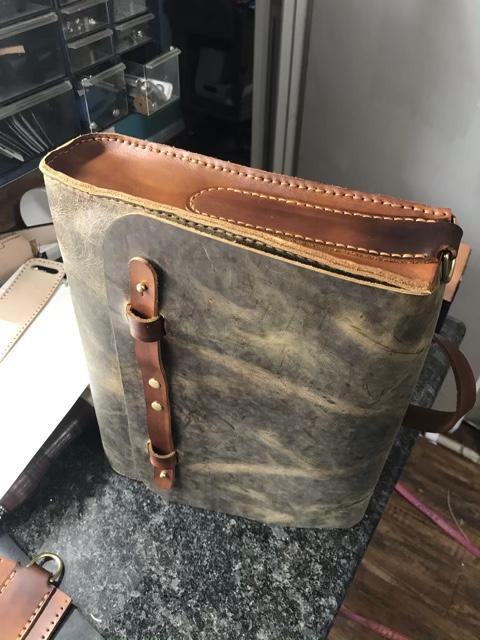
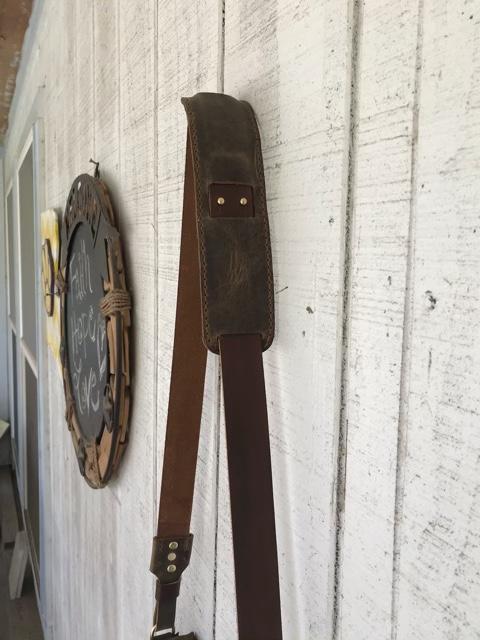
Here are a few pictures of how the loops are incorporated....So, this is the front of the bag body. The loops are secured inside the inside pocket.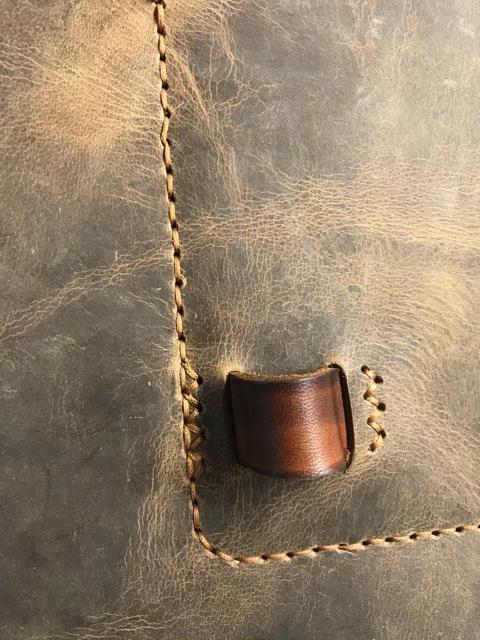
-
My new bag
bikermutt07 replied to bikermutt07's topic in Purses, Wallets, Belts and Miscellaneous Pocket Items
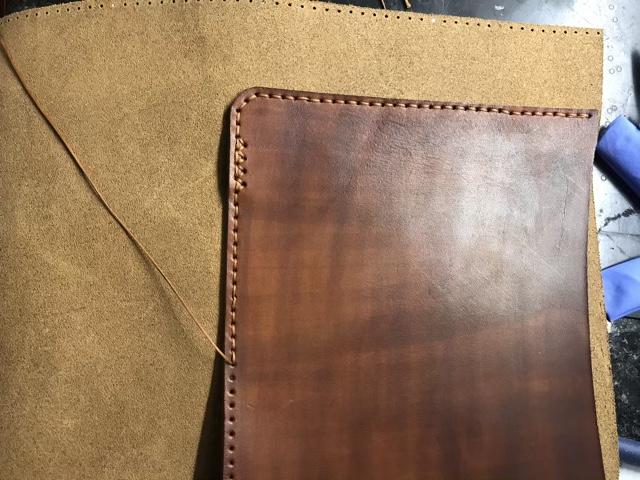
Assembly was kind of awkward. I couldn't really glue it together like normal. I did find making a knot in the stitching every so often helped with keeping the stitches tight. Also taping the pattern to the leather oversized burnt up a bit of left overs. The process goes like this. Cut out the patterns large. Tape to the leather, then punch the holes, then cut the final dimensions through the paper pattern. It winds up being a tad wasteful. And, it was hard to get a rythum going. But, things started moving a little faster about half way through. -
My new bag
bikermutt07 replied to bikermutt07's topic in Purses, Wallets, Belts and Miscellaneous Pocket Items
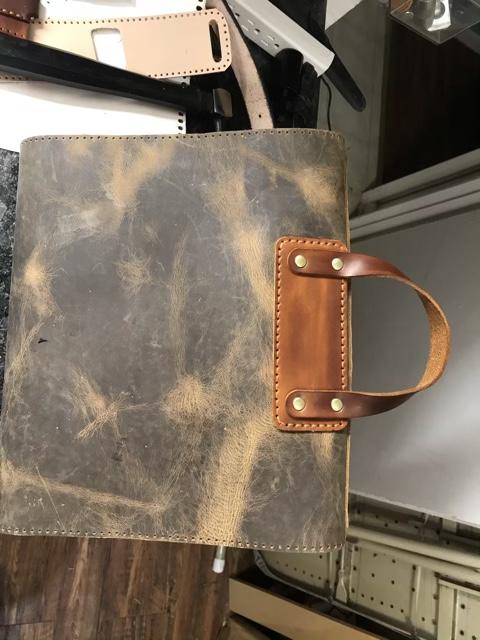
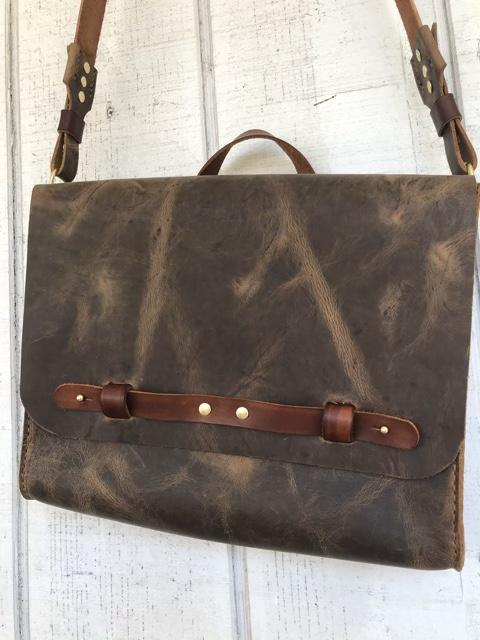
The loops for the closures are incorporated into the inside pocket. That part was kind of a booger to get it to look right. A note on the closure itself. It is kind of tough to fasten it back closed. The original design has English points on the closure. But there were so many round points in the design that I wanted to keep those round. I may have to cut English points on this one. And maybe next time make those loops out if 4oZ to make them a little more flexible. Concerning the carry strap I found it a little busy for my taste compared to overall construction and I was going to simplify it. But, I couldn't work it out without cutting and staining more veg tan. After finishing the strap I really like it and it didn't take that long. I'm guessing I have about 25 hours in this bag. I may decide to sell it and plan on asking about $425.00. That may seem high, but it was a bit of an undertaking. -
My new bag
bikermutt07 replied to bikermutt07's topic in Purses, Wallets, Belts and Miscellaneous Pocket Items
-
My new bag
bikermutt07 replied to bikermutt07's topic in Purses, Wallets, Belts and Miscellaneous Pocket Items
No lining. I'm not much on those, plus I'm probably not near good enough to make one up. The pattern did come with an inside pocket. I'll need to resize those and post them. I see a lot of first timers on Facebook that started with Tony's patterns. He also posts an assembly video with each build. Give it a shot. It doesn't take a lot of tools to do his stuff. -
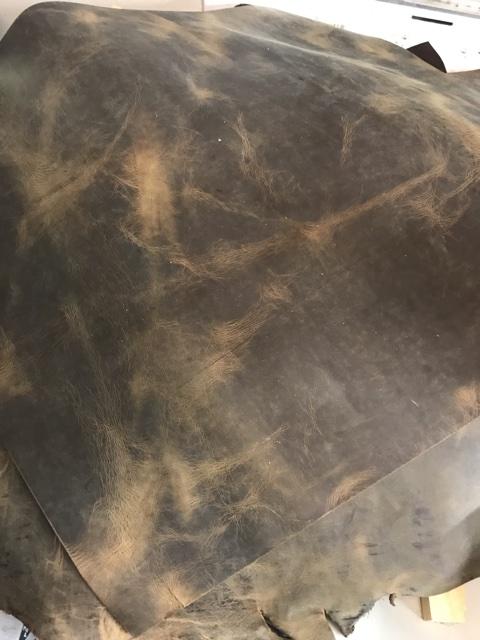
Here is a bag I just finished. The pattern came from Diesel Punk on Etsy. The leather is Acadia tan crazyhorse and Wickett and Craig bridle in Fiebings golden brown pro dye. The thread is cigar 1mm from that guy that had us do some beta testing. The hardware is solid brass from The Buckle Guy. I used a lot of tools on this, more than anything I would say the hole punches and strap end punches from Wuta came in super handy. I also used a pair of sinabroks hole punches for most of the stitching in 1.5mm and a borrowed 1.5mm single hole from @koreric75 It was a lot of work and no I didn't burnish any edges. I just didn't feel it needed it butting up against the crazyhorse. Anyway, enjoy. I will post more pictures in the replies.


-
Knife sheath
bikermutt07 replied to Bayou Bengal's topic in Gun Holsters, Rifle Slings and Knife Sheathes
Great job. -
1/2 off Aiskaer Stitching Chisels - complete set of 20 irons $45 +shipping
bikermutt07 replied to YinTx's topic in Old/Sold
That is a fine deal. Too bad I'm not in need. -
Great Great Stuff.
-
Full size straight edge guide
bikermutt07 replied to Constabulary's topic in Leather Sewing Machines
Festool has a pretty cool set up for routers....$$$$ -
It may not be of much help, but there is a company in New England that supports the trunk folks with hardware and such. https://www.brettunsvillage.com/ I have never dealt with them though.
-
Look up Kevin Lee. His company is called Crazy Cut Leather. He has several knives to choose from, mostly from D2 steel. I think he is out of China or Hong Kong. His prices are very reasonable and he ships worldwide. For other tools of medium to fine quality with great pricing look to Wuta. I have been dealing with them for several years now and have never had less than great service. Here are a few links. https://rover.ebay.com/rover/0/0/0?mpre=https%3A%2F%2Fwww.ebay.com%2Fulk%2Fitm%2F153305380601 https://rover.ebay.com/rover/0/0/0?mpre=https%3A%2F%2Fwww.ebay.com%2Fulk%2Fitm%2F153381008578 https://rover.ebay.com/rover/0/0/0?mpre=https%3A%2F%2Fwww.ebay.com%2Fulk%2Fitm%2F153115931406 https://rover.ebay.com/rover/0/0/0?mpre=https%3A%2F%2Fwww.ebay.com%2Fulk%2Fitm%2F153432722499 https://rover.ebay.com/rover/0/0/0?mpre=https%3A%2F%2Fwww.ebay.com%2Fulk%2Fitm%2F153433833827 https://rover.ebay.com/rover/0/0/0?mpre=https%3A%2F%2Fwww.ebay.com%2Fulk%2Fitm%2F152356872544 Enjoy your next step.
-
Nubuck is a chrome tanned, sometimes veg retanned leather. It's not something you need to worry about making yourself. Look to Acadia leather for some sides. They have many deals on pull-up leathers (most with a buffed surface like nubuck, but with color change on the wrinkles) on Instagram. Here is some form of crazy horse I got from them.
-
That is great stuff. I like the lion bag the most.
-
Ha! I work at a flooring store and never thought of that.
-
If you just want to build one, diy leather patterns has lots of tote plans. Diesel Punk Leather also has some cool designs. If you want a really great lesson in pattern making, check out Nigel Armitage on Vimeo. It will be the best 4 dollars you ever spent.
-
Well, it was certainly worth the wait. Awesome stuff.
-
Speed Reducer mounted directly onto Servo Motor
bikermutt07 replied to Constabulary's topic in Leather Sewing Machines
Red Green says, "remember folks, this is only temporary...........unless it works". -
Motoko II backpack build
bikermutt07 replied to koreric75's topic in Purses, Wallets, Belts and Miscellaneous Pocket Items
It looks even better in person. -
The best option I have found for skiving an edge on a budget is a knife from Lisa Sorrell. I think the knives are 40 bucks. Watching her 2 YouTube videos about using them has finally given me the confidence to try a skived edge. I never had any luck with the safety or super skivers from Tandy. Here is a link for Lisa's knives.... https://sorrellnotionsandfindings.com/product/skiving-knives/ Here are the two videos...
-
Sheridan tote bag
bikermutt07 replied to Rolandranch's topic in Purses, Wallets, Belts and Miscellaneous Pocket Items
Heck yes. I see you having a long career in leather. Make sure your pricing is up to snuff. People will pay for it. If I can make a small suggestion.... Read a book by Chris Voss called, "Never Split the Difference". It will be the best 20 bucks you ever spent. I am reading it now. He really knows his stuff. -
Sheridan tote bag
bikermutt07 replied to Rolandranch's topic in Purses, Wallets, Belts and Miscellaneous Pocket Items
I hope you demanded a high price. I couldn't imagine something of that quality selling for less than $6-$800. Hopefully, it brought more. -
Fancy Farrier Aprons
bikermutt07 replied to Rolandranch's topic in Clothing, Jackets, Vests and Chaps
Your carving is a good bit above the other skills you show on this project. Really Great Job. -
I'll take them.