


dikman
-
Posts
4,826 -
Joined
-
Last visited
Content Type
Profiles
Forums
Events
Blogs
Gallery
Store
Everything posted by dikman
-
You got a walking foot post bed for next-to-nothing! Bargain! I decided to put my 51W59 (post bed) on a table with a "standard" cutout and had to make a filler piece as the bed was shorter, as well as fit some support pieces along the lower edges. Mine doesn't have hinges. I would think that a 111- lift lever should work.
-
Okay, I’m positive I need a 335 (video)
dikman replied to luxuryluke's topic in Leather Sewing Machines
A cylinder arm is probably more versatile, but it all depends on what you're going to sew, you can do most things on a flatbed (except go round and round and round like in the video ). -
I wish! I've been told "no more sheds". I had to move the sewing machine spare parts into another shed and re-arrange the reloading gear to make room. And get rid of a domestic machine that I don't use.
-
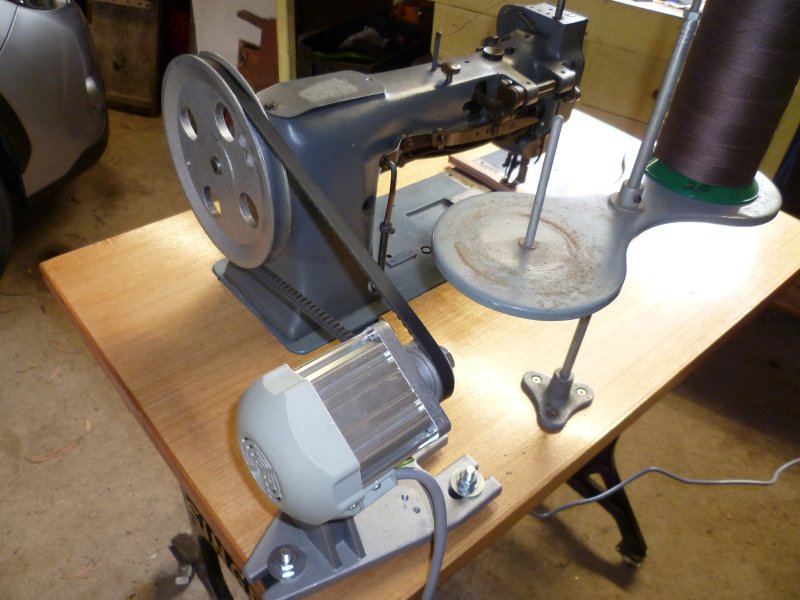
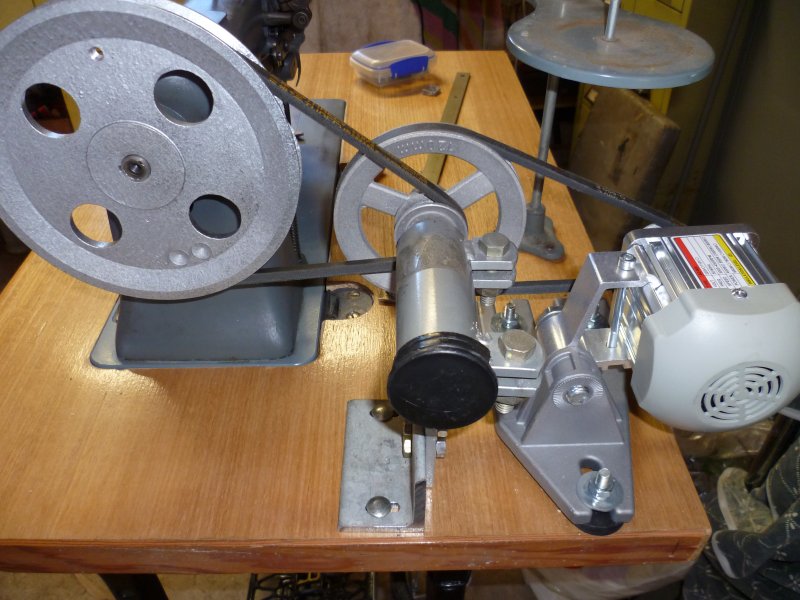
Here's what I did to mount a motor on top. I had a full depth table so cramming it in wasn't necessary for me. Without a big pulley it could be fitted a lot closer. The second photo is the somewhat extreme length I went to in order to slow it right down! If you made a "box" to mount the head on and made it longer then you could almost fit the motor right next to it and in line.
-
Don't worry, I will be, as I love old tools. In some ways these knives are no better, functionally, as my re-shaped and re-purposed old cutlery knives, but these have a "pedigree" which sets them apart.
-
Went to buy an embosser, ended up with a few items....
dikman replied to mogwild's topic in Leather Tools
If that lot is from a private collection it's all a bit bizarre! It's as if he went to a Tandy store and said "I'll have one of everything to start with" and then just grabbed extras too. -
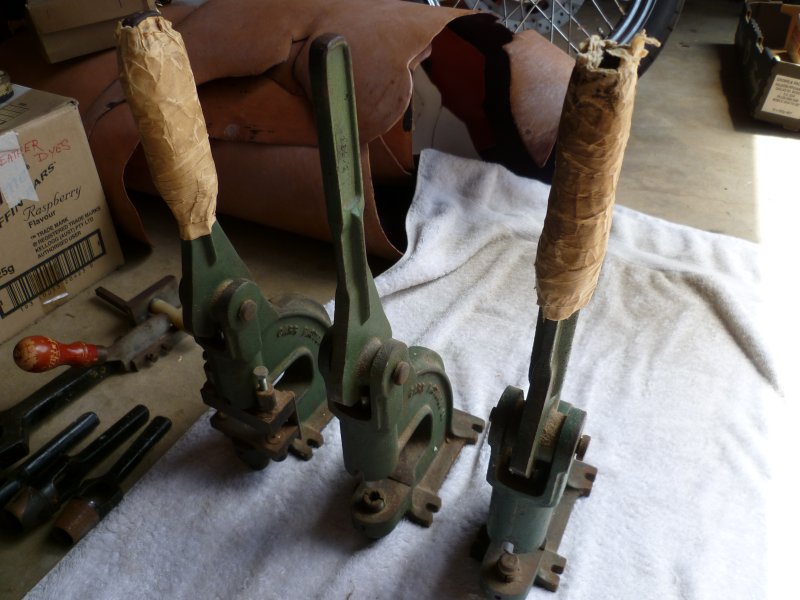
Found 3 G Barnsley knives, thanks to the other recent timely post I've identified one as a clicker knife and one as a banana knife (weird name for a knife). Pretty well all the tools need sharpening. The hides are pre-dyed (coated?) on one side only. Of limited use to me, although the black, brown and reddish-brown may be useful, white, light yellow and purple not so much. Cleaned up the three Carr presses and realised that some other strange-looking bits are actually assorted fittings for the presses (for rivets, snaps etc). Next big job is to make sense of the rivets and caps.
-
Went to buy an embosser, ended up with a few items....
dikman replied to mogwild's topic in Leather Tools
Those photos are jaw-dropping stuff!!! It looks like you bought out a small shop! In your position I would have done the same thing and taken the lot. I rather like the oak leaves/acorns and the celtic pattern (I'm not one for geometric patterns on leather, just doesn't look right). You've got many, many hours ahead of you sorting stuff out. Well done. -
I know this depends on whether you have both the gear and the abilities, but old kitchen cutlery can be re-shaped to make suitable knives for leatherwork. With the right sharpening technique they can be made very sharp! One thing you'll want to make is a leather strop (loaded with polishing grit) to keep your cutting tools sharp. Search the forum for how-to articles..
-
He wanted to make sure that the tools went to someone who would appreciate them (and I do!). I intend to strip the strap cutter and sharpen it. I have one of those ubiquitous wooden ones but this one should be much better. I found some old receipts in among the paper patterns, looks like a lot of the stuff was bought around 1970-71-72 (including some of the dye!!). There's another tray in the toolbox that I missed that has more tools in it.
-
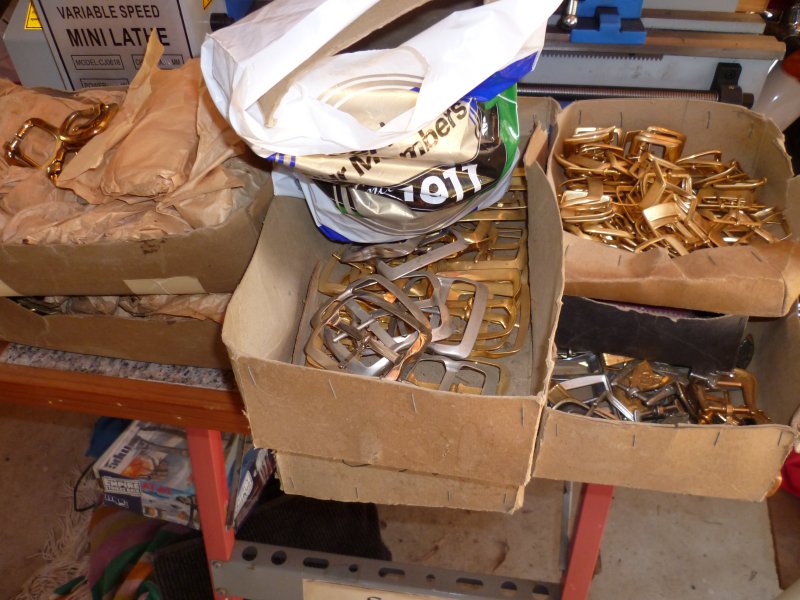
But tinged with sadness. A friend of ours used to make belts and bags commercially many many years ago. He sold off the machinery but kept the handtools thinking he might use them again. Didn't happen and a couple of weeks ago at lunch, knowing I dabbled in leatherwork, he asked if I would like his (old) stamps. Naturally I said yes, so today went around to pick them up. The sadness part is that he just found out he has terminal cancer, with approx. 3 months to live. Came as a complete surprise to everyone. Anyhow, he took me out to the shed and it wasn't only stamps!!! A few photos, but I'm still sorting it all out. Approx. 70 Craftool stamps (much better than my cheap ones!), a set of nylon stamps (?), a set of large letter stamps, assorted hole punches (British made), 3 Carr presses (2 setup for fitting eyelets/studs), a tool box with assorted tools, boxes of buckles(!!!), more rivets than I'll ever use (decorative type), a couple of rawhide hammers, a strap cutter labelled G Barnesley, Sheffield, bottles of assorted dyes (all very old) and a large assortment of leather, mostly offcuts but some bigger bits too. Most of the buckles I'll never use as they're lightweight, sort of decorative, types so I'll have to get rid of them. I suspect a lot of the dye will go too, along with some of the leather scraps. I didn't want to appear picky there so just took the lot. Biggest problem - somewhere to put this stuff as my little shed where I keep my leather gear is already full!!!!!!!!


-
That type generally comes in only one size.
-
I would certainly have a go at fixing it (but I'm like that!). As Floyd said the damage appears to be on the inside so fine grinding wheels in a Dremel should take out the worst of it followed by fine wet and dry (used wet) then buffing wheels and polishing paste. I've treated a slightly damaged hook this way (not me, it came with the machine) and it now works fine. And try not to hit the hook with the needle, it's not supposed to do that.
-
Brian, you have just proved, without a shadow of a doubt, that you are indeed a NERD! Excellent job, I would think there is a market out there for such upgrade/mods, however given you also have a "day job" it's probably too much trouble to explore such an option. What's the LCD on the side for?
-
Thread for sewing holsters.
dikman replied to AA3JW's topic in Gun Holsters, Rifle Slings and Knife Sheathes
I assume you mean .8mm? (8mm is like thick string ). #138 is quite a bit thinner than .8mm. I normally use (approx.) 1mm waxed poly thread for handstitching holsters. -
I was thinking the same as Matt re- the type of machine. Upholstery-weight machines are arguably one of the most commonly used types so second-hand ones should be around. Singer 111/211 class, Seiko, Consew would probably be the first choice due to parts availability (mainly feet). IF you're a DYI type of person then an option is to buy one with a "standard" table and then cut off everything that's not needed and reduce the table size to a minimum. A servo motor can be mounted on the top of the table, at the back of the head, it doesn't have to go underneath. Just a few thoughts.
-
Cylinder head machine for sewing pouches on heavy Dacron material
dikman replied to Nbocc's topic in Leather Sewing Machines
At 1/2" + thickness I would hazard a guess and suggest a CB3200? -
40W Chinese Laser - Engrave and Cut Leather - Discuss
dikman replied to Billy Hell's topic in 3D Printers and Lasers
Thanks for the link VYO. Now that I know what to look for I found plenty on ebay, available locally for about $180 (not much cheaper buying from China/HK/Aliexpress). Yes, they're (very) small and thus limited in capability but looks like a bit of fun and can be stored - and used - almost anywhere. Looks like I'm due for a new toy. -
I have three Skyrit motors - 2 x 550w, 1 x 750w - and on mine at least there's no output to control what you want to do.
-
40W Chinese Laser - Engrave and Cut Leather - Discuss
dikman replied to Billy Hell's topic in 3D Printers and Lasers
Looks like the depth adjustment is set pretty shallow. Has this thing got a brand name? I rather like it for it's simplicity of operation and small footprint. I was going to buy something like Rocky's until I realised I have nowhere to put it!!! -
I'd try what fred suggested, fine wet and dry used wet which should give a smooth finish. You could try applying car body filler to the surface first if you want it absolutely smooth when you sand it. Filing and using coarse papers can often leave these surfaces furry at the edges.
-
Seiko STW-8B aka Consew 226R refurbish/adjust
dikman replied to katit's topic in Leather Sewing Machines
What about foam earplugs? They can scrunch down pretty small, or be cut to fit. -
The big problem with using cordless drill motors (for anything) is finding a suitable power supply as they generally draw at least a couple of amps (often more).
-
Seiko STW-8B aka Consew 226R refurbish/adjust
dikman replied to katit's topic in Leather Sewing Machines
When I repainted one of mine I just used screwed up tissue paper pushed into the holes. -
Attachment or something that will make an overlapping seam?
dikman replied to VYO's topic in Leather Sewing Machines
Well, I'm with catskin. Any machine can do what is drawn, but I'm having trouble picturing how anything can turn what is drawn into what you're describing. (But I'll be the first to admit that my knowledge of some of the esoteric capabilities of sewing machine attachments is sadly lacking).