-
Posts
4,847 -
Joined
-
Last visited
Content Type
Profiles
Forums
Events
Blogs
Gallery
Store
Everything posted by dikman
-
Try this. I've also got a parts list but it's just over the posting limit. 111w152.pdf
-

Buying Keestar Sewing Machine 441 Directly From China..
dikman replied to korokan's topic in Leather Sewing Machines
Not just America, our manufacturing industry here in Australia is a mere shadow of what it once was, with no sign that it will ever come back. Once it's gone, it's gone. -
Looks really useful - if you sew mattresses!
-
I think that says it all!
-

Not sure what my problem is... any insight appreciated!
dikman replied to RaptorBravo's topic in Leather Sewing Machines
edwelld, what kgg said. I often get that same thing with what appears to be multiple threads coming up from the bobbin area, all I do is handwheel the pulley back and forth a little which releases the thread and it then just pulls out normally.- 14 replies
-
The Yamata appears to be a clone of the newer Pfaff 335 which means it has higher lift and should handle thicker thread. As it's the head only you will be up for a bit more money for a table, motor etc. Only problem with the Consew is it has a clutch motor (fortunately servo's aren't too expensive).
-
Don't sweat it, I tried to do the same thing - once.
- 9 replies
-
- consew 205rb
- servo motor
-
(and 1 more)
Tagged with:
-

Beginner Saddle Leather Sewing Machine
dikman replied to Oelschlagel's topic in Leather Sewing Machines
That linked article is very misleading! It starts off showing a "proper" leather sewing machine and then promptly talks about what are simply domestic machines. The author appears to think that if it has the words "heavy duty" on it then it will work with leather. I wonder how many have been sucked in by this article? -
I soon found that none of my spanners would fit in the gap (!!) so I had a thin flat spanner from who-knows-where and I filed out the "jaws" to fit the flats on the pulley. I have used it many times since.
- 9 replies
-
- consew 205rb
- servo motor
-
(and 1 more)
Tagged with:
-
For what it's designed for it's not a bad little machine, but as Joe said, be prepared to spend a bit of time getting it to run nicely. They aren't intended to do long stitch runs as the bobbin is very small. If you don't have a patcher then it could be a useful, and cheap, addition but it is not intended to replace a "normal" machine, e.g. a flat bed or cylinder arm machine. It will get into places that they can't.
-
What type of needle are you using? It's generally recommended that for nylon etc a "standard" round point garment needle is best.
-
There's nothing particularly revolutionary in that video, he makes it sound like some sort of industry conspiracy. Basically, sellers sell reducers, usually one of two types, which do the job so I doubt if they want to bother trying to explain to customers about fitting a large replacement pulley. This way they can leave the machine intact, so it is one less area that a customer can have problems with. Matt makes a couple of good points, but only two are really of any concern, imo. If the machine is under warranty you should probably take that into account, but there's no way that I can see that swapping to a larger pulley is going to damage the machine or the motor as long as the machine is used within its limitations. The most important one, though, is the question of safety, if you fit a large pulley and intend to do handwheeling make sure your foot is off the pedal before touching the wheel!!!! At the slow speeds most of us are looking for any "flywheel effect" is going to be irrelevant, besides which the weight of your pulley isn't likely to be that much more than the one you took off. I have fitted a quite heavy pulley on one of my machines and it works fine, I also have had no problems getting a 4:1 reduction using this method, and while it is fine with one servo with a different brand it wasn't good enough, so I fitted a reducer too and am getting 11:1 reduction. As for the timing, as Tom said as long as nothing is changed inside the machine doing this cannot affect the timing! Industrial machines are built to take lot of abuse and to keep working day in, day out under conditions that we are unlikely to subject them to. Slowing them down, whether with a reducer or a large pulley, is going to significantly reduce the wear on a machine. In short, you are worrying unnecessarily.
-
Umm, the printer needs a Gcode file to print. You need a slicer programme to convert the .STL to Gcode, it also sets the print parameters. I use Slic3r but many use Cura.
-

Altering flat bed accessory for cylinder arm
dikman replied to Ceejay's topic in Leather Sewing Machines
Don probably has the right idea, adding and removing bits to make it fit properly, but that still requires some woodworking tools and basic skills. Another way might be to make a thin top piece that is cut correctly and glue it on top. I think you'll be struggling to make it usable. -
Have a look at Thingiverse, there are all sorts of things to print that people post the .STL files for. There are even a few things for sewing (just search for sewing). Pretty good way to get started.
-
Well, it was a slightly strange looking machine and the label, as Wiz said, definitely isn't a Consew one. The ad said "for parts", although what they might fit is anybody's guess. I certainly wouldn't want to pay much for something like that, could be a good thing that you missed out.
-
Did it stitch before and now won't? If so what changes have been made to it since. If it's a new machine then contact the seller. Other wise more info will be needed - does it do it without a needle?
-

Altering flat bed accessory for cylinder arm
dikman replied to Ceejay's topic in Leather Sewing Machines
The knee lifter arm looks like it has a bit of adjustment left where it can slide further into it's clamp, will there be enough to clear the bolt? I agree, however that it's a very poorly made item, particularly if it's supposed to be made for that machine. -
In a word - yes! It requires a bit of skill, and lots of practice, to learn to control one to get consistent low speed sewing. It didn't take me long to change to a servo!
-
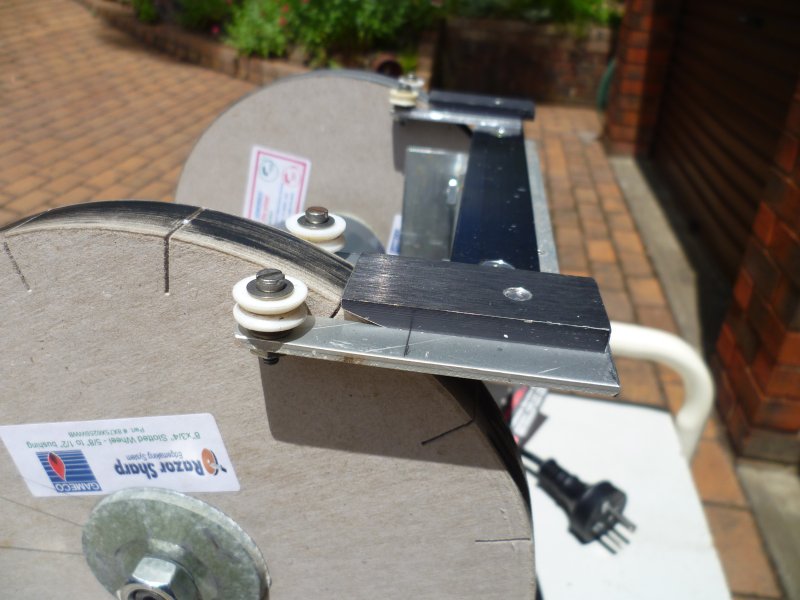
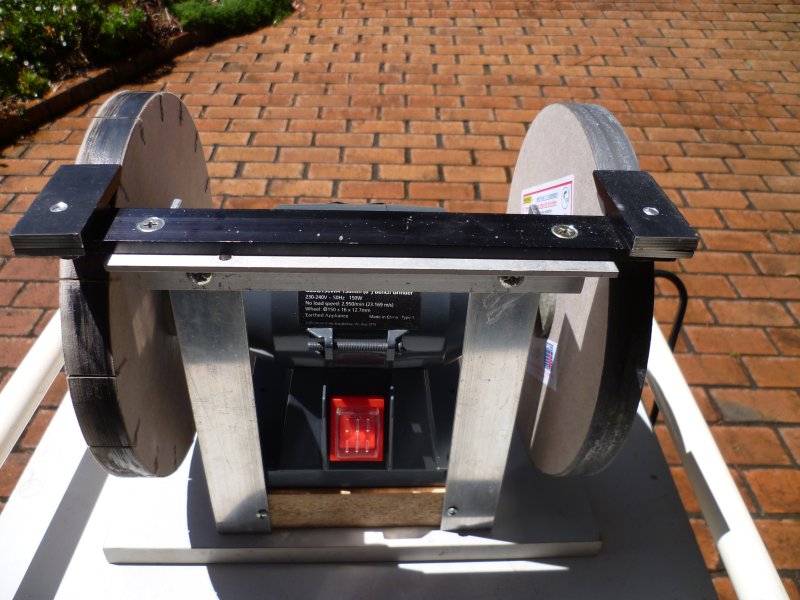
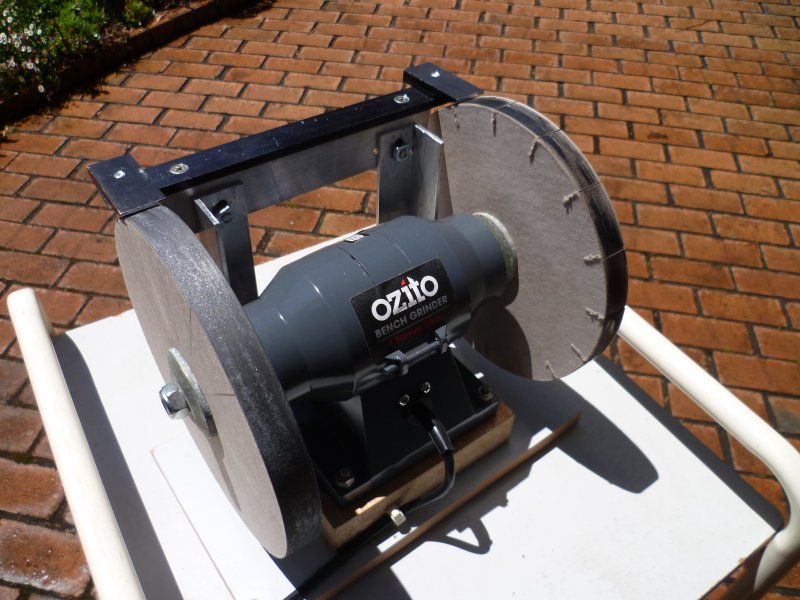
Version 4! The guide wheels are some plastic things that I had and I used the lathe to cut a V groove in them. Not the prettiest of things, but as long as it works (which it appears to do) it doesn't matter. The wheels took a bit of fiddling to get them adjusted right but now the blade doesn't lift as I pull it across. If the wheels prove too soft I'll make some new ones from nylon.
-

Knife sheath for middleearth style knife
dikman replied to pitersek's topic in Gun Holsters, Rifle Slings and Knife Sheathes
I just found this post, and yes, a very nice job indeed. Only thing I wonder is does it really need the keeper strap? I think it would look better without it and doubt if it's really necessary. Brian, I've been to every one of the Adelaide shows but one and have met some really great people there, Morrie being one of them. A few have passed on since the shows started but they've always been great people to talk to and free with their advice and ideas (all but one guy and I think it was an ego problem!). -
So I made a jig to (theoretically) get consistent sharpening angles. My first idea was to just fit a bar across the wheels but I soon realised that wouldn't work because of the knife handle, dragging the knife across the inside of the wheels would raise the blade and change the angles. So, version 2 with blocks the width of the wheels, version 3 with added spacers under the blocks for more clearance. Looked good, but unfortunately there is a slight problem with such a design, because the wheel is rotating away from me it tends to grab the blade and try and drag it forward along with the wheel. This results in an uneven bevel. Pressing down harder on the blade didn't work as that also put more pressure on the wheel and yes, it's quite easy to burn a blade doing this!! The only way this can work would require a fairly elaborate means of clamping the blade to the guide, such that it can slide but not lift, or perhaps some sort of arm coming from the rear of the guide, over the top and finishing just above the front of the guide by the wheel to stop the blade lifting. This may be the easiest to do but would need to be adjustable for different thickness blades. Could be getting a bit complicated.


