.jpg.d60258221c476480a6e073a8805645bb.jpg)


Dwight
-
Posts
5,235 -
Joined
-
Last visited
Content Type
Profiles
Forums
Events
Blogs
Gallery
Everything posted by Dwight
-
Sometimes using the "search" function of the forum will get your results much quicker. In this case, . . . the discussion was fairly recent, . . . and can be found at: http://leatherworker.net/forum/index.php?showtopic=25656&hl= rounded corner&st=0 May God bless, Dwight
-
IWB holsters for mainly 1911 style guns, . . . plus belts for them, . . . and mag carriers. I do other stuff, . . . but that is my "main squeeze". I stayed with it from a zero start, . . . and am looking for it to expand a bit as soon as I get my new shop open (in process of building it right now). I think you do better when you heart is in what you do, . . . for example, . . . I've done two wallets, . . . and could not care less if I ever do another one. Lacing is not my thing. I mess around a bit with chaps, . . . saddles, . . . but that is only for friends, . . . or for fun. A friend has two adorable girls in horses, . . . so whatever I can do to help them is kicks and giggles for me. May God bless, Dwight
-

Double Shoulder Holster Rig
Dwight replied to Lobo's topic in Gun Holsters, Rifle Slings and Knife Sheathes
As usual, . . . excellent job, . . . would not have expected anything else. I did a double a year or so ago for 1911's, . . . muzzle down, . . . it was fun too. May God bless, Dwight -
Lining Compared To Burnishing
Dwight replied to glockanator's topic in Gun Holsters, Rifle Slings and Knife Sheathes
I will not burnish the interior of any holster I line, . . . nor will I put anything other than neatsfoot oil on the lining. Anything you put on the lining will make the lining harder, . . . physically harder, . . . which in turn defeats the purpose of the liner, . . . to be a soft place for the weapon to lay. Gum trag in my opinion is one of the worst offenders. To try it, . . . take a piece of 8/9 oz leather, . . . burnish the flesh side with GT, . . . let it dry, . . . then rub it hard against your face. Feels like sandpaper. I'm not putting that abrasive against my customers weapon, . . . even if it is a "plastic fantastic". May God bless, Dwight -
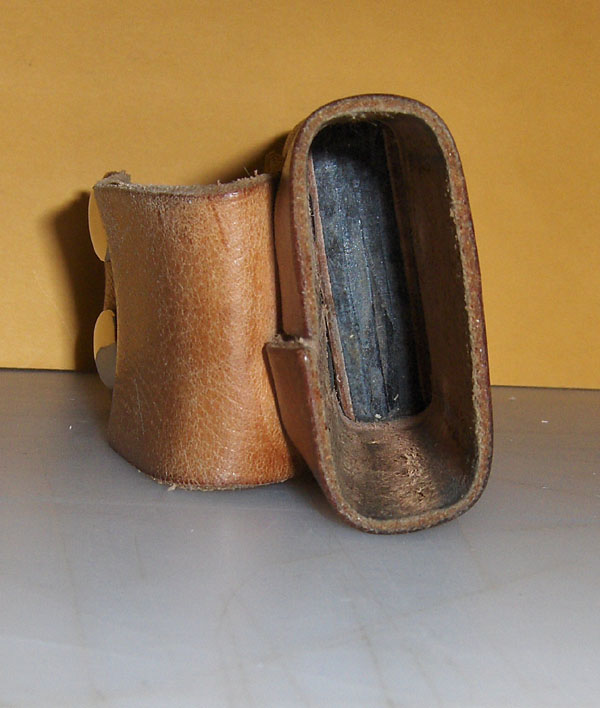
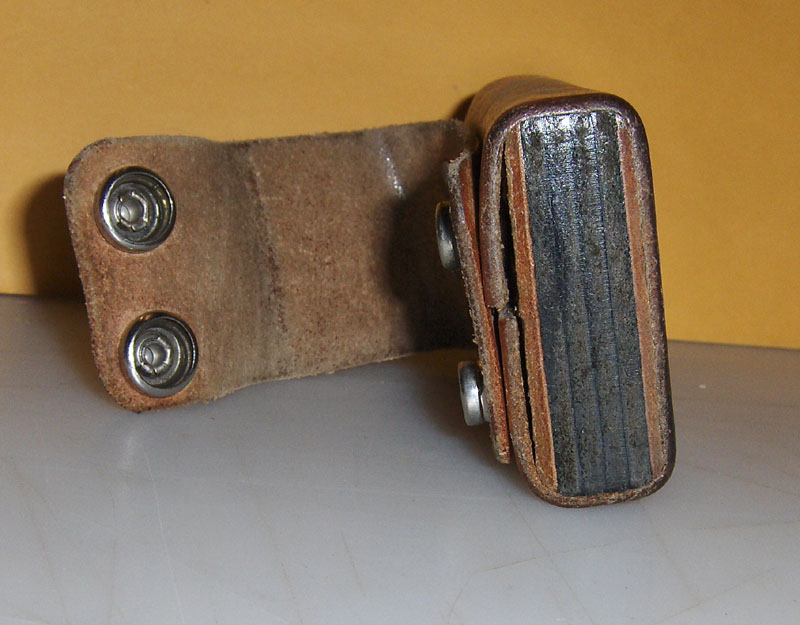
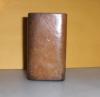
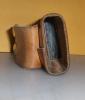
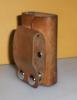
If I understand you correctly, . . . it is a small tablet, . . . but yet a big phone. I make my "I phone / android phone" cases with a solid bottom, . . . several layers of leather sandwiched together about 3/4 inch wide and the thickness of the phone plus maybe 1/16 of an inch. I then make a board the height, width, and thickness of the phone, again plus 1/16 of an inch. I wrap 6/7 oz veggie tan around the form, . . . wet it, . . . and let it dry. I don't overlap, . . . I make the joint in the back, . . . riveting the belt loop to the back. I have never put a flap across the top with velcro on the front, . . . but as security is important to you, . . . you may want to. The enclosed pics are a much smaller phone, . . . but the basic idea of the case. It's several years old, . . . is my "work" phone carrier, . . . and just allows the top 3/4 inch to peek out to grab when it rings or I have to make a call. It goes up on the roof when I'm shingling, . . . on the mower or tractor, . . . in the car or jeep, . . . haven't lost it yet. May God bless, Dwight

-
Pricing Holsters
Dwight replied to charlescrawford's topic in Gun Holsters, Rifle Slings and Knife Sheathes
Chiefjason, . . . next time you make a batch, . . . get some real beeswax, . . . The toilet seat ring is only partially beeswax, . . . and the rest of the ingredients are very probably some sort of polar bear grease or some similar goo. The recipe for the beeswax / neatsfoot oil combo requires virgin beeswax which is impossible to use for a toilet ring in its true state. Using only beeswax and neatsfoot oil, . . . it always comes out just a bit harder than Kiwi shoe polish, . . . but still a firm paste that has no lumps or bumps. Your batch that is thin like vaseline is because of the "extra" ingredient you got in the wax ring. May God bless, Dwight -
In a one word answer, . . . no, . . . but your results will not be as good. There actually is a chemical process that takes place when you wet a piece of veggie tan leather and then allow it to dry. I cannot describe it because I don't know all the "terms" that make it up. But I do know for certain, . . . the first time you wet it and it dries, . . . if it is done with water only (maybe just a few drops of Dawn dishwashing liquid), . . . that is when and how you will get the best results. If you dye it first and allow it to dry, . . . when you then wet it with water to mold it, . . . it just does not come out as good. Personally I mold many of mine, . . . then finish the gluing / sewing / edging / burnishing before I dye it, . . . and then use the wetting of the dye to allow me to "touch up" some of the molding that didn't work to suit me the first go around. That process is the best I have found for me. May God bless, Dwight
-
Bruce is very much on the money, . . . unless you have some serious vision problems, . . . the pricking wheel will mark the back of the leather plenty well enough to see it. I even use it on suede, . . . and have no problems seeing it, . . . with 68 year old eyes and no glasses. You can also use a pair of calipers, . . . dragging one tip against the edge if you don't want to gouge the leather, . . . it will give you a defined line on the skin. May God bless, Dwight
-
When you have tried unsucessfully to keep someone from doing something stupid, . . . best thing is to leave em alone. He obviously knows more than you do , or at least he thinks so.May God bless, Dwight
-
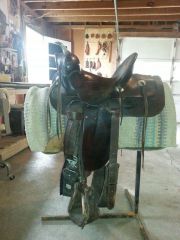 I would simply love to have an old saddle like that. It is the type we used when I was "much" younger, . . . especially the steel horn and straight up seat. Brings back some fond memories. Thanks for sharing. May God bless, Dwight
 -
The 2 part epoxy is probably stronger than Weldwood contact cement, . . . but my experience is that if you try to take apart two pieces of leather that have been properly joined with Weldwood, . . . you literally rip one or both of the pieces of leather. So, . . . long and short,.........the Weldwood held, . . . the leather separated. I'd try Weldwood first on a test piece. Just remember that if you are using it on the hair side, . . . you have to seriously rough that up with a wire brush or something. May God bless, Dwight
-
Holster With An Offset And Drop
Dwight replied to vaalpens's topic in Gun Holsters, Rifle Slings and Knife Sheathes
Some of us have produced some of the best looking offsets imaginable to the confused mind of man. Of course, . . . we called them mistakes, . . . and trashed the holster. Seriously, . . . just make sure you put the gun into the wet leather for molding, . . . crooked. It'll mold crooked and offset from the body just as easy as it will mold tightly conforming to the body, . . . no need for some plastic insert. May God bless, Dwight -
How To Make Large Dog Collar Sturdy Enough For A St Bernard
Dwight replied to OdinUK's topic in How Do I Do That?
We're considering the possibility of a 200 pound dog tearing up a 1 1/2 inch wide collar,........... c'mon guys. Ever seen horse harness??? Two or three or four horses, . . . 1000 pounds each, . . . pulling on a simple doubled leather strap, . . . most of the time just sewn together, . . . pulling plows, . . . discs, . . . wagons. The main thing when making a strap that will be used for pulling, . . . NEVER sew across the strap. It makes a perforation line, . . . and that IS THE PLACE where the strap will some day break. May God bless, Dwight -
Depending on how precise you have to have that one inch hole, . . . I have made a number of tools and punches out of electrical contuit (in the trade it's called EMT, . . . Electro Metallic Tubing). That 1 inch EMT if cut off to a piece about 9 inches long, . . . taken to a sander, . . . and the outside edge laid up against the sander, . . . so a sharpened edge is created on the interior edge, . . . you will have wonderful punch that is very close to 1 inch in diameter. You DO NOT whack it to make the hole, . . . you tap, tap, tap it around the top edge, . . . holding the punch firmly down on the leather. You can do the same for 1/2, 3/4, 1 1/4, 1 1/2, and 2 inch. Just be careful and not burn the edge as you sharpen it, . . . that will seriously weaken that section of the edge, . . . and it will become very dull, . . . very quick. Some folks who have seen these punches of mine complain that you have to sharpen them more than the "professional" ones, . . . but when your punch costs fifty cents instead of 75 dollars, . . . yeah, . . . I can sharpen it a bit more often. May God bless, Dwight
-
Pricing Holsters
Dwight replied to charlescrawford's topic in Gun Holsters, Rifle Slings and Knife Sheathes
Quite honestly, . . . I have found that the market will work with you to help you price something, . . . no matter what it is. It also does not matter how much time you have put in on a certain project. The buyer will have an idea of what he will pay, . . . and while the first few you sell, . . . you may not do as well as you want, . . . you'll get a feel for the market. Take em to a gun show, . . . plunk down the table price, . . . lay em out there with a price tag on em, . . . if they sell right away, . . . they were too cheap. If they are still there at the end of the day, . . . most likely you missed a couple of buyers who would have bought if it were just a bit less. May God bless, Dwight -
How about two envelopes, . . . one for the front flap, . . . one for the back flap, . . . tie them together with a leather lace that runs through the spiral itself. I'd use maybe 5/6 oz on the front and back for tooling, . . . pigskin or thin veggie tan for the inside. She can simply untie the lace and move the envelopes to another notebook, . . . and it will never be a problem opening. May God bless, Dwight

-
I've seen in older books where they used very thin fabric, . . . and tucked it under for about a 1/4 inch all the way around. Of course they angle cut the corners, . . . and I would suppose that they took it all to an ironing board first, . . . then glued the edges together, . . . then glued the whole thing into the book. At least that is how I would try it. I don't have any book experience, . . . but I have done a few pouches, . . . and that is my proceedure, . . . which of course I copied from what I saw in the books. I use weldwood contact cement for mine. May God bless, Dwight
-
What To Use To Sand Belt Loops
Dwight replied to rccolt45's topic in Gun Holsters, Rifle Slings and Knife Sheathes
One little thing I forgot to add, . . . this makes a punch that is exactly 1 1/2 inches long if you did it my way. Belt slots often need to be closer to 1 3/4 or so. When you have to enlarge the slot (make it longer), . . . put one end of the punch down in the slot you already made, . . . and rock it forward against the area you need to elongate. Now, . . . take your time and tap, . . . tap, . . . tap, . . . tap the end of the slot punch through making the elongation. With a little practice, . . . you can make 2 or 2 1/2 inch slots with this punch, . . . and it will look like you did it all in one whack. May God bless, Dwight -
My leather work for the most part is a product of my company motto: Affordable Gunleather For Those Who Can’t Afford To Be Without Their Gunleather I simply cannot afford to offer the gunleather I offer if I have to hand stitch the holsters and belts. Not that I do not occasionally do that, . . . but I only do it when it has to be done, . . . and is VERY infrequent. My customers safety, . . . comfort, . . . and budget comes before something as esoteric as "hand made", . . "hand stitched", . . . etc. That does not say that no one else should do it, . . . by all means if there is a niche market out there for hand stitched goods, . . . go for it. May God bless, Dwight
-
After screwing up 3 or 4 good belts, . . . I learned to very carefully cut the very end of my belt to go into the tip. The tip is designed to be the same size as the belt, . . . so since there is metal there, . . . you have to cut away leather to make way for the metal. Also, . . . I don't do 1 1/2 belts, . . . I do 1 7/16, . . . because all of mine are double layer, . . . and if you do a double layer 8 oz, . . . you can run into belt loop difficulties, . . . which isn't fun. Cut a strip of scrap leather, . . . 1 1/2 wide, . . . and outline the tip on the end of the strip. Cut that, . . . then begin by taking 1/16 off each side the length of the tip. A dremel tool with a sander also is a super help, . . . or a 1 inch belt sander, . . . you just have to be really careful with sanding. I prefer to cut, . . . Eventually you get what you need to make it work, . . . outline it on a piece of manila folder, . . . and you have a pattern for the next one you do. Final tip, . . . after you set the little screw(s) in the back of the tip, . . . rub your finger over them to make sure there are no burrs, . . . sand em off if there are. Those little burrs will ruin the face of the belt the first time the guy uses it, . . . and he WILL BE angry with you. May God bless, Dwight
-
What To Use To Sand Belt Loops
Dwight replied to rccolt45's topic in Gun Holsters, Rifle Slings and Knife Sheathes
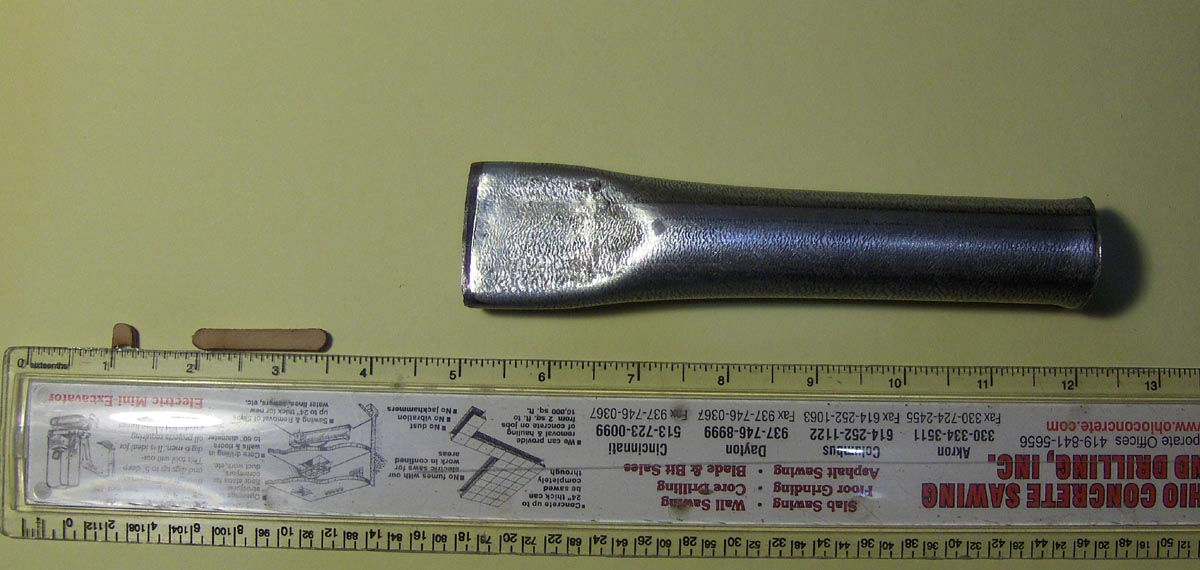
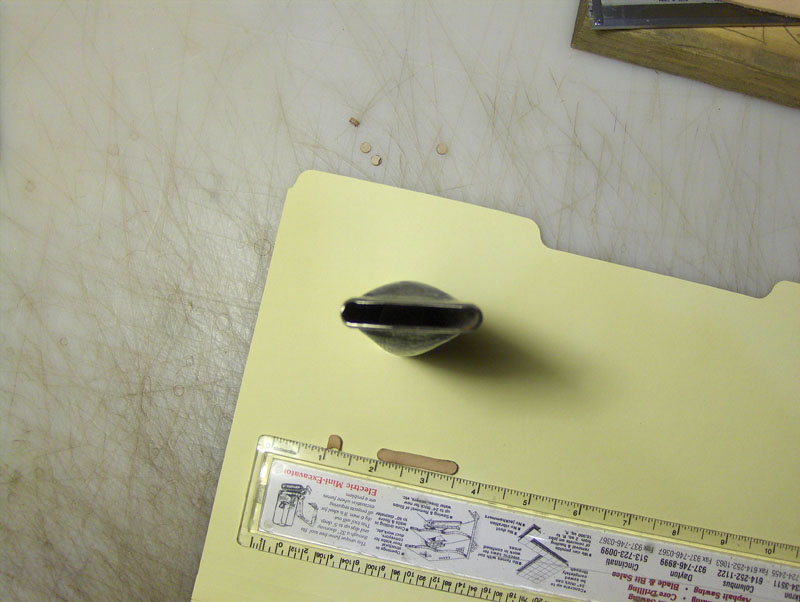
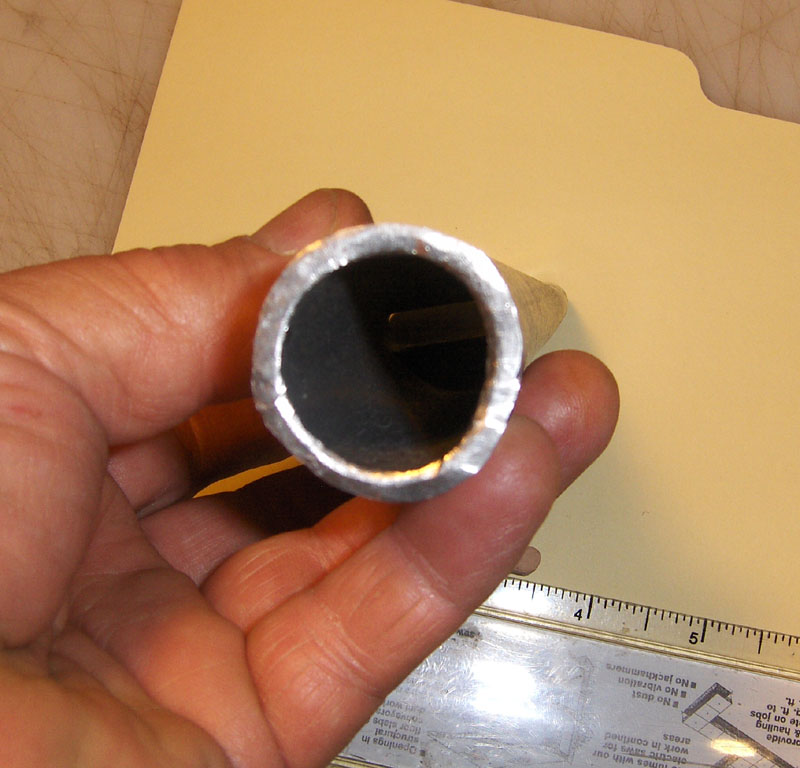
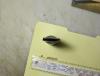
Hey, guys, . . . you're welcome, . . . I'm just one of those stingy old coots you hear about from time to time. I just try to make things easy on myself, . . . and this was one of the easier ones I've done. You can see in one of the pics that it is getting a bit dull, . . . I touch up the outside edge with the little belt sander I have, . . . and use a very fine round file just to clean off the burrs on the inside, . . . keeping that inside edge straight. Being able to fabricate your own tools can save you a bunch of $$$$ sometimes, . . . this is one of them. May God bless, Dwight -
What To Use To Sand Belt Loops
Dwight replied to rccolt45's topic in Gun Holsters, Rifle Slings and Knife Sheathes
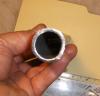
OK, . . . you asked for it, . . . I used galvanized 1 inch conduit, . . . actually measures 1.200 OD with my calipers. I took a piece of 1/4 inch flat stock and ground a taper on it from about 1 inch to about 1 3/4 or something like that, . . . and rounded the sides with a full half radius the full length of the two sides (its about 3 inches long). You first take the cut piece of conduit to a sander and sharpen that outside edge so you could use it to punch out a perfect round washer of leather. Then you begin to flatten the end of it, . . . keeping the piece of flat stock in that end, . . . so it doesn't ever get a chance to fully collapse. Just keep hammering until it gets nice and flat on the edges, . . . pull out the flat stock piece, . . . VOILA, . . . a punch. May God bless, Dwight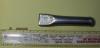
-
Very First Project (Chinks)
Dwight replied to Beckywynn's topic in Clothing, Jackets, Vests and Chaps
Ya did good, . . . my first pair was much more plain Jane, . . . when it comes to tooling, . . . I'm far more at home with a chain saw or a ratchet set. Just really don't have the patience for it, . . . so biggest majority of my stuff is bland. Keep up the good work. May God bless, Dwight -
On a 1911 w/thumb break, . . . I put the strap dead across the back of the slide, . . . in front of the hammer. If it was me, . . . I'd make it just a "good" fit for the single safety weapon, . . . and he can stretch it over for the others. He can take the biggest one, . . . snap it over on it, . . . leave it over night, . . . it should stretch, . . . and if you did the normal amount of leather on the holster, . . . I would not think there would be any kind of problem. May God bless, Dwight
-
What To Use To Sand Belt Loops
Dwight replied to rccolt45's topic in Gun Holsters, Rifle Slings and Knife Sheathes
If you use a good slot punch, . . . the sanding needed is incredibly minimal. I got sick and tired of bad looking belt slots, . . . built a punch out of a piece of conduit, . . . sharpened the edge on an electric sander, . . . pounded it down to a 5/16 by almost 1 1/2 inch slot, . . . I've used it for 5 years, . . . looks ugly, . . . but it works. May God bless, Dwight