Dwight
-
Posts
5,257 -
Joined
-
Last visited
Content Type
Profiles
Forums
Events
Blogs
Gallery
Store
Everything posted by Dwight
-
Chris, . . . welcome to retail sales,.......... You now have been initiated into the brotherhood of conscientious craftsmen who serve a NON conscientious buying public. Of all my "problems" I encounter with products, . . . it is the belts that seem to cause the most quandries. The reason for it is that people in general do not "think" about the belt. They think that because they bought size 36 jeans 8 years ago, . . . they still wear a 36 belt. I had one good friend insist he had not gained any weight at all, . . . yet the 2 belts I made him were now 3 inches too small. Funny, . . . they both fit the day he picked them up. I "fixed" both problems, . . . but it just spotlights the problem that belts make. I really don't know of any foolproof way to fix the belt problem, . . . just have to roll with those punches, . . . May God bless, Dwight
-
Tree Reaper has the science of that project. If you also want to make the letters come out more "even" as far as how they look in depth, darkness, etc. you may want to look at a $35 to $50 arbor press you can get from Harbor Freight. It only takes a few scraps and you can master that machine and the Tandy stamps to the point that it REALLY looks good. May God bless, Dwight
-
FWIW, . . . I have an aluminum Boss, . . . got it in '06 or '07, . . . not sure which. Like you, . . . belts, holsters, knife sheaths, a couple of purses (ugh!!), guitar straps, and the occasional "fix" for a saddle, halter, etc. My Boss has served me quite well, . . . and the Tippmann service has been the best. I love the idea that I can take it to someone's barn if I need to, . . . all I need is one flat board and a "C" clamp, . . . I'm in businness. When not being used, . . . it is off my desk and on the floor under it. My desk also is my cutting table, . . . stamping table, . . . etc. My favorite part is that I can dictate to the machine the exact point I want that needle to insert the stitch, . . . a sometimes near impossibility with other type machines. I've been sewing for roughly 50 years, . . . and if I could only own one leather sewing machine, . . . it would be the Boss. The only "downside" is I really have to brew a good pot of coffee and get really psyched up whenever I start sewing on of those 50+ inch belts or cowboy rigs. The old arm gets a bit tired from all that, . . . just wish I had a Krispy Creme store next door, . . . that would make those long belts go easier. May God bless, Dwight
-
In a class I teach, . . . all of my students can answer your question: "Hands are for hamburgers, . . . machines are for stitching" That is what I teach them, . . . then I introduce them to my Tippmann, . . . and the race is on. May God bless, Dwight
-
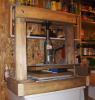
I wanted to "test" a press before I bought one, . . . made this one out of 2 x 4 lumber & bolts in all of about an hour, . . . it has done everything I have asked out of it. May God bless, Dwight
-
The tag says it is a 2.5 CFM. At the store, they sell two models, . . . I decided to take a chance on the smaller, . . . not knowing one way or another, . . . and it is more than enough for my holsters. May God bless, Dwight
-
Two things: 1, the very best medium for producing patterns is the old manila file folder. Cheap, . . . rugged, . . . once "finalized" the patterns last indefinitely and if you screw one up, it is not a major investment to make another one. 2. go to JoAnn fabrics, . . . get one of their 40% off coupons first (good for 40% off retail price for one item), . . . go to the back of the store where their odds and ends are, their out dated stuff, . . . etc. You may find a bolt of vinyl like is used for seat upholstery. It is not a perfect substitute for leather, . . . but it is a world cheaper than leather, . . . makes good patterns, . . . can be sewn to see how the holster would "look" and "work". Even if you have to pay full price of $16 a yard, . . . that is usually a piece that is 36 by 45, which is almost 12 square feet, . . . makes the price about $1.33 per sq ft, . . . verses $5 to $8 a sq foot at the leather store. I got me a piece some time back, . . . will be making a pair of vinyl chaps before I take the razor to my chap leather. May God bless, Dwight
-
Thanks, Jack, . . . I knew the process, . . . couldn't remember the word. May God bless, Dwight
-

Proper Way To Dip Dye
Dwight replied to Kcinnick's topic in Dyes, Antiques, Stains, Glues, Waxes, Finishes and Conditioners.
Wellllllllll, . . . you won't get a basic black that way. Finish is nothing more than personal preference, . . . and at least as far back as the Revolutionary war, . . . leather was dyed if for no other reason, . . . to identify the nation from which the soldier came. Mostly I dip dye, . . . because my customers do not like raw leather, . . . they like dark brown, black, black cherry, sunburst, and others. So do I. Oh, . . . and I do dip dye. May God bless, Dwight -
There is a technical term for it, . . . but it amounts to making the water "wetter" so to speak. It absorbs deeper into the leather or something. Anyway, . . . it is about a heaping teaspoon of liquid soap into the "really good and warm" water, . . . and it is just like you said, . . . a vacuum forming process. I bought my vacuum pump at Harbor Freight, . . . $100, . . . bought the vinyl at JoAnn's, . . . got a vacuum bag valve off the internet for $15, . . . folded the vinyl in half, . . . sealed the side edgers with Weldwood contact cement, . . . it works super for holsters. I actually made one holster not too long ago for a 1911 Commander, . . . it was molded so tight that it would open both snaps and pull the holster out of my britches when I tried to draw the gun. Needless to say, . . . we modified the holster, . . . I'm wearing it right now, . . . and we don't get that carried away any more. May God bless, Dwight
-
Hazards Of Boiling Beeswax For Medieval Leather Bottles
Dwight replied to UKRay's topic in Leatherwork Conversation
FWIW, . . . I went to the Goodwill store some time back, . . . spent $10, . . . got a gently used crock pot. Put about a pint of water in the old thing, . . . plug it in, . . . put your wax in a quart jar, . . . put the quart jar in the water in the crock pot, . . . go get a cup of coffee and a small danish. By the time your danish is history and the coffee is down to one swaller, . . . the wax should be molten, . . . and "so far" at least, . . . it never has gotten hot enough to turn color on me. I won't mess with wax or parrafin any other way, . . . but then again, . . . I won't go sky diving either annnnnnnnnnndddd, . . . my wife doesn't care what I do with that old crock pot just so long as that ugly lookin' thang stays in my shop. Also keeps me from having to clean the white top of her glass top stove May God bless, Dwight -
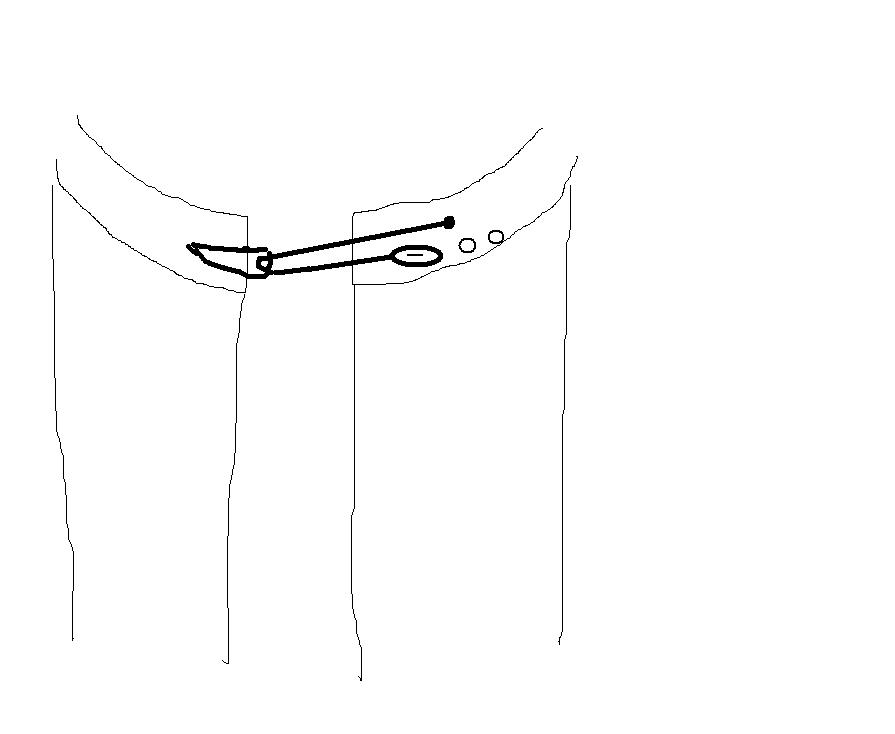
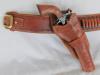
I am not a "Western Historian" but I have been led to believe that most gun belts of the old west were not lined. Many had sewn loops which of course would be on the outside of the belt. Many others used a system where a slot was made, . . . the loop came up through the slot, then back down through the same hole. All my gunbelts are made this way, . . . lined or unlined doesn't make any difference. I use a 3/4 inch long bag punch, . . . 5/6 oz leather, . . . 7/8 inch wide, . . . wet it, pull it through, form it, let it dry, dye & finish it, . . . have not had any customer complaints yet. Here's a couple of examples. The hog leg is lined, the other is a folded, rough out. May God bless, Dwight
-
mydarshan, . . . thank you. I have been kicking around making a wallet for about 2 years, . . . but could not find the "pattern" I wanted to use. I really do like that one, although I am at a loss to determine what the two straps are for on the back side of the wallet. Could you enlighten us about it? My poor old "dime store" wallet has just about had it, . . . this will be a fitting replacement. May God bless, Dwight
-
Looks good from this end, . . . hope she enjoys wearing them as much as you did making them. Those have to be a labor of love, . . . May God bless, Dwight PS: Do you have any links to "old time" or "antique" chap designs, pictures, images? I want to make myself a pair of authentic looking "old style" cowboy chaps, but most of the images I come up with don't quite give me the details I need.
-
To avoid metal, . . . and get it tight, . . . I'd use a loop and button system: like a 3/4 inch wide piece of 7 or 8 oz being anchored on the left chink at one end, . . . the other end having a button hole in it. Pass the strip through a loop on the right chink, . . . pull it tight and button it. May God bless, Dwight
-
One problem you will find with the wood or the hardboard, . . . making the connection to the edges of the other pieces. If it were me, . . . I'd go get a couple of pieces of 1/16" aluminum, . . . make the back and the front out of the exact same pattern, . . . use a serpentine piece for the sides. You can make the top and bottom about 1/2 inch wider and longer (all around), . . . notch it, . . . then bend it down with a pair of vice grips, . . . it makes a super edge to pop rivet the bottom to the edges, . . . then hinge the top. Just thinkin', . . . cause if I had that guitar, . . . you can bet your bootsies I'd have it in a super protective case. May God bless, Dwight
-
Go to my website, . . . the belt page will give you pictures and the information. www.dwightsgunleather.com You have to make the belt, . . . let him wear it in the pants he wears most often, . . . window the name between the loops is the best, . . . I think. May God bless, Dwight
-
My First Avenger Holster
Dwight replied to mlapaglia's topic in Gun Holsters, Rifle Slings and Knife Sheathes
Dip dyeing is one sure way to get rid of streaks, . . . and do the dying right after you cut out the blank pieces. In this case, you would have dyed both pieces, . . . then after a couple days drying, . . . come back and very gently do the flesh side of the holster with a dauber to get the black interior. OR, . . . you can do the Katsass process, . . . glue two thinner pieces of leather flesh to flesh, . . . after you dye them, . . . for a lined holster that is bi-color. I fought back and forth with all sorts of "better ideas" on dying, . . . one day as I was reading an email I got years ago from Lou Alessi, . . . (he dip dyed all his parts and pieces as soon as they came off the cutting table), . . . I just asked myself who the expert was and who wasn't. Lou won. May God bless, Dwight -
TwinOaks is right about the clamshell being easy. I usually introduce all my students to a flat backed pancake, . . . easy to make, . . . easy to adapt, . . . very comfortable when finished. May God bless, Dwight
-
Iwb For A Small Bersa
Dwight replied to Sanch's topic in Gun Holsters, Rifle Slings and Knife Sheathes
/\ /\ /\ I'm with you, Shooter, . . . no SOB holsters come out of my shop. May God bless, Dwight -
"john Wayne" Style Holster/gunbelt
Dwight replied to Josh Ashman's topic in Gun Holsters, Rifle Slings and Knife Sheathes
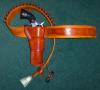
Personally, . . . I think everyone should have a "Duke" rig. I researched mine as best I could, . . . from what I was told, he liked a closed bottom, . . . and that the belt was also a money belt. Hence, . . . my version: May God bless, Dwight
-
1911 Cover Trigger Or No ?
Dwight replied to MADMAX22's topic in Gun Holsters, Rifle Slings and Knife Sheathes
I have had 1911's since 1966, and know for a fact that it would take several concurrent problems working together to make a 1911 unsafe in a holster just because it's trigger was not covered. BUT, . . . I also know that there are many folks out there who jam all their guns into any holster they can find. That can produce an unsafe condition, . . . especially if the customer is carrying a Glock or Springfield XD or another similar weapon that uses a striker firing mechanism and does not have a manual safety. The 1911 is without a doubt the safest semi auto on the market, . . . but you have to allow for the others. Glocks tout their "internal" trigger safety system, . . . but it has a well documented pattern of failure, . . . anything entering the trigger guard can easily snatch the trigger back, . . . and it is disasterville from there out. Having said all that, . . . I wouldn't make any holster that leaves the trigger exposed, . . . unless it is for a revolver. May God bless, Dwight -
For the most part, . . . Sixer has it nailed for me too, . . . the major exception is belts, . . . especially black ones. I use a 1 HP motor, . . . it burnishes for all my belt edge burnishing. I burnish, . . dye, . . . then re-touch the burnishing before final finishing. For me it goes quicker before the dying process, . . . and even going over it a second time, . . . I save a bit of time. AND,................... the double burnishing gives my belts a better job I think. But you can do it the other way, . . . just remember to ALWAYS dye before any finishing process. Finish application is inclusive of that word, . . . FINSH, . . . meaning end or last. May God bless, Dwight
-
Want To Make My Own Holster And Belt
Dwight replied to Kcinnick's topic in Gun Holsters, Rifle Slings and Knife Sheathes
I guess I get to be the "other" voice. 1st power tool to buy: Harbor Freight, 1inch wide belt sander, . . . costs less than $50, . . . does all the edges on holsters, belts, purses, and does a good & quick job. A tubular sander can do a better job sometimes, . . . but it takes a lot more practice and a lot steadier hand. 2nd power tool to buy: Tippmann Boss Stitcher, . . . somewhere between $1000 (used) and $1500 (new with warranty, etc), . . . and if given reasonable care, . . . it should last you a lifetime of hobby leather work. If you get bored and want to unload it, . . . put it on Ebay with a $1100 reserve price, . . . it may have to stay there through a couple of cycles, . . . but they most generally sell quickly. You could even buy a new one, . . . sell it on Ebay a year later, . . . lose $300 in the process, . . . but you will have saved your fingers and wrists an untold amount of pricks, jabs, wrenching, pulling and twisting. AND, . . . you will have to practice for some kinda time, . . . and be a perfectionist type, . . . to hand stitch a 52 inch belt more evenly and better than my "Boss" will do it. That is not even counting that I will stitch that 52 inch belt in about 20 minutes, . . . while hand stitching will be at least several hours, . . . if not days. Anyway, . . . welcome to the wonderful world of leather work, . . . it's fun, exciting, nerve-wracking, expensive, and rewarding: sorta like getting married or buying a motor cycle. May God bless, Dwight -
Need "Blue Guns" for Holster making
Dwight replied to ABC3's topic in Gun Holsters, Rifle Slings and Knife Sheathes
You can shop where you like for sure, . . . but I use Law Enforcement Target for all of my blue guns I need. Law Enforcement Targets, Inc. - Shooting Targets, Paper Targets ... www.letargets.com/Cached - SimilarYou +1'd this publicly. UndoLaw Enforcement Targets provides a full catalog of targets, including ... Paper & Cardboard Targets - Steel Targets & Stands - Zombie Targets - Contact Us8802 W 35w Service Dr NE Minneapolis, MN 55449 (651) 645-5246 Most of their guns are in the $33 to $36 price range, . . . and if they do not have it, they will arrange to have it directly shipped to you. Most of the time, I am lucky enough to reach Cathy, . . . she does a great job. I don't normally have any issues with the blue color coming off, . . . did once because of my own stupidity, . . . , and I have used a press, never broke one yet. May God bless, Dwight