


Dwight
-
Posts
5,261 -
Joined
-
Last visited
Content Type
Profiles
Forums
Events
Blogs
Gallery
Store
Everything posted by Dwight
-
Sometimes when I walk in there, . . . I think the cash register does a little dance, . . . "He's Baaaaaaaccckkkkkk". May God bless, Dwight
-
Once you get your pattern, . . . make a test cover with fabric backed vinyl purchased at JoAnn fabric. Get their 50% off coupon off Google, . . . buy a yard of it, . . . it'll be 36 by 48, . . . so you'll have plenty enough to mess with. Leave 3/8 to 1/2 inch extra, . . . all the way around, . . . take a pair of dividers and mark that all the way around the edges of the pieces. Then, . . . staying about 1/16 of an inch away from your scored line, . . . coat each piece with Weldwood Contact Cement, . . . a thin coat is adequate. When the cement dries, . . . (I use a heat gun to make it happen a lot faster), . . . slowly and carefully put the edges together, . . . and re-mark them now in the inside, . . . and sew that line. You can use a sewing machine, . . . with carpet thread, . . . also bought at JoAnn's, . . . and a lot of machines will do that. I had a Brother machine I bought at a yard sale for $25 that would sew that all day. The seam will then need to be laid over so that it all points down toward the pavement. Have fun, . . . show us pics when it's done. May God bless, Dwight
-
One sure fire way is to not saddle stitch, . . . use a lock stitch like a sewing machine would make. I know, . . . "saddle stitch is the only authentic, . . . " (ad nauesium), . . . but if you can, think of the number of holsters and belts that are in use in the world that were never even thought of in terms of saddle stitching. I don't know the official ratio, . . . but I'd bet it would be at least 10 to 1, . . . machine stitch vs saddle stitch. My Tippmann boss makes the prettiest white stitches you could ever want, . . . May God bless, Dwight
-
 Well, . . . again, . . . try the chemical removal of a bit of it using a moist rag. I've had some success that way, . . . May God bless, Dwight
 -
You may find it cracks, . . . and I don't know why, . . . something in the formula makes it like being put on in very light coats, . . . hence the 50/50 cut with water. But it is a holster, . . . not a belt or wallet that will be constantly flexing one way or another. Personally, . . . I like those 50 cent bristle pig brushes from Harbor Freight, . . . just swirl it on, . . . work it up to a lather like, . . . brush out the bubbles, . . . hang it up to dry. That's how I do it, and I've never really had any troubles. Got lucky though, . . . I read about the cut before I used it. May God bless, Dwight
-
Did you cut it with water first?? Should always be cut 50 / 50 with tap water, . . . otherwise it goes on too thick, . . . becomes brittle at times. I usually do 2 coats of it reduced, . . . sometimes 3. May God bless, Dwight
-
Lowes has it for something like $13 a pint, . . . for the liquid, . . . the gel is a bit more, . . . and at times is well worth the extra couple bucks. The liquid tends to thicken up as the solvent escapes, . . . adding a bit of acetone thins it right back out. May God bless, Dwight
-
I have no experience with the leathercraft cement, . . . though I've heard good words about it. Back over 50 years ago I began using Weldwood contact cement for formica kitchen cabinets, . . . found out it worked on a host of other stuff, . . . naturally gravitated to it for leather, . . . have never been sorry. You can put two pieces of leather together with it, . . . and then rip them apart, . . . but the glue doesn't give, . . . the leather does. Leathercraft cement could not be any better, . . . only equal the Weldwood. I actually did a small holster for a Bersa Thunder years ago, . . . Weldwood only, . . . not one stitch in it. I'd bet it is still together. And yes, . . . it holds up even thru wet forming. Anyway, . . . keep up the good work. May God bless, Dwight
-
Hmmm, . . . do I know you from somewhere ???? Cheap advice, . . . if you contact cemented both wings correctly, . . . all that stitching you did around the belt loop holes was really not necessary, . . . adds some character, . . . but for me, . . . that is expensive character, . . . Other than that, . . . looks OK, . . . One other thing, . . . use one single wrap of plastic around the gun, . . . the way you wadded that up, . . . it may stretch the holster and make it be a bit on the loose side. May God bless, Dwight
-
They are both acrylic finishes, . . . most likely adding Resolene will add to your headache, . . . as it will not be any less flexible (probably somewhat stiffer), To lessen the shine, . . . you might take a cloth with denatured alcohol or acetone (only moist, not wet) and lightly go over the sheaths a couple of times. Acrylics do not fully cure overnight, . . . take a while to get full hard. You may be able to undo some of it. I would treat a panel of leather the way you did the sheaths, . . . then using denatured alcohol first, . . . see if it will undo it. If not, . . . next try acetone, . . . and if acetone doesn't do it, . . . your only hope would be good ol unleaded gasoline. But remember, . . . I've messed up as many projects with those chemicals as I have saved, . . . go slow, be careful, and don't have any open fires or electrical heaters nearby. May God bless, Dwight
-
My armor experience is having created two sets, . . . both very much Roman-esque armor, . . . my favorite was worn by General Sutonious as he battled Bouddica in the History channel or Youtube. The front is one piece, . . . 12 oz or so veggie tan, . . . hand molded, one section at a time. The back is done the same way. Care needs to be taken, . . . make the arm holes and neck hole plenty big enough, . . . and roll the edges out. I don't have a picture of mine, . . . but this image is the one I used to design mine, . . . and provided the opponent only had a wooden sword, . . . it would probably prove battle worthy. The two pieces are buckled together at the top, . . . the front overlaps the back on both sides, . . . and they are buckled together as well. Have fun with your armor, . . . I wear mine to imitate the 3 centurions of the New Testament, . . . at church presentations. May God bless, Dwight

-
Zippers have two sides, . . . one with the slider, . . . one without. I always sew in the slider side first, . . . starting from the bottom or the end where the two meet, . . . come back down to the starting point, . . . put the zipper together, . . . zip it closed, . . . sew in the other side. I also ALWAYS completely stick my leather / zipper things together with contact cement. It first, . . . lets me see what the finished product will look like, . . . and second, . . . helps me keep everything in line. That's how I do it anyway. May God bless, Dwight
-
You and I find flaws, . . . probably could find them in each other's work, . . . but so much of the purchasing world out there, . . . they either go over it with a fine tooth comb looking for a big enough reason to get a discount or return it, . . . (maybe 3 - 5 % ), . . . or they unpack it, smile, and go to using it. The maker knows his mistakes, faults, etc, . . . including how he hid the "charm" and "character". Most of my brands, . . . they go inside the holster, . . . it's still branded, . . . but I've never had one come back with that complaint..........lol May God bless, Dwight
-
I think a lot of people equate "hand made" to "having given attention to the details of the product". I'm not sure they care if it was clicked, cut, or chopped out, . . . hand sewn or machine sewn, . . . if they can understand that the maker took the time to create it correctly, . . . and it passed a decent "QC" inspection, . . . they are happy. At least that is the type of feedback I get from my customers. AND, . . . yes, . . . they do want HANDmade to be WELLmade. May God bless, Dwight
-
I haven't made many, . . . but I resolene mine as well, . . . no complaints yet. May God bless, Dwight
-
I had the website up for something near 10 years, . . . and in all actuality, . . . it more than paid for itself. What I liked about it, most of all, . . . I could put examples on there, . . . especially my own creation of IWB that is totally tuckable, . . . I've never been made with it and I've worn it all sorts of places. Would I suggest you fix one up? Yes, . . . it is a good advertising tool, . . . and in today's commercial world, if you don't have a website, . . . well you are just the "trailer trash" of the commercial world. There are lots of places where you can get it done, . . . I did my own, . . . my way, . . . which is kind of my thing. Best wishes which ever way you go. May God bless, Dwight
-
Well hmmmm, . . . I make a concoction of 50% beeswax and 50% neatsfoot oil (use the real oil, . . . not that compound stuff), . . . and I do it by weight. I actually weigh the amount of beeswax I've got in "this little bag", . . . then add an equal amount of neatsfoot oil. I put em in a quart jar, . . . set the quart jar in a little crock pot I keep just for that job . . . come back some time later, . . . it's all mixed together. When I've made it and it was kind of soft and squishy, . . . it seemed like I'd used more oil, . . . maybe not. Put it back in the cooker and try more wax, . . . see what happens. Personally, . . . I love the look I get from it, . . . used it on my own personal cowboy rig, . . . and I just chuckle when I see it. One of my favorites. Not much new here, . . . doing a few holsters and a knife sheath at the moment, . . . had to shut down long enough to build a snow blade rig for my quad, . . . needed something to keep the snow off the parking lot and driveway. I shut down my website, . . . going to re-do the whole thing or scrap it, . . . have not made up my mind yet. Wife wants me to shut down and retire, . . . and that is an option at least. If you decide to put up a website, . . . Go Daddy is pretty easy to use, . . . and they have always been friendly and treated me right. May God bless, Dwight
-
More oil.
-
Because you have two holes, . . . this is a natural for a kydex template. Of course, . . . make a "perfect" pattern in paper, . . . transfer it to a piece of kydex (get it at Tandy leather shop), . . . punch two holes, . . . lay template on leather, . . . mark and punch holes, . . . lay template back on leather, . . . drop couple of small bolts into the holes to hold template from moving, . . . grab the razor knife an start cutting. They will be as perfectly symmetrical as you are able to cut them, . . . May God bless, Dwight
-
No offence my friend, . . . some folks are content to farm stuff out, . . . others like to keep it in house if possible and practical. I'm the latter guy, . . . got burned too many times in years past on other things, . . . found out if you want a job done right, . . . best do it yourself if you can. Actually that is what got me re-interested in leather work, . . . making my own leather for my guns, . . . and I just branched out. I know the quality my customer will get, . . . but do not know what they will get from an XYZ holster sold here in the states from Naugatuck, . . . but actually produced in China or some similar place. My cards are a reflection of me and my method: simple, to the point, unadorned, and unpretentious. AND, . . . if I ever decide that I need to make a change, . . . since I only run em 10 at a time, . . . I haven't lost much if I decide to chuck the ones I've got now, . . . in favor of something better (in my opinion). But you are in my camp and tepee when you get galled by folks who use faulty practices for justification of their pricing system. They call it a "cost of doing business", . . . and I just call it tomfoolery, . . . May God bless, Dwight
-
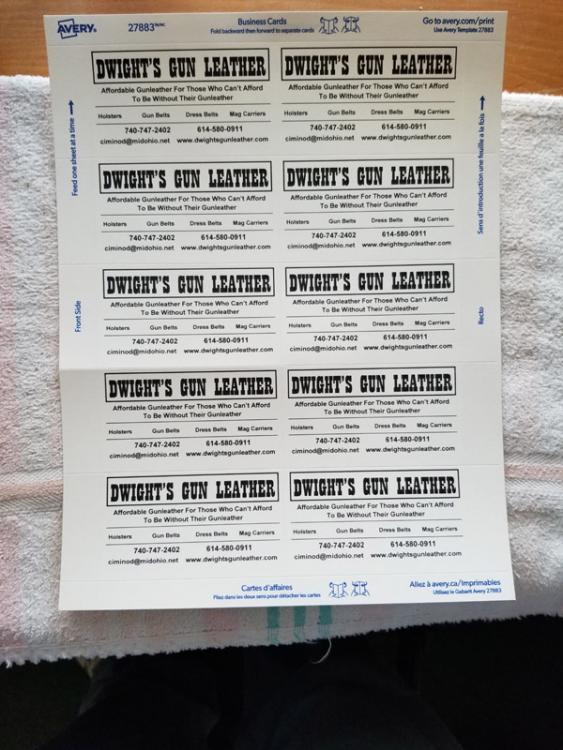
And then again, . . . for the simple minded who need business cards, . . . there is this option: print em yourself, . . . 250 cards for 8 bucks. I did the artwork and layout myself one evening, . . . I'm happy with it, . . . works for me. I pull up the file, . . . lay a sheet of 10 business cards in my laser printer, . . . hit the "GO" button, . . . 10 cards in a total of 30 seconds or so. May God bless, Dwight
-
Years ago, . . . I worked for an electrician who basically took his cost of materials, . . . multiplied it by 3, . . . and that was the price. Now, sure, . . . there were adjustments, . . . but the cost x 3 was his starting point. I basically did the same thing with my leather shop when I first started out. I took the time to figure out a few items, . . . the ones that sell the best, . . . did a detailed work up, . . . and ever since, I've just adjusted upwards more or less the % that my raw materials go up. I also put in 10% for THIMS, . . . (things I missed). If you really want to do it, . . . an Excel worksheet is your answer. Put in the item, . . . divide it down to feet (length), . . . square feet, . . . liquid ounces, . . . etc. Add into it the cost of your conchos, . . . belt buckles, . . . rivets, . . . chicago screws, . . . If you take the time to set the thing up correctly, . . . all you have to do is hit one button, . . . it will tell you the actual cost you paid, . . . or the replacement cost (new pricing is taken into account), . . . etc. May God bless, Dwight
-
Air brushing seems like it would have the best effect
-
CENTER of the buckle, . . . tothe the hole most used, . . . divide that dimension in half, . . . that is your center point for the name. May God bless, Dwight
-
Hey, Ken, . . . couple notes, . . . 6 oz will be good for the outside panel, I use 6/7 for my gun belts and it works out fine. 3/4 oz calf is the "top of the line" for the loops, . . . but can be hard to come by. I use 4/5 veggie tan, . . . punch the holes at 3/4 inch long, . . . cut the strap just over 13/16, . . . makes a nice fit. Wet the strap good before you start the weave, . . . pull it thru, . . . then back thru the same slot, . . . pulling it tight around a cartridge, . . . and leave the cartridge in there for a good 15 to 20 minutes, . . . then very gingerly slip the cartridge out and let it all dry. I would not use 6/7 for a backing, . . . probably 3/4 or pigskin, . . . 6/7 will make it almost 1/4 inch thick . . . kind of hard to handle. Measure the diameter of the cartridge, . . . the thickness of the leather, . . . add 1/16 of an inch, . . . that is the dimension, center to center, that you want to punch your weaving holes. May God bless, Dwight
