


Dwight
-
Posts
5,269 -
Joined
-
Last visited
Content Type
Profiles
Forums
Events
Blogs
Gallery
Store
Everything posted by Dwight
-
 Unless you plan on molding the writing off the barrel, . . . I don't see why any Colt peacemaker or clone would not do for it, . . . only question is, how long is the barrel??? The only single six I know of that is different substantially is the Rugers, . . . and that even goes for the older Vaqueros. I understand that after enough griping by the buyers, . . . Ruger re-fashioned the Vaquero so it is now pretty much the same dimension as the old Colt peacemaker. I use my Beretta Stampede for all my single six holsters, . . . never had a complaint yet. And Rings does make a blue gun in several different barrel lengths. May God bless, Dwight
 -
Doc Holiday Shoulder Holster Pattern Needed
Dwight replied to Dwight's topic in Gun Holsters, Rifle Slings and Knife Sheathes
Thanks taltexan and cowhide, . . . I think we're getting closer. May God bless, Dwight -
Doc Holiday Shoulder Holster Pattern Needed
Dwight replied to Dwight's topic in Gun Holsters, Rifle Slings and Knife Sheathes
Thanks, Mike Craw and CaptQuirk, . . . I think we are on the road. Now to just get my schedule rearranged to get it done. AND, . . . I'm talking myself into one of those vests, . . . more I see it, . . . the more I like it. JoAnn fabric, . . . here I come. May God bless, Dwight -
Doc Holiday Shoulder Holster Pattern Needed
Dwight replied to Dwight's topic in Gun Holsters, Rifle Slings and Knife Sheathes
Thanks CaptQuirk, . . . but that really isn't very close to the real thing. May God bless, Dwight -
Just wondering if anyone has a really legitimate pattern for Doc Holiday's shoulder holster from the movie Tombstone? Got a friend who wants one, . . . and he wants it as near as I can get it to the original. I couldn't find one any place else, . . . and I feel confident in trying to make it on my own, . . . but I thought I'd see if I could save myself some time. Thanks in advance if you can help. I'm particularly interested in the tooling, . . . as it looks like it is, . . . but there is never enough detail in the movie to see it real good. May God bless, Dwight
-
4" & 5" 1911 holsters
Dwight replied to Bolt Vanderhuge's topic in Gun Holsters, Rifle Slings and Knife Sheathes
Yessir, . . . top notch work. I am a bit curious though, . . . what weight leather are they? May God bless, Dwight -
Putting nylon webbing inside of folded leather straps
Dwight replied to Anubis78's topic in Sewing Leather
Leather was doing a great job with all this stuff long before nylon, rayon, and other webb stuff came along. Personally, . . . I don't see the purpose, . . . leather works fine by itself. May God bless, Dwight -
Fully adjustable rifle sling pattern?
Dwight replied to jesters1's topic in Gun Holsters, Rifle Slings and Knife Sheathes
This may be what you are looking for, . . . it is THE pattern for those who shoot high power at Camp Perry and other places. http://www.ebay.com/itm/Grade-B-Tan-US-M1907-Leather-Rifle-Shooting-Sling-M1-Garand-1903-Springfield-/382093886500?hash=item58f6920424:g:dPgAAOSwsW9Y2zfN You could buy this "el cheapo" and use it for a pattern to make yourself a really good one. This is the "used to be" US military sling, . . . till they went to cotton ones, then to polyester or whatever the new material is. May God bless, Dwight -
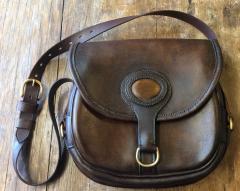 Stunning and awesome, . . . I am not one for purses / bags, . . . but that one is exceptional. Great design, . . . great work. May God bless, Dwight
 -
What is this Non-Mexican Holster's Name?
Dwight replied to RVM45's topic in Gun Holsters, Rifle Slings and Knife Sheathes
On John Bianchi's video, . . . that is the "western" holster he shows how to make. Take a look at virtually all the old western movies and TV shows, . . . it IS THE style for the biggest part of them. Not sure it really has a name, . . . I make them like that, . . . but they are dual layer holsters, . . . two pieces contact cemented flesh to flesh, . . . makes a really smooth and solid holster. May God bless, Dwight -
Unmitigatedaudacity, . . . you have an inbound PM. May God bless, Dwight
-
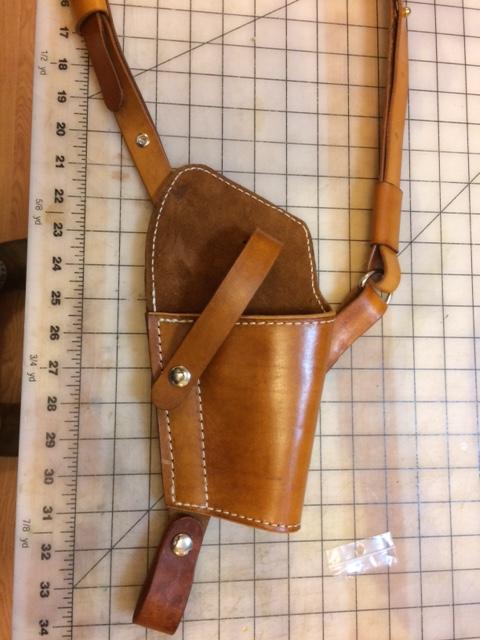
I make one of these every now and then, . . . just finished one for an HK USP .45, . . . These pictures don't tell the whole story, . . . but if you look close you can get an idea of my pattern. When I do a scope, . . . I cut a channel down where the sight track should be for the scope mount to go down in, . . . I would do the same for a red dot or anything else like that. In a wheel chair, . . . I would also opt for a thumb break rather than the strap over the gun butt, . . . with the thumb break, you do not have to mold it tight for retention, as the thumb break will provide security. May God bless, Dwight
-
I played the game trying to find something that works really well with those dyes, . . . ruined a couple of projects. Said to heck with it. Started back buying their reducer, . . . have not had ONE problem since that was dye related. I'm staying with their reducer, . . . there is not enough savings with anything else to make it worthwhile to ruin an otherwise completed project, . . . trying to save $.50 or a dollar on the dye. Once I did the $$$ calculation as to what I might save vs what I might lose, . . . it was an easy decision for me. Now when I need more dye, . . . I pour out of the bigger bottle, . . . the dye into a 4 oz container, . . . dump that in my dye container, . . . then rinse that bottle out with a 4 oz bottle of reducer, . . . pitch that bottle and keep the clean reducer bottle for the next batch I have to make. It has solved some of my dye problems. May God bless, Dwight
-
Don't let me assume to tell you how to run your railroad, . . . but the devil would be handing out ice cream cones before i would lift 3300 pounds with a 2 inch wide Walmart belt, . . . which is what you are advocating here: 1/16" by 2" wide, . . . is nothing more than a 4 oz strap. Scary !!!!!!!!!!! May God bless, Dwight
-
I've never had any real issues with Tandy snaps, . . . but they did change their supplier, . . . the backer pieces for the male part are differently shaped, . . . and the exterior piece that attaches to the female part seems to be made a bit thinner, . . . BUT, . . . they work, . . . May God bless, Dwight
-
Not to jump on anyone else, . . . but I've been messing with this leather stuff now on and off for 55+ years, . . . line 24 snaps have done everything I've ever asked of them, . . . and while I did one time buy some smaller ones, . . . have never used em. I only use regular line 24 snaps, . . . and some one way snaps (very rarely) that I got from Sailrite several years ago. And I honestly don't know if this tool will work on other sizes, . . . never tried. Oh, . . . and don't go to Walmart for the tool, . . . for some reason, they quit carrying it, . . . Hobby Lobby carries them. May God bless, Dwight
-
This is the tool I use 95% of the time, . . . had it for 12 or so years, . . . bought it at Walmart for $9.95 back then. Make sure you do not lose the little red piece in there, . . . goes around the male portion of the snap, . . . makes the tool work. You can use it without the cylinder but you mess up the snaps some times and that can be aggravating. I also have the Tandy tool set for snaps and rivets, . . . it does not hold as well as this tool in my opinion. The single bad part of it, . . . the throat is small, so the snaps have to be within a couple inches of the edge of whatever you are doing, . . . and for me that is the 95% of my work. May God bless, Dwight http://www.hobbylobby.com/Fabric-Sewing/Sewing-Quilting-Notions/Fasteners/5-8-Heavy-Duty-Fastener-Plier-Kit/p/109268
-
How many layers are you putting together, . . . or are you talking about sewing straps end for end to make a much longer one? May God bless, Dwight
-
If this dude is going to hold 10,000 pounds, . . . how wide and thick is it going to be? May God bless, Dwight
-
Yeldarb, . . . you can fight it, . . . or you can do it the easy way. Personally, . . . I'm all for easy. When I do a bag, . . . especially with an oval or a round bottom, . . . that bottom is stitched very early on in the process. I take a pair of dividers, . . . and lay off an area all around the bottom, . . . in this case it would be 3/8 of an inch. Lay off the same on the side material of the bag, . . . lay it off on the hair side of each piece of leather. Apply Weldwood contact cement up to each line, . . . on the hair side of each piece and allow it to dry. Then, . . . start putting it together, . . . both edges flush with each other, . . . flesh side of the bottom laying against your table, . . . flesh side of the bag's sides pointing up. Allow about a 1/2 inch strip for the overlap of the two sides, . . . and get started. Put together about 4 to 6 inches of the bag and bottom, . . . stitch that in place, . . . but make sure you stitch it at 1/2 inch in from the edge. That will make sure that all the contact cement is well inside the bag, . . . which is especially valuable if you are going to dye it. Contact cement will not allow the dye to penetrate. Work on it about 4 to 6 inches at a time, . . . and when you get around to your starting point, . . . you will then discover why you do this step first. The sides will then be either too short to touch, . . . or too long. Ideally, you want it too long, . . . so you can trim a 1/4 or 1/2 inch off one of the sides, . . . stitch the side up, . . . and have a beautiful and correctly proportioned bag. Sewing the seam first is a recipe for bag and purse disaster in my experience, . . . so I do just about everything else I can before I finally sew that line. Once the bottom and side seams are sewn, . . . you will have a bag that is sewn inside out, . . . simply turn it right side out, . . . voila, . . . beautiful should be the word. May God bless, Dwight
-
It would be tricky, . . . but turning it inside out, . . . would be the first thing I would do, . . . so you are like sewing inside a box. I did a really deep bag for a wedding gift some time back and that is how I did it. Worked out fine. I think this one could be done that way, . . . but it would depend on the dimensions. May God bless, Dwight
-
If a feller had a couple weeks he didn't know what else to do with, . . . I really think the boss could be changed over to a "air over oil" cylinder operation quite easily, . . . with a rocker pedal for the foot, . . . and a sliding air switch and second cylinder on the presser foot, . . . he could keep both hands on the leather, . . . and just as fast as he could rock that foot of his, . . . he could do stitches. BUT, . . . my way, . . . the arm gets tired, . . . it's time for Hershey's and coffee, . . . May God bless, Dwight
-
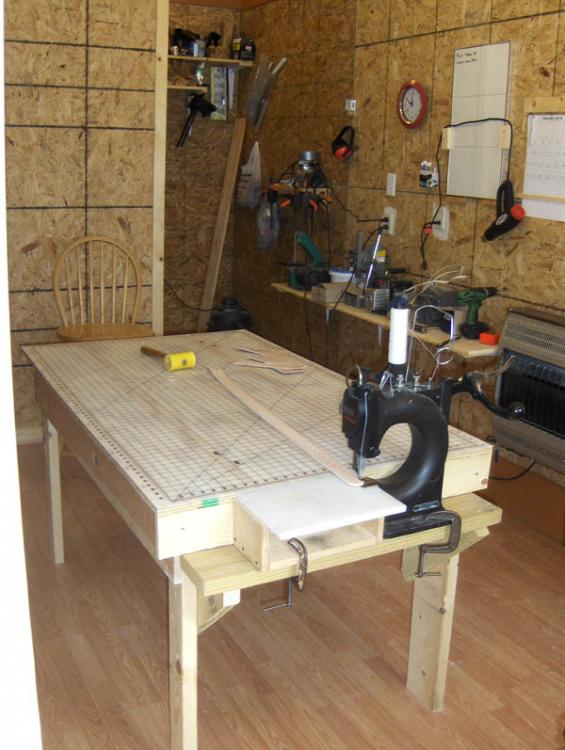
Mine is a Tippmann Boss, . . . love the thing, . . . my website shows some of my work, . . . all done with it. Picture shows the first belt I did in my new shop, . . . fixed a flat table I can slide on the machine, . . . or slip it off and not use the table. May God bless, Dwight
-
I'll get in here, . . . mine has been a "new" aluminum, . . . from 2005 or 2006, . . . somewhere back there. I use it for whatever I make out of leather, . . . if it needs sewn, . . . except vests, . . . different machine for that. Look on my website for examples, . . . page 3 to be specific, . . . it sews everything up to and including 3/4 inch of dry veggie tanned leather, . . . although not too well on the 3/4 inch stuff. I use it to punch the holes in those things, . . . then hand stitch it. I live 2 hours from the factory, . . . whenever I have a problem (happened twice so far), . . . that I cannot fix myself, . . . I load it up, . . . call em and give em a heads up, . . . one of the mechanics cleans off a bench, . . . fixes my machine, . . . 2 hours later I am back home sewing again (or taking a nap). The Tippmann people are great people to work with. The other day I finished a belt that was darn near 3/8 of an inch thick, . . . for a feller that is in the 44 in waist area, . . . all in about 20 minutes, . . . at almost 6 stitches per inch, . . . total sewing was something over 100 inches. I use everything from 207 thread to 415, . . . but 346 is my mainstay, . . . very seldom use anything else. A happy customer??? Yessir, . . . I am, . . . and if I could go back and buy a different machine, . . . I most likely would not do it, . . . this one does what I want, where I want it, and the way I want it, . . . electrics do not always do that. May God bless, Dwight
-
1. Yes, you can paint the dye on the other pieces, . . . but will that not allow those pieces to be of a different color? I would at least dab them in a corner somewhere out of the way, . . . to see if maybe dabbing them with a sponge will color them without dunking them (the felt pieces). 2. When you say "regular" Feibing black dye, . . . I'm not sure there is any such thing. There is oil dye, . . . USMC dye, . . . water based dye, . . . and probably one or two I forgot to mention. I only use the professional oil dye, . . . so you'll have to check yours against that, . . . maybe talk to someone at the store. BE SURE to thin the black down half and half with their reducer though, . . . or you will be forever getting off the extra pigment. May God bless, Dwight
