RockyAussie
-
Posts
3,265 -
Joined
-
Last visited
Content Type
Profiles
Forums
Events
Blogs
Gallery
Everything posted by RockyAussie
-

Messed up my machine (juki 441 clone), advice appreciated.
RockyAussie replied to Ysalex's topic in Leather Sewing Machines
Have you checked how the machine operates after you did the steps in Uwe's video of setting the needle height and adjusting the needle to shuttle relationship up to 4.2 minutes in on the video? This is shown in the manual you linked to on page 11 step 14. The same step Bob has shown. If you have this correct then you should not be getting any missed stitching at this stage. The rest of the steps can be difficult to get right and may not be necessary to do anyway. I have done this whole process following Uwe's video and it can help but as I said generally you should not need to go beyond any steps shown up to getting the timing position of needle to shuttle relationship. -
Messed up my machine (juki 441 clone), advice appreciated.
RockyAussie replied to Ysalex's topic in Leather Sewing Machines
Been thinking .......If the screw is so bloody tight are you absolutely sure that the timing has shifted there and not that the needle bar has been knocked upward???? -
Messed up my machine (juki 441 clone), advice appreciated.
RockyAussie replied to Ysalex's topic in Leather Sewing Machines
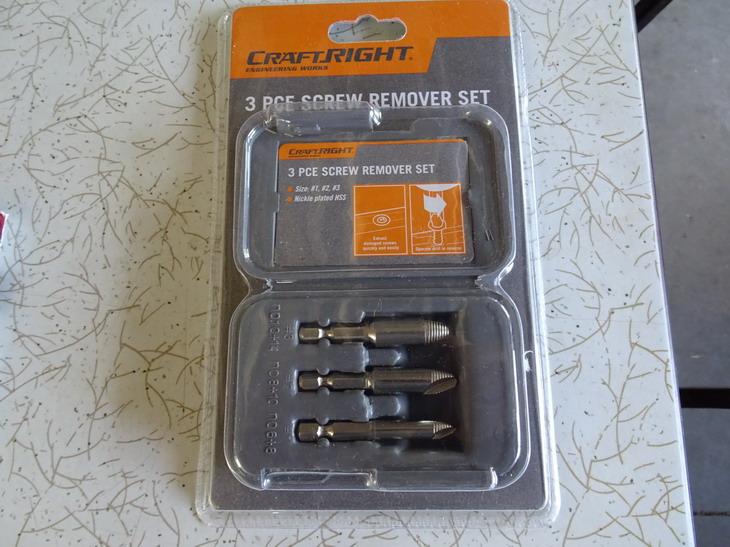
Here are a couple of pics of the screw extractors I got last weekend. Big for this job I think but a specialist bolt and nut place should have something along this line that would do the job.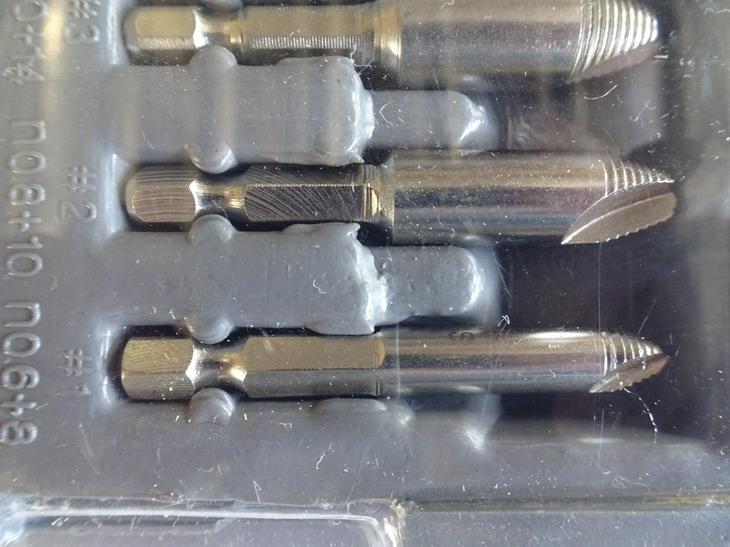
-
Messed up my machine (juki 441 clone), advice appreciated.
RockyAussie replied to Ysalex's topic in Leather Sewing Machines
That is a shame. I will have to think more about the problem then. I same as you have no idea how to get that screw out without major surgery of some sort. Drilling it out would seem to be the only solution. In the hardware store last week I picked up a set of 3 screw extractors that are like a drill bit that cut in reverse that were fairly cheap but I have not had a chance to try them yet.($6.00 au ...I couldn't resist) A reverse drill bit a little smaller than the thread would be best I think. -
Messed up my machine (juki 441 clone), advice appreciated.
RockyAussie replied to Ysalex's topic in Leather Sewing Machines
How bad is this timing issue? I presume you are getting some missed stitching happening when you go into reverse? Or are you getting the needle not going back into the same holes? -
Bag hangers, bangle hangers etc
RockyAussie replied to RockyAussie's topic in 3D Printers and Lasers
No No No croc ones. I dont think they would wash that well my friend. Here is a link to a video I made showing a bit on us making them and cutting them out with pla patterns I printed up for the job. The lovely models at the start are my Granddaughters. -
Bag hangers, bangle hangers etc
RockyAussie replied to RockyAussie's topic in 3D Printers and Lasers
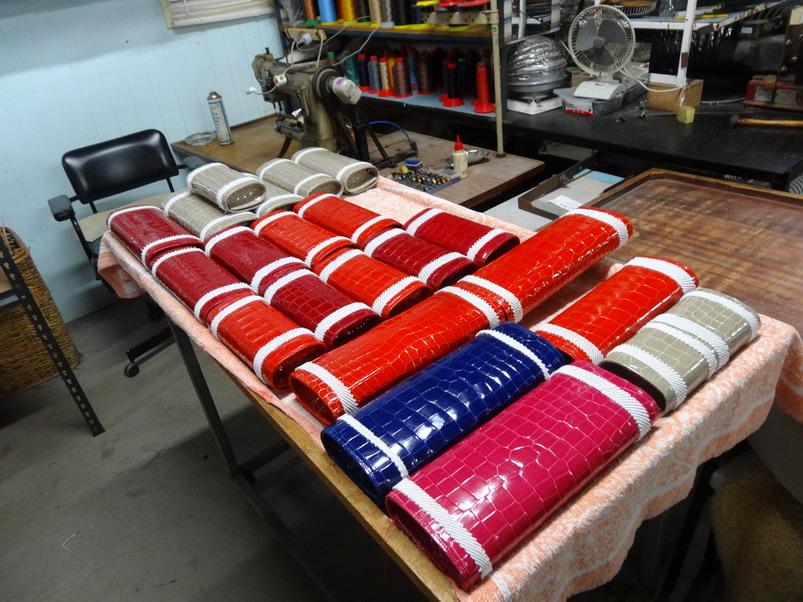
Not sure if this will get you off ya but Bert. I found doing the drawings and with these type of machines that work away by themselves you tend to be ON your but a bit more. Mate if I can ever stop making these dam face masks I might just look into that idea. Every time we get some packaged up to send there goes another ting. Seems more people see my website than I ever thought. Now if only I could get my handbags to sell like that but I cant see them being mandatory any time soon. -
Just an observation......Your top tension looks to be too tight. When either the bobbin or top tension is too tight on supple type leathers you will often get a stitch length variation which can be worse when the machine does a reverse stitch. Firstly I would check that you can stitch through this leather in a continuous run and get the tensions showing up in a similar way, meaning no going up and down on and off. If you have it right there will be no shortening of the leather length from what it was to start with.(alittle longer perhaps) Back your foot pressure off until you can raise it by lifting the foot with your hand. I generally set my foot pressure back until the job wants to lift with the needle then screw it down a couple of turns. (you may have to consider taking out the small spring inside if you have not already) The needle size you are using is too large a size for this leather with this thread. Also that thread looks a bit like a slippery type thread and it may be worth trying another type to help rule that out as 1 potential problem. (they can be difficult to get the tension right sometimes on slippery threads). Try a firmer leather and see if that works and if the stitch does not return back into the same holes THEN start looking into under machine adjustments.
-
Bag hangers, bangle hangers etc
RockyAussie replied to RockyAussie's topic in 3D Printers and Lasers
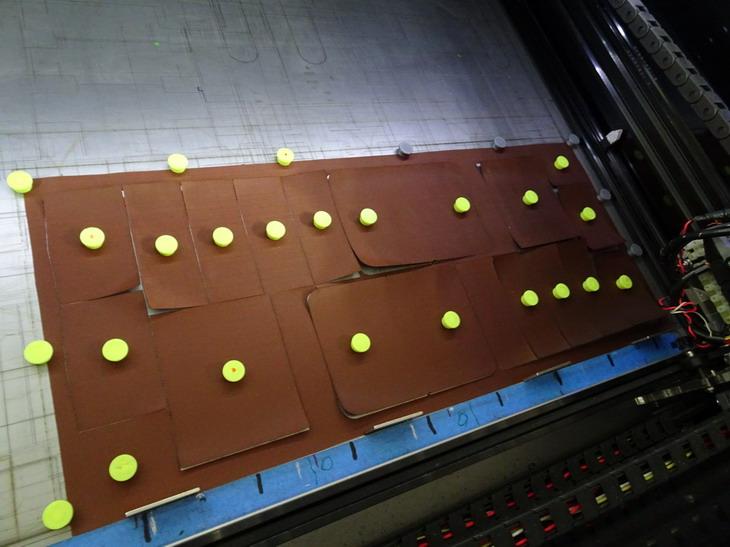
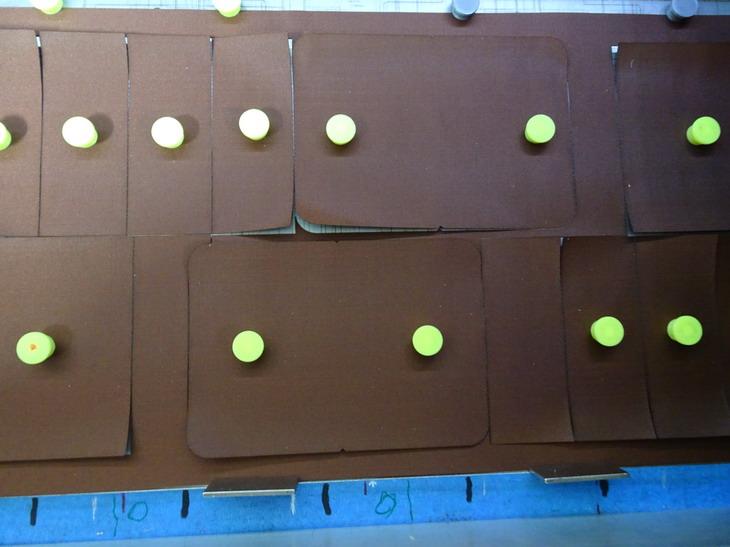
Thanks guys. Bert ....Get a printer mate. Once you get the hang of doing the drawing stuff in a cad program the possibilities are almost endless. I think if I were starting off today into manufacturing leather goods I would have to put the 3d printer near to the top followed closely behind with a small watt laser (2.5). Not only do I save a lot of time and money on knives by printing out some of the cutting templates many of the components now get cut out on the little laser. That has cut my knifing costs in half. Just the other day I decided to try cutting the material we use in our wallets and purses with the laser and wow its fast (1100mm per minute) and sealed up edges as well. For doing up prototypes and small numbers they are truly a God send. Here the cardboard is cut first with the laser to give me a way of positioning the magnets needed to hold the fabric while the laser cuts the fabric. Once I have the magnets positioned I remove the cardboard template and hit the go button. Beautiful clean sealed edges in 4 minutes. All of the leather pattern parts were cut out in cardboard in a few minutes as well. Way nicer than having to carefully cut out each piece sooooo carefully with a knife by hand. With some luck I will get this prototype model done today.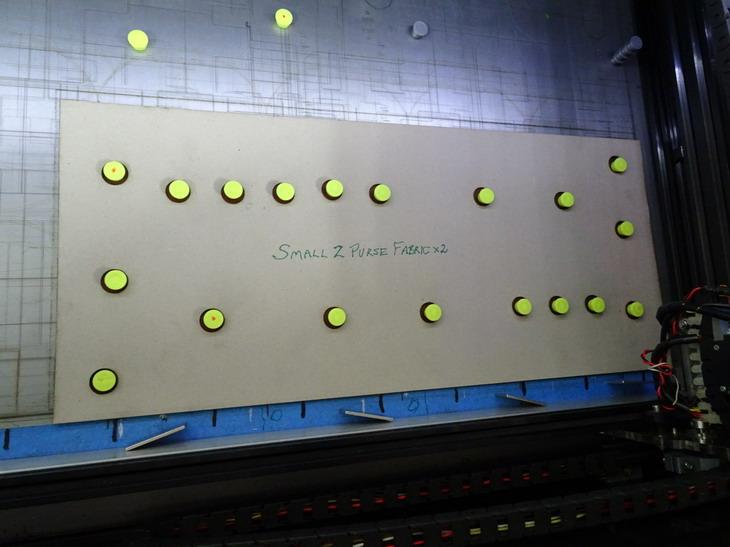
-
Pouches, Coasters, Cases... Lots of small items.
RockyAussie replied to AlexOstacchini's topic in Art
Very very nice work and your wooden form looks like it is working brilliantly. With regards to the snaps....I have only had this happen when I tried putting some leather down on the anvil piece to avoid scratches and that I found distorted the outer cap piece. Perhaps the antique ones with a design on may work better for you. -
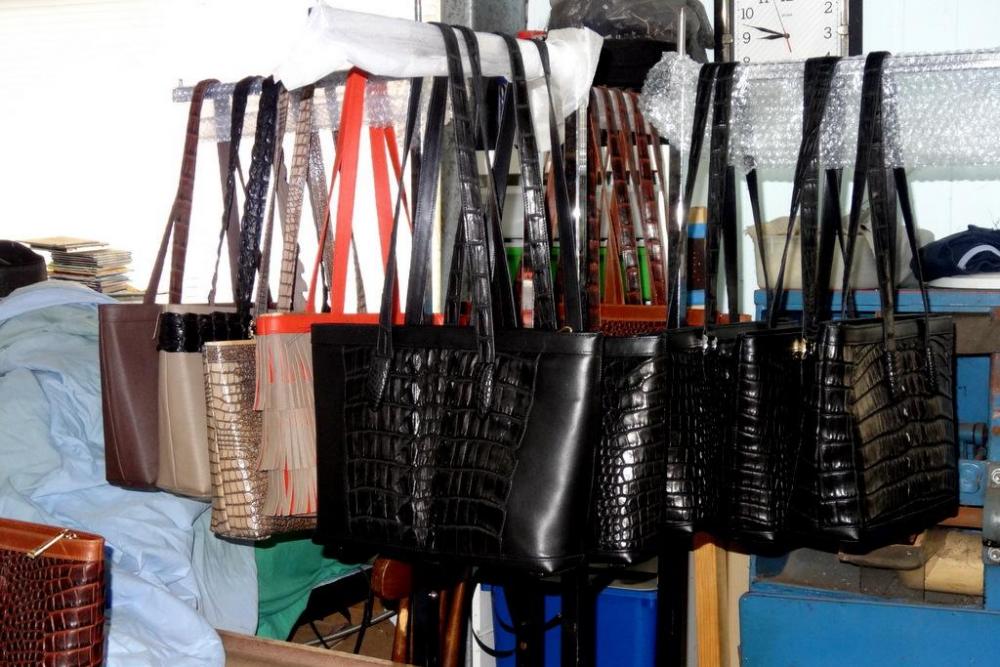
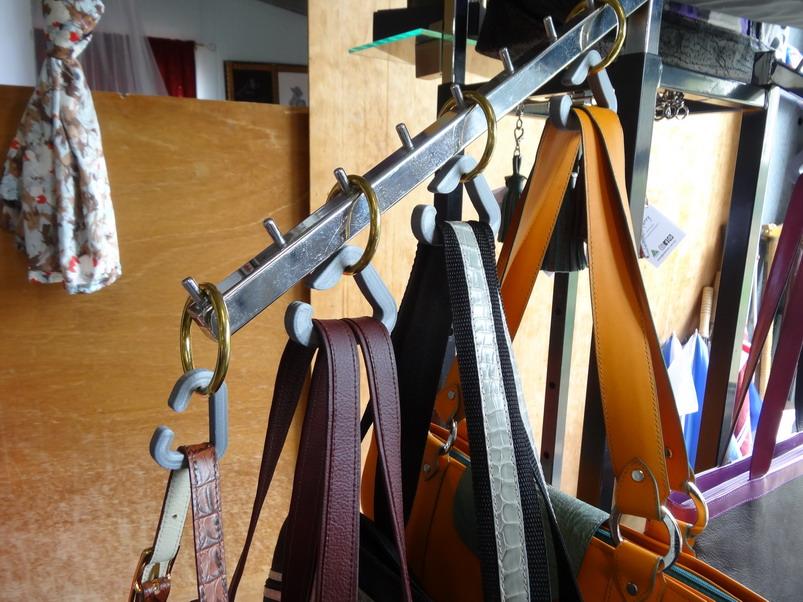
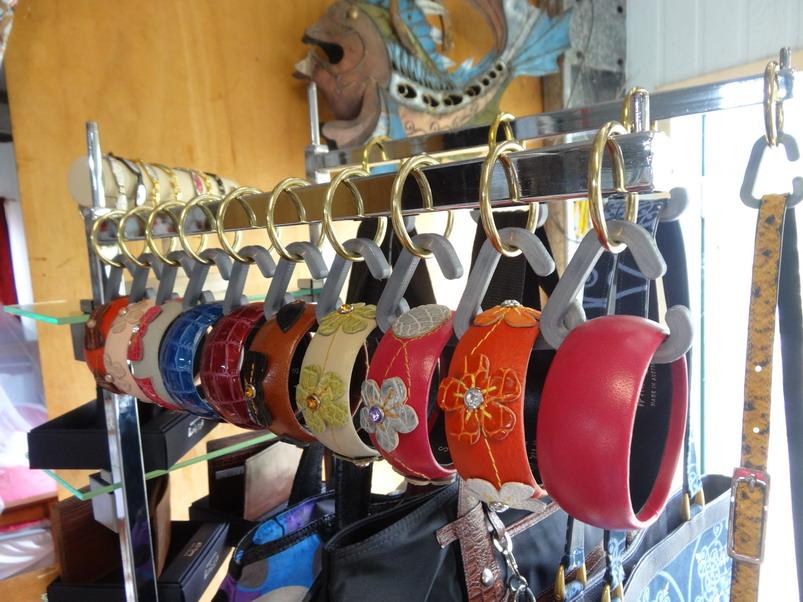
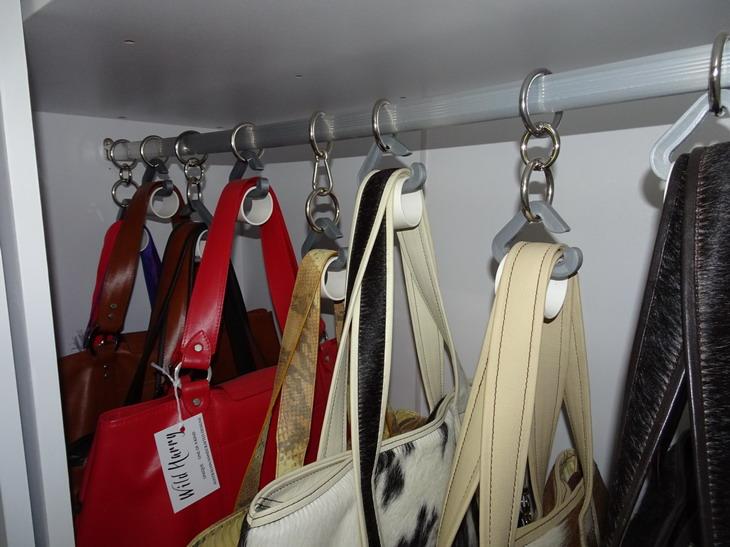
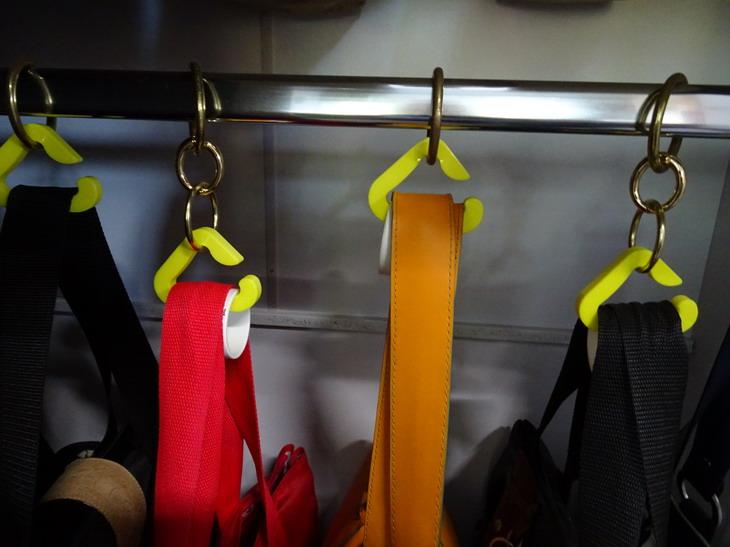
Recently I agreed to supply some of our bags and bangles and some other stuff into a shop and in order to maximise the usable space and make it easy for people and shop staff to access these articles I came up with this idea. Now instead of taking a whole heap off to look at the one they want, they can just take it of the hanger. The first picture shows the problem when trying to rack up a heap of bags in a small area. This shows the bag hangers on a stand I came up with for the shop This one shows the bangle hangers We now store them in cupboards at work this way as well now Here are some stl files if you want to print them - Note between them you should be able to get a lot more by just altering the scale in your slicer program. BAG HNGR PLA.stl BAG HNGR 4.stl BAG HNGR 5.stl If you don't have a printer but still want them let me know and we can work something out. Stay safe and stay well Brian

-
There are all sorts of leather varieties as to the quality and strength and from my experience with most chrome tanned leathers I would suggest the width would need to be 32mm to 35mm wide at that thickness. Doubled up it may be too thick but you could drop back the width to 20mm if you wanted. I would fully stitch the length to reduce any stretch either way you do it.
-
Good looking video showing the machine in use. Thanks for sharing.
-
No problems..... but you need to take the caster wheels off. You keep sliding around when you sew otherwise and they do get the thread tangled around them and then only slide around badly and getting the thread out of them is a time wasting bitch.
-
Thanks Bert, lets just hope some buying customers see it that way. It can be if the gussets go into place after but it is very difficult not to push the gussets out of place when pushing in and around the bottom curve. My 331 has the needle 7mm in from the edge and some 335s are even 11 from the edge. In production it is better to make the job for the operator as easy to do as possible and to achieve that I make the gussets fold over the lining with an attached stiffener before the outer cover piece is attached. Here are a couple of pictures to show better what I mean - Different bag but same gusset technique.
-
Many a time a U shaped table will get in the way on larger jobs and it is easy to set up a table or tray underneath for when you want one there. I have to say respectfully that if you would have trouble working out how to get the machine to the height you want, you would be best to forget about doing leather work. Every day come new challenges to overcome and that is just something you gotta learn to enjoy. Getting the right machine that can do the job you want it to do IS the point here.
-
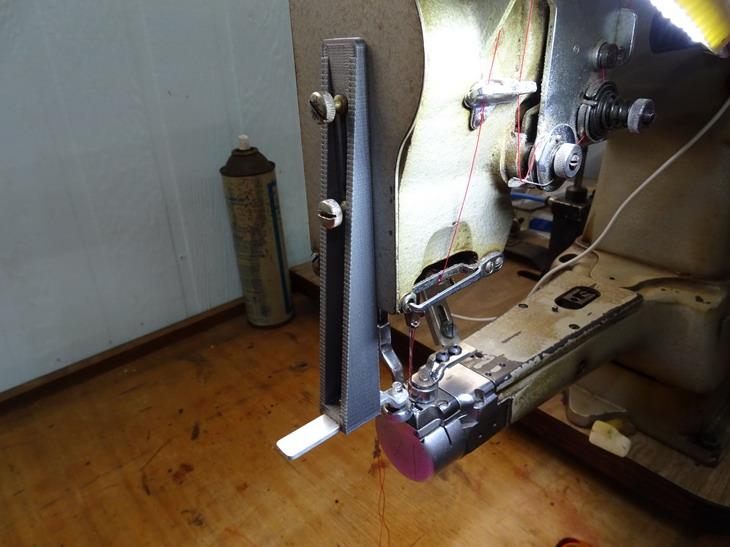
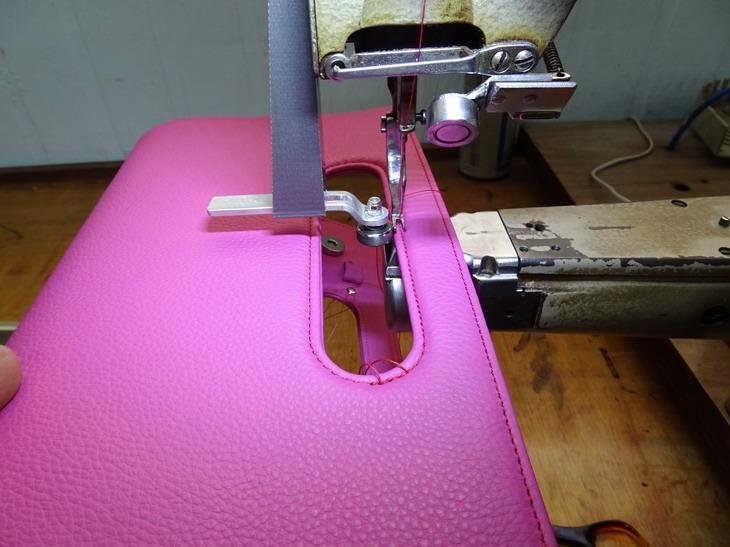
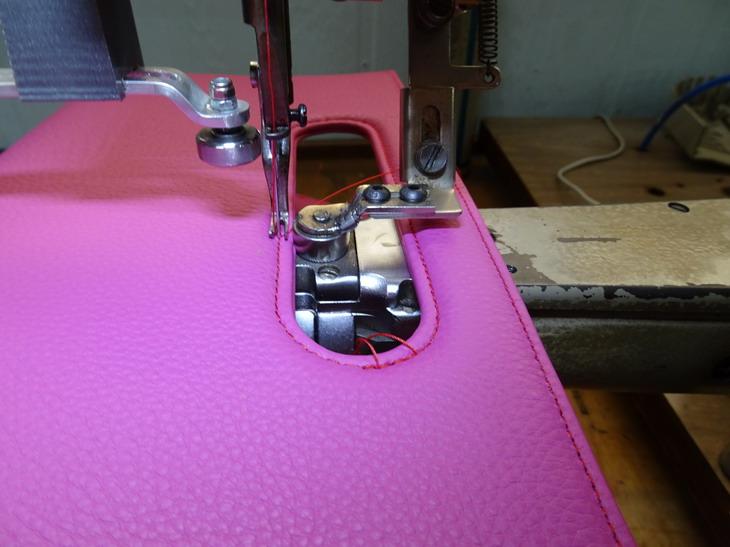
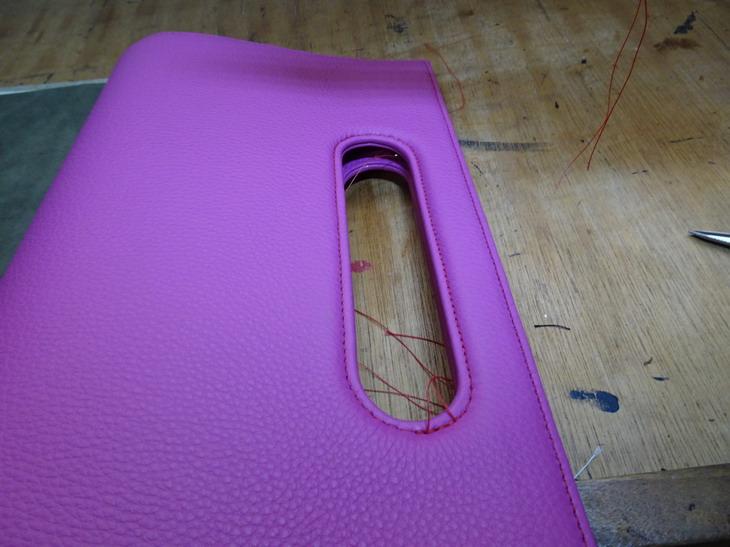
Well I tested it and it works OK but this one's probably not of much interest due to the rarity of this particular machine model which is a 331 Pfaff. With the walking foot models you would have to change the feet from right to left halfway through and I think that would f be super unexciting. If any one wants the stl let me know. History.... the wife liked the look of this bag handle method but with the gussets in place you can not stitch the handle holes down in the one operation so I reasoned that by back stitching the top line first then spinning at the other end I could drop down the other guide and continue to complete the rest of the hole stitch. This shows the outer roller guide down for the top side stitch (Sorry I stitched it up before I remembered to take the pictures) It then moves up and the other one drops down for the bottom side Not too bad for the first go at least
-
I would suggest for the type of work you are doing that you consider something along the line of a Cobra class 26.
-
Good stuff @jimi. I have to ask if you re taped all them holes you have the allen heads in out to 4mm? I've been working on a drop down guide for going down on the left side of the needle and was hoping to find a tap and screws to match the machine threads. What a joke, just .2mm smaller. I should get to try it out in the next day or so and load some pics up then.
-
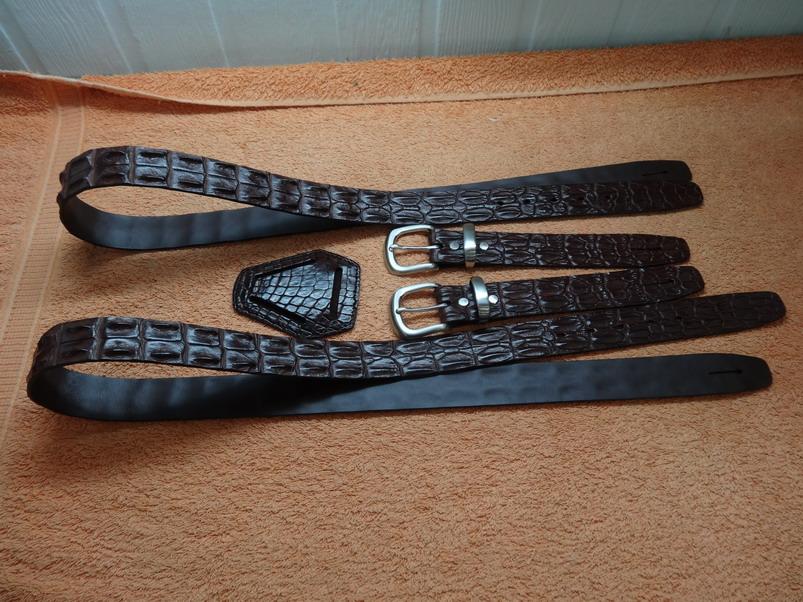
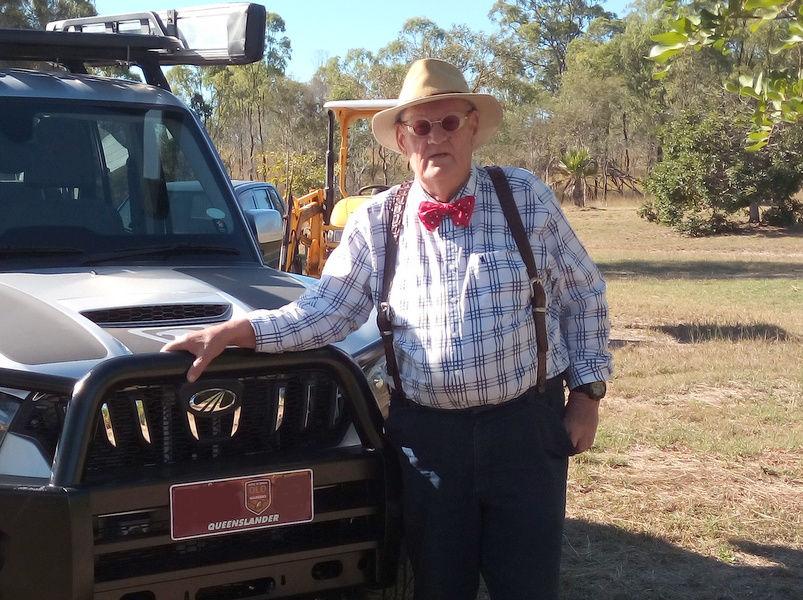
I've made some pretty fancy ones in the past but a pair I made a couple of weeks back would be about as easy a design as you could get I think. Basically its just 2 belt straps with buckles for adjustment and a piece to connect them at the back. I managed to get a couple of pics of the customer wearing them.
_resize.thumb.jpg.31546f1baeda738ae6e702f7ef558808.jpg)
-
Is it possible to mould chrome-tanned leather?
RockyAussie replied to ScottEnglish's topic in How Do I Do That?
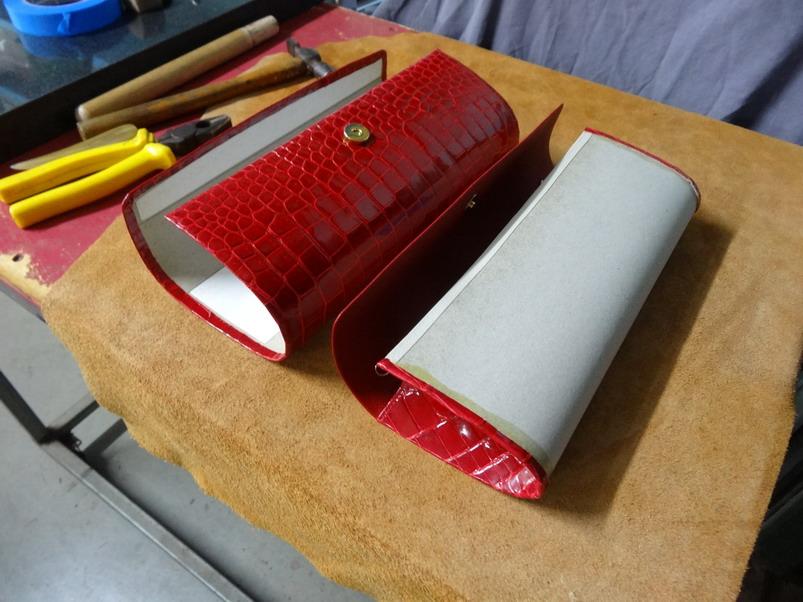
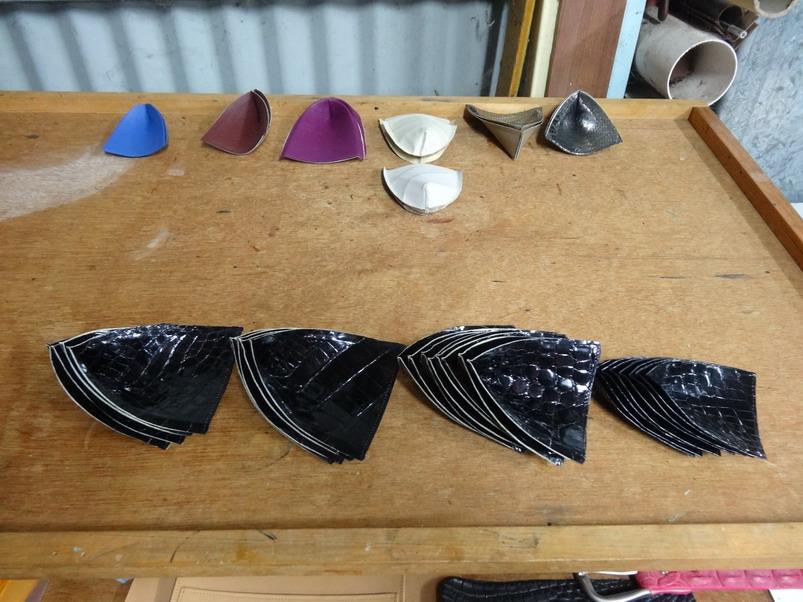
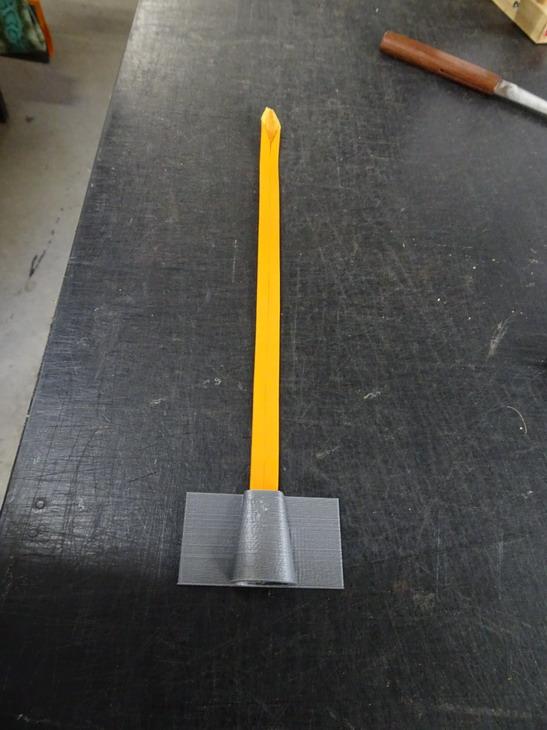
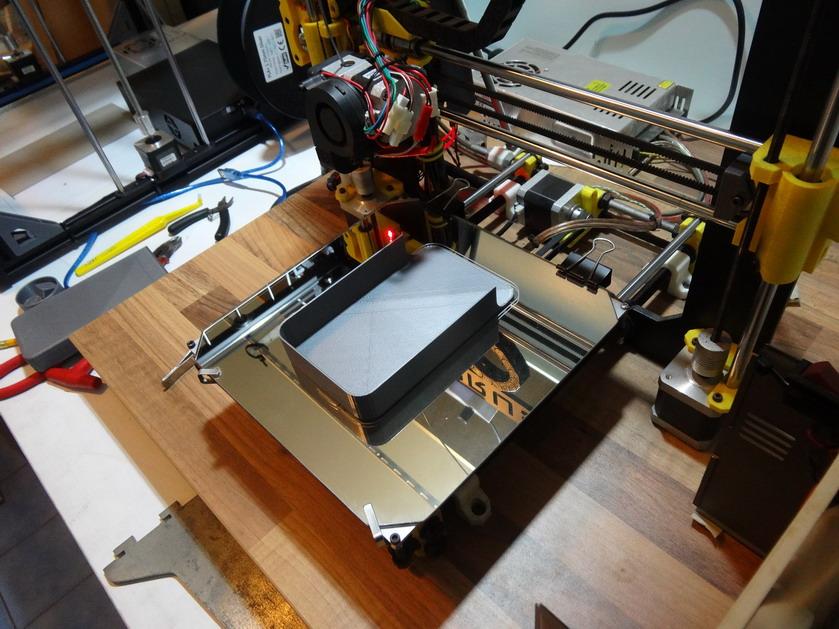
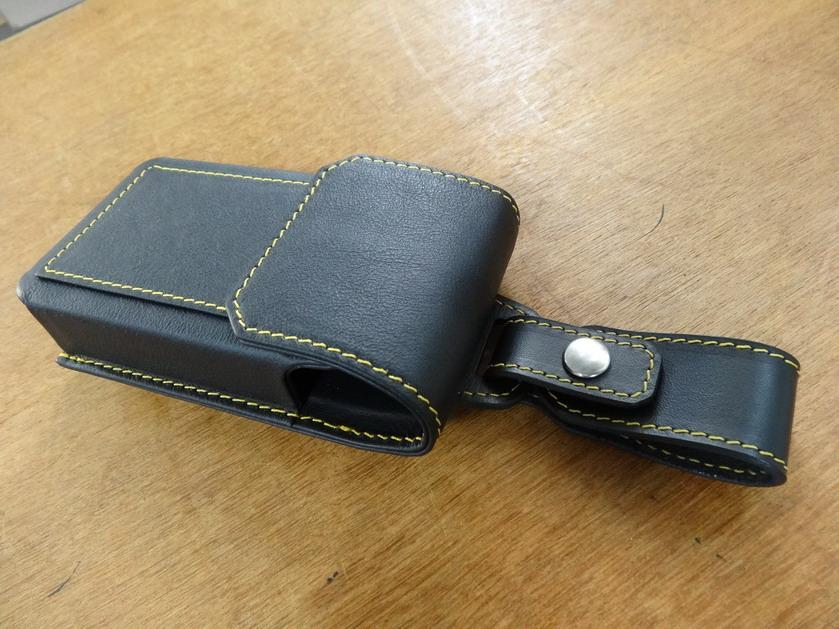
Use a little dish washing detergent as well as that helps to get the water into the pores/cells. I sometimes leave the leather in for hours and give it another hot water dip before taking it out and further breaking up the grain with my hands sometimes depending on the thickness and the character of the leather. Before putting into mould I squeeze out excess water then press into some paper towel to get rid of any remaining excess of water. Yes and to my knowledge mostly any leather they use has to be veg tanned including the alligator or croc skins. regarding the 3d printer....I have to say I wish that technology was around when I started my business. There would hardly be a day go by that I am not finding some other thing I can make with it to improve manufacturing times or the quality of products produced. My latest one yesterday was designing a funnel in pla to improve how well my strap folding machine worked as it folds the straps on soft leathers. Took 3 tries but I am happy to say it works real good. (cost in pla+ is less than $1 per piece and I can now just stretch the design for any width strap or thickness in a couple of minutes. With regards to strength of the pla+ used in a shaped product as against wet casting veg I would offer up my latest phone pouch design for you to consider for yourself. To protect the hardware on the back of this phone pouch I have used another one of the phone pouch shells.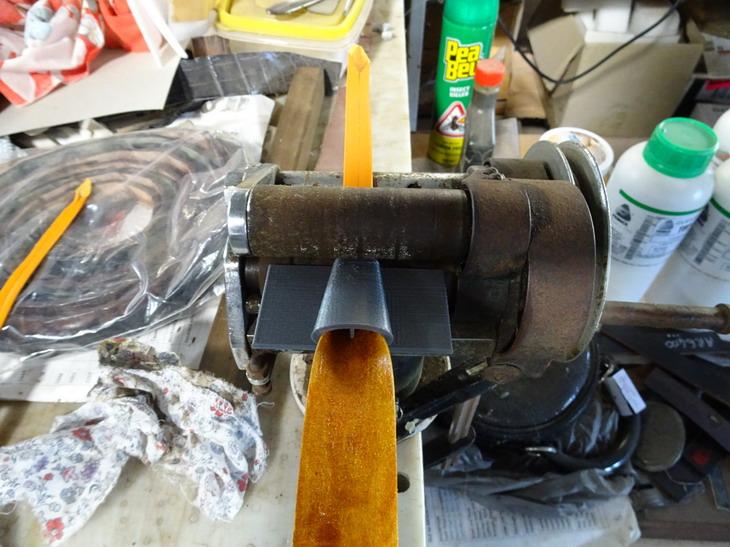

-
Is it possible to mould chrome-tanned leather?
RockyAussie replied to ScottEnglish's topic in How Do I Do That?
You can on some but not all chrome tanning is the same either. On the second page in this post I did awhile ago you can see how I used some chrome tan leather to make some handcuff pouches and the 3d printed moulds etc.As long as the leather will absorb the water into it it will normally dry harder and into the shape but may not always set as firmly as veg will. -
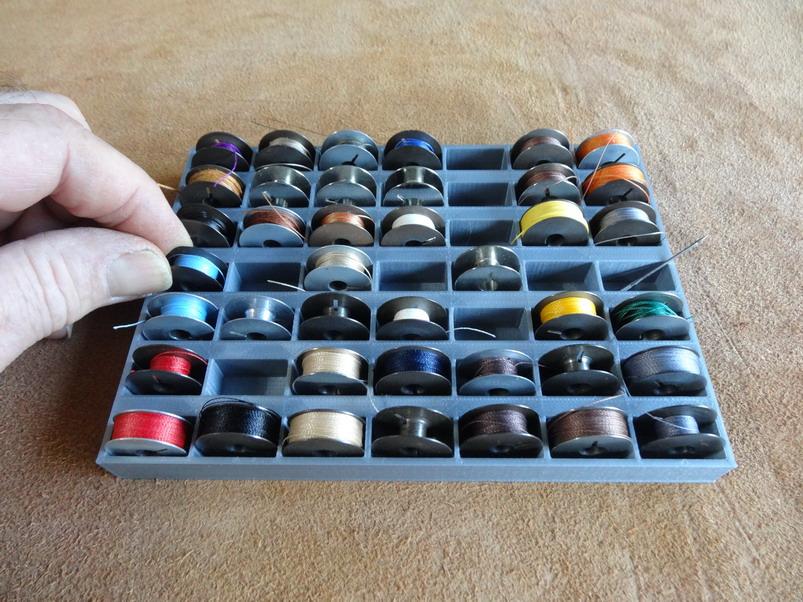
This one is a bobbin holding case that will take 49 bobbins with the bobbin holes being 22x11mm. I have made it so that it would be easy to pick up the bobbin wanted due to the space between them as shown in the below picture. Here find the stl file - BOBBIN CARRIER.stl
-
This'd be the right place for sure and a big welcome to you. Have you a manual for the 29K and if not what is the full number of it.
-
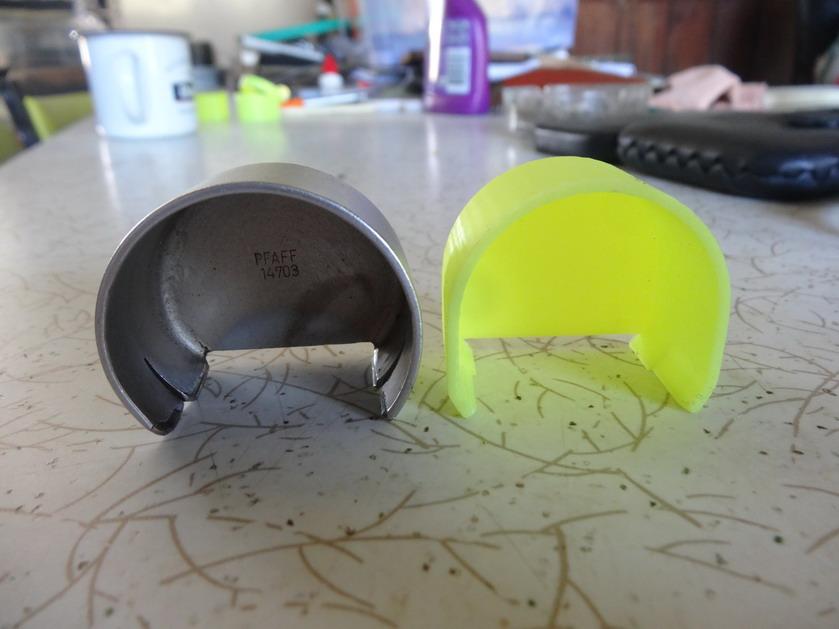
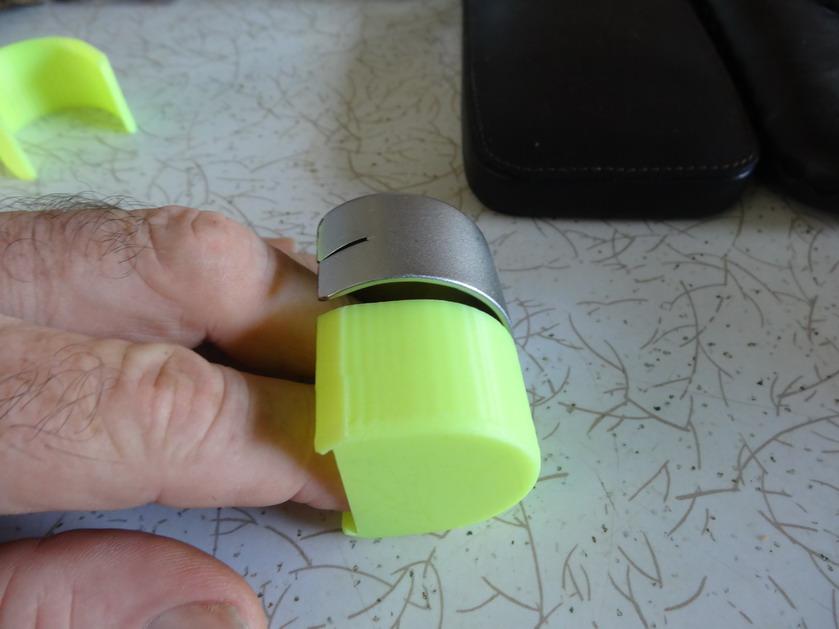
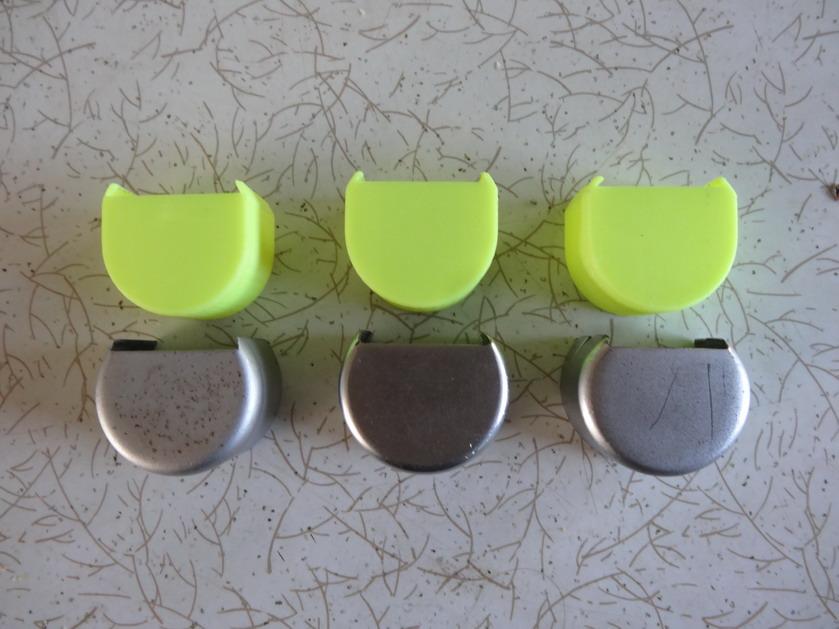
Here are the stl files for the old casting 335 pfaff and 69 adler bobbin end cover caps. They are the same - Adler Bobbin Cover.stl This one is for those rare 331 Pfaff cylinder arm machines Pfaff 331 Bobbin Cover.stl This first picture shows the reduced size across all 3 versions. This one may show better still on a 331 style I will load a 49 piece bobbin holder case tomorrow if I get time Cheers for now.


_resize.jpg.b2eca296f40a19d1e32699a5deac3231.jpg)