hidepounder
-
Posts
1,808 -
Joined
-
Last visited
Content Type
Profiles
Forums
Events
Blogs
Gallery
Everything posted by hidepounder
-
Casey, Seeing these examples reminds me of a lot of gun engraving patterns.....as you are engraving now, I know you are familiar with those styles and some of the sites may have patterns that are more easily adaptable to a tooling pattern.......just thinking out loud, here.... Bob
-
A couple of new sheaths
hidepounder replied to DCKNIVES's topic in Gun Holsters, Rifle Slings and Knife Sheathes
Beautiful sheaths and knives, Dave, as always! Bob -
Problem with stitches on the back....
hidepounder replied to hidepounder's topic in Leather Sewing Machines
Thanks Harry....I'm definitely going to experiment with larger needles. Bob Brent, I was surprised to find out hoe many of us have been putting up with this problem. I'll let you know if I get any significant improvements. Bob -
Some great floral carving examples
hidepounder replied to Johanna's topic in Floral and Sheridan Carving
I'm glad this thread got bumped....I love to see that Sheridan Lady piece by 2 Shews....it's amazing! Just when I think I'm might be about to break out, I see work like this and am completely humbled! It's definitely inspiring and motivates me to study and practice harder. But it can be frustrating knowing how easy it is for some of the really talented artists to produce these masterful compositions! Soooooo....back to the bench!!!!! Thanks again for sharing, Johanna, Bob -
Tim, I'm the last guy who should give anyone any career advice......except this......do what you love to do and do it better than anyone else! The money will follow. I can tell you from experience that there is nothing like being excited to get up in the morning to go do what you love! Bob
-
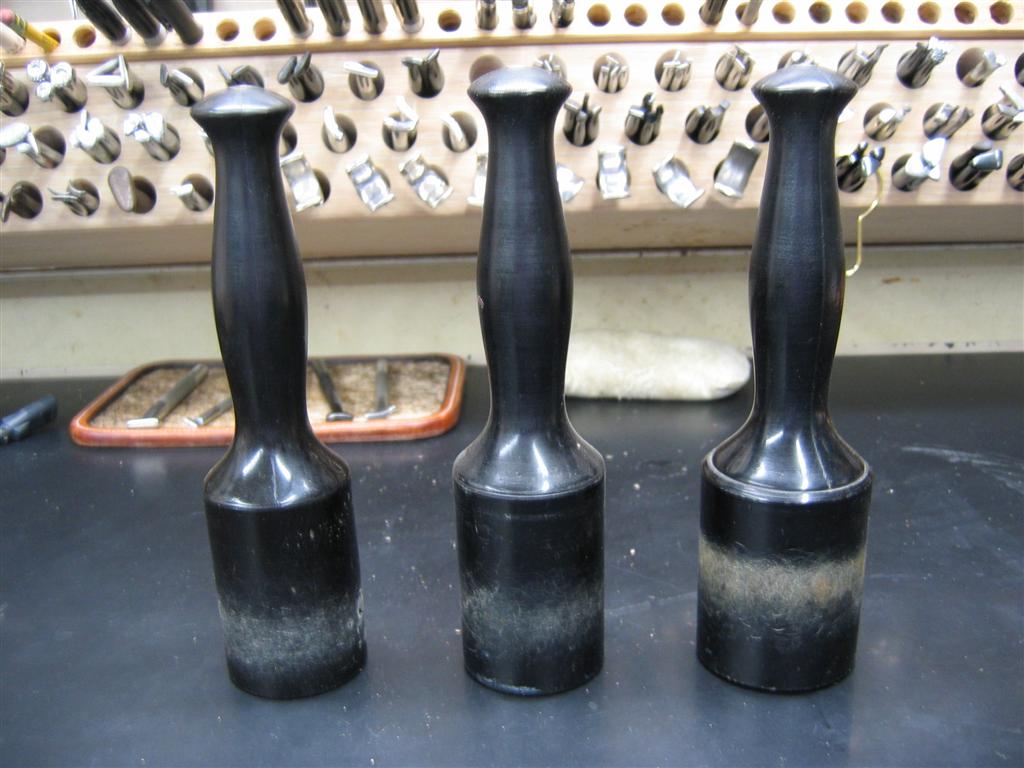
They are molded in one piece and I can't remember the name of the material....I like them because there is no flaking as you see with rawhide or nylon mauls, and I like the longer striking head on them. Bob
-
The site looks great Bruce and I'm excited about your blog! I know it's going to be fun and I'm looking forward to it! Bob
-
Here's what Beard Mauls look like. These are 16oz, 20oz and 24oz. Bob

-
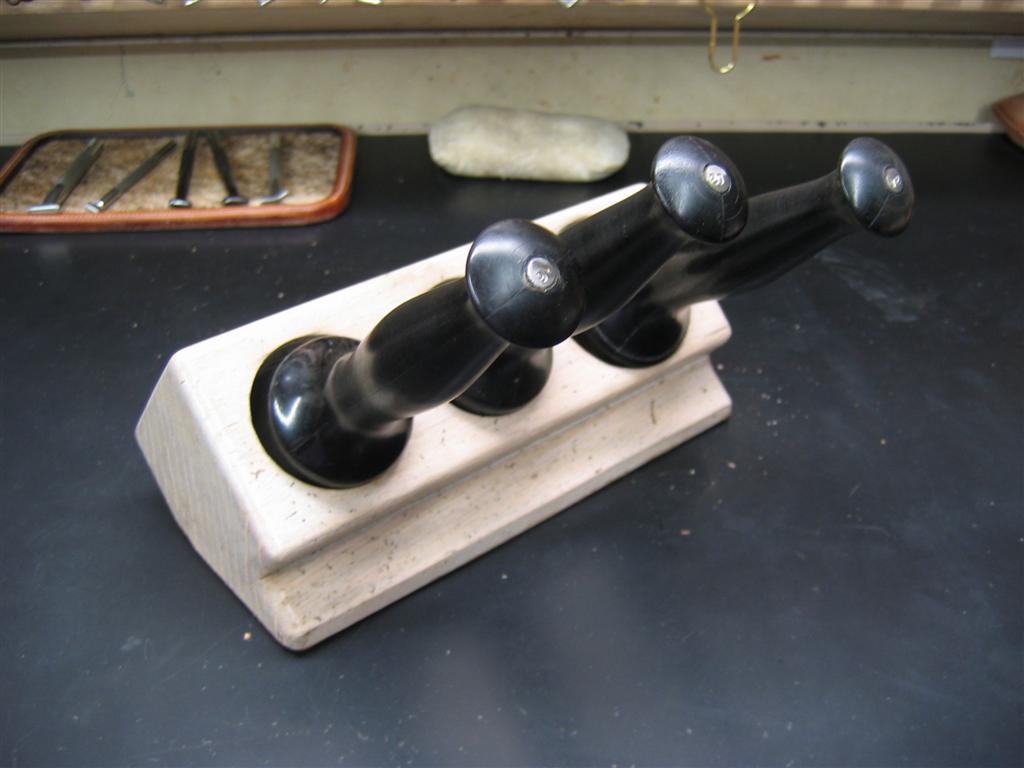
Our own Ed, the BearMan makes beautiful mauls! And matching desk stands for them too! Bob
-
Great job as always, Steve! Love the skirt rigging of course! Bob
-
I use my Bob Beard 16 oz for 90% of what I do (if you exclude saddle work)....but that's a hard decision.....I'd probably select the 20 oz Beard if I could only have one. BTW if anyone has a 12oz or 32oz Beard they don't like or aren't using I'll give you your money back and some to boot! Bob
-
Problem with stitches on the back....
hidepounder replied to hidepounder's topic in Leather Sewing Machines
Bree...you may be right! What you are describing is exactly what I am seeing! One of our members told me the exact same thing in a PM. Like you say, it doesn't happen with soft leather. Thanks! Bob Steve, Wetting the leather is a really good idea! I'm going to give that a try! Thanks, Bob -
King's X, I owe you an apoplogy! Milli was asking you a question and I posted an answer!!!???? Sometimes my enthusiasm takes over and I get carried away. I didn't realize I had done this until I was reading the thread again today. Anyway, I really didn't mean to hijack your thread and I apologize to you and Milli for doing so....I can be a bucketmouth sometimes!!!!!! Bob
-
Frank, Applying Edge Cote is not necessary when modifying your billet ends. Once you make the cut and edge the corners, wet the leather and apply Fiebings bar soap to the edge and then burnish with a heavy piece of canvas that has been saturated with Fiebings Yellow Saddle Soap. It will make a very nice, smooth edge that you can now dye any color you want. When it is dry, polish with a clean cloth to remove any dye residue and apply your final sealer. If you want to really make is shine, burnish the edge with parafin using a piece of heavy canvas and then polish and seal. Bob
-
Problem with stitches on the back....
hidepounder replied to hidepounder's topic in Leather Sewing Machines
Thanks Art! Sounds like I need to go larger! The truth is, when I started sewing, I copied a needle/thread chart out of the Weaver catalog and that's where I came up with those needle sizes. I'll try the larger needle. Bob -
Problem with stitches on the back....
hidepounder replied to hidepounder's topic in Leather Sewing Machines
They're fairly snug, Ed. I think the problem is the stiff lining material doesn't want to allow the thread and loop back into the hole....? It's doesn't happen with soft material or when the flesh side is exposed. Bob -
This is a question for all you sewing machine gurus...... When stitching belts and other lined items, my stitches on top look good, but those in back look bad. I typically use 138/99 with a 14 needle or 99/69 with a 12 needle. I'm using a Artisan 797AB, but I have the same problem, to a lesser degree, with my Adler 205/370. The thread size doesn't seem to make much difference. The back side stitches don't pull up nice and tight like the top does. Some of the lining material I use is thin....2 oz....but is much firmer than the leather on top....I wondered if that was part of the problem. It seems like increasing tension doesn't help the stitches tighten up any. Do I need to use a larger needle to allow the stitch to pull into the leather? I also have this problem when sewing the skived folded end of a belt where I'm transitioning from 10 oz leather to 5/6 oz leather. Everything looks good until I transition to the lighter leather. I have frequently noticed this on other peoples work as well. My goal is to make the stitches on the botton look as good as those on the top....am I asking too much or using the wrong set-up? Suggestions? Thanks, Bob
-
Bree, I've never seen that Tamper before...looks handy. Might be good for tapoffs too! Bob
-
First Gun Belt with Cartridge Loops
hidepounder replied to Crystal's topic in Gun Holsters, Rifle Slings and Knife Sheathes
Great job Crystal....looks really nice! The two tone spices it up. Bob -
Hi Milli, I call it a spine, also, don't know if that's correct or not. Anyway, I machine stitch everything. When I attach the spine to the leaves, I glue them with Barge, then sew. I use Neatsfoot or Olive Oil. I use a trimmed piece of woolskin and start out VERY lightly, continuously working in circles and concentarating on getting a even application. When I start, it doesn't look like much is going on, but it is. I've never used the Bee Natural, but I hear it is good stuff. Hope this helps, Bob PS....I do all my background dying before I oil....
-
You're right on the mark, Monica, that's exactly what I do too. Not only on belts, but everything that gets lined! Great edges by the way. Bob That is an excellent idea! Don't know why I never thought of that! I use glass to skive on...think I'll add a piece to glue on, too. Great tip, thanks! I love this place! Bob
-
Checkbook,,, Stohlman design
hidepounder replied to BearMan's topic in Purses, Wallets, Belts and Miscellaneous Pocket Items
Ed, That's really nice stuff. I've been wanting to do some coloring like this....now I know who's work I'll use for reference! Nice job Ed, it's top notch work! Bob -
Tina, Absolutely beautiful as always....your work is always spectacular! I'm particularly facinated with the tri-weave mix on the binding and the way you incorporated a tri-weave circle under the binding. These are the things which really create depth and distinction in your work! Masterful!!!! Always a fan, Bob
-
I think I would take it up with the customer....explain the design problem. You might suggest using his initials in a mongram style, centered on each side as an alternative...... Just a thought... Bob
-
Good job Tim, they both look good! Bob