HaloJones
-
Posts
382 -
Joined
-
Last visited
Content Type
Profiles
Forums
Events
Blogs
Gallery
Store
Everything posted by HaloJones
-
Camera bag
HaloJones replied to Arutemu's topic in Purses, Wallets, Belts and Miscellaneous Pocket Items
Welcome to the addiction nice job on the bag, I like the contrasting colours -
Impressive as ever!
-
Alex, I got it from chap in Russia, google translated this page & sent him a message - he speaks good English, paid via Paypal & arrived 3 wks later https://www.livemaster.ru/toolsandtoys Only other place i have seen them is KS Tools in USA Parts all dyed, now for some assembly

-
Use the thin stuff to line the soft stuff: then wallets, purse, clutch, book covers etc
-
One of my fist bags
HaloJones replied to campingtomz's topic in Purses, Wallets, Belts and Miscellaneous Pocket Items
Looks good, any shots of the inside? also what leather did you use? -
So all holes now punched time to dye the pieces
-
can i slightly shrink leather that i already wet molded?
HaloJones replied to Roz0323's topic in Leatherwork Conversation
Line the flashlight part with a thin leather? or put a leather wrap on the flashlight? -
Now that is pretty
-
It’s all a facade
-
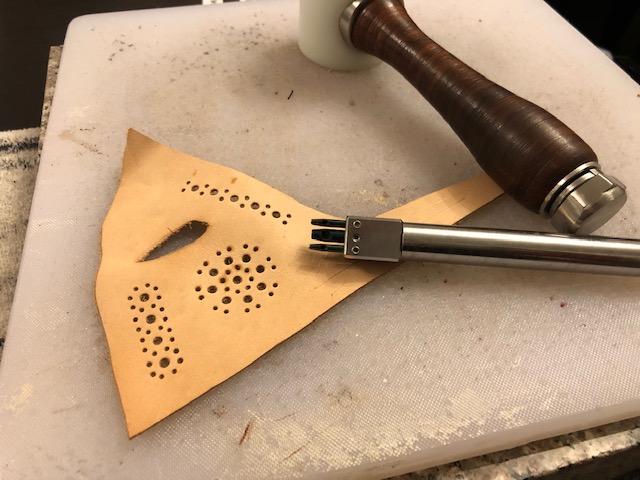
So at last my new punch has arrived Its a nice bit of kit - it has 5 punch tubes but they can be removed individually, so i can make it a 3 hole for curved lines etc ! Now to get all the bits punched.
-
That is the worst pair of crocs I have ever seen!
-
So I changed the braid the Mexican & I much prefer it & nope its not too bulky

-
Magnolia themed Telecaster jacket
HaloJones replied to Teleweezel's topic in Clothing, Jackets, Vests and Chaps
Impressive is all I can say! -
I used the PETG one with a mallet & have seen logos done the same way too
-
I have made only 1 stamp (a tiny mule foot) which I 3D printed using PETG filament, I expect it to last some years I used free software called Tinkercad as I have zero CAD skills. if you have, or want justification to get a 3D printer it’s a viable option to do it yourself Recycling 3D filament is possible but I personally don’t think the effort justified the saving, I think in materials my stamp cost 10p! If you just want numbers then many existing options exist, see any leather tool supplier
-
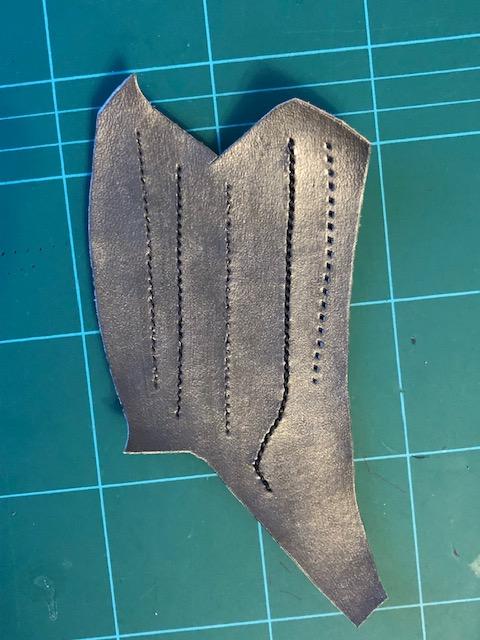
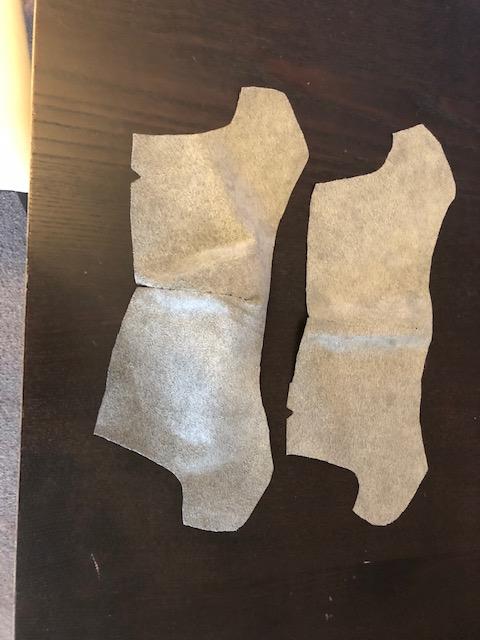
So while waiting for the brogue punch I have done samples for the dark silver colour, its equal parts eco-flo black, silver & pearl. The finish on the dye is streaky as i used a plastic brush for application; final will be better applied I then did some test sewing to see what size thread I like the look of; I chose the 0.3mm thread - 2nd from left. Happy with the stitches I have sewn the (dyed & burnished) tongue to the mid-upper section
-
Free spill stand for Fiebings 440ml dye
HaloJones replied to chrisash's topic in 3D Printers and Lasers
Handy, thanks -
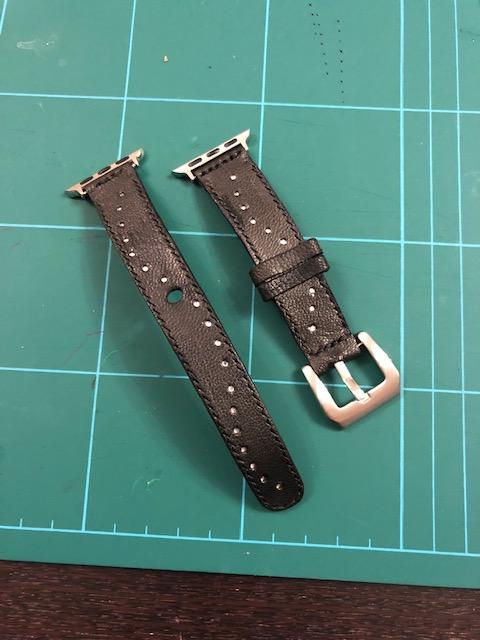
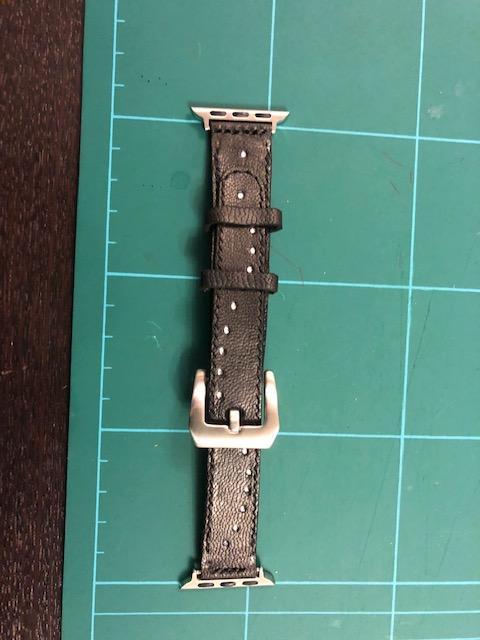
Watch Strap
HaloJones replied to HaloJones's topic in Purses, Wallets, Belts and Miscellaneous Pocket Items
Thanks It’s for an Apple Watch, the stitching is only that close due to burnishing -
Imaginative & well put together, a really nice bag, a good size too
-
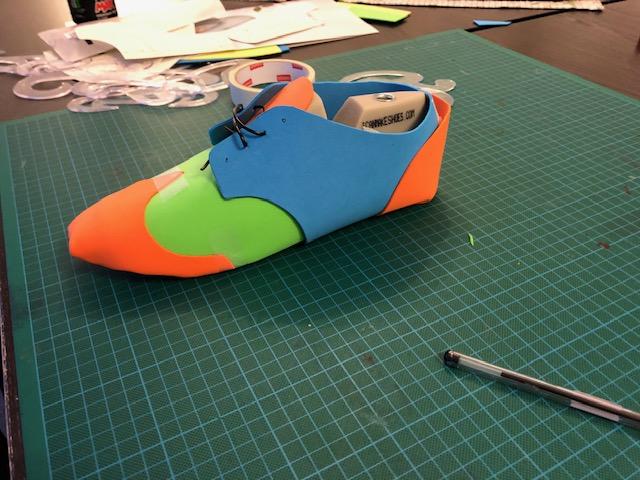
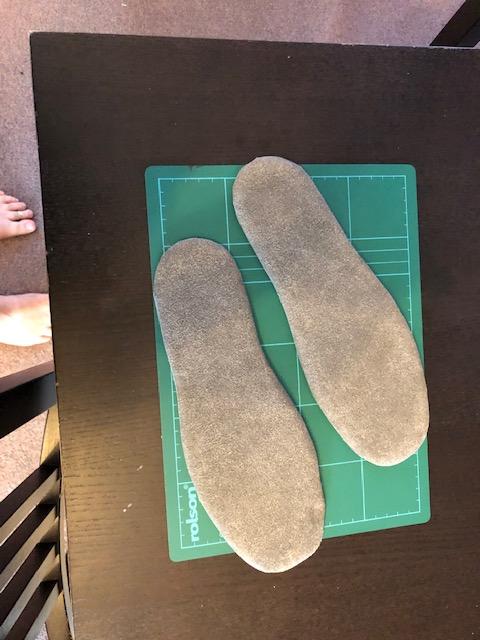
Soles will be 2 layers of 3mm leather. I did a shoe making course with “I can make shoes” for the basics, the rest I am making it up as I go
-
Wow, that's amazing
-
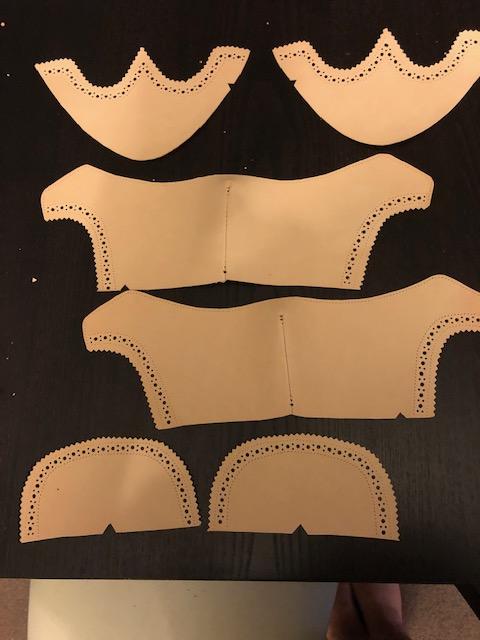
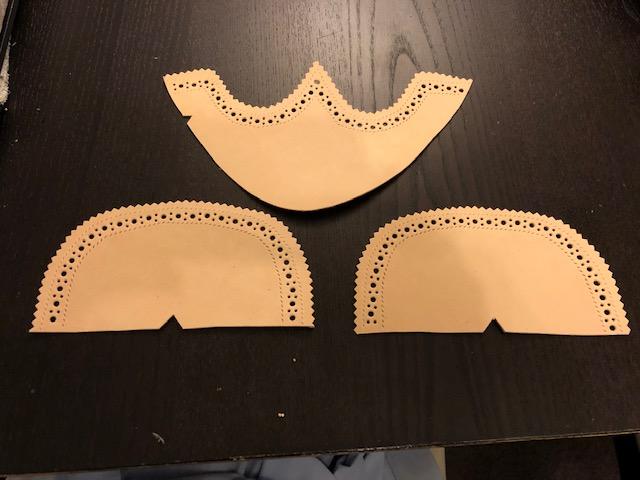
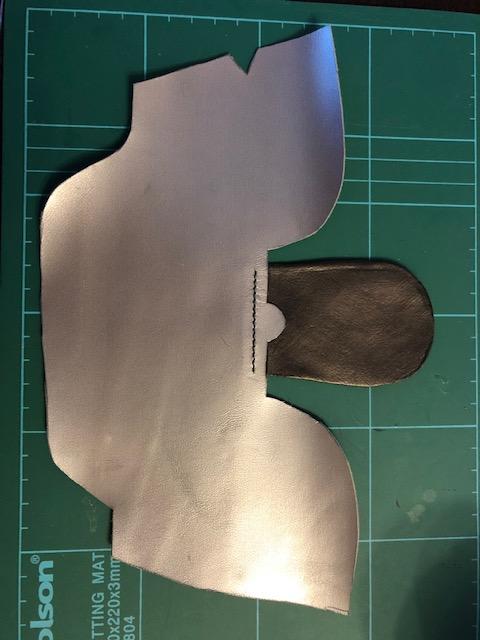
So I decided that I want some brogues, I thought I would share my process here, not because I am an expert (these will be my 3rd pair of shoes) but as any pointers / advice will be welcome I started with making a pattern, (good old craft foam) I plan on the shoes being tri-colour, so the orange foam will be black, the green a light silver & the blue a dark silver. Using the foam pattern I have cut veg tan calf (to be died black & silver) and some chrome tan I had in the right colour, all leather is about 1.2mm thick I was unable to find randing (not sure if this is the right word) so I made my own; I used a veg-tan belt blank I had, dyed it black & stitched with a 1mm waxed thread in a silver/grey colour) Inner soles are Texton board with a foam padding & micro-fiber lining Shoe lining for the rear section is also made from the same micro-fiber material I am waiting on delivery of a brogue punch (due in a week or so from Russia) to the do the brogue hole pattern The next steps as I see them are: Punch brogue pattern Dye leather Sew heel cap to rear section Sew front sections together Cut front section lining Form shoe

-
OK so in the end i did a simple whip stitch to keep the bulk down, give it time I may change my mind & the braiding, but here they are

-
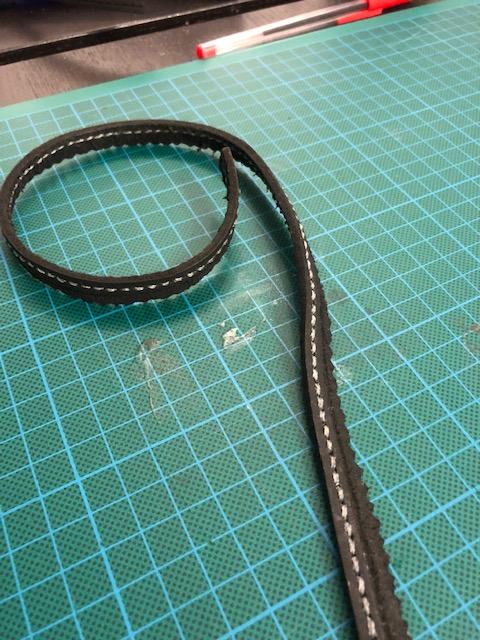
So this has to be my 3rd or 4th strap but its probably the first I am really happy with, in that it does not look totally amateurish Made from 1.5mm calf on the upper, lined with 1mm pig skin, random HD upholstery thread I had lying around. Buckle is a 925 silver one from a French supplier via Amazon For the sparkles / dots I punched holes in the top layer & pushed through some little plastic crystals (ones used in nail art) as the holes are smaller than the crystals no glue was needed