DonInReno
-
Posts
794 -
Joined
-
Last visited
Content Type
Profiles
Forums
Events
Blogs
Gallery
Store
Everything posted by DonInReno
-

Wrestling match- which machine is Best
DonInReno replied to jrprottas's topic in Leather Sewing Machines
A walking foot upholstery machine is a good middle of the road choice for anything other than light weight sewing, but I’m assuming you already have a light weight machine of some kind? -
Is this your first industrial machine? The Juki is a great starter machine and parts and accessories are quite inexpensive so it can be fun to pick up presser feet/feed dogs/etc. that best fit what you’re making. When looking for parts keep in mind that many other industrial machines interchange with your Juki.
-
It’s pretty straight forward to braze or silver solder the parts back together if it didn’t bend much before it broke - cast iron comes in many flavors and some bends a little and some doesn’t. Your input shaft may also be bent a little and it’s easy to determine with a basic machinist dial indicator. You may mention to your welder friend that any sewing machine has spent it’s entire life being covered in oil so he’ll need to bake the oil out of the pores before brazing. This will also reveal any cracks that need to be ground out as thin black lines. Some machinists put cast iron in the wood stove overnight to bake it out, but heating it up to a dull red with just about anything is all you’ll need. good luck!
-
Need help Identifying this Consew machine
DonInReno replied to tecbuddy1's topic in Leather Sewing Machines
This probably is a consew, but these models always remind me of the ones made by Brother back in the 70’s (and 60’s?, 80’s?) There’s little paint worn through on the bed so 99% chance it’s been repainted. In a generic sense this shape of machine was probably made by a dozen companies around the world as a less expensive alternative to a Singer 111, many of which are cheaply made. Even 40 years ago the fastest way to increase the value of a generic knock off is to put a more desirable name on it. I normally warn warn someone that if it’s hard to find information on it’s most likely even harder to get parts for. Maybe yours uses parts common to other more popular machines, maybe not. At $100 I’d buy it if it looks complete and makes a stitch, but that would be top $ since there is an increased chance parts will be a problem. Once it’s up and running reliably you could probably get $200 for it. Above $200 most people would rather buy a singer 111. -
Popular & Affordable Used Machines for making Bags?
DonInReno replied to JC2019's topic in Leather Sewing Machines
Honestly I doubt you’ll be able to figure out the exact perfect machine for your style of bags until you try a basic machine to get some experience with the limitations of a flatbed. It’s a lot like marrying the first person you’ve ever dated - chances are slim that’s the best fit. I don’t think thread size has even been discussed - huge difference in machines. -
Your first pictures show marks that are normal from sanding grooves with sandpaper on a flat surface. 600 to 1000 grit paper on a flat surface will quickly take out slight grooving. It shouldn’t matter if there are flats on the disks - flats don’t effect the consistency of tension, but any grooving is not good. I also don’t think a static friction test gives a person any usable information as long as the friction is consistent they are working just fine. Tension adjustments should become second nature to even an occasional sewer.
-
What's up with this thread I was given?
DonInReno replied to williaty's topic in Leather Sewing Machines
I’d say chances are high that there are grooves worn in the thread path essentially the size of the thinner of the two threads and the second thread may be stiffer but it sounds more like it’s thicker and dragging in the grooves. While it might seem like the series of holes is there to “remove memory” from the thread, that’s not the purpose of the holes and commercial thread doesn’t need to be straightened. There are multiple holes to allow tension to be increased or decreased depending on how many holes are used. Commercial machines require tension adjustments anytime something changes - it’s an essential operator skill and should be embraced as much as much as any other basic sewing operation. -
Speed control by pedal force or movement?
DonInReno replied to Gymnast's topic in Leather Sewing Machines
Um...99.99% of all speed/volume controls use some movement - it works. -
Newly received Cowboy CB4500 blanket foot adjustment
DonInReno replied to ke6cvh's topic in Leather Sewing Machines
I also sew canvas with a similar machine and you’ll definitely want to become familiar with adjusting feet, tension and whatnot. Trying to avoid changing anything that should be changed to save time just doesn’t work so well with these larger machines. -
How can I tell if a machine is a 563 or 563-3?
DonInReno replied to blackmad's topic in Leather Sewing Machines
The class 3 would still be awesome if it had the correct holes in the casting for the necessary parts to make reverse work, but it doesn’t. -
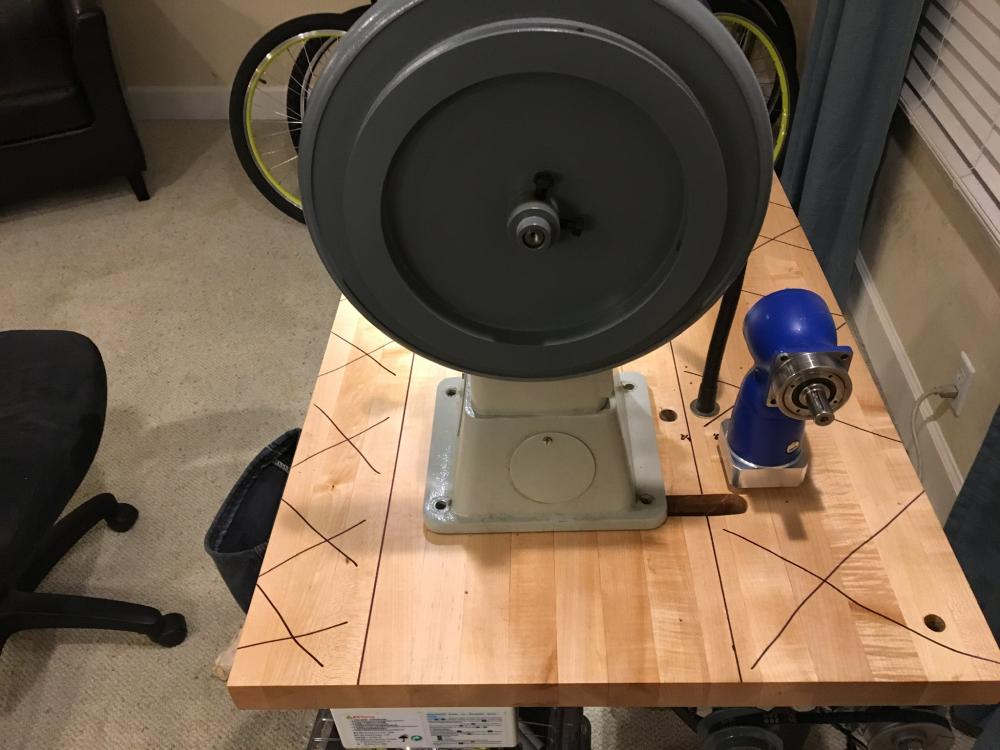
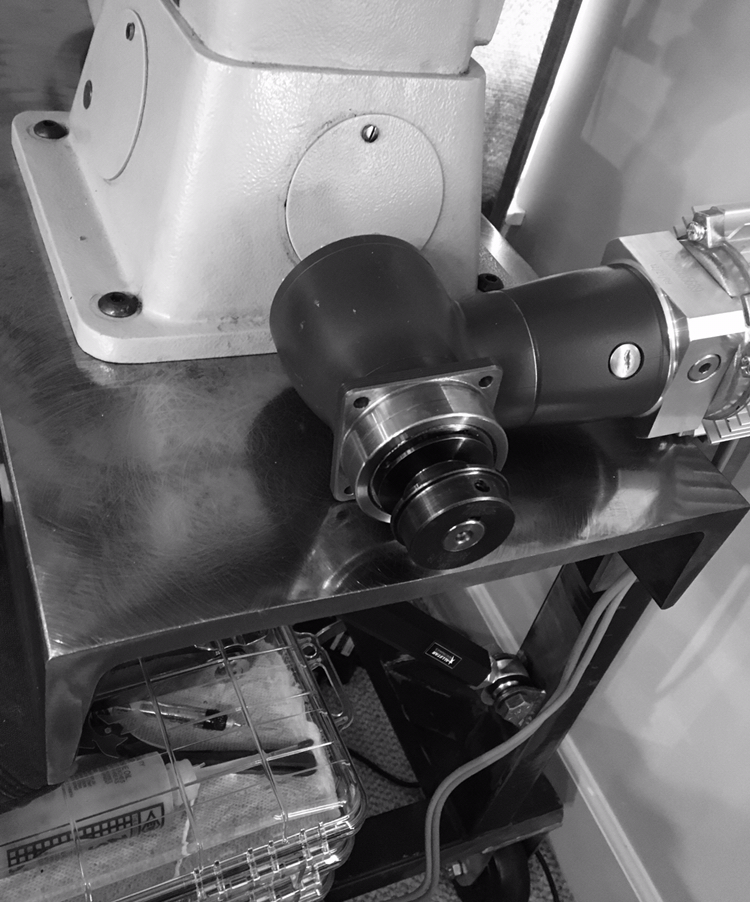
Well the motor is coupled to the reducer - now it needs a new mount. Something with an easily adjustable belt tension that can be set without tools - the design hasn’t jumped out yet, but it will probably have a simple 2” hand wheel. I’ve come to like the simplicity of hidden thread spools in some of the big stitchers so I’m making a spool holder that hangs just below table top with a simple tube rising up a foot or so off the bed that supplies thread to the machine. Maybe the best looking thread stand is no stand at all! Lol Somewhat along the same line of thinking it dawn in me that if the thread is already under the table top why not add a somewhat hidden tensioner on one side of the table front running to a simple rotating metal post just barely sticking out of the other side of the table front. There’s plenty of room to hide a motor for the winder and I’d forgo an automatic stop for the simplicity of holding a small button down for a few seconds - the bobbin is winding a foot from my face so it’s easy enough to manually stop when the bobbin’s full. The wood top is completely gone and the 1/2” thick top has been roughly attached to the table frame. Bolting the machine down was as simple as drilling four holes, tapping 3/8” threads and screwing it down. The top is so solid it really has a nice feel and will serve double duty for leather tooling. At first the plan was to paint it, but I ran across a door kick plate that had a nicely blued finished much like a firearm and that might be cool - the way a blued finish rubs off with use has always looked classic. I’ll have to weld closed a couple of holes and spend an entire weekend lapping the top and corners flat and polished. I picked up a 7” diamond cup wheel for the grinder and after an hour was able to flatten out more than half of the unevenness, but there must be another .020” that needs to be lapped out one way or another. It’s such a big flat surface that if I can get it super flat it should look and feel really nice. The downside to using C channel is all the weird internal stresses and there’s no telling what kind of distortion will happen when the big cutout for the flatbed machines is made. Maybe the flatbed machines should get an entirely separate top? At about 100 lbs it’s a challenge to get this top on and line up th four bolts. There are a lot of trade offs trying to fit so many different machines in one base! At Summit Racing I fell for the slightly larger look of their hexagon shaped threaded tubes and a different shaped and slightly larger 3/4” rod ends that were in sale. The 20,000 lb rating on the rod ends definitely isn’t needed, but it passed the cooler than what I have now test! *chuckle* One thing is for sure, the majority of space behind the machine on most sewing tables is 80% wasted and basically has been a part of traditional designs as mounting for the motor, thread stand and light and not much else. I do miss having a little more space in front of the machine for scissors and whatnot so I’m saving a 4” strip off another piece of channel as an extension - maybe removable, maybe welded solid. I ran across some 8”x3” vintage iron wheels off an industrial cart that just look cool - much cooler than the current 5” rubber casters...and then saw some hexagon solid axles that would compliment the iron wheels....how’s that for the goofiest use of time on a sewing table! Lol. Some designs make sense, on this I’m just adding bits that simply seem cool, however impractical they may be, and so far it’s been a lot more fun than it should be! :-)
-
Antique sewing machine protection wipe down
DonInReno replied to Sugarkryptonite's topic in Leather Sewing Machines
It’s funny you say that - I also like to see the machines and my covers are 10 mil clear poly bags cut to just fit around the machines and almost stand up on their own. To be honest I don’t know if these bags were originally 55 gal super heavy trash bags or if they were sold as garment bags. Heavy clear poly is one of my favorite pattern materials for equipment covers - easy to cut and edges can be heat welded with an ordinary clothes iron by placing parchment paper between the iron and plastic. Clear vinyl would make a good cover. -
Surpluscenter.com usually has good deals on large non-servo dc motors and speed controls that might work, but 1 hp isn’t much for a 12” lathe. If you really are sold on a big servo they are readily available on eBay, but finding a stand alone controller set up as you described will be difficult - industrial servos are typically not a plug and play application - even a controller that can drive the servo on its own needs a lot of setup. its a better question for one of the home machinist forums.
-
Nice! It still amazes me that the 132k6 and various clones have not been as popular in the US as they are in Australia and England.
-
A little closer - I roughly cut it to size and ground off most of the defects - it still needs to be sanded, corners rounded and mounts welded on. This particular channel is 30lbs per foot so it should be about 90 lbs - maybe 85 once the cutout for flatbed machines is made.
-
It’s funny that you mention a lathe - being primarily a wood guy my side of the family garage is filled with woodworking tools, but for a month now I’ve been adjusting to the idea of replacing a mobile wood lathe for turning tapered columns with a big stationary metal lathe. Here’s a cute little bar in a train caboose that I finished earlier this year.

-
She’s broke....Singer 111w155 parts needed
DonInReno replied to Glaciersew's topic in Leather Sewing Machines
https://supsew.cld.bz/Superior-Sewing-Digital-Master-Catalog You can’t order directly from Superior since they are a wholesaler, but you can check the catalog to see if the part is available, or to at least have a better understanding of what is out there. -
Good job! I just had a big sense of relief. Lol
-
It helps that it’s a neighbor since he’s less likely to be hiding something significant. ”timing issues” becomes a catch all phrase explaining away the simple fact that the machine doesn’t make a stitch. It must be human nature to believe turning a screw or bumping an adjustment won’t hurt anything and is easy to undo if it doesn’t help.....any old industrial has had a number of well intentioned self taught mechanics under the hood.... Worst case the machine has been tweaked so much that everything is out of adjustment, some screws are broke off and others are stripped. Shafts are bent, the hook, bobbin case, presser feet and feed dog are out of the junk bin and will never work without replacement, and the machine has essentially been stripped of anything good and to keep it working worn out parts have been cobbled together. For that reason if I don’t know anything else about it a machine that won’t stitch is worth half price. Now if it looks good and tight and it’s obvious a good quality hook simply needs a minor adjustment that’s different and not so bad.
-
I almost forgot to mention how much I’ve grown to like the first reducer. I’ve sewn with it about 8 months and the biggest change is I rarely have to touch the hand wheel. Literally the handwheel may not get touched in any given sewing session. With a quick tap on the gas I’m able to inch it along 1/8 of a stitch at a time. Stopping the needle all the way up or down is a piece of cake so a needle positioner wouldn’t do me much good. Between the motor and reducer the pulleys are set up to function more like a 5:1 and the initial stiffness I was worried about has not been an issue and it’s not difficult to hand wheel if need be. Having a little too much reduction makes sewing much more relaxing and I’ll not miss the days of always being on edge with a machine that hauls asss! Lol
-
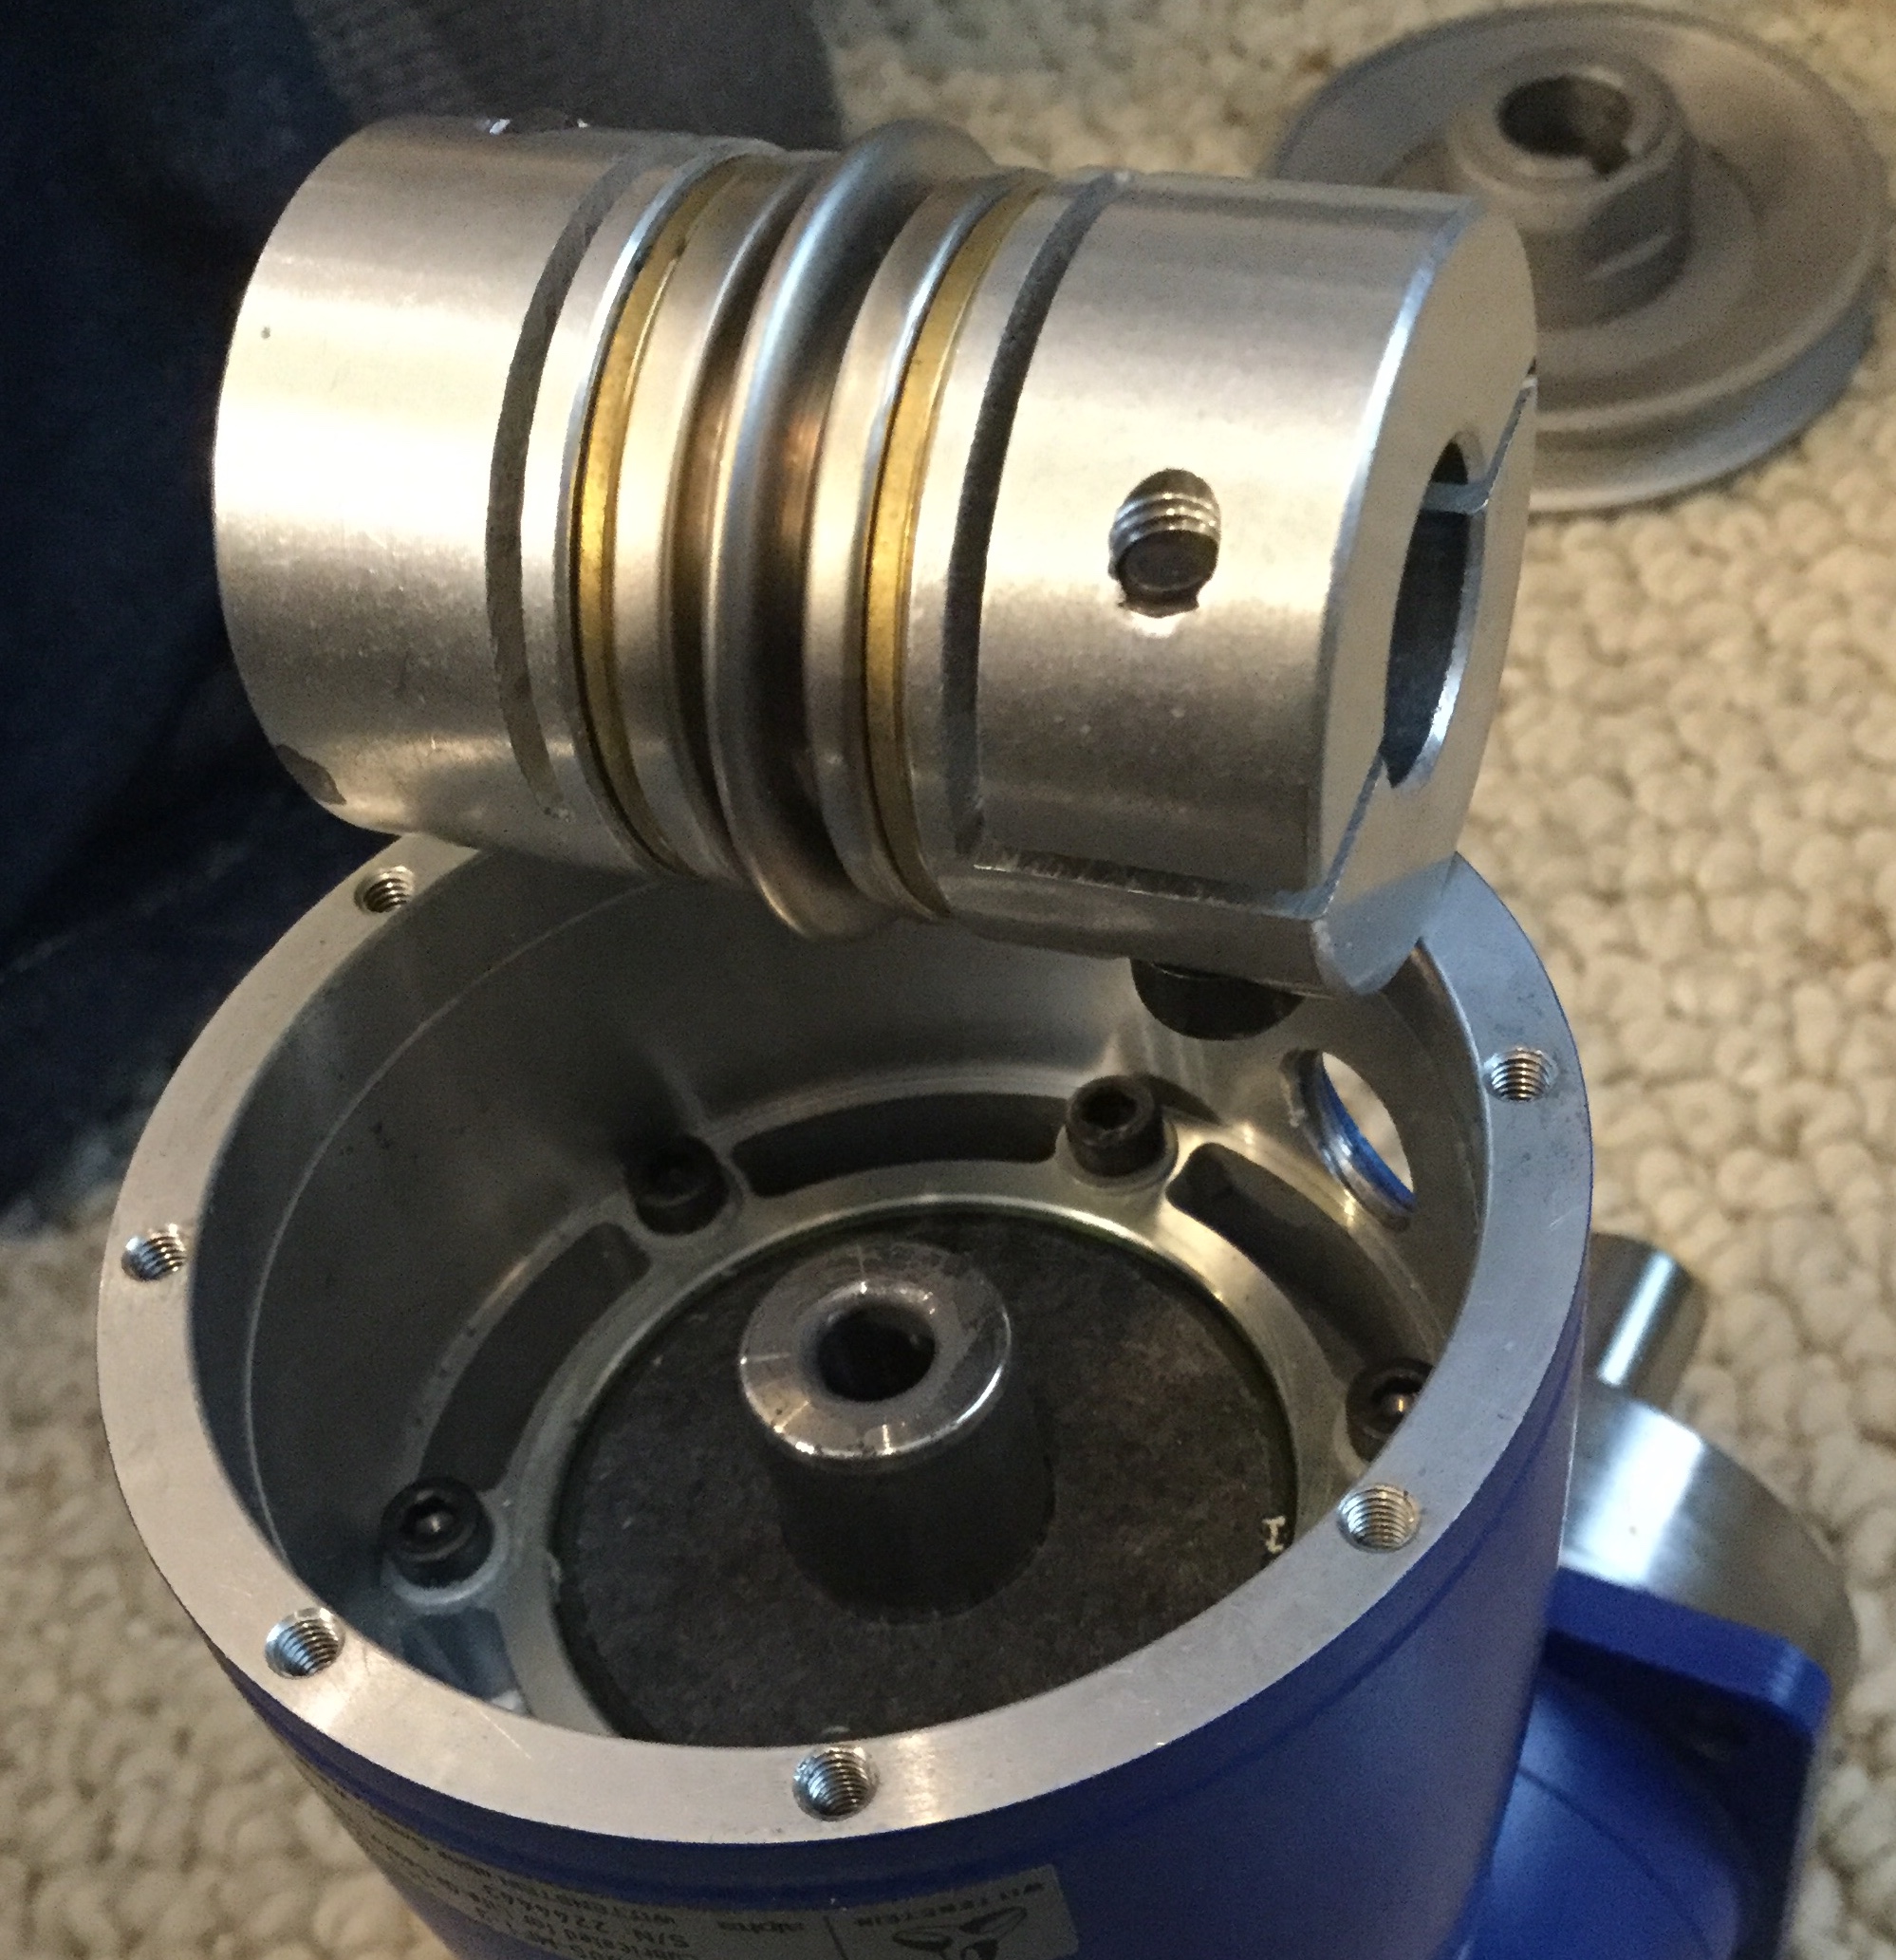
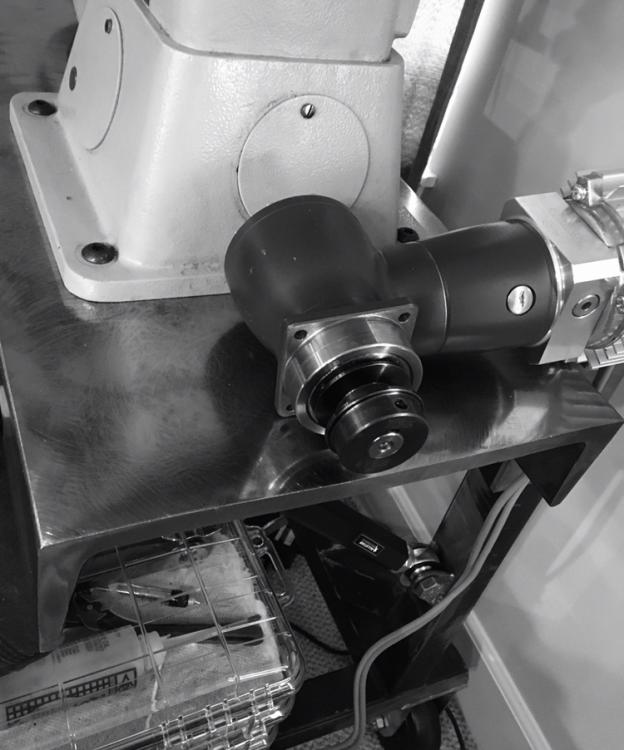
Finally had time to dig into the new reducer and so far it seems much more compatible for sewing. It’s a 050 size, which is two steps down from the first one that I’ve been using this year. It’s super compact and eliminates one belt that would be used in a traditional reducer. It’s so compact in fact there’s a good chance at least one of my fabric machines will get directly coupled and eliminate all the v belts, although in that case a 5:1 reducer might be better matched. I was happily surprised to find it came with a flex coupling. So the input shaft is 14mm, the output is 16mm and both ends of the flex coupling are 14mm. A 5/8” pulley was drilled out to 16mm with a countersink bit that was .005” under 16mm then finished up with a router bit that just by chance was exactly 16mm across the cutters. Honestly I didn’t expect the router bit to survive, but with lots of oil and a very slow feed rate it appears none the worse for wear. Drilling out one side of the flex coupling didn’t go as well since I tried to save a half hour and clamped it in the vice with a bored out piece of wood that was just too soft and it moved a bit over .008” which is too much runout for this type of coupler. We’re a little spoiled with a Grainger store about 5 minutes away - a new coupler already the correct dimensions is only about $10. For a motor that little consew servo will mount up very easy - if the front bearing retainer plate is just too thin and it craps out I won’t miss it much. To join the motor the threads are cut off the motor shaft, four mounting holes are drilled in the front case and it bolts together in a nice compact package. The world is so full of metric parts I almost ordered a set of drill bits, but instead wasted a couple of hours that would have paid for the new drill bits - it’s silly what we do to avoid having to wait two days for shipping...it still makes me chuckle.

-
....and down the road if you ever want to sell it the one with reverse will be worth twice as much if all other things being equal.
-
Singer 111W153 & table resto project
DonInReno replied to Sugarkryptonite's topic in Leather Sewing Machines
Looking good! -
Thanks - it’s just a goofy fun project to give me something to do over the Christmas vacation :-)
-
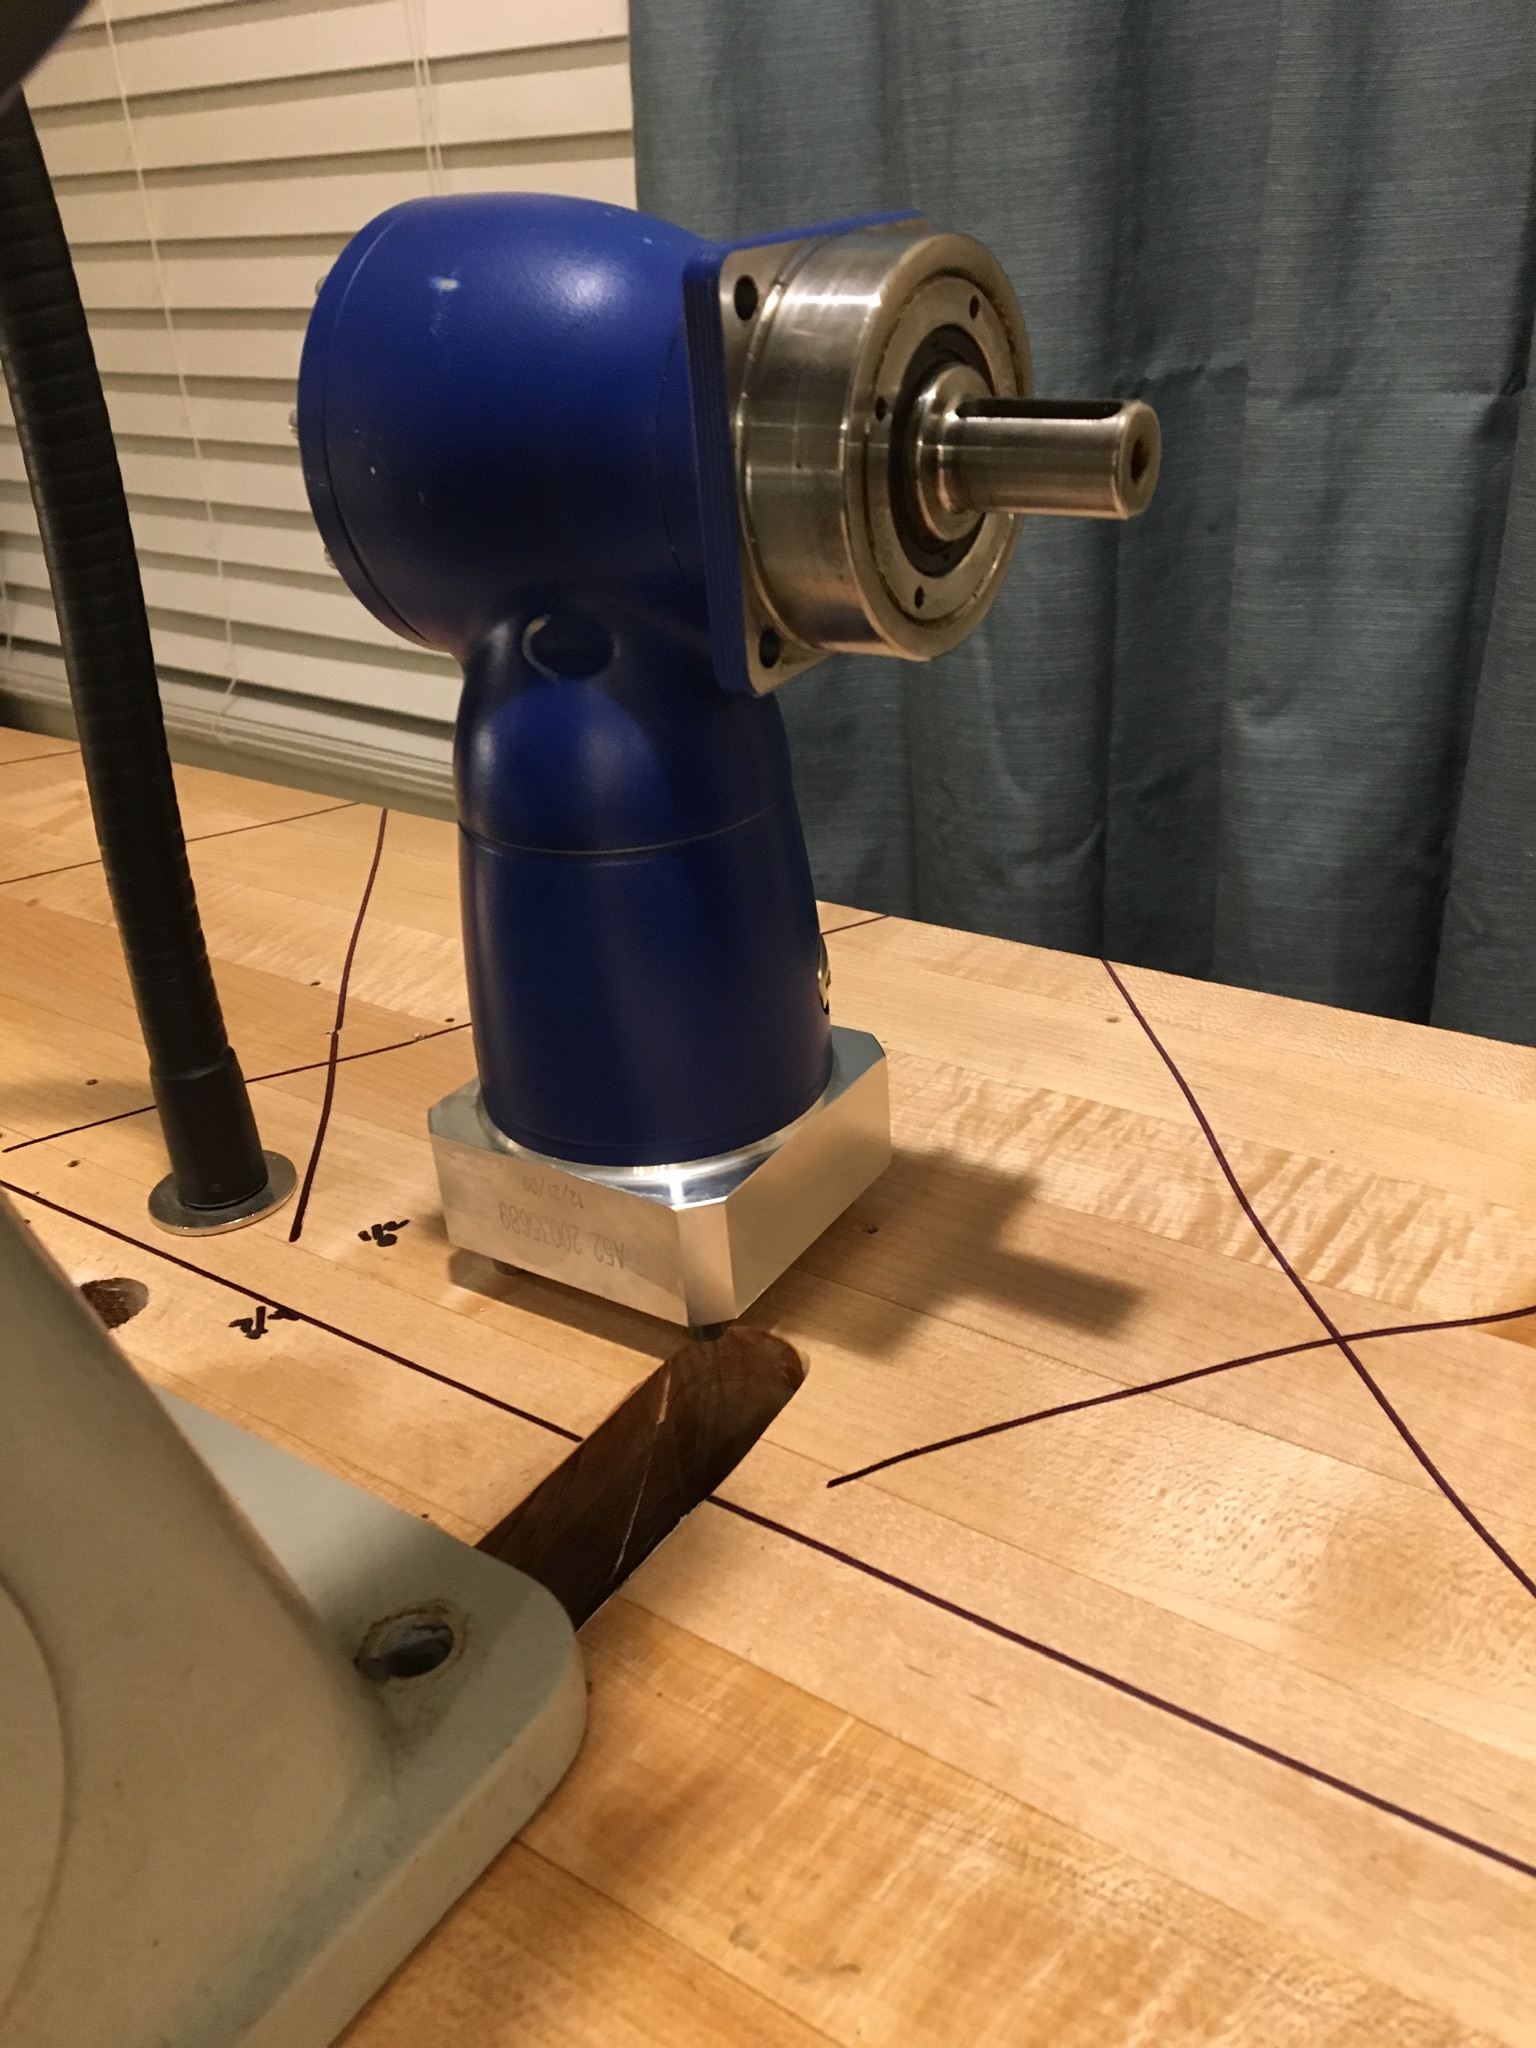
Rather than shifting machines with different bed lengths to the rear of the bed cutout to line up with the speed reducer, I want to easily slide the motor/reducer to where a machine is. It’s a tall order to use one table for a sailrite clone to a double needle upholstery machine, to a center mounted cylinder arm, to an edge of table mount! Lol The 7:1 reducer was just way too slow and 3:1 is popular for a reason. This little guy is 3:1 and was removed from decommissioned equipment. About $500 new - for $100 I don’t mind if it has .001” extra backlash, but so far it feels nice and tight.