-
Posts
794 -
Joined
-
Last visited
Content Type
Profiles
Forums
Events
Blogs
Gallery
Store
Everything posted by DonInReno
-

Singer 111w155 stitch length issues
DonInReno replied to Glaciersew's topic in Leather Sewing Machines
Great information! -
Of course put in a new needle so you’re not trying to solve a problem caused or partially caused by a bent, misaligned or dirty needle. The first thing that comes to mind is a little extra upper tension is needed to pull the loops up, especially since the material thickness affcts the problem. On a corner the thread does not necessarily have the same pressures on it as the needle withdraws. If there’s a skipped stitch right after the turn with loops after that then the hook isn’t grabbing the thread loop - do you allow the needle to raise a little after bottoming out in the stroke BEFORE turning the material? Of course hook timing is important and needle to hook gap should be minimal to reduce any skipped stitch.
-
Seemed like this machine was /is also on eBay
-
It sounds like you’ve answered your own question 95% of the way. If this is the first commercial machine your frame of reference will quickly change after a few weeks of sewing with just about any cylinder bed model that handles 69 to 138 weight thread. Changing thread sizes/needles/tension settings is not difficult, but does come at a cost in both time and frustration. Others will have better advice on what models fit the capabilities and price point you’re looking for. Have fun with it and best of luck!
-
Something that can catch people by surprise is how common it is for commercial machines to be repainted - if that’s the original paint it’s probably in very good condition. Most repaint jobs are very obvious while others need a closer look. At least some small chips in the original paint are sure to show through a new topcoat even if it’s been carefully sanded. Even if it’s been repainted the machine may be in fantastic shape. Also look closely along the thread path - if that’s the original paint I’d expect little wear on the thread take up and thread guides. Any first walking foot machine is a great gift worn or not!
-
Very cool!
- 24 replies
-
- quick-release
- qick release
-
(and 1 more)
Tagged with:
-
oops - my mistake it was a union lockstitch on cl.
- 14 replies
-
- wanted
- looking for
-
(and 3 more)
Tagged with:
-
That makes perfect sense! On mine it only happens when it’s first powered up. TomG, As you know the lowest speeds are a challenge to regulate since the speed controller is pretty sensitive. I retrofitted a different pedal so it takes two inches of toe movement to move through the entire speed range. This would not be a good choice for production sewing, but it allows a nice relaxed foot movement with as much control as the servo is capable of. While it allows better control, without a reducer the motor just doesn’t have the torque to smoothly sew at those slow speeds and there’s a lot of handwheel use starting and stopping stitch runs in heavy material. Currently that motor is attached to a planetary reducer with a final reduction of 8:1 (8 turns of the motor turns the factory 111w155 handwheel once). This is too much reduction for most purposes, but does allow the motor to be kept on 4000 rpms and provides between 1/2 stitch per second up to 500 stitches per minute. Rarely does the handwheel get touched because jogging the pedal easily allows about 1/10th turns and stopping all the up or just past bottom becomes normal. A 3:1 reducer combined with small servo pulley would be just about right with something like 6:1 final drive ratio would easily give 1 stitch per second. For the price this motor is still a bargain.
-
This is a super technique! A utility knife makes a tiny mark that’s little more than a small scratch. A more permanent mark can be made with center punch, carbide scribe, or even a small carbide burr in a dremel. Even something as simple as a Sharpie mark (if it won’t me smudged off), or fingernail polish, or a paint pen will provide a reference without permanent mark. Degreasing helps these marks stay in place.
-
Yes that odd “pulsing” tendency of the belt does make a spring loaded tensioner harder than it looks to overcome. I’ve seen a few that incorporate a small shock absorber piston so the tensioner can move, but can’t quickly cycle in and out with the variations in the belt/pulley. With the proliferation of soft closing hinges and drawer slides in cabinets, there are a few parts that seem ideally suited, but I have no idea if the pistons have enough resistance and travel. There are small industrial soft close cylinders in varying amounts of resistance, but they are too $$$. Hell, half the new toilet seats are soft closing so something cheap should work! Lol Another design uses a one-way bearing and friction clutch like the drag on a fishing reel so it cinches down easily but requires much more force to loosen. Unless it’s incorporated into an automotive tensioner that can be modified for less spring force that seems too complicated to cobble together. The pivot bolt could always be tightened so the spring adds the tension and the position is simply locked in place. In the end maybe it’s no more complicated to add an easy method of moving the motor. Moving the super smooth feed handwheel of a mill or lathe makes me think of an easy to reach handwheel moving the tensioner...hmm... I also wondered if pulley size made a difference in belt slap, but when I added a larger drive pulley it actually became worse - in this case the paint on the pulley had more grip so the belt would noticeably ride up where the belt was slightly thicker.
- 24 replies
-
- quick-release
- qick release
-
(and 1 more)
Tagged with:
-
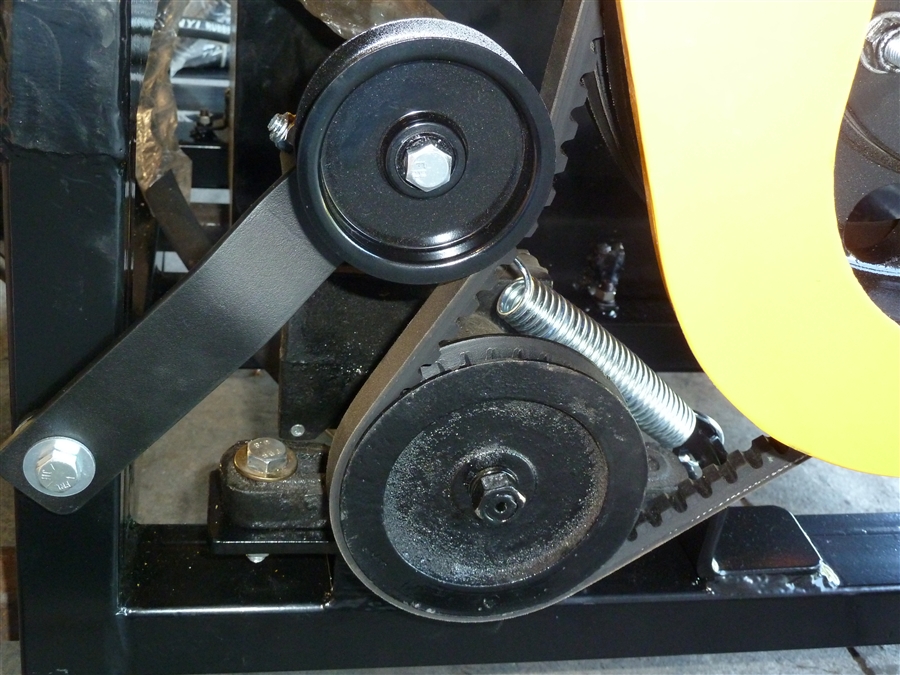
Uwe did a great job describing where to move the reducer. Along similar lines I’m using multiple machines on one table and need a quick way to get a properly adjusted belt. The dimensions of each machine and their hand wheels vary all over the place so each machine has its own belt and I’m looking to add a simple tensioner pulley that’s spring loaded like the one in this picture.
- 24 replies
-
- quick-release
- qick release
-
(and 1 more)
Tagged with:
-
Yes mine will keep running a little bit when it’s first turned on. As to really slow sewing, you’ll have add a speed reducer, or get the smallest possible pulley for the servo and a larger handwheel.
-
Did you just buy the k6 that was on the San Francisco craigslist? It looked good. If it was $100-$200 less I would have taken a day off to drive over and look at it. I’d love to find a crusty one for cheap
-
Is the machine well oiled everywhere there’s metal to metal contact? Sounds and even vibrations can be misleading so keep an open mind as to what part of the machine is causing the issue. Use a strong flashlight and look closely under the bed and all around the hook - look for moving parts that get close to other parts as the scraping occurs. Take the upper plate off so you can see the workings surrounding the needle bar and presser foot bars. All metal to metal contact points are well oiled in there? One 40 year old machine had a slight interfearance defect that should have been filed down at the factory and the original owner simply figured it was normal. There also may be part of a needle or a loose screw in there somewhere. I also look for contact points - scratches, dents, etc. where a machine may have been dropped tweaking something. Does the noise go away if the presser feet are raised? Many aftermarket presser feet aren’t as exact as they could be - use a flashlight behind the feet to see if they are rubbing each other. Then I’d take the bobbin and case out - again aftermarket parts do not always fit as well as they could or have as strick controls over dimensions. Take off the needle and presser feet. Then unscrew the needle plate screws a few turns, keep a finger on the plate and cycle the machine by hand - if the feed dogs are hitting the bottom of the needle plate you will feel it. The feed dog might not be square with the needle plate slots due to a defect. You might wonder why someone would install a defective part, but some machines up for sale are a collage of the very worst parts taken off numerous machines or new parts uninstalled once they were found to be defective. Remove needle plate and feed dog - look closely all around the hook. All the metal to metal contact points are well oiled? Any used machine like yours should have the hook out since there’s a lot of crap that can pack under it - best to wait until you understand the process of resetting the hook timing and have a good reference video in case it gets confusing. If you aren’t sure how to adjust something don’t mess with it or you may create new problems. Good luck finding it! Be sure and let us know what it is when you eventually track it down!
-
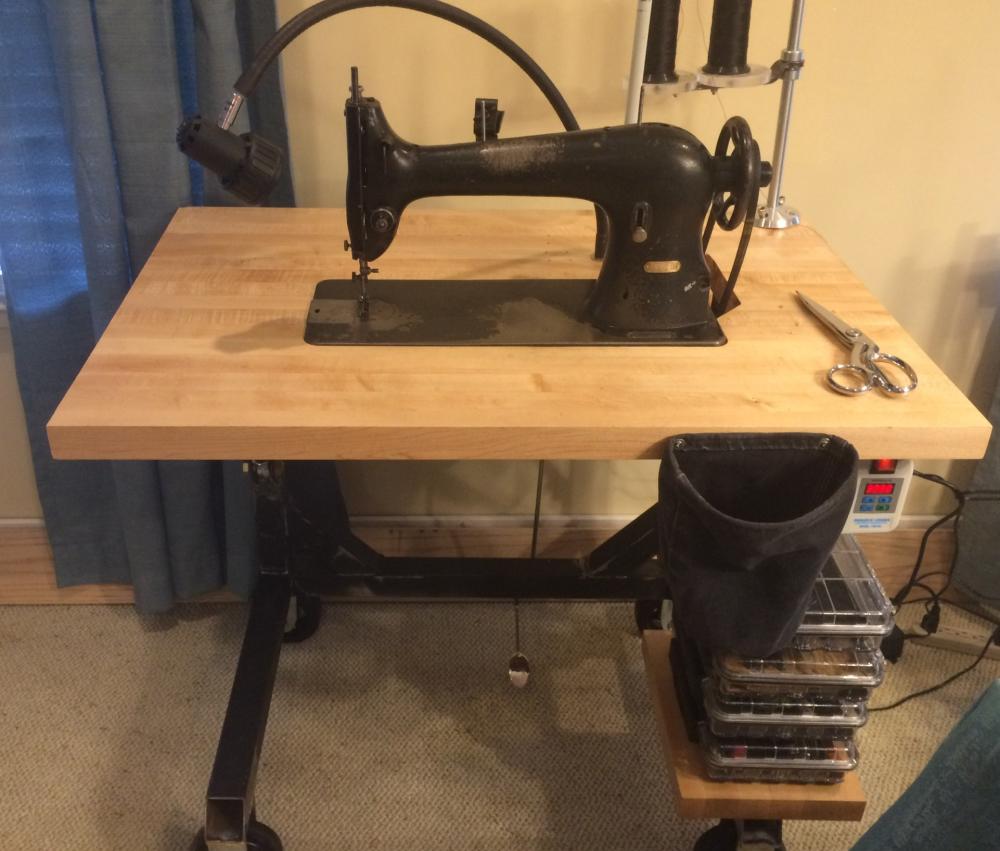
That stand does look nice with the machine.
-
Hmm... yep I stand corrected - I figured the fatter bobbin on the 31-15 would easily hold more thread even though the diameter is slightly less. The 19131 bobbin has .003 cubic inches more volume - less than 2% so I’m guessing nobody could tell the difference. 31-15 uses a bobbin #2996. .460” x .800” .175 cubic inches 31-20 uses a bobbin, #19131 .360 x .910” .178 cubic inches
-
Back in my 20’s as a lowly Forest Service seasonal firefighter in the middle of Wyoming, the smoke jumpers in Missoula (who manufactured their parachutes and packs in the off season) had a “commercial sewing machine” in the list of inter-governmental surplus so I filled out the form and a month later it showed up table, needles, thread and all. Honestly I don’t know if it was a 31-15 or 31-20, but it sewed 138 weight thread well and by the end of the summer all the guys on the crew learned to sew. There’s a soft spot for the machine and when a nearby repair shop was essentially giving this 31-20 away I picked it up. It was made in the 1920’s and is obviously a past factory machine with an inventory badge and at least one repaint. It was well used for sure and surprisingly well maintained by someone who took the time to not bugger up a single screw slot or let schmoo build up anywhere. It looks like it was last taken out of service decades ago when a needle broke or bent and rounded off the replacement non-singer hook a bit. I’ve heard the wives tale repeated numerous times online that the 31-20 bobbin is larger than the 31-15 ... it’s actually a slightly smaller bobbin and case, and the shuttle sits in the same size hole as the 31-15 (I’m assuming that’s to allow clearance for thicker thread in the 31-20 since the same bobbin/shuttle combination was also used in the 31-22 which was labeled as a heavy thread model). As far as I can tell from early manuals these three parts are the main difference between the 15 and 20 (not counting presser feet/feed dog/needle plate part numbers). All my flat bed machines share the same table so a few adjustments were made to the cutout and it gets its own belt since the hand wheel pulley is so tiny. I’m looking forward to the bobbins and case showing up to see if what’s left of the resharpened hook will be long enough. It will be a good starter machine for someone, especially if it sews 138 well. What has worked to adjust the needle/hook gap? It’s as non-adjustable as hook timing? Seems a paper shim between the bed and shuttle carrier ring is the place to start? With a new needle it wouldn’t hurt to close the hook gap .005”
-
That’s a very nice template!!
- 181 replies
-
- diy sewing table
- industrial sewing table
-
(and 3 more)
Tagged with:
-
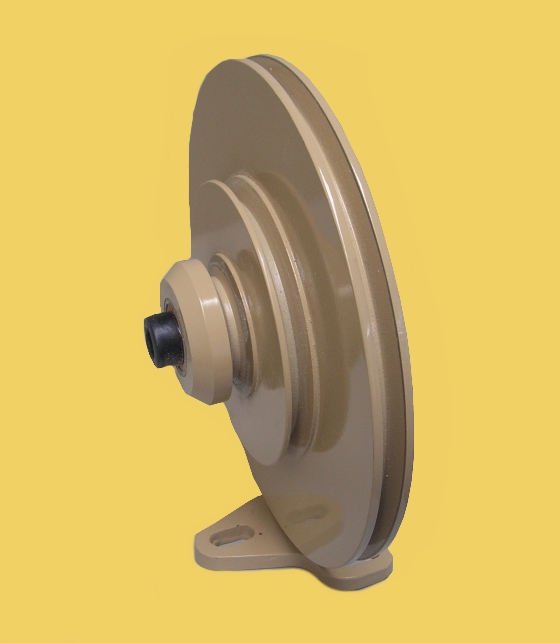
Leather machine co. sells their brand of 3 pulley reducer for $120us + shipping.....most manufacturers of leather machines have this style of reducer..... the same design can often be found used on eBay for around $100.
-
If you’re just experimenting I’d grab a 1/2” bore adjustable pulley - shim the difference with a thin wall tubing that fills the space close enough. Although I was never intrigued by adjustable pulleys, I picked up a handful on a $2 clearance sale and like them more and more.
-
Going forward you’ll find it’s relatively easy to keep all the recesses clean - just oil it regularly and run Qtips in and around stuff to clean out crap. It’s not the fastest way, but it’s easy and can be done inside and not offend anyone. Nice machine! Perfect to get started on - a great way to practice is draw a design on a sheet of paper and follow it without thread. Like most things, developing mental and muscle memory goes a long way toward good results.
-
Those cute little table top walking foot machines only have a decent amount of low speed torque with the addition of sailrite’s Monster wheel. The monster wheel cost me as much as a basic servo. The niche these machines fill is where space and/or weight are at an absolute premium - like living in an RV, sailboat, or tiny apartment.
- 5 replies
-
- budget
- lightweight
-
(and 2 more)
Tagged with:
-

96K51 bottom stitch issues with 207
DonInReno replied to plinkercases's topic in Leather Sewing Machines
Also, sewing thick thread at high speed will shred it as the needle heats up - go slow and use a lubricant like silicon spray. -

96K51 bottom stitch issues with 207
DonInReno replied to plinkercases's topic in Leather Sewing Machines
Not that it will help you sew 207, but in general if you take a few feet of thread by the ends and pull it back and forth through each part of the thread path it can turn up sharp areas. Abrasive cord is perfect for taking off sharp edges - any ace hardware or decent auto parts store will stock it. if you’re tension spring is maxed out beefy replacements are easy to come by - I order complete tension units and strip off the parts I need.


