BondoBobCustomSaddles
-
Posts
1,033 -
Joined
-
Last visited
Content Type
Profiles
Forums
Events
Blogs
Gallery
Store
Everything posted by BondoBobCustomSaddles
-
 I got a piece of advice from an old time black powder gun maker over 40 years ago, and it has stuck with me, and served me well. Basically what he said is " find someone whose work you admire and ask him what it is he does to achieve whatever it is that you are impressed with". He may have added a few colorful words in there that I didn't put in, but; basically that is what he said. As it relates to this subject, I have been impressed with the work of artisans like Bruce, Al, Keith, Bobby and Cary. That by it's self is a testament to why I use products like neatsfoot oil, lexol, ev olive oil, and all the others. At the end of the day, the results they give, reassure me that the advice I got way back then, was solid. Thanks Bruce, for taking the time to write what I have been thinking for a long time but; just didn't have the time to comment on. Bob
 -
Van, I don't have a websight per say, but; if you search "Bonbo Bob Custom Saddles" you will get a few threads that have pics of my saddles in them. I only make a couple of saddles a year and have been doing so for the past 20 years or so, that being said if they have my stamp on them, that is 2 B's back to back and says Bondo Bob Custom Saddles around the border edged with a rope edge, then it is mine and I made 100% of it. Bob
-
Cobra 4 Accesories ** Help **
BondoBobCustomSaddles replied to Fd3615's topic in Leather Sewing Machines
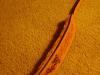
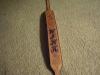
OK, I am going to join in here, because; I do it a little different and it seems to work for me. I am fussy about the finish of the edge on my stirrups so this is what I do. First I use a stirrup plate and the right foot stitch. I place the body of the stirrup to the left of the machine and the raised portion of the plate nests under and up against the stirrup outer edge. Now then on covers that are tooled, there is a border and a stitch line that I mark and want the stitches to follow, so in order to have enough material sticking out for the foot to adequately "clamp" down on for each stitch, I leave about 3/8 to 1/2 inch extra material sticking out past where the stitches are to be. This does several things for me, 1 as mentioned, it gives enough material for the foot to rest on, 2 it allows me to be very specific about where the stitches go , 3 and after it is glued, stitched, and cut off to the exact final trim line, it gives a good surface to edge, burnish and finish for a nice mirror finish. Hope this didn't confuse. Here is a piece of a pic to show what it looks like when finished. Sorry, but; this is the only pic that shows a finished stirrup. Bob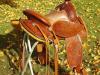
-
What everybody said, plus the one thing not mentioned. Looks like you are catching the "bug", be careful, it is addictive ! LOL Enjoy your leatherworking journey. Bob
-
Welcome home Van! Thank you for your service. Being an old vet myself, I know how much it means to be home. Glad to see you are "doing leather". It is a great way to help settle the nerves, except when you screw something up! LOL! Anyway, the folks here are the best and all levels of achievement from the beginners to the professionals. They are all ready to give you help and have many ways of doing things. I am sure you will get some enjoyment and help from this sight. Make the best out of your GI Bill, and enjoy that Tide! After all, you got a good ole Michigan State Coach down there to lead them! He'll make sure you got something to cheer about! Once again, Welcome Home and Thank You for your service. Look forward to seeing more of your work. Bob
-
I don't do much hand stitching any more, however; I still do some on certain parts of saddles, and; what works for me is, I get some bee's wax on my hands, especially on my "pulling fingers", that helps me get a grip on things. Like Snubby I am degenerated too. Bob
-
Snubby, did you say you were a degenerate? Me too LOL
-
Saddle Seat - Smooth Or Rough Out?
BondoBobCustomSaddles replied to CourtneyLynn's topic in Saddle Construction
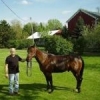
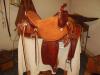
First of all, Toot and I usually see things pretty much the same, as is the case here. I agree fully with his out look on roughout vs: smooth. I have built many of both and at the end of the day it usually doesn't matter weather the rider is really experienced or a rooky. It's just a matter of preference. I have actually built a couple of saddles on the exact same tree, right down to the width and height of the gullet,, height of the cantle and so on, only difference was the length of the seat. I built these for a husband and wife team that ride usually 8 to 10 hours a day for work and on their time off, they trail ride. They are vastly experienced riders with more than 100 years riding experience between them. one liked and wanted a rough-out, the other a light weight smooth- out. And while they are noticeably different, because of personal preferences and riding styles. They are built on the same tree. When they switched saddles for the heck of it, they both said the same thing, "give me back my own saddle". What I am trying to say is, it is a matter of what you like and are used to. Like someone said, try both and make your decision based on good experience. Just to show you the difference in look, here are a couple od pics of those two saddles. Bear in mind they both fit horses that are the same in comformation. Bob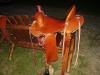
-
Pad Folio
BondoBobCustomSaddles replied to hidepounder's topic in Purses, Wallets, Belts and Miscellaneous Pocket Items
Just when I think I am getting it down to look like your work, you post a new twist to a leaf, or fold in a scroll that just blows me away. Guess I have to get back to the bench and give it another go!!! Great work Bob, as always, love your work. Bob -
First Pair Of Work Boots
BondoBobCustomSaddles replied to Tim Schroeder's topic in Shoes, Boots, Sandals and Moccassins
I agree with all the comments here, question is, are they as comfortable as you had hoped when you started? I bet they are. Bob -
Replacing Fleece
BondoBobCustomSaddles replied to rktaylor's topic in Saddle Identification, Restoration & Repair
Randy, like CW, I prefer lug straps, however; when I get one in like this, I just do it the right way. Not that much ore work, and going out the door, I know I did it right. As for the pockets, if you use a couple of the original stitch holes in the skirt and the pocket leather to locate the pocket and rigging in the proper place, and then while they are secure, restitch with fresh holes, then put the sheep skin on last you will have put it back to the original condition. Bob -
Those things must be coming on as the next fashion statement. I saw a lady decked out to the nines at the hospital the other day wearing a pair of riding half chaps/spats, and another at the mall yesterday. Neither looked like they had just stepped off a horse, but; they were wearing them! I probably should dust off my patterns from the track, looks like they might get some use this year. That set you have look like they would fit right in with that group. Nice job Bob
-
Randy, just a thought. Years ago, when I first started out making saddles, I wanted to do so for many reasons, one of which was that I wanted to have a saddle that was as comfortable as an old Ryon I had. I made templates of that saddle, front to back. and side to side so I could replicate that seat. They have served me well, I have never had a customer that was dissatisfied with my seats. I attribute that to those templates. I use them on both metal strainer and leather ground seats. Just sayin" Bob
-
Nice job Randy. Yea 28 lbs is about all you can get down to, and still have a good saddle that will last. There are still a couple of paces you could get another lb or so out. but; then there is a place or two that you would add it back in, so, at the end of the day 28 lbs is where you end up. once again, nice job. Bob
-
d welcome to the forum. You will find a lot of experience and willing help as you take your trip with leather. Great bunch here. Where in Michigan are you located? Are you green and white or maze and blue? Bob
-
I have not seen or worked on a Corriente Saddle, however; I can tell you this, it takes about 2 full sides of skirting leather to make a good saddle with rear cinch and breast collar. The cost for 2 sides of good leather and a partial side of latigo will run close to $600 plus shipping. By the time you add all the other material to make a good saddle and include a decent tree, you will easily have roughly $1200 in materials, not including any silver if required. Oh and by the way, the price of leather is going up again. There just isn't any way I can fathom making a good saddle for that kind of money. I agree with Keith, spend your money on a good used saddle, if you can't afford to have one made. Bob
-
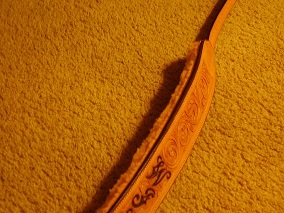
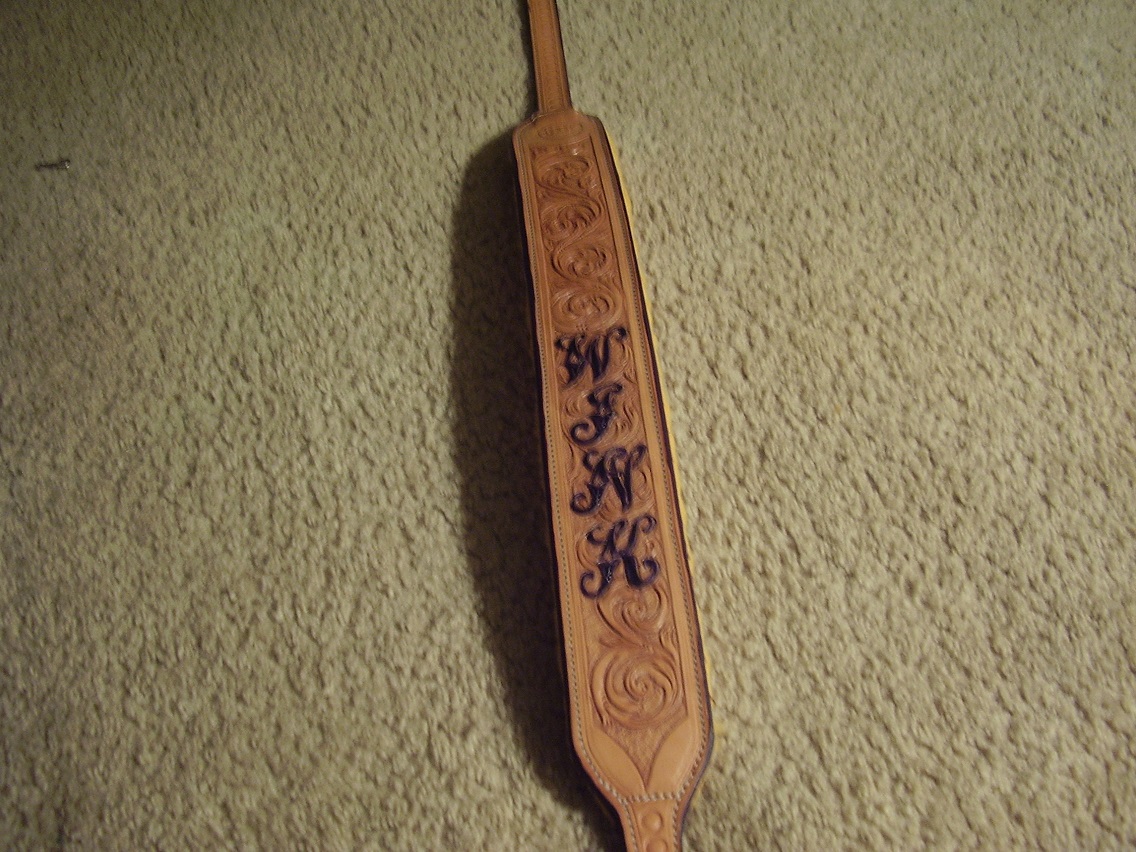
Nice work Ken. Couple of comments and questions, 1) How do you like those "quick disconnect" clips for attaching strap to guitar? 2) How do you like Bob's book? 3) I see that you have the same barber I have! 4) All you need on that strap is a sheepskin shoulder pad ;>) All in all nice work! Bob
-
And then there are those of the persuasion that "Thicker-er is better". This strap was made for a friend that wanted it strong enough so he could pull his truck to a gig with it if he broke down on the way!! It is two layers of 7 oz. plus sheep skin backing. Bob
-
Hey Josh, nice work. It all goes together. The antique finish, really brings out the detail. Bob
-
Mallet Or Maul For Punching? (Not Tooling)
BondoBobCustomSaddles replied to Willbury's topic in Leather Tools
I agree with most of the comments made here concerning mauls vs. mallets. I will add that I (Personally) prefer rawhide over nylon for the head. I like the sound, or lack of it that the rawhide makes vs. the tapping sound of a nylon head and also like the fact that when using a rawhide head, even if you miss hit the object you are applying persuasion to, it will "grab" the object and direct the force anyway. Also the same reasoning for maul over mallet, in style of head used, especially when applying a lot of force, as in large holes, strap ends and oblong holes in the 1" and over size in 10 oz. and up skirting leather. Bob -
It is , of course, a matter of personal preference. I prefer the antiqued look most of the time my self. Bob
-
Looks good Randy. Now it is time to apply it to leather! Take your time and do it justice. Bob
-
Tom, I use 1" my self. I am sure others have other suggestions, so the best I can give you is what I do. I get my foam from an auto seating shop here in MI. I am sure you have them out there in PA also. I buy it in 4' X 8' sheets. I use it the same way that Al Stohlman's book says to do it. That has always worked for me. I have probably done at least 100 or so of them this way with no complaints. Hope this helps. Bob
-
Nice work Chief! Bob
-
Leather Rope Bag
BondoBobCustomSaddles replied to hidepounder's topic in Saddle and Tack Accessory Items
Bob you are right, it's been too long since your last post. I was suffering from withdrawal from seeing some more of your work to study, so I took a trip to Oklahoma City a couple of weeks ago, hoping that along with getting to study the work of John W. and Cary S. I might see some of your work at the C.B. museum or even better yet, run into you at the Team Roping Finals at the fair grounds. There were some Arizona cowboys there, but I didn't see you. Anyway, this bag is as usual, much to take in, and study. Absolutely a joy to look at. Bob