nylonRigging
Members-
Posts
478 -
Joined
-
Last visited
Content Type
Profiles
Forums
Events
Blogs
Gallery
Store
Everything posted by nylonRigging
-
Looks like ? , in the Vid. . That your outer presser foot not lifting also . .
-
Mach 3 sewing machine, good or ???
nylonRigging replied to Johns3b's topic in Leather Sewing Machines
I have never seen anyone with branding a Machine head with sales name 'Mach3 ' as logo ? Only cross reference in the name . if type in general search , ( Mach3 sew ) The only thing that I could see connected to sewing was Longarm Quilting machines, and Mach3 software stitch/pattern programing. I seen that machine you asking about advertised in the craigslist/salem OR. , their asking 2500-$. it looks clean and head is a complete set-up w/table and drive. It is/looks like any other 441 clone, and i have noticed asking/pricing is all over the place right now on used sew machines. 2500-$ is little high for used but not unreasonable ' if ' you are real close to area for you to easy pick-up . also price not unreasonable if has a lot extra's with the machine ? feet, Dogs/needle-plate set-ups, or binding or other attachments ? You saving minimum about 700 to 800-$+ over buying new . ( this for example ) , if you buy new from dealer on west coast here, You are in WA. like from artisansew down in bay area CA. you going to pay 3000-$ and change, and plus at least 200-$ 4'x4' pallet truck shipping up I-5 N. to a shipping hub for you to pick-up. . -
CONSEW 206RB-5 THREAD SHREDDING ISSUE
nylonRigging replied to Mrrattle's topic in Leather Sewing Machines
Sounds like the machine was misused and monkey mechaniced by the previous owner . If all is in time properly . The going Slow is Fine, and the Fast RPM is Bad on thread could also mean simple problems . Maybe some needle strikes. Check real close for a Burr or a Nick in your Needle-Plate, smooth-out with fine emery . Check for Burr in the Hook, take piece of cotton ball or Q tip and run it across Hook. If any snagging, smooth it out. In my life I have even run across/pulled-out a couple new Needles out of the Pack also that had a 'sharp Eye' inside-edge that would also shred Thread . . -
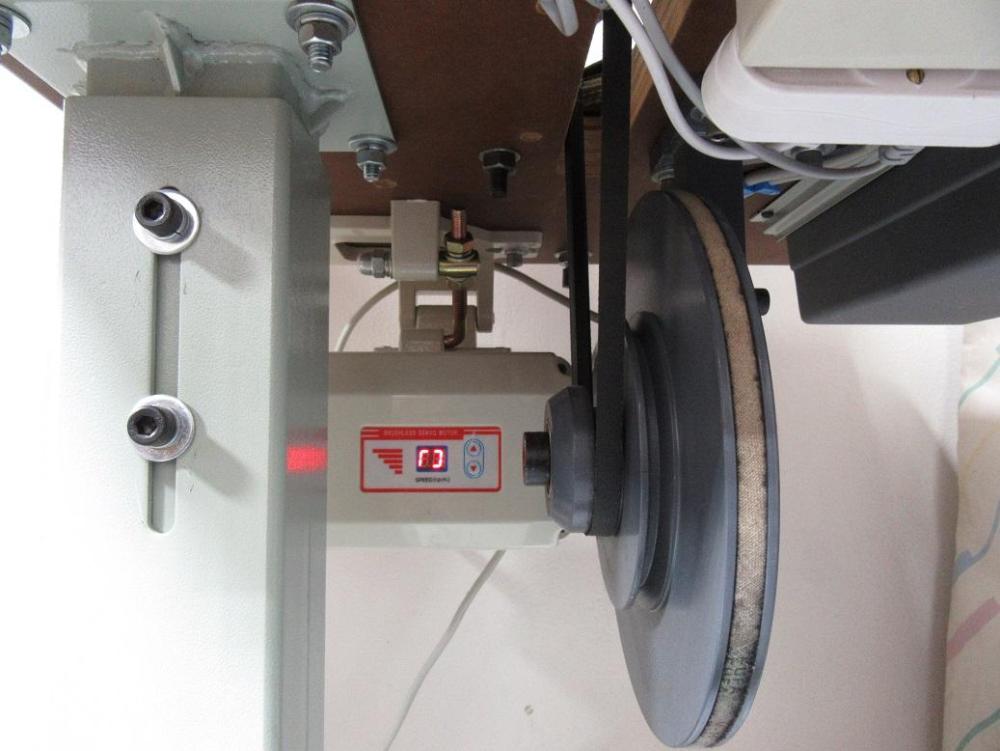
should be similar/same watt set-up as this older Artisan 3200 I have had for several years, good watt, programmable servo and added reduction. mdl. ( ACF-622 b brushless servo ) - -
-
Consew 230R-1 setting it up for leather
nylonRigging replied to lilbax's topic in Leather Sewing Machines
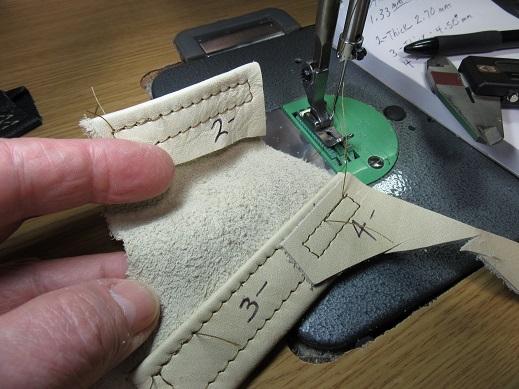
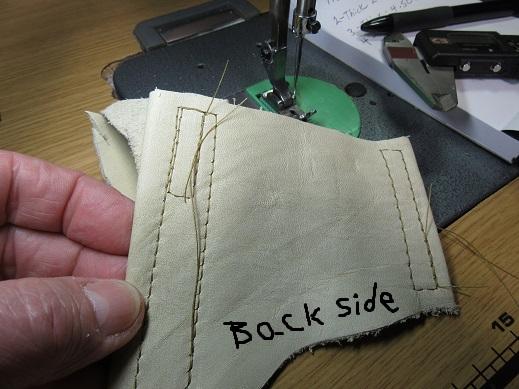
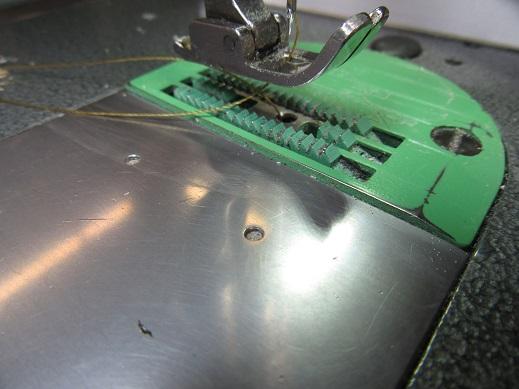
Your machine should be a 135x5 needle right now ? , Your machine is pretty common. just figure out what DB Model MITSUBISHI, that is looks like and go from there for info also . Needles like 135x5 is perfectly fine. Your machine isn't doing any bigger than #69 thread anyway. 135x17 offers a little bit bigger needle thread hole for larger thread, but you wont need it. It a good learning experience for you and changing out a few things on this bottom-feed machine, and will be good basic knowledge, and be pretty helpful when you moving-up to a better machine latter on. 'Basic stuff ' like this translates over down the line. You changing out Needles , Dogs, needle-plate, Feet ...etc. that is real economical ' for your machine . Just go on Ebay for presser feet, or a roller foot . If just using standard presser foot, just buy both a Large and a Medium Dog and needle-plates to play around and see which feeds best to what you doing . You might not even need to go to the largest tooth Dog . -------- Your machine will stitch thinner leather . It is just that a unison-feed, or a drop-feed walk has far better feed and needle control. I threw a couple Pics. in to show you. I cut a piece of old scrap leather/deer . It is average @ about 1.33 mm thick. it still fairly supple but Old. I doubled 2x thick, and it was about 2.70 mm thick . . then tripled 3x thick to about 4.50 mm thick .. then 4x thick to 5.04+ on the Caliper . I did Little effort on my end, I just used what #69 that was already strung-up on the machine and the 20# needle hole round point fabric needle . It just sewed it all on the 1st attempt, no practice scraps before I took the Pics. I keep an old DB-170 Mitsu. and I worked it over to Feed heavier cordura/webbing with a better servo drive,and 135x17 needle, higher tension . 69/T-70 is the limit on thread size. - -- 27 replies
-
- needle size
- thread size
-
(and 4 more)
Tagged with:
-
Understanding Bonded Nylon and Bonded Polyester Thread
nylonRigging replied to Trouthunter's topic in Leather Sewing Machines
Nylon is structurally stronger and more abrasive resistant than Poly . Poly is more UV resistant than Nylon . Both Nylon and Poly have there versions of ' satin soft ' threads. . -
Consew 230R-1 setting it up for leather
nylonRigging replied to lilbax's topic in Leather Sewing Machines
It sounding like you have zero, or very little knowledge of sew machines in your Post. So It a 1st time, low budget machine, if just starting out learning . learn some machine stitching basics, needles, thread, and machine working mechanics with using it...---> Save your money and work on getting a Consew 206, or Juki 1541 for future expansion of your skills . That is a pretty common Mitsubishi cast head, used on many brands, and is a Drop-Feed ( bottom feed ) . it a light-Med. duty sew machine. OK.. It will 'can' sew leather . at a minimum expectation it can do some decent stitching on thinner softer leathers. 'if' you change a few things with it. But you need to put some time 'sitting behind' getting to know the machine. Also the machine ( it is , What it is ) you got to recognize it's limitations. It takes easy to find selection of Feet, Dogs, needle plates, Needles, and also will take easy to find presser roller-wheel. The Roller Foot, is an easy swap/change-out, and it also can do some decent stitching . You can tune it for 135x5 and 135x 16/17 size needle. It will use #69/text 70 thread . it has small bobbins . It does have Reverse, but you will 'try and try' to adjust, to get it to sew same SPI in reverse, but it Won't ever never be satisfied with stitch quality in reverse . It is set-up in your picture for Fabric Stitching . For sewing Leather. You need to get needle control, slow it down, get a quality servo. or a cheep servo drive with using a reduction pulley . You going to have to change out the Dog and needle-plate, to a Med. or Heavy tooth, and get rid of the fine fabric toothed Dog . put in a little heavier tension coil spring on top thread. experiment with the presser-foot tension. use a smooth/slick chrome plated press foot . .- 27 replies
-
- needle size
- thread size
-
(and 4 more)
Tagged with:
-
Looks good for it's age. 450-$ is not a bad price at all for machine in Pic. as long as it sews . There is a reason people still buy and sell them. Patchers can reach in, and stitch were no other machine can get into. and ( Yes ) they are handy/effective to have in your machine stable . ( for me ) It one of those machines you don't use often, but when you do use it.. You REALLY Need It, and glad you got one sitting in the corner. .
-
That guy is a magician with a sew machine. Have you seen the Vid. of him making his own piping foot set for French Seam ? . Cut out of a hunk of scrap metal with hand tools, for his twin needle Durkopp&Adler 268 FA-373 French Seam piping, Scrap Metal Feet set -
-
Sailrite did a couple good examples, on doing two turn-corner techniques with French Seam. Turn-Corner, French Seam -
-
I have paid that and more-$$, for older machines , BUT ( My opinion ).. I would never pay 575-$ for a machine in that Poor condition, of that age . I can imagine how the drive looks ? , and It my lay down a Stitch, but that head and table look like it has ' already seen it's better days ' about 20 years ago . .
-
Typical GC20606 Twin Needle machine
nylonRigging replied to Pipdoc's topic in Leather Sewing Machines
New to industrial sew machines, and buying that 1st machine that is double needle ? Sounds like you want double the frustration on your learning curve ....LOL The double needle maybe a good buy, and you can use it for certain stitching . But it would be better for you to pair the Double-needle as secondary station, with a good Single-needle machine as your primary, as the single needle will be the one you sit behind the most hours for a daily workhorse. . -
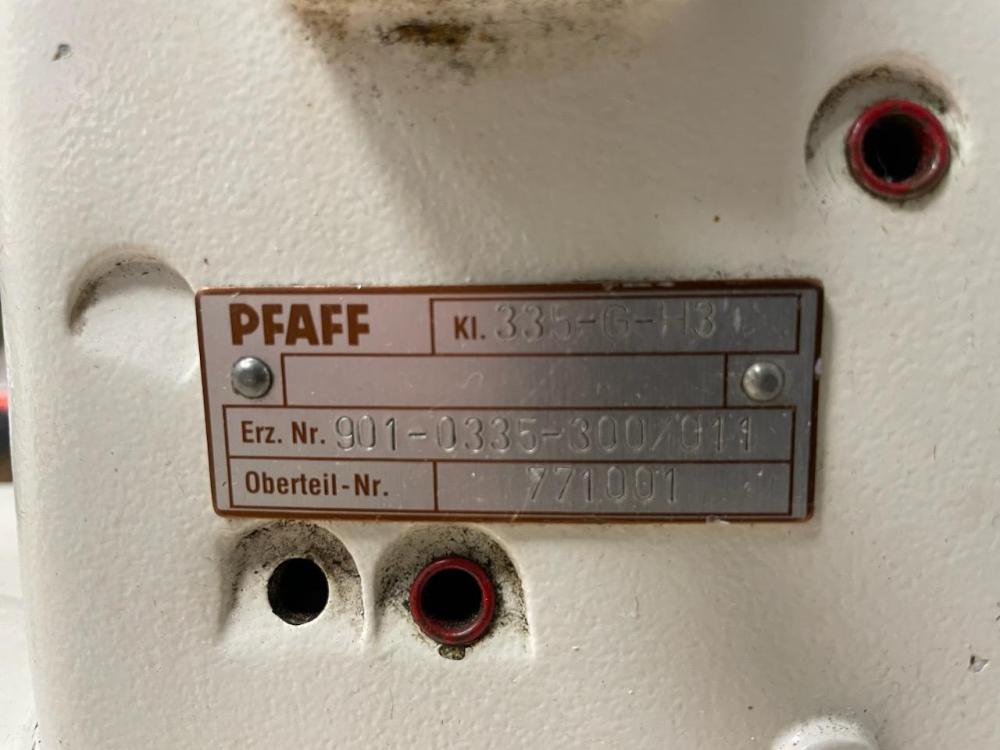
I pretty sure that the ( H3 ) is factory designation on the dedicated binding feed model of 335 . I would not mind finding a good deal on a older clean little 335 H3 head for tape binding . I for most part use needle-feed flatbeds for binding, but I have one cylinder arm unison feed right now set-up for binding also . So seller only selling you 335 Head only ? no table or drive ? . If you buying the 335 head from seller just take your time and string it up and turn it over by hand on some material to make sure it feeding and lays down nice stitching before buying. .
-
I just now noticed it say's H3 on the provided Pic. from OP . I think that the clue to dedicated binding model ? .. is that -H3 ?.. or is it a -113 on the plate #'s ??? - -
-
I not into pfaff's much . I thing that a G model does not necessarily make it a 'factory set-up' dedicated binding set-up on the 335 . You need pay attention to the feed dog movement, and if the needle-plate set-up, and feed dog, binding swing plate witnessed to move together . The dedicated binding pfaff 335 has unison feed, but the feed dogs only move horizontal back and forth motion, with No Up Down oscillation moment. ( I think ?? ) that if it is the normal unison feed 335. you can just change-out needle plate, dogs and feet to fit your needs . .
-
Lighter Fluid . it a great light, flash dry, solvent. Also when I gluing any materials, and I accidentally drag some residue on any finish surface with glue on fingers .The instant I see my screwup, I grab the roll of heavy clear package wrap tape I keep. then stick the tape onto/over top of the sticky glue speck to pull it off the finish. .
-
Industrial Machine Sews Delicate Fabric?
nylonRigging replied to hannahandcrafts's topic in Leather Sewing Machines
Sewing ultra fine thin, soft supple leather and using a 1541 . That was how I pretty much picked-up a good deal once on a 'very lightly' used 1541 . Was a local to me that did fine garment leather design. He bought it to add to his machines . He found that the 1541 it was just to little much machine for his taste in thin and soft materials he used . So I picked it off him, and saved and couple hundred plus+ shipping cost. . -
For the most part I always buy/use bonded nylons . Buying separate L and R twist threads always dwarfed by bigger problems. My main attention to thread has always been turned to the threads, size, color, quality, and have thread that has consistent snag-free roll-off to fight tension problems when stitching . Definitely there is a lot depth in just thread knowledge that I probably will never totally grab because I get so involved with just machine mechanics, and the constant struggle sewing/turning-out a nice Item that can be proud of. I have always kept running 2 or 3 double-needle machines, and mostly all confined to same drive mechanics, and never really worried about buying separate L-R twist thread cones for them . The stitching work always turns out great, if you just put an eye-on that Left side every once in while when working . I just accepted the small problem of L-side needle thread as just one of life's universal indignities that you just live with when sewing double-needle ... LOL .
-
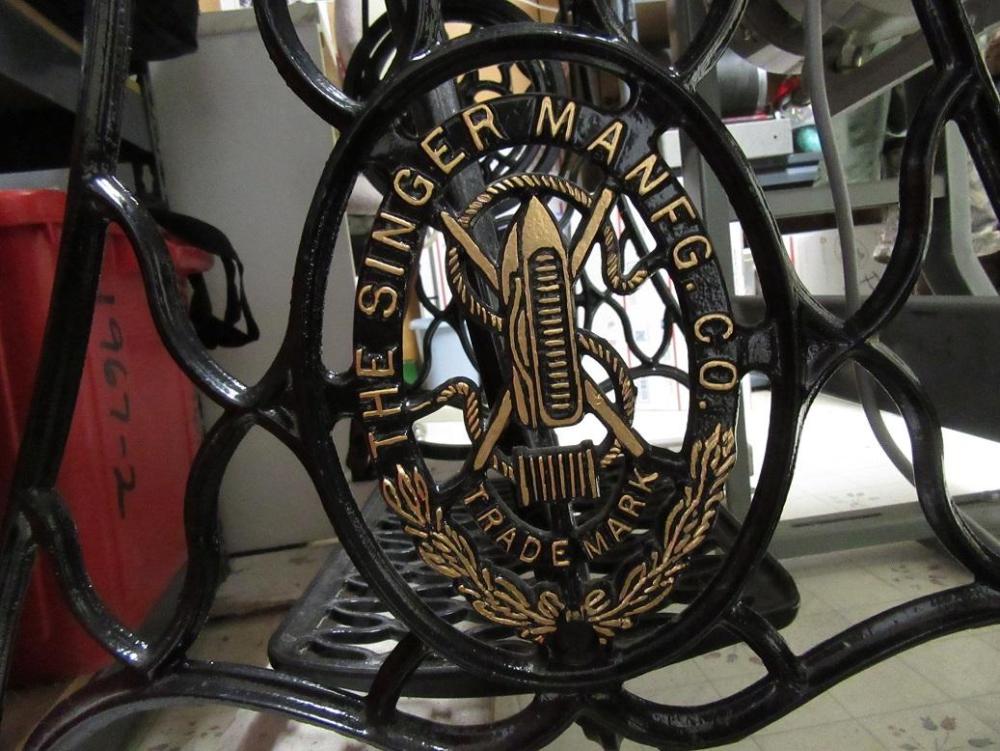
That what I did when I restored my 29-4 . for treadle base I just bead blasted the base and gloss black powder coated it . Then just went down to the Ace Hardware, and bought a gold-leaf paint pen to do the front-facing SINGER header, and both L and R sides of the singer emblems . Those paint pens make it way easy to make the job look good . - -
-
Exactly what ( Gump ) said . L and Right twist cones. Your suppose to do that, but ( IMHO ) most individual 'small shop' people don't . If you Don't.. you really need keep your eye on your L-side needle thread . make a habit, It easy to catch with your eye when that needle side top thread starts to look shabby . So.. ( for example ) .. I do a lot of seam binding #69 nylon, What I do is into a routine 'make habit' after every, or every other item I finish. I just 'stop and look' at L-side needles thread, when the needle is stopped in the down plunge, and you got that little bit of thread slack before the needle up-stroke. If I see it getting/looking shabby . I just release upper thread tension. Then I just peal off good yard or two of upper thread on that needle-side to normalize/balance the double-stitching, and keep on going . And It No biggie about tossing a couple yards of thread ever so often . Because that's why they sell Thread by the Pound....LOL .
-
Cobra Class 4 & kydex plastic?
nylonRigging replied to DieselTech's topic in Leather Sewing Machines
I do some internal stiffing plates in panels with some of sew designs i sell using thicker than what is used in Holster construction. Holster kydex/ABS is pretty thin stuff . You going to sew threw it like butter even with using a lot smaller sew machines than the bigger class4 . The ABS plastics are more rigid and harder material as you go thicker. You will still punch threw no problem . Your Polyethylene plastic sheets are easy 'smoother' on the needle and nicer to so threw. I think the Polyethylene less abrasive on the thread than the harder ABS, and easy to tension look good. All depends on what you making/sewing and type, thickness..etc. but Always keep in mind that the weakest point for bend fatigue crack/breakage, will always be the sew line threw in the plastic, the line of 'holes you punch' . . edit add: .. I seen old singer class7 sew threw silver dollars... LOL . -
Advice on juki 1541 vs 1541S
nylonRigging replied to idyllwildpatrick's topic in Leather Sewing Machines
what kgg said . Big Yes, on 1541S w/safety clutch. Cheap insurance if using heavier thread and catch and you get jammed. Threads heavier than the lighter #69/t70 are not so forgiving. 1541 is one of the best daily workhorse machines out there . - Mine seems to have no problem with using the lighter bonded 69 thread . - -
LOL... The machine in the Pic. looks like someone Pee'd on a old Penny . .
-
Pretty sure the 146's are Double Needle, Needle-Feed machines . Needle Feed lays down some nice stitching .The 146 should do good on smooth upholstery leather or fabric. Do you own other sewing machines ? . Auto upholstery gets into piping and a seams where a owning a single needle is needed . I can see where a double-needle would do good for some french seams. Auto Upholstery not my discipline, & I not into the Pfaff double needles, I into the double needle needle-feed Singers 112 /212, and Juki LH3528's. They all share same needle gauge sets, and are always pretty easy find and easy on the wallet. So.. If you buy it. When you getting into Double Needle machines, always take in consideration that Gauge Sets always play into the equation. So look into the the Needle span you needing for seams, plus feed-dog, needle plate. Press-foot . .
-
New member, new to me machine Sunstar KM-340BL
nylonRigging replied to noidea's topic in Leather Sewing Machines
Pic. of your machine to get look at your feet . I not positive ? , looks/resembles the Consew Feet like a ( 205 RB ) but you might start your search for compatible Foot-Sets on Ebay . Low Price-$ sets to see if the Feet shanks are good to go for a match.to your feed . .


