McCarthy
-
Posts
25 -
Joined
-
Last visited
Content Type
Profiles
Forums
Events
Blogs
Gallery
Everything posted by McCarthy
-
Yes. Get good blades and strop them extra sharp. Grooved stitching is a personal choice. Without the groove your stitching will look more slanted and "hand stitched." Yes, but you can live without it for this project. Good choice. Yes. I recommend John James 002 Choose carefully. Have a gameplan to sharpen it. Not for this project. Yes, or you can make one easily enough. Yes, if you are using hardware you need the setters for it. I can't live without mine. No, but you will want an anvil type surface for setting hardware. Nothing serious, a flat piece of steel will do. I wouldn't use a tack hammer, any light hammer with a reasonably wide face will do as long as you sand it flat, polish it smooth, and don't hit anything hard with it. I prefer vises myself. Especially for something like a sheath where you want a good clamp. IMO you do need something to hold the work for best results. You don't need a granite slab for this project but in the future if you need one you will know. Good plan. Classic. Yes you will want beeswax. It has many uses. You will save a lot of headache by burnishing with Tokonole. Fiebings pro dye in black or dark brown to dye the edges. Ritza Tiger thread specifically.
-
Excellent thread. What is the significance of the two round awls, and the block of wood next to the mallet?
-
Cocobolo is pretty much universally respected for burnishing. The grooves darken but don't transfer dye after you wipe it. I have tried oak and didn't like it. Also tried brass and it didn't do much. I have seen someone on youtube using aluminum but I forget who. Sam Andrews maybe.
-
Watch Strap Makers
McCarthy replied to cottontop's topic in Purses, Wallets, Belts and Miscellaneous Pocket Items
Going off the top of my head, some of the tools you might want are a nice set of acrylic templates, x-acto knife, pricking irons (3.38 mm maximum), stitching pony, edge paint, 3M wet/dry sandpaper in various grits, a bookbinders paring knife, dividers, and hole punches. For glue, Aquilim 315 or Saregum. For thread, you can't go wrong with Fil au Chinoise. You will have to experiment with the thickness. John James 004 harness needles. Luxury upgrades would be a fileteuse and a multiple hole punch. There are plenty of YouTube vids that show the process, mostly non-English but that doesn't matter. A picture is worth a thousand words, as they say. -
#2 will give you a nice rounded effect on two layers of leather, or a slightly squared edge if there is a welt. That is what I would use. You may want to use a #1 on areas where there is a single layer though.
-
What Is Best Surface Material For Hole Punching On Bench.
McCarthy replied to shadowryder's topic in How Do I Do That?
I have a nice big crystal cutting mat that I use for most things but for punching holes (or anything that would wear out the mat) I use a block of lead. If I didn't have the lead, I would take four short lengths of 4x4 and screw them together into a nice solid cube and use that. -
I don't see how they can stop you from selling leather fashion accessories that attach to a belt. Not your fault if a customer decides to cram his evil, patriarchal, possibly racist firearm in there.
-
Hey! That's a good idea. I have a roll of clear plastic stuff that I got from Weaver (I think) but it's too thin and curvy. The cutting boards are thick enough to get a good scribe.
-
You should look into carrying Meisi thread. Particularly their Superfine linen and Xiange polyester. I love Xiange but the nearest source is in Canada and they have a very limited selection. Their website is http://www.meisi108.com/
-
I haven't tried it, and I am opposed to it on principle because it's marketed to gullible, emotional people by lying about saving cows. Nobody "needs" leather, it's a luxury and it's okay for it to be an expensive finite resource.
-
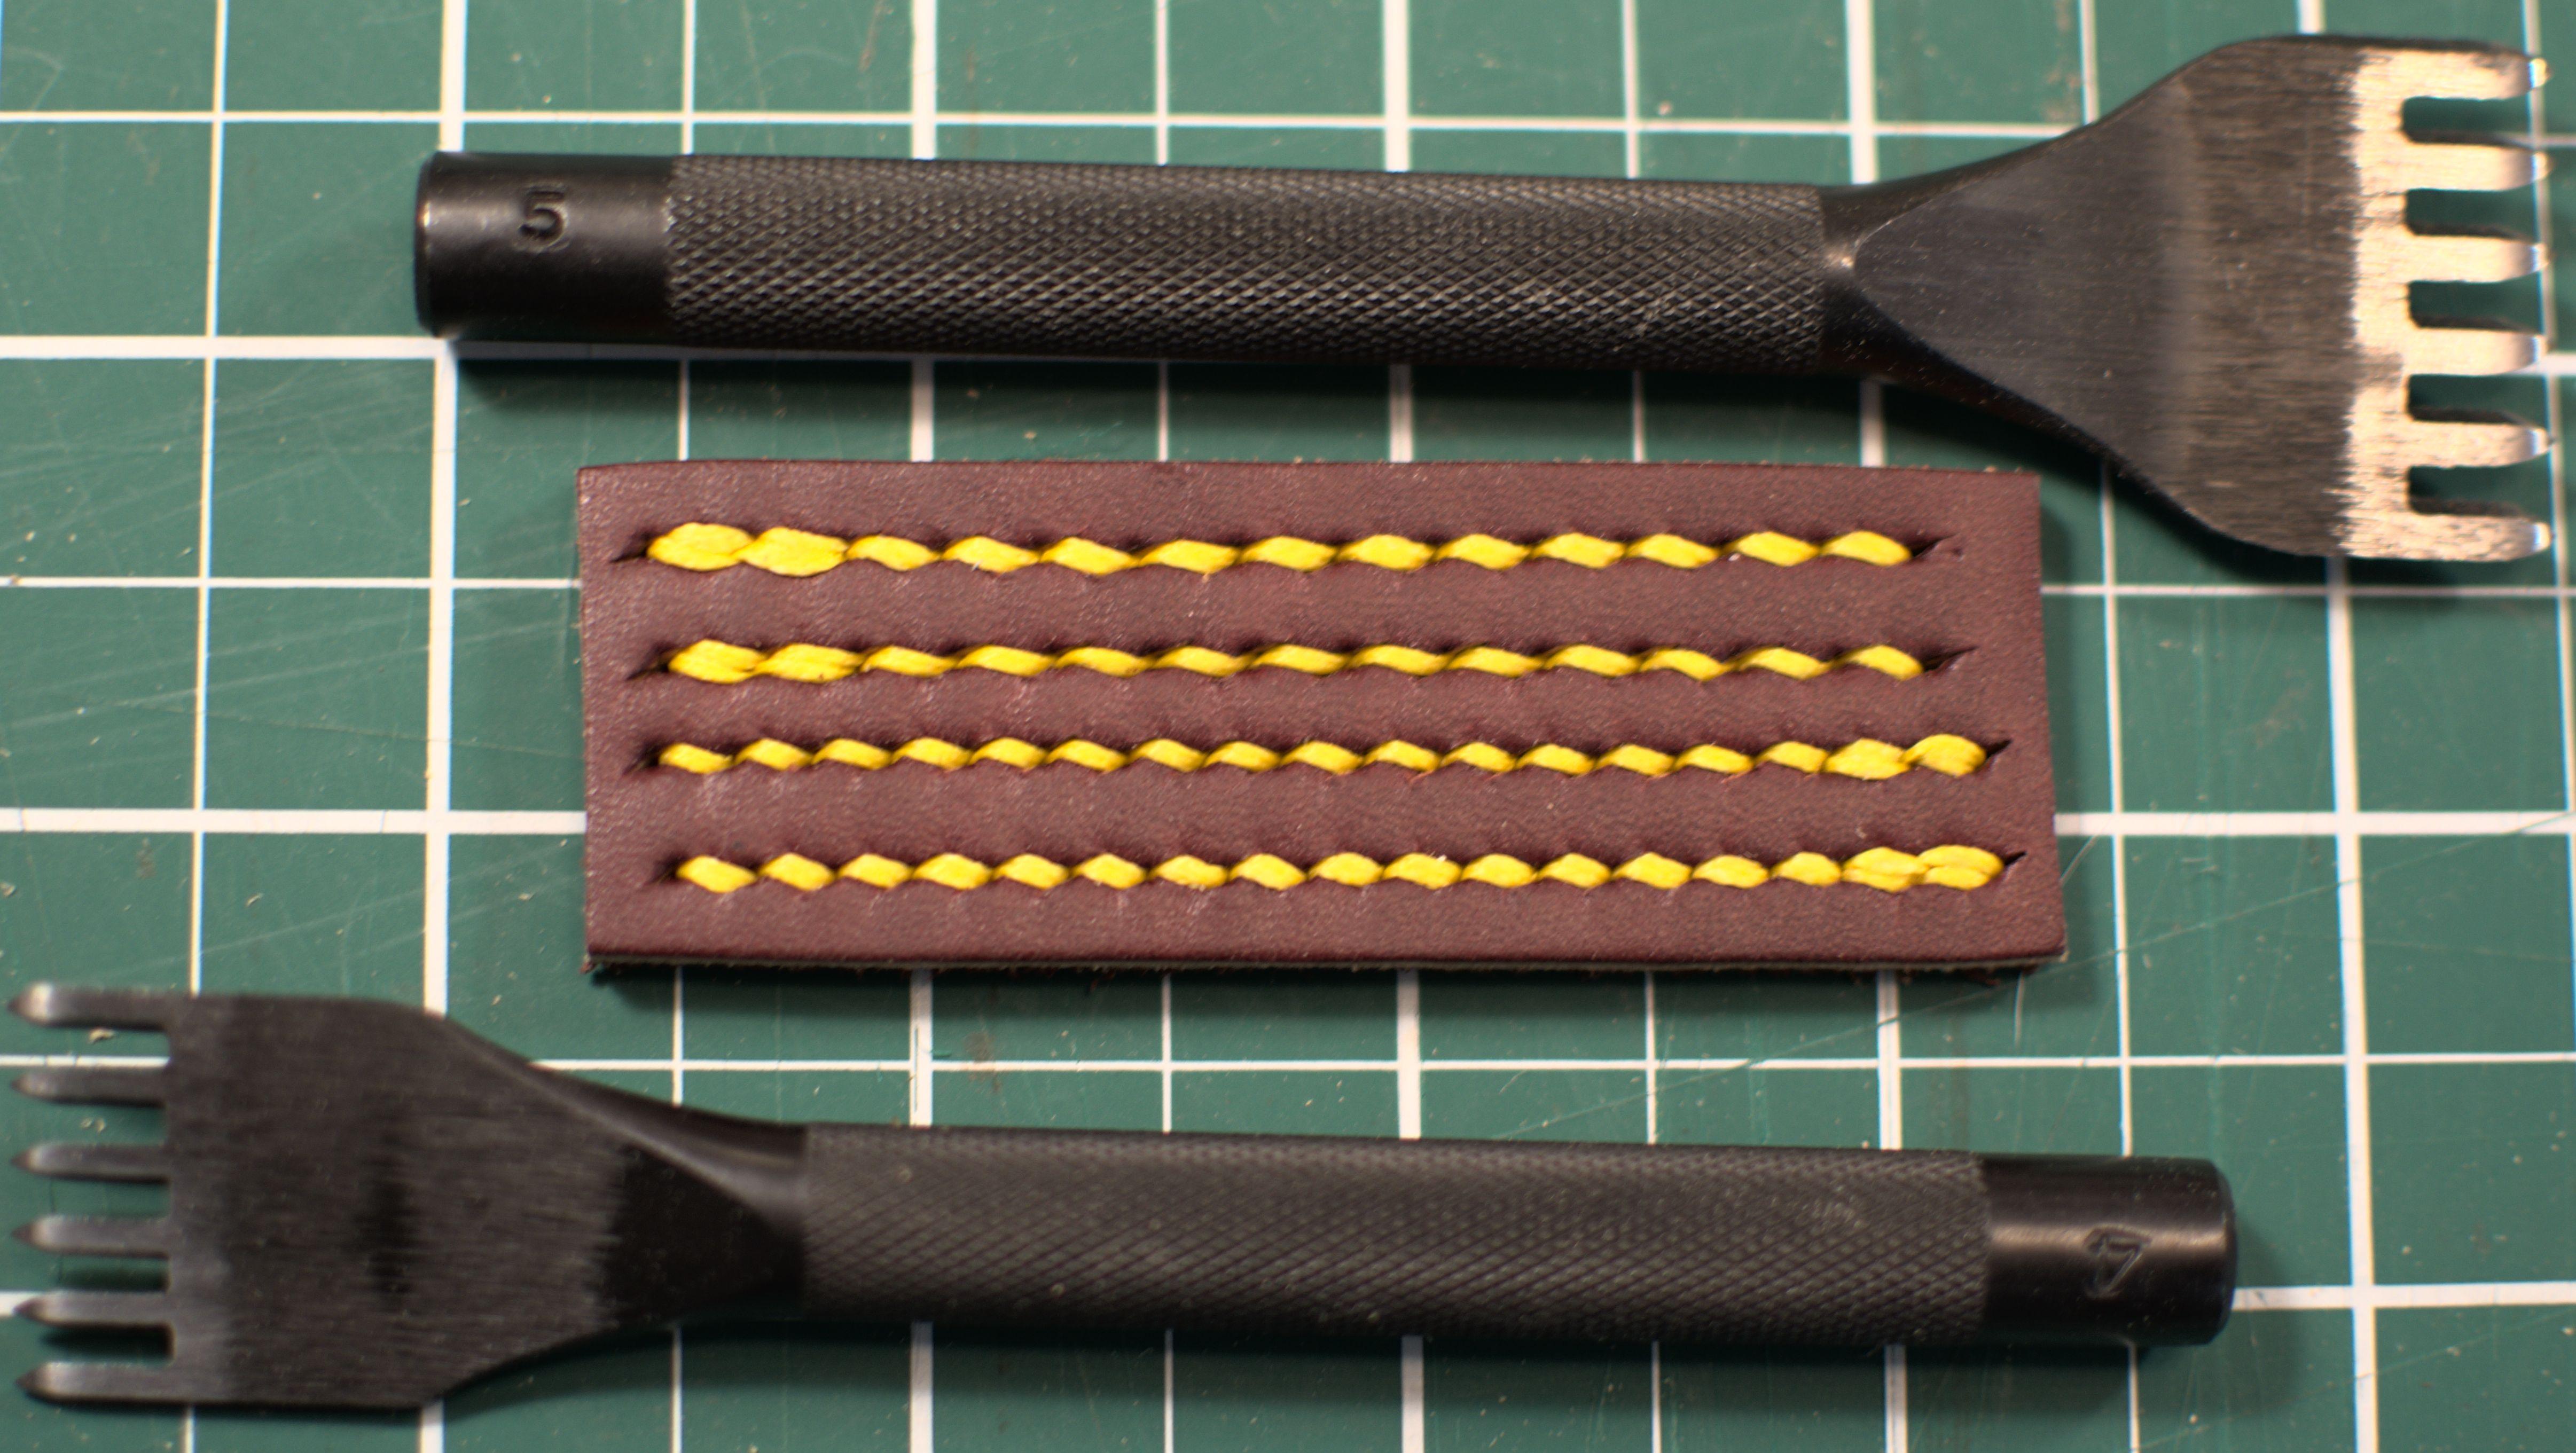
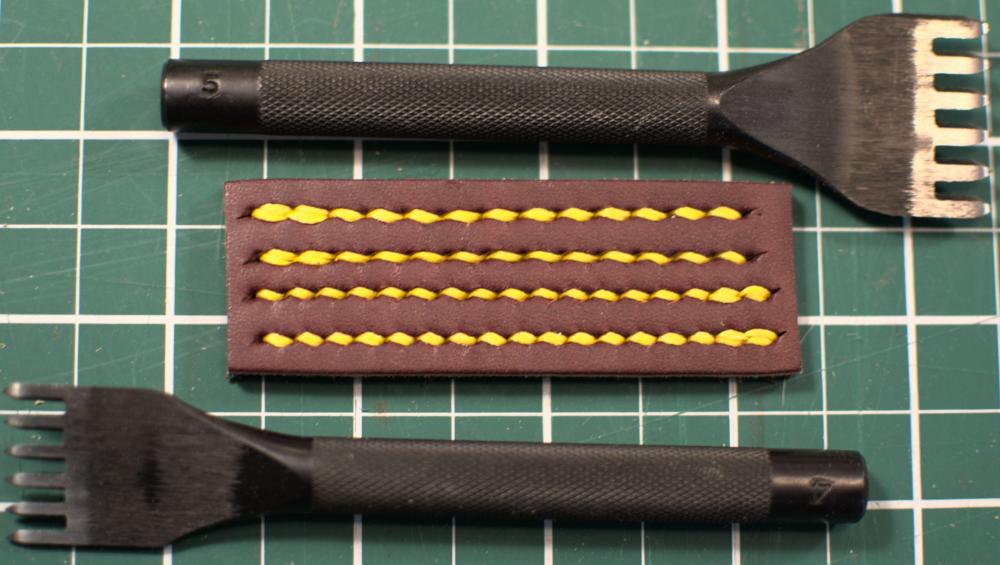
Here are 4mm and 5mm chisels with 1.0mm tiger thread on the outer lines and 0.8mm on the inner lines. This was on W&C 8/10 bridle leather, and the teeth will only go through one thickness comfortably. So on two stitched layers, you will either be completing the hole with an awl, or punching each layer individually. Some of the more expensive makers offer reverse sets, so you can punch both sides. I started with these chisels and quickly moved on to pricking irons, so you never know where you will end up.
-
How many stitches per inch? I can't tell without seeing the whole holster but I would guess it's 6 SPI. These chisels in 4mm are what I would recommend for that kind of work. Maybe even 5mm, if you are going to be doing thick welts.
-
If you can show us an example of the sort of stitching you want to do, we can give advice on how to achieve it.
-
0.8 mm Ritza tiger thread and John James 002 needles would be better suited for those irons. 1/0 needles are too big, they would go with 4mm irons and Ritza 1.0 or 1.2.
-
What stitching irons are you using?
-
Thanks, that's exactly what I needed to know.
-
I'm sure it can be done, but I'd like to know if anybody actually does it or has tried it and is it worth doing. I've seen plenty of people cutting and engraving leather but I haven't seen any instances of someone that uses a laser to mark the cutting lines instead of using a template. It seems like it would be more accurate than cutting out a piece of paper and tracing it onto the leather with a scratch awl, but on the other hand it might be more time consuming and frankly the soot is my biggest concern.
-
No, there isn't, and that wasn't my question.
-
I was looking into getting one of those cheap 2.5 watt diode lasers to cut out watch straps and it seems like it would be more hassle than it's worth to deal with the soot. But what if you just etch a faint line? You could have an oversize cut line, a final trim line, stitching lines, hardware locations, positioning marks. I've never used a laser so I don't know if this is a dumb idea or a useful shortcut.
-
If you take one of these center finders and drill out the hole in the bottom it holds the small C.S. Osborne punches perfectly. I mark the leather with a divider, sight down the hole and center my mark on the x axis of the sight picture. Then I stick the punch down to make a mark. I only make marks with the tool, I take the punch out to drive it through. This is the only way I can make neat holes, because I can't manually center the punch on a dot to save my life.

-
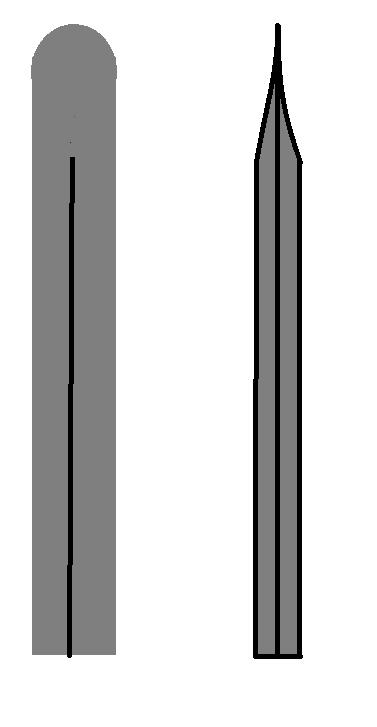
The parallel portion of the sides don't need to be sharp at all. You may want them more slender to reduce drag but they aren't cutting anything, only expanding the hole cut by the tip of the awl blade.
-
I've spent hours trying to sharpen awls the Armitage way and the method I've settled on is to just use a Dremel with a felt buffing wheel with green polishing compound. I like the tip to be completely rounded and very thin. If you have a point it will pierce the leather in the first place it touches, but with a rounded tip it can nestle down into the prick mark and be perfectly centered. It will still go through the leather like butter. The diamond shoulders definitely need to be removed at the tip, and smoothed out as much as possible on the rest of the blade. My ideal awl is not even a diamond shape but flat with parallel edges.
-
I have a set of Barry King grooved edgers and one Ron's rounded edger and I prefer the Ron's. I like the bigger handle, but mostly I like how easy it is to sharpen perfectly. The initial edge that it leaves does actually look better but there is still a line that you need to sand.
-
Felt buffing wheel and a loooooong strop paddle. Both with green compound. Also a 1" wide strop specifically for box cutters. I used to do the japanese water stones but now I'm just too lazy. The buffer gets the job done in seconds.
-
Does anybody have an opinion about either of these? They look like the same product with different paint jobs, but the Cowboy is cheaper.