TomE
-
Posts
1,292 -
Joined
-
Last visited
Content Type
Profiles
Forums
Events
Blogs
Gallery
Store
Everything posted by TomE
-

Different leathers, different ounces, so confusing!
TomE replied to Pqstraub's topic in Leatherwork Conversation
Harness and bridle leathers are vegetable tanned cow hide that is stuffed with fats/waxes for water resistance. Plain vegetable tanned leather will accept tooling, stamping, and wet forming better than bridle or harness. Harness leather is generally stiffer than bridle bc of additional waxes added during the currying process. Bridle leather typically has a more polished/shiny finish than harness. I make English reins for jumpers and dressage out of 9/10 oz bridle leather. I make split reins for western riding from 10/11 oz harness leather. The split reins that I am familiar with are not sewn. The bit end either folds back on itself, or is capped with a leather chape and is tied with a latigo saddle string. I think the best bridle and harness leathers in North America come from the Herman Oak Leather Co. and Wickett and Craig Leather. The Hermann Oak bridle and harness leathers tend to be stiffer, which I equate with stretch resistant. Wickett and Craig is a bit softer temper and they offer bridle and harness leathers in a wide variety of colors. You can request samples from either tannery. Both are top quality tanneries. Wicket and Craig has no minimum order whereas Hermann Oak generally requires a minimum of a roll = 5 sides. Single sides of either leather can be purchased from retail distributors. You can request a side for reins and they will select a larger hide that should cover 7+ feet along the topline. Springfield Leather sells Hermann Oak and does a lot of custom clicking/cutting. They could probably sell you the straps you need for reins. -
Weaver Leather Supply has 3" SS flat cinch buckles, and 3" polypropylene webbing.
-
Also linen has a unique look compared to synthetics that are twisted or braided. I like how it feels when hand sewing but rarely use it for horse tack.
-
For bridle leather, Fiebings Aussie conditioner tends to maintain the original color better than Blackrock Leather N' Rich, Bickmore Bick 4, and Effax Lederbalsam. I apply a light coat of neatsfoot oil before conditioning. Once the oil soaks in the original color returns. I don't seal projects, except the edges, so I don't have expeience with those finishes. Another idea is to use neutral shoe polish for shine and some water resistance. I think it will stay on top of the grain. Lincoln stain wax (shoe polish) is a quality product.
-
Dachshund bag
TomE replied to Stetson912's topic in Purses, Wallets, Belts and Miscellaneous Pocket Items
That bag is a winner. Lots of techniques that I don't know how to do. Looks like fun. -
Belt Buckles
TomE replied to Stewart's topic in Purses, Wallets, Belts and Miscellaneous Pocket Items
Love your creativity. Beautiful, original work as always. My biggest design decision is - do I use a black strap or a brown strap? -
Welcome, fellow Midwesterner. Check out the pinned posts in the Computer Help forum for tips on posting pictures. I use Photoshop for this purpose but there are free options for resizing.
-
The Saddle Restoration Group on Facebook has a lot of traffic by folks who buy and sell saddles. Have you posted there?
-
I am sorry to hear that. He will be missed on this forum.
-
Might consider a swivel with 2 rings or squares. More to choose from at Weaver, Buckle Guy, Batz Corp, Bieler's Manufacturing. Could attach one ring to the project with a leather chape or loop. Stohlman shows examples for attaching buckles and rings in volume 1 of his case making books.
-
I use a sponge or a wool dauber to apply BT639 then slick the surface with glass. Moss-back refers to the glue that tannerys used in the past for finishing the back of bridle leather - made from peat moss. I bought a slicker with smooth rounded edges from Springfield Leather Co. BT639 is available in quarts if you contact Campbell-Randall. You might try Tokonole first if it is more readily available.
-
I've used this water soluble flexible adhesive for sealing the flesh side of leather https://campbell-randall.com/product/sup-bt639-g-leather-finish-for-sealing-flesh-side-moss-back-suede-1-gal. Tokonole also works. Can also apply wax with a heat gun. A glass slicker is useful for burnishing the flesh side.
-
I haven't made many belts and not surprisingly they turned out looking like horse tack. If you plan to seal edges with beeswax you might look into using heat to help the wax penetrate the leather. I use Duane Watts' lollipop burnisher that I heat with an alcohol lamp. The video from Cary Schwarz shows an edge iron that I think he made. Similar to a Dixon edge iron.
-
Definitely should tuck in the pant legs to show off those boots! Nice work.
-
A slightly damp edge will help the fibers compress into a smooth surface and a bit of lubricant (saddle soap, conditioner, etc) helps prevent overheating with the power burnisher. Need to find the right balance of moisture and friction to get the results you want. You sure can use beeswax or gumtrag to finish, but I find it easier to get a smooth, hard, shiney edge with Tokonole. I am guessing it is essentially glue in some type of slippery vehicle, probably silicone based like cyclomethicone used in hair products. A wax treatment might be a better choice for sealing the edge for outdoor use but it is more work and doesn't shine like Tokonole. For horse tack there's an expectation that it will be maintained by cleaning, conditioning and occasional oiling so I am not aiming to seal the leather. There are a lot of variables to play around with. Let us know how it goes.
-
It is a small square of canvas that I use to apply saddle soap to the edge before power burnishing with the wooden Cobra burnisher. I've tried making a canvas sleeve to fit over the Cobra burnisher (either side) but the sleeves wear out quickly when burnishing 9-10 oz bridle leather. I guess I've experimented nonstop for several years with burnishing protocols. I've used gum tragacanth, water, saddle soap, Martin's Edge Solution, polyvinyl acetate (Elmer's white glue), beeswax +/- paraffin, a homemade paste of carnauba wax-beeswax-neatsfoot oil, and Tokonole. Slicking with canvas, wooden/plastic/bone burnishers, and the wooden power burnisher +/- a canvas sleeve. I've also done a topcoat of beeswax applied with a heated edge iron. All that stuff works, more or less. The biggest thing for success with a power burnisher is learning how much water and lubricant are needed to produce a slick edge without overheating. Just need to practice for your type of leather and burnishing machine. Here's my current protocol for bridle leather. I try to avoid sanding the edges unless they are really rough because edge finishing is already very time consuming, and sanding bridle leather can do more harm than good - the coarse fibers tend to pull up and the edge gets rougher. I apply Pro Dye to the edge with a block of heavy felt or Magic Eraser held in a clothespin (or use one of the refillable markers with the felt tip). Once the dye has soaked in but the edge is still damp I apply some saddle soap using a damp piece of canvas then immediately power burnish as a first pass. I then dab on Tokonole (or Elmer's glue diluted 4-5x with water), wait for it to become tacky, then power burnish. I finish by polishing the edge with a piece of dry canvas. If I'm going to further seal the edge I dab on softened beeswax and work it into the leather with a heated edge iron. I then rub the edge with a piece of canvas to remove excess wax. I guess I will continue to experiment and would enjoy hearing others' experiences. The HO bridle leather is difficult to slick, compared to regular veg tan, but I like its firm temper for horse tack. Wickett and Craig bridle has a softer temper and is easier to slick. HO traditional harness is waxy and easy to burnish. That's my 2 cents.
-
Saddle soap is a good lubricant. I switched to Fiebings paste saddle soap applied to the edge with a damp piece of canvas. This works better for me than swiping a wet sponge on a bar of saddle soap, which delivers more water and less glycerin lubricant to the edge. I am using a Cobra burnisher set at about 2000 (?) rpm.
-
You might look at commercially available lace bevelers for inspiration. https://y-knotlace.com/bevelers:25542
-
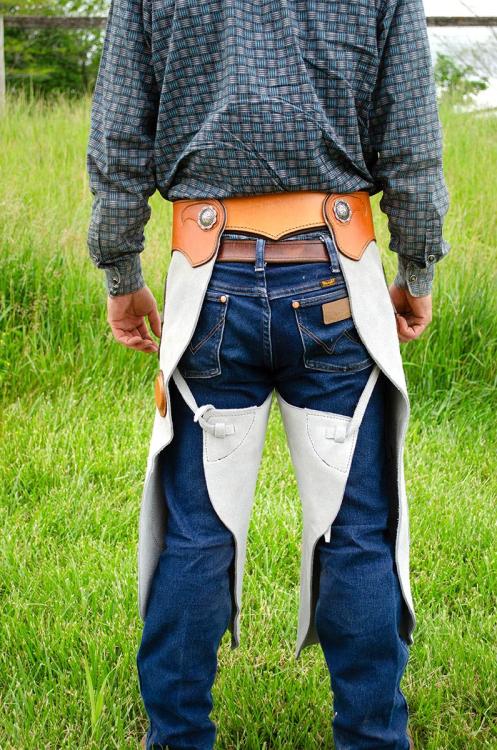
Ha! The rural version of plumber's butt.
-
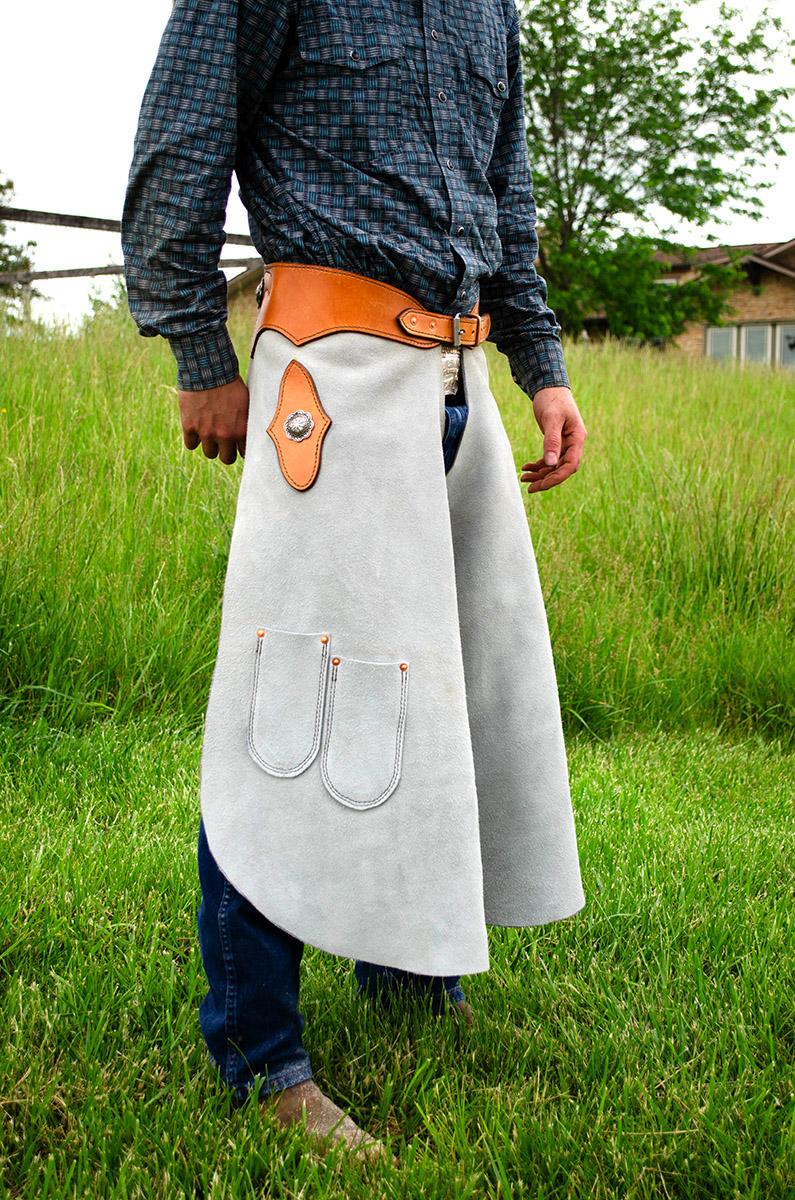
Thanks, Jonas. Tried to incorporate methods I know. Thank you. Yes, I trim 15-20 of our broodmares and youngsters, and pay a farrier to shoe a couple that are in work and need shoes. I feel comfortable working on horses I know, and only have myself to blame if they act up. The apron is heavy but my farrier says he likes the 7oz split better than his worn out 6 oz apron.
-
Brain fart. I don’t normally add the quotes. Google for the save.
-
He's wearing the apron higher than expected, but he has room to grow.

-
He is a world class farrier blacksmith. Makes it look easy.
-
@Northmount shared the tip to use Google to search this site instead of the built in search engine. In the Google search bar type ( site:"leatherworker.net" YOUR KEY WORDS HERE ) without the parentheses. I find this much better for finding old threads of interest.
-
Good looking collar and nice buckle! This reminds me of a Craig Trnka video showing how to make a bar shoe. He has a bigger surface to work on than you.