TomE
-
Posts
1,294 -
Joined
-
Last visited
Content Type
Profiles
Forums
Events
Blogs
Gallery
Store
Everything posted by TomE
-

Replacing girth straps on jumping saddle
TomE replied to TomE's topic in General Saddlery Discussion
Thanks once again, @jcuk. I greatly appreciate the education. Is the chrome tanned strap stronger than veg tanned? We have some nicer (that is, more expensive) saddles that appear to have veg tanned girth straps. -
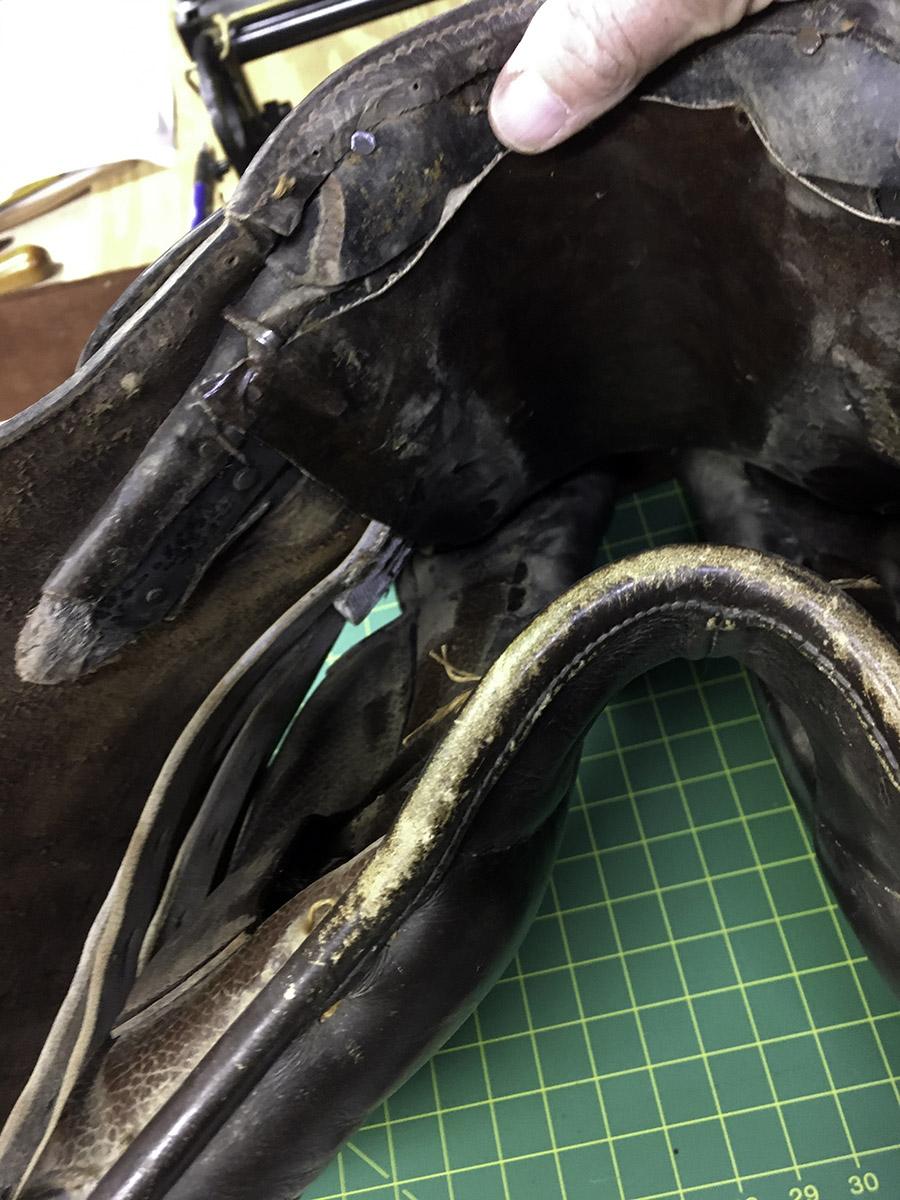
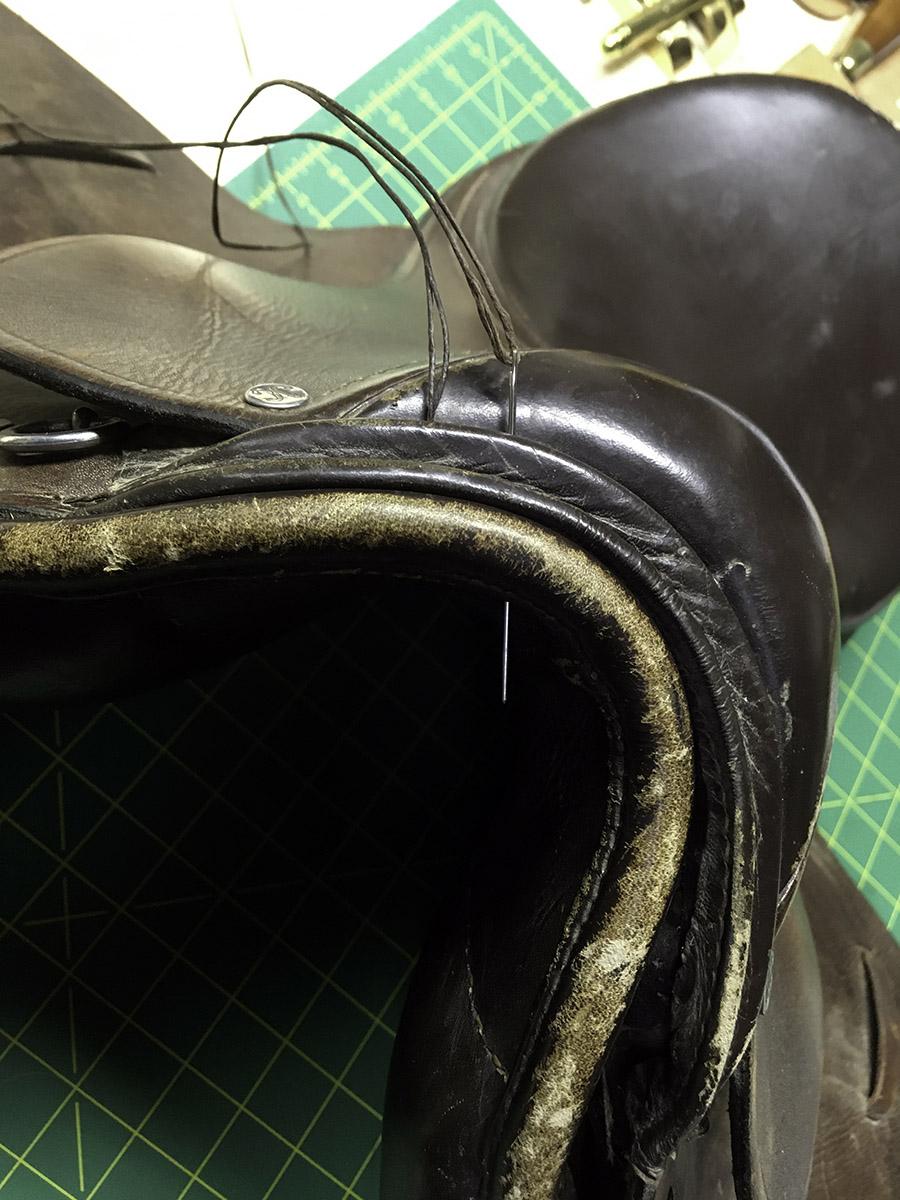
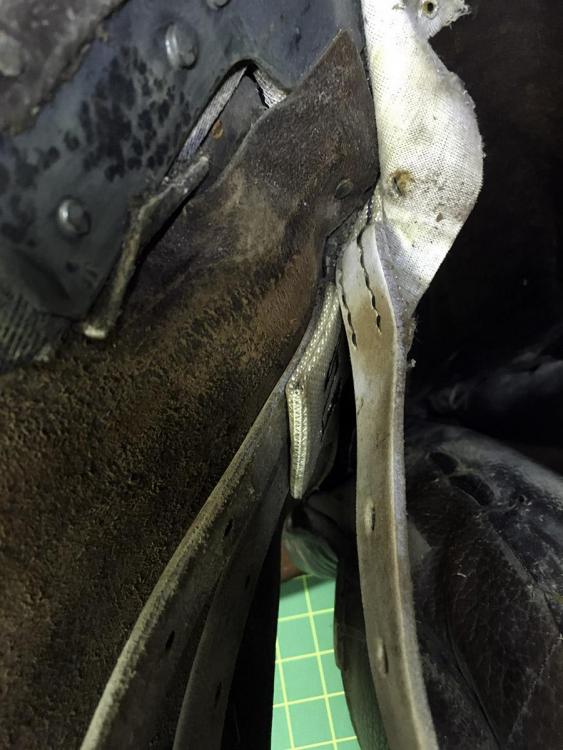
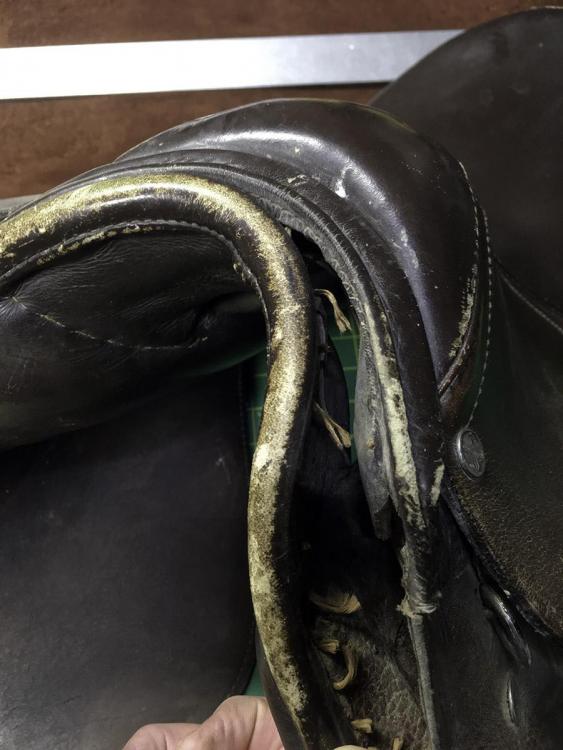
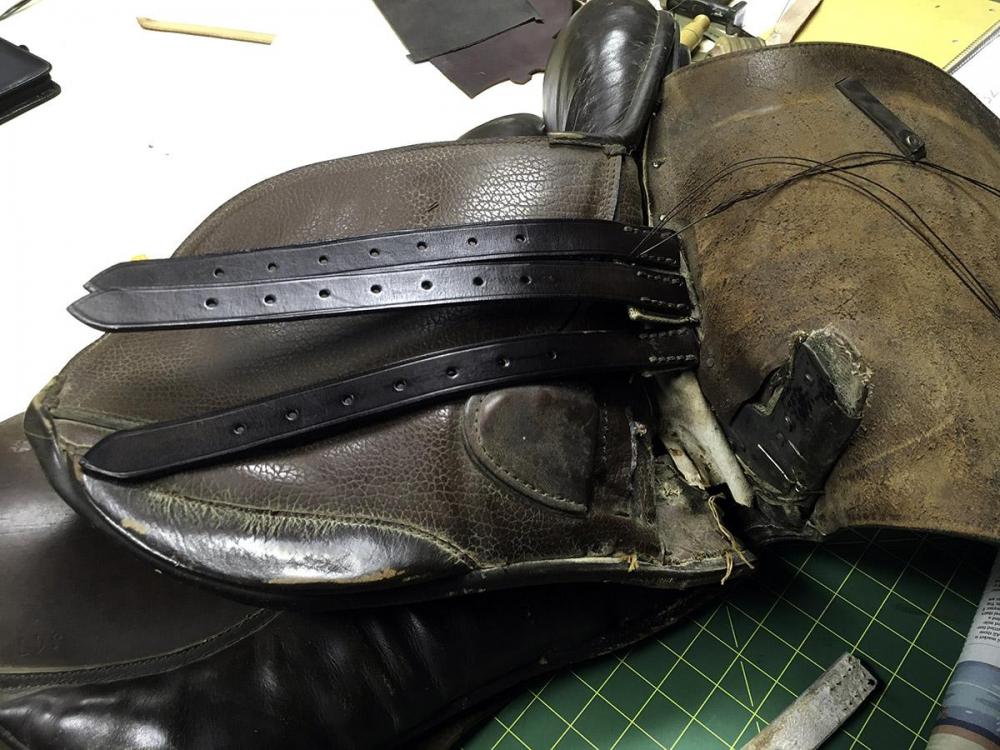
I've seen white girth straps like this on several old saddles. They don't look like veg tanned leather - more like chrome tanned. Does anybody know what they're made of? Since the straps were stretched and looking worn, I replaced them. I dropped the front of the panel to gain access to the girth straps. The points of the tree were removed from pockets in the panel. I cut new straps from a HO bend, and sewed them on the webs using 1mm polyester thread, doubled up, with a single needle backstitch. The front of the panel was reattached with a pop stitch through the existing holes.


-
Headstall round sutured with silver ferrules
TomE replied to Turtlepaint's topic in How Do I Do That?
I haven't worked with ferrules but here's a link showing crimped ferrules on round cheek pieces for 5/8 inch hardware https://www.ranch2arena.com/products/041320-round-leather-with-ferrules-installed. For width of the round, Steinke ("Bridlework A Step-by-step Guide") starts with a 3/4 inch strap to make a round to fit 1/2 buckles. The strap is thinned where the round will be formed. He sews the cover around a piece of flexible, rubber coated multistrand wire. I use 1-1/4 inch straps to make rounded halter throat latches for 1 inch or 3/4 inch snaps. I split the cover to 7 oz thickness and wrap it around a 9 oz leather filler. The rounds end up being 1/2 - 5/8 inch diameter after shaping in a rein rounder. After rounding I trim the width of the ends to fit the hardware. I based my rounds on the descriptions of rounded leather handles in volume 2 of Al Stohlman's Case Making books. -
I assume you follow the usual practices to minimize dye ruboff. Fiebings Pro Dye and Fenice Colorfast dye produce less ruboff than other dyes I've tried. Prior to sewing, buff the work with a soft cloth until there's no more dye rubbing off. I quit using Tan Kote as a finish after sewing because it works like a dye solvent and discolors even bonded nylon thread. Then there's the failsafe - use dark colored thread.
-
Halter from the old German book on saddlery.
TomE replied to Mulesaw's topic in Saddle and Tack Accessory Items
Not sure how I missed this post, but wanted to say it's a beautiful piece of work! Really like the look of the leather, and the stitching is spot on. Do you have a clamp onboard to hold your work as you sew? Hope that Bent approves. -
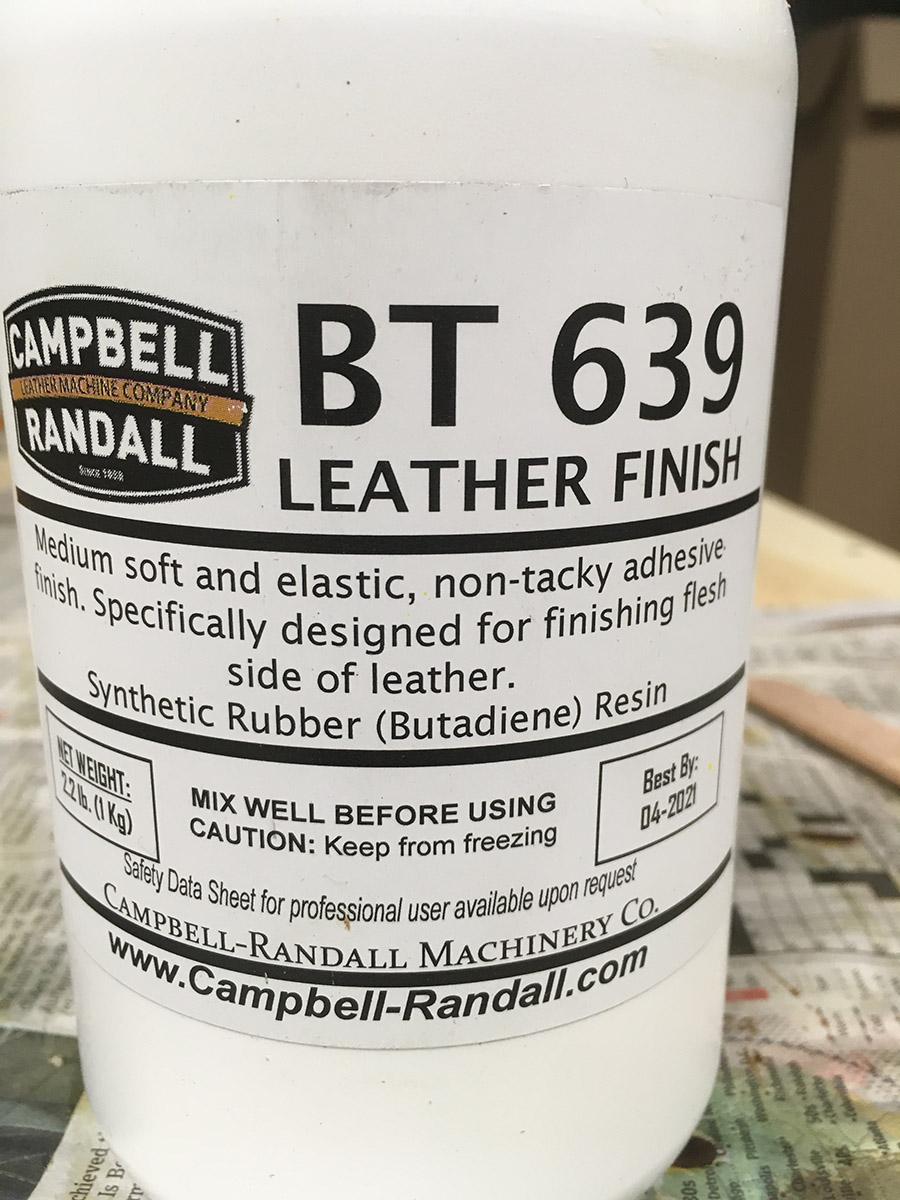
This flexible, water-based adhesive is designed to finish the flesh side of leather. I use it for bridle parts made of a single layer of 9-10 oz bridle leather, including bridle leather with a pasted or moss-back. I apply it diluted 50:50 with water and work it into the fibers with a glass slicker. After the first coat dries, I apply a second coat and smooth it over with a paper towel. The adhesive penetrates several millimeters into the leather. If you build several coats it will repel water and neatsfoot oil. I am evaluating how well it holds up with tack but so far I am pleased with the results.

-
@Mulesaw I recently discovered the book "Saddlery and Harness-Making" by Paul Hasluck. It is a reprint of 2 volumes originally published in 1904 and available in hardback and paperback editions from used book sellers. The book has considerable detail about tools, materials, and instructions for making saddles, various pieces of bridlework, and harness. There are many illustrations. The book doesn't fill all the gaps in my understanding of the subject, but I am learning a great deal about the why and how of saddlery. It's a fun read.
-
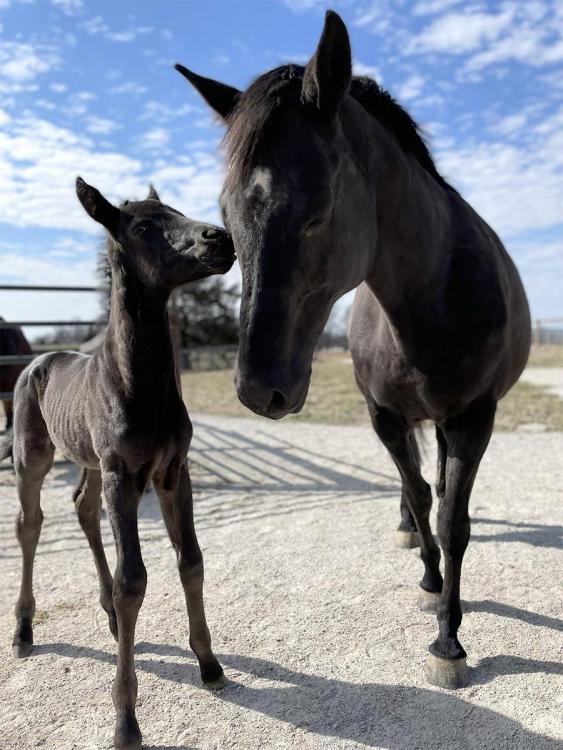
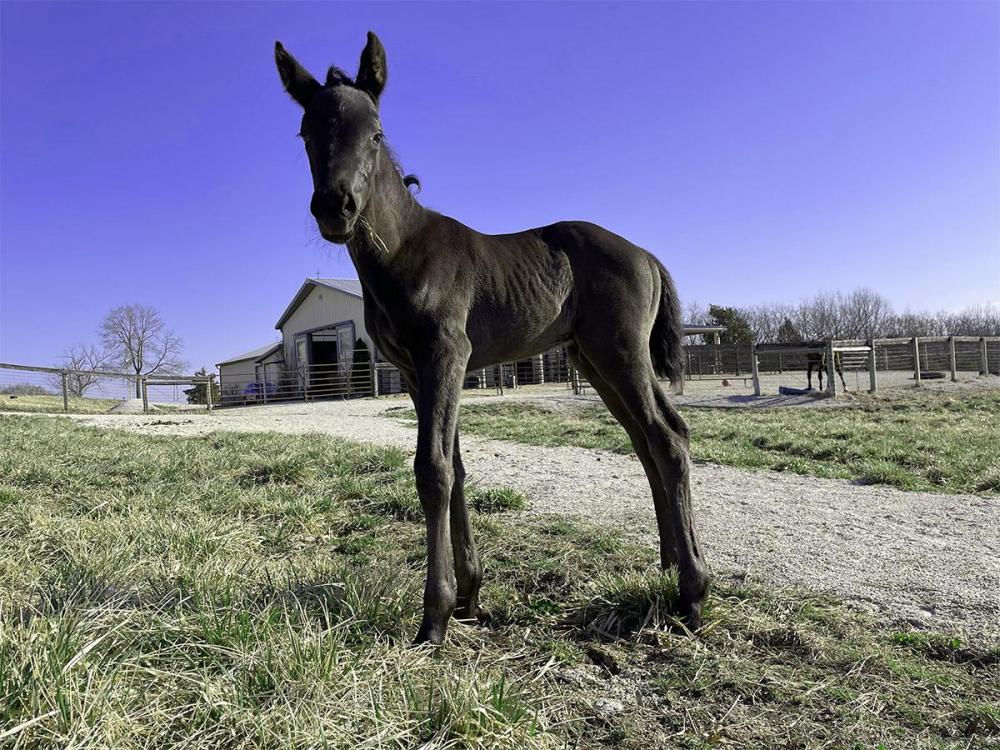
He is a warmblood bred for dressage. He's a bit of a spitfire at this stage of his life. The Caspian horses are less than 13 hands and bred as children's hunter ponies. The remainder of this year's foals will be warmbloods bred for jumping.
-
@Mulesaw here's the colt born this month.
-
Half round knife sheath
TomE replied to Rossr's topic in Gun Holsters, Rifle Slings and Knife Sheathes
That's a beauty! Wish it was coming my way. I really like the colors and detail on the sheath. -
@Mulesaw if you're on Facebook see our Maefield Farm page or my personal page (Tom Ellenberger). I can post here if you don't do FB.
-
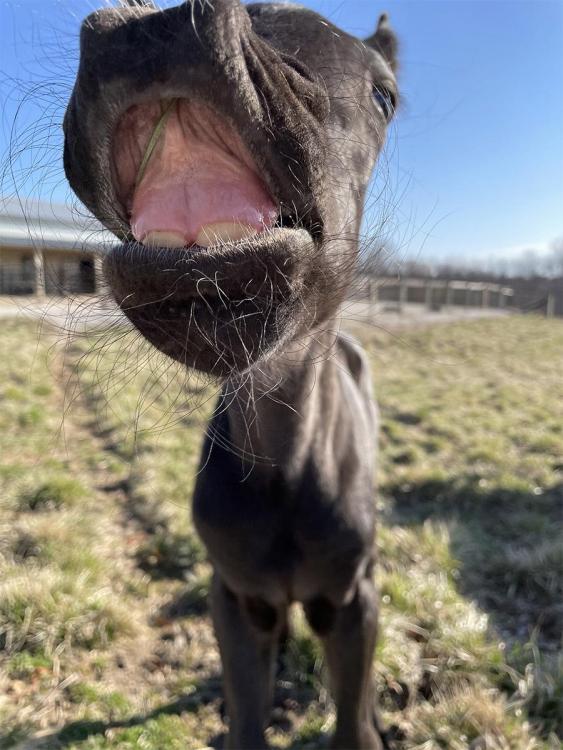
Nice! It is foaling season for us. One colt born 3 weeks ago and 3 more foals expected in May.
-
How fun is that? Perfect!
-
Wow! Congratulations on 2 passages. That must be incredible. My only journey today is walking from the house to the barn -3 times.
-
I like tracing from a printed page as you're doing. I don't cut out the pattern. Just sketch over the printed pattern on lightly cased leather then clean up the lines with a pen or pencil before cutting. I usually do a bit of shaping with a drum sander to fix my mistakes.
-
Campbell Randall sells Colorfast dye. Springfield Leather sells Fenice Diamond Water Stain (?) that looks like a similar product. They have a Youtube video about it.
-
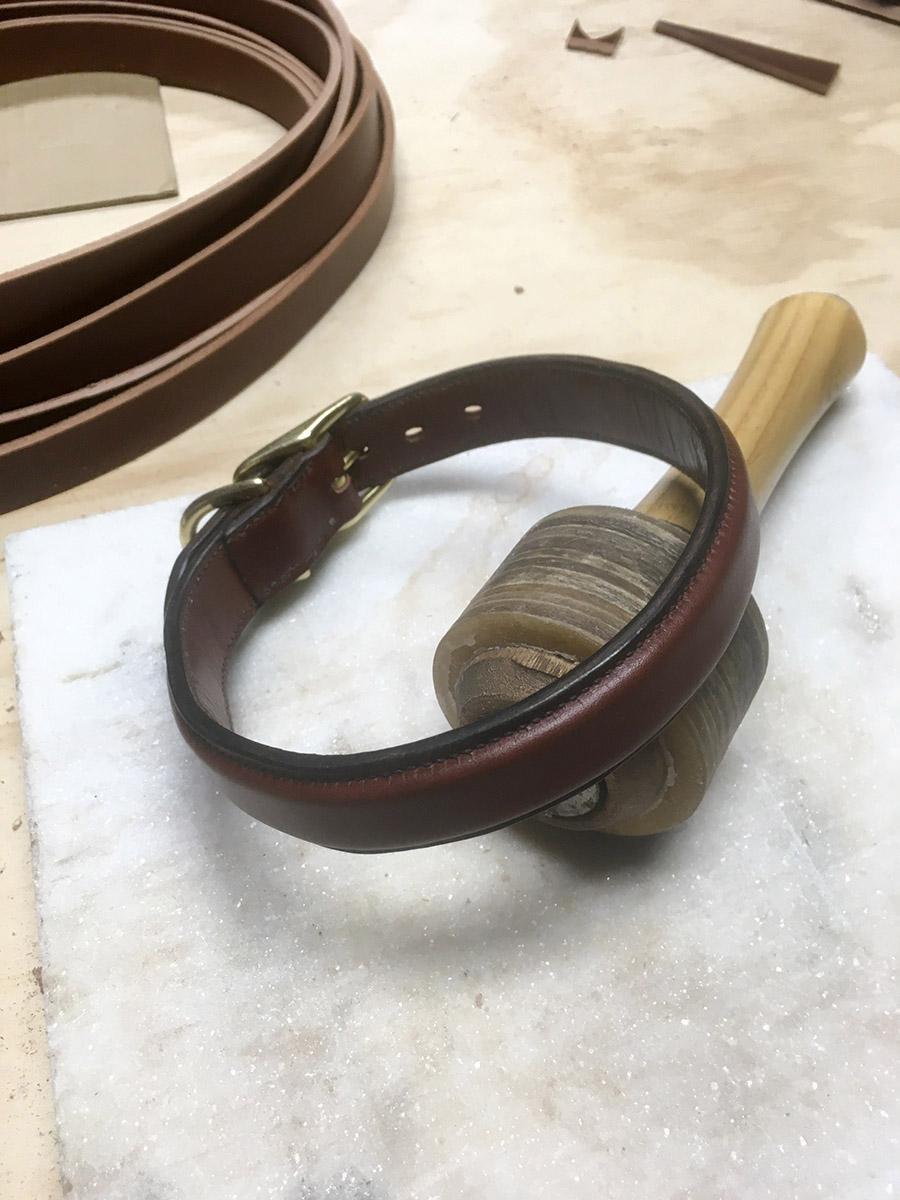
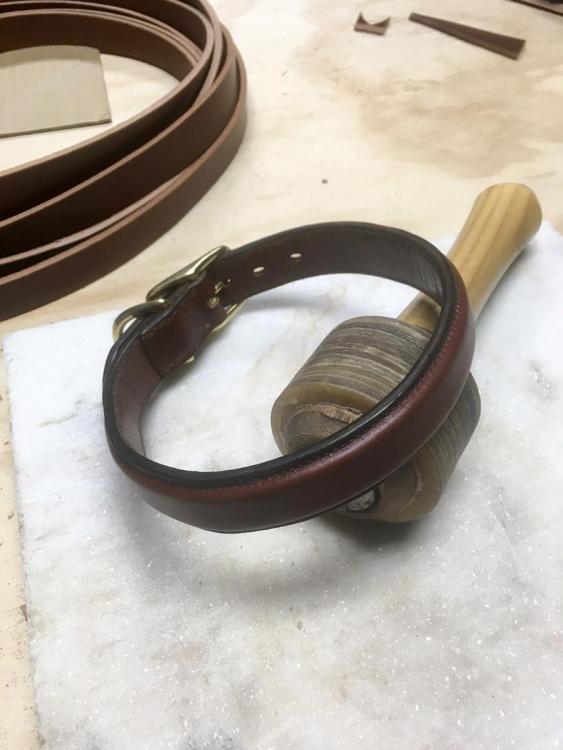
I have the best results burnishing bridle leather using canvas and saddle soap. I made a canvas sleeve for the sanding drum on my burnisher. For tack, I dye the edges with Fiebings Pro Dye or Fenice Colorfast dye. The Colorfast dye has "waxes and binders" that produce a reasonably shiny edge as seen in this dog collar.
-
That's some nice machining. You must have quite a shop. Does it work for alcohol based dyes?
-
My strategy is to hoard what I need. Weaver Leather Supply has good email notification when a backordered item becomes available - I snap up a few dozen. My favorite vendor for heavy brass and stainless hardware - Batz Corp - is not long on customer service so I regularly troll their online store to check status. Using the broken supply chain as an excuse to learn some new tricks.
-
I would skip the glue because it will be easier to line up the holes when stitching. The stitches will be plenty strong. If its difficult to insert a harness needle through the existing hole then a sewing awl is a useful probe. I'd be using #207 (0.02") or #277 (0.023") bonded nylon thread and backstitching 2-1/2 stitches to put both ends on the backside. Trim the ends close, wave a lighter at the ends to seal them, and tuck each end into a hole using a fid (blunt awl). I'd apply a light coat of neatsfoot oil, let it soak in for a day, and apply another coat if it needs it. Leather balms like Fiebings Aussie Conditioner work well for me.
-
@Jax may I ask about your setup for sewing rubber rein grips? I just bought a pile from Abbey England and was debating whether to sew the grips on nylon straps by hand or use a machine. Some old books recommend a pop stitch sewn by hand. Advice on thread weight, needle type, and stitch length appreciated.
-
I'll bet he's pleased with it. Worthy of a real man who sews.
-
I agree with continuing to clean with a mild soap. Maybe the saddle is clean enough to use and she can work on it again later. I swipe a damp sponge over a bar of glycerin saddle soap, just enough to create some suds, and rinse the sponge often in a bucket of clean water. After cleaning, I wipe with a damp sponge to remove soap residue and let it dry as per @Mulesaw's directions. Takes time to clean years of neglect.
-
You might email or call Hermann Oak Leather Co. I've found them very responsive and would think they'd be concerned about that hide representing their product. About a year ago they had production problems because of a splitter that was off line for several weeks, and SLC was short on quality product. I ended up keeping a side that had a lot of puckering because it was all that was available. A few weeks ago, HO told me they were at maximum production capacity and not taking on new customers at this time.
-
To Change Motor Speed and/or Rotation of Motor (printed page included with my Cobra 4) 1. Hold down the button on the control panel until the display reads "S.0" The S looks like a 5. 2. Press the up button 2 times until the display reads "S.2" 3. Press the down button once and the up button once, and the motor will then be set to rotate in the opposite direction.