


TomE
-
Posts
1,292 -
Joined
-
Last visited
Content Type
Profiles
Forums
Events
Blogs
Gallery
Store
Everything posted by TomE
-

Anyone know what this is called and where to find it?
TomE replied to pdbalestracci's topic in How Do I Do That?
Similar to a halter snap. The clip can be spring steel or a cast piece with the spring in the base. Batz Corp carries quite a few variations in zinc diecast, solid brass, or steel. I find it easier to download their PDF catalog to find part numbers then search the website for the part. https://products.batzusa.com/item/spring-snaps/340z-rigid-square-eye-spring-snap-hooks/340z-1-np -
Awls are no different from other tools that pierce or cut leather. Sooner or later you’ll have to sharpen them. I’m very happy with Osborne awls and hafts. Once I have them shaped and sharpened to my liking it’s not hard to keep them sharp - except when I drop the awl. I use wet/dry abrasive to sharpen and card stock coated with rouge to strop. Learned from a Stohlman book but Nigel Armitage has a video showing the same method.
-
Trying to make a wrangler/rough rider holster.
TomE replied to Frankster's topic in How Do I Do That?
Can’t beat Stohlman for classic leatherwork. Will add the holsters book to my collection. -
Thanks. He's a 4 year old warmblood who started under saddle last fall and is learning his job.
-
Trying to make a wrangler/rough rider holster.
TomE replied to Frankster's topic in How Do I Do That?
Second that - I really like the tooling you've done. Makes me think I need to learn something more than cutting and sewing straps together. Is the artwork your design? -
I thought this was an interesting demonstration, but I don't carve leather and am easily entertained.
-
Lucas Hub Oil is an upgrade IMO from standard 90W gear oil. Sold at Tractor Supply Co and auto parts stores. Not a sewing machine, but it quieted the gear box in my 14 year old rotary cutter (brush hog).
-
Don't think you'll go wrong with glycerin saddle soap, and you can always add conditioner later if desired. I clean a lot of tack with a bucket of warm water, a sponge, and a bar of saddle soap. Wring out the sponge - you don't need to soak the leather. After applying saddle soap, wipe off the excess using the sponge rinsed in water and wrung out. For tack, I like Bick's 4, Fiebings Aussie, and Blackrock conditioners. The Aussie is less likely to darken the leather than the other two.
-
That's a good looking sheath! I use a peg awl haft for sewing heavy leather. I have better luck guiding the awl with the larger handle. https://osborneleathertools.com/product/peg-awl-haft-143/
-
Thank you, @PastorBob. I appreciate your encouragement. Having fun learning new things after putting leathercraft aside for ~45 yrs.
-
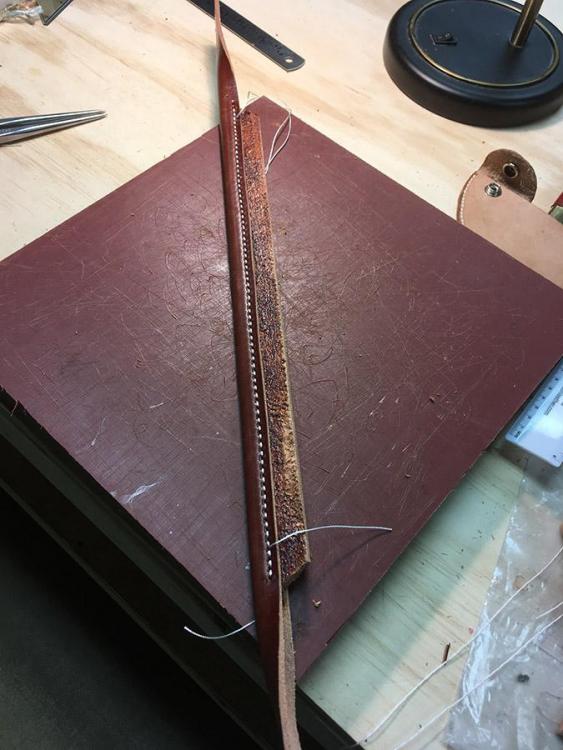
EDIT TO SAY I DIDN'T NOTICE HOW OLD THIS THREAD IS. The leather rougher is helpful if the adhesive bond will be stressed during assembly. I use an Osborne leather rougher on the grain side of the leather filler shown here to improve the bond when making this round out of a 7 oz cover wrapped around a 9 oz filler strip. The rough surface is the grain side of the filler after roughing and coating with Barge cement. The cover is wrapped tightly around the edge of the filler piece and glued before sewing and trimming the excess filler. It is difficult to get the grain side of the filler to stick to the damp cover during assembly unless I rough the grain before gluing. Unlike a wire brush, the rougher has sharp pointed bristles that will dig into the grain and give it a suede texture without too much effort. I haven't had a problem with the Osborne rougher clogging when using on clean veg tan or bridle leather.
-
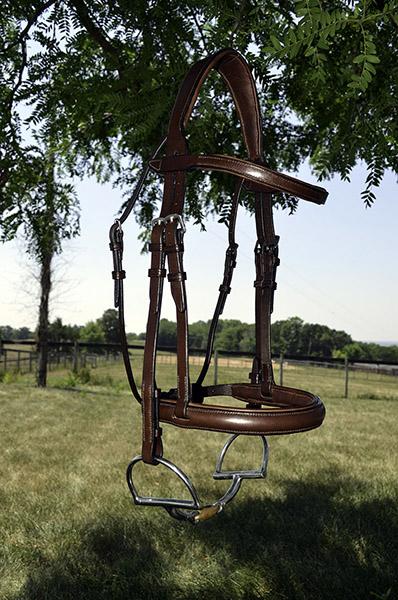
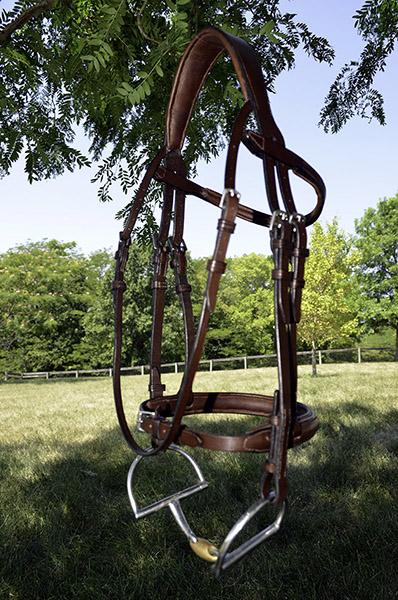
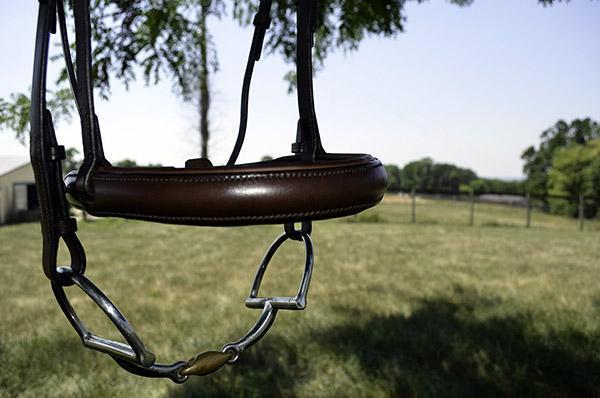
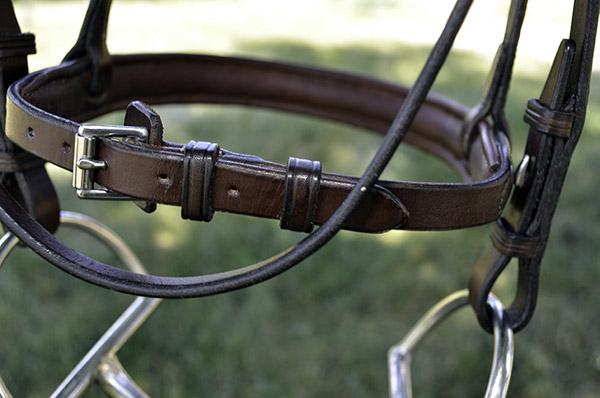
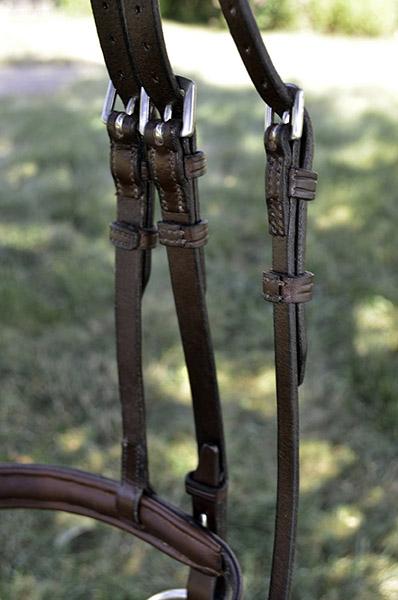
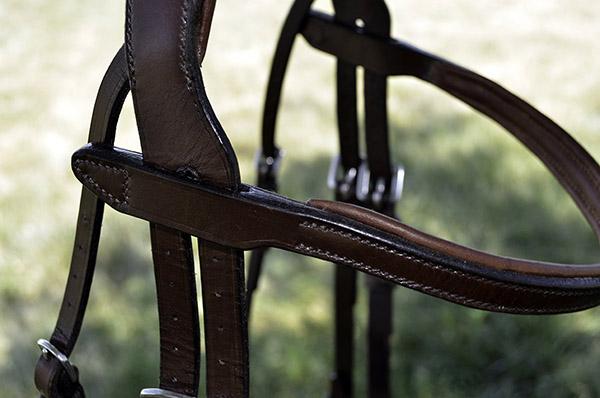
Thank you @Klara! The headpiece design is based on an Antares bridle. Thanks, @Bert03241. It's not perfect, but each one I make gets a little easier and I like it better.
-
I use a heated brass lollipop burnisher from Duane Watts. Warm the beeswax in the flame of an alcohol lamp, dab on edge, smooth and work it in with a hot burnishing iron. This video from Cary Schwartz shows the traditional Dixon style edge iron, which is hard to find.
-
I use a clicker board (red polypropylene) for cutting small pieces, and an Olfa cutting mat for squaring up hides and longer cuts. I try to modulate the pressure to decrease gouging into the cutting board/mat.
-
Finished my second bridle. Appreciate your comments and suggestions. HO bridle leather, stainless steel hardware, hand sewn with waxed #207 nylon thread. I'm trying a new-to-me edge treatment - burnishing with hot beeswax.
-
Bad kitty! Vinegar is used to neutralize cat urine odor and also to kill mold on dirty horse tack. Might be worth a try.
-
Girth straps incorporate heavy elastic webbing like this sewn to leather chapes. https://www.weaverleathersupply.com/c/product/elastic_webbing_green_1__6100_gr/6100-gr?search=true Another way to go.
-
Neat design. Smart looking piece of work.
-
The feed dog should rise above the throat plate to transport material through the machine. I like mine set at ~1/16 inch (1-2 mm) above the plate at the high point. Really like the solid feel of the narrow plate/dog on my Cobra 4.
-
Glock 21 45 auto/ snapping turtle holster
TomE replied to Garyak's topic in Gun Holsters, Rifle Slings and Knife Sheathes
Really impressive. I guess snapping turtles are useful after all. -
Not to muddy the waters, but have you trimmed the edge square before starting the edge finishing process? With veg tan I use a round knife or piece of broken glass ("glassing the edge") to level the edge before any sanding or finishes. I normally do this before sewing, but when using a machine on a raised leather strap I sew it then trim the edge close to the stitch line.
-
Thanks, @Alexis1234 . I’ve been reading the Hasluck book on saddlery and harness making. Not complete but historical.
-
Beautiful work! I'm sure the goat will be proud to wear it. What was the vintage harness makers book you used?
-
Zippo makes a refillable butane insert for their lighters with one or two burners. I use it to thaw gate latches in the winter. Throws a lot of heat and doesn't quit in cold weather. Now I'm thinking it might be an alternative to the alcohol lamp I use for creasing and burnishing.
-
I like the Osborne rotary and spring punches. The spring punch tubes are longer with a more gradual taper which is useful for punching through thick leather. Both types of punch tubes are removable and can be "sharpened" on a buffing wheel. They shouldn't be sharpened like a cutting blade, just polished to remove machining marks and trued up if the contact surface is uneven. The copper anvil on these punches can also be trued up with a file when it becomes grooved. The so-called punch sharpeners that bevel the inside of the punch tube will cause the leather plugs to be compressed in the tube, making them harder to eject. If a new punch is jamming I punch through oil tanned leather or a lightweight slippery plastic until inside of the tube becomes smoother.
