TomE
-
Posts
1,293 -
Joined
-
Last visited
Content Type
Profiles
Forums
Events
Blogs
Gallery
Store
Everything posted by TomE
-
A friend gave me a cake of 50:50 beeswax and pine tar, and it works really well for waxing thread. Slightly more tacky than pure beeswax to improve grip on the needles and slightly softer so it is easy to spread/burnish into the thread. She thinks it lasts longer than plain beeswax to preserve linen thread. Here I am using heavy polyester thread to replace the billets on a jumping saddle. I begin and end each stitch line by passing the needle with doubled up thread through a hole 3 times (single needle backstitch) and the thread is nicely lubricated. My new favorite wax. To address some of the concerns raised in this thread: The beeswax/pine tar mixture is only slightly darker than pure beeswax. It is not at all messy to work with and easier to get a thin even coating on the thread than the pure beeswax I have used. I found Bickmore's pine tar at my local feed store with the leather care products (it is also used as an antimicrobial for treating hoof wounds and infections) so I will be making a batch of my own. I think she molded the wax in a muffin tin.

-
Beiler's Manufacturing and Supply has spot and rivet setters with semi-automatic feed. I have no experience with these machines. Call them for a catalog. Orders placed by phone or USPS.
-
Welcome! I am always interested in reading about the chemistry of tanning and currying leather. Any books that you can recommend or articles that can be shared? Particularly interested bridle and harness leather.
-
Not sure about this item but I have an old Tandy Pro modeled after an Osborne #84. I use it frequently for lap skives on the ends of straps including buckle turrns. It is difficult to split items wider than about 2-3" on one of these, and consistent splits longer than ~1 ft require practice. Thin leather pulled through the splitter will stretch. My tips are to keep the blade really sharp, pull the leather with a slightly downward angle, and keep a finger on the leather entering the blade to prevent it from lifting up (and cutting through the grain) at the end of a strap. I eventually learned to split 2-3 ft long straps to a desired thickness provided the temper of the leather was consistent throughout. Now I use a motorized, push through splitter for big jobs and use the manual splitter for lap skives.
-
Will message you with my email address. Thanks so much.
-
This is very helpful. Thank you. First I've seen it recommended to angle the feed roller for a tapered skive. Also, varying the distance between the foot and the bell according to the thickness of the leather. Any chance you could provide the complete manual? I have ordered a couple of FAV roller feet from Campbell-Randall that use the eccentric pin mentioned here. Would like to read how FAV recommends using this adjustment.
-

Is the veg tan tooling leather sold at "ST Leather" any good?
TomE replied to jasonsmith's topic in How Do I Do That?
I have been to the ST-Leather shop/warehouse in Saint Louis a handful of times. It is a warehouse crammed full of an entertaining mix of tools, supplies, and leather. Some name brand items (CS Osborne, Fiebings, Hermann Oak) and other generic low quality stuff. I view it as a bargain hunter's outlet. I have purchased several sides of HO veg tan that were fine, but I picked them out in person. Their imported leather looked on par with what I see at Tandy. The leather is kept in a large room that is not climate controlled - humid in summer, cold in the winter. I did buy some bonded nylon thread a few years ago that came apart and frayed in my machine - perhaps the bonding agent deteriorated with age. They refunded my money for the unused spools. Most everything else I've purchased (in person) from ST-Leather has met my expectations. Not high end, but serviceable stuff. Nonetheless, I make the 3 hour drive to Springfield Leather to purchase most of my leather because they have a larger inventory of HO leather to look at. -
Steel or brass staples can be used for running loops on tack or harness. Beiler's and Weaver sell them. Google "slide loop staples."
-
My advice would be to gain experience using your new machine for heavier leathers before buying additional plates to extend the range to lighter weight projects. You'll have a better feel for what you want/need with respect to thread size and leather thickness. You can do a lot of good work with the stock accessories. I have 2 machines and still do a lot of hand sewing because for some projects it's easier than setting up on a machine, and I like the look of a saddle stitch for certain projects.
-
@RockyAussie and @Patrick1 sell narrow feed dogs and plates for the 441 type machines. Patrick also has narrow foot sets for sewing close to edges and raised features. You can message them here or contact through their websites, Wild Harry and Hennigan Precision Engineering, respectively. These accessories are handy for extending the range of the 441 to lighter weight leathers. The narrow dog/plate from Brian (RockyAussie) is my every day set up for sewing tack. It feels more stable to me than the stock plate. The even narrower plates and feet from Patrick are great for sewing next to raised leather features and they do a nice job climbing over increasing thickness, for example the turn at the end of a strap that wraps around hardware. I prefer using #207 thread or smaller with the dog/plate set up that I purchased from Patrick - he has several widths - to have good clearance around the needle. I don't have experience sewing canvas on a 441. That would be a reason to purchase some #138 thread.
-
Beautiful work as always. Looking forward to seeing the case come together. I'm thinking bridges of Madison county...
-
I've cleaned my share of tack and I start with saddle soap, a sponge, and a bucket of warm water. I would aim to thoroughly clean the surface using enough saddle soap to make some suds then wiping down with clean water. Rinse the sponge often. No need to soak the leather with water. To clean areas encrusted with dried sweat/sebaceous secretion you can use dilute household ammonia to remove the scum then clean thoroughly with saddle soap and water. Neatsfoot oil is a good choice for restoring moisture to the leather. You can apply it before the leather is completely dry if you like. The pure neatsfoot oil is probably better than neatsfoot compound, which includes petroleum based chemicals. Nonetheless, Al and Ann Stohlman note in their Encyclopedia of Saddle Making that they often used neatsfoot compound to good effect, but preferred the pure neatsfoot oil. Apply the neatsfoot oil in thin coats and allow it to soak in before applying more. It doesn't take much, and you can permanently ruin leather by over oiling it. The leather becomes sticky to the touch and spongey/weak in temper. I usually apply conditioner after oiling the leather to add a little gloss and some water repellency. My favorites are Blackrock Leather N' Rich, Fiebings Aussie, and Bickmore Bick 4.
-
Thank you!
-
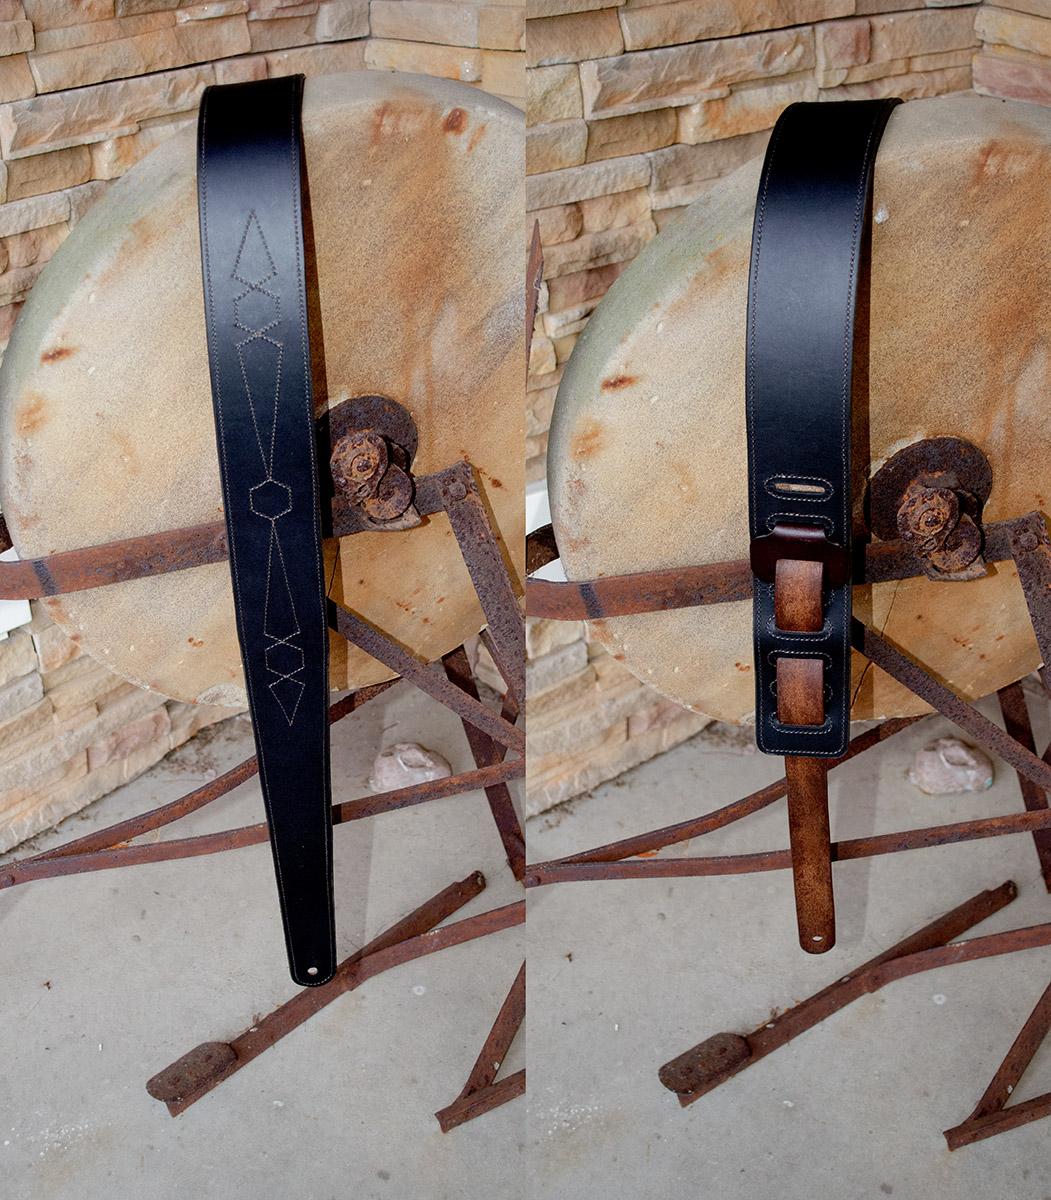
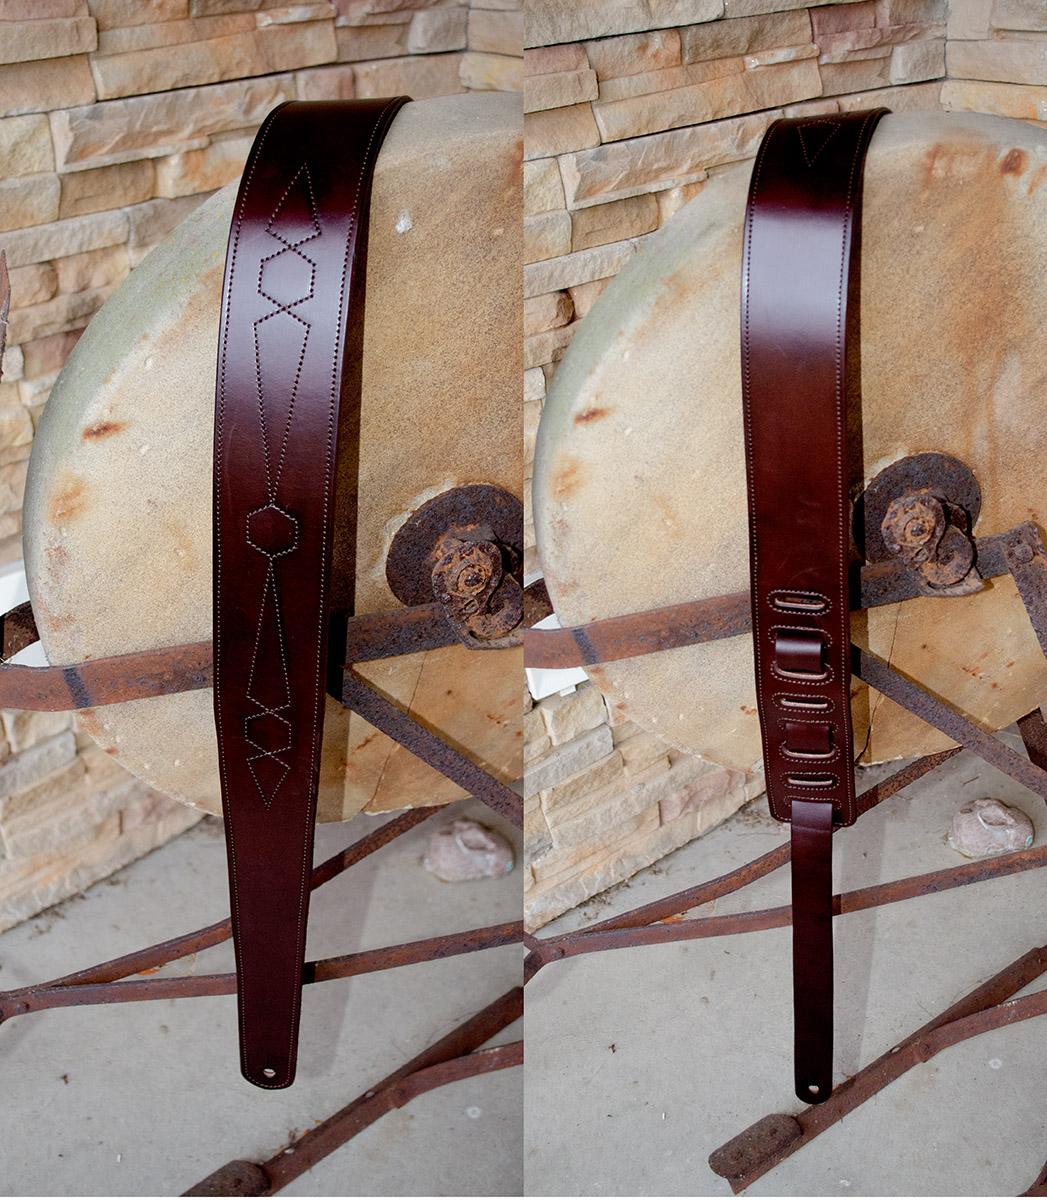
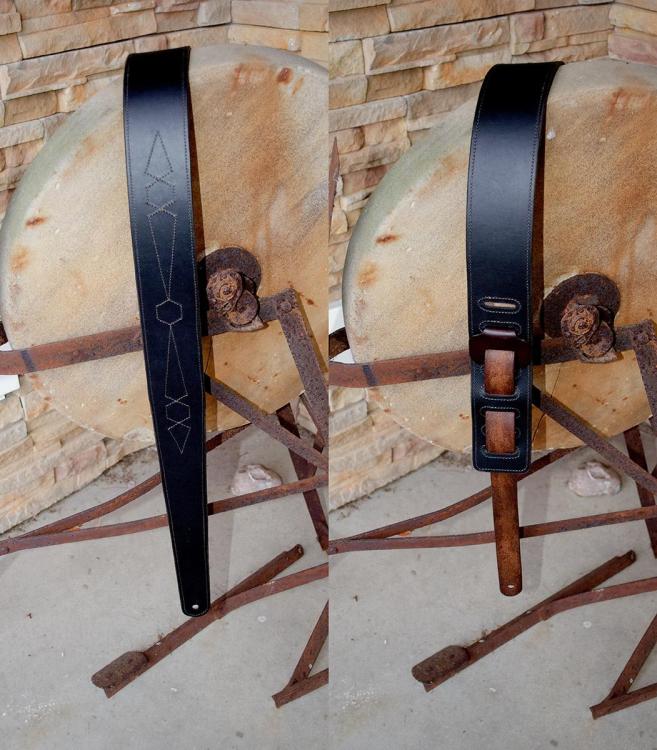
Thanks! The keyholes on each end of the strap fit over “pins” on the guitar.
-
Made an adjustable guitar strap for a friend. HO bridle leather lined with black napa leather. He is buying a guitar with a honeycomb pattern on the top. I couldn't figure out how to neatly stitch a honeycomb so I came up with an art deco type pattern with several hexagons.

-
They don't list quarts on the website. I called in my order and was informed I could buy a quart. That was 2 years ago.
-
I use this flexible, water based adhesive to replace the pasted back of bridle leather after splitting. I dilute it 50:50 with water and use a glass slicker to work it into the flesh side. They sell it in 1 qt bottles as well. https://campbell-randall.com/product/sup-bt639-g-leather-finish-for-sealing-flesh-side-moss-back-suede-1-gal
-
Hmmm. My bell can be adjusted towards and away from the foot, I assume to account for wear from sharpening. Techsew suggests backing away from the foot (~1mm gap) for firmer leather. Similarly they suggest reducing spring tension on the roller when skiving thicker leather. I'll have a look at the Cechaflo videos.
-
I am also having trouble finding videos on bell skiver settings, other than the basic summary of what the knobs do (often by people who know less about the machine than I do). @RockyAussie has one of the best videos on sharpening and some setup for skiving, but I'd like a manual/video that systematically shows how to set up the machine for various weights and tempers of leather. I am trying to understand the interplay between bell knife position, presser foot height, drive roller height and spring tension. Also, the use of various roller feet for angled skives. I am trying to figure out if I can skive the edges of 9-10 oz veg tan straps in an angled skive to about 3-4 oz thickness on the edge. Having some success but it would be helpful to know more about how to dial in the machine.
-
You have an attractive maker's mark that adds to the style. Good looking project. I got excited thinking you had tooled bridle leather - I have a fair number of shoulder/belly scraps to use - but I guess English bridle is a color of dye.
-
Klenda's article on bulldog tapaderos is in the March/April 2023 issue of Leather Crafters and Saddlers Journal. Jason Timmermans has an article on "Custom Hardened Leather Arch Supports" in the July/August 2022 issue. He explains the use of stearic acid (long chain fatty acid) to harden leather. Think this traditional approach is a better than simply drying out the leather. Can purchase these back issues from the Journal's online store.
-
Fiebings Saddle Oil is another product that I use for work boots. Sold at farm stores. Has silicon oils like Fiebings Golden Mink Oil. I think that is a waterproofing ingredient. Saddle Oil will darken the leather somewhat. I suspect it will soak in even with the Atom Wax applied, but if not the Atom Wax will wear off with a bit of use.
-
Thank you, @YinTx, @paloma, and @chuck123wapati. I appreciate the encouragement. Sticking with what I know.
-
Thanks, @Gezzer!
-
Thanks, @RockyAussie. That's very kind.