


TomE
-
Posts
1,292 -
Joined
-
Last visited
Content Type
Profiles
Forums
Events
Blogs
Gallery
Store
Everything posted by TomE
-
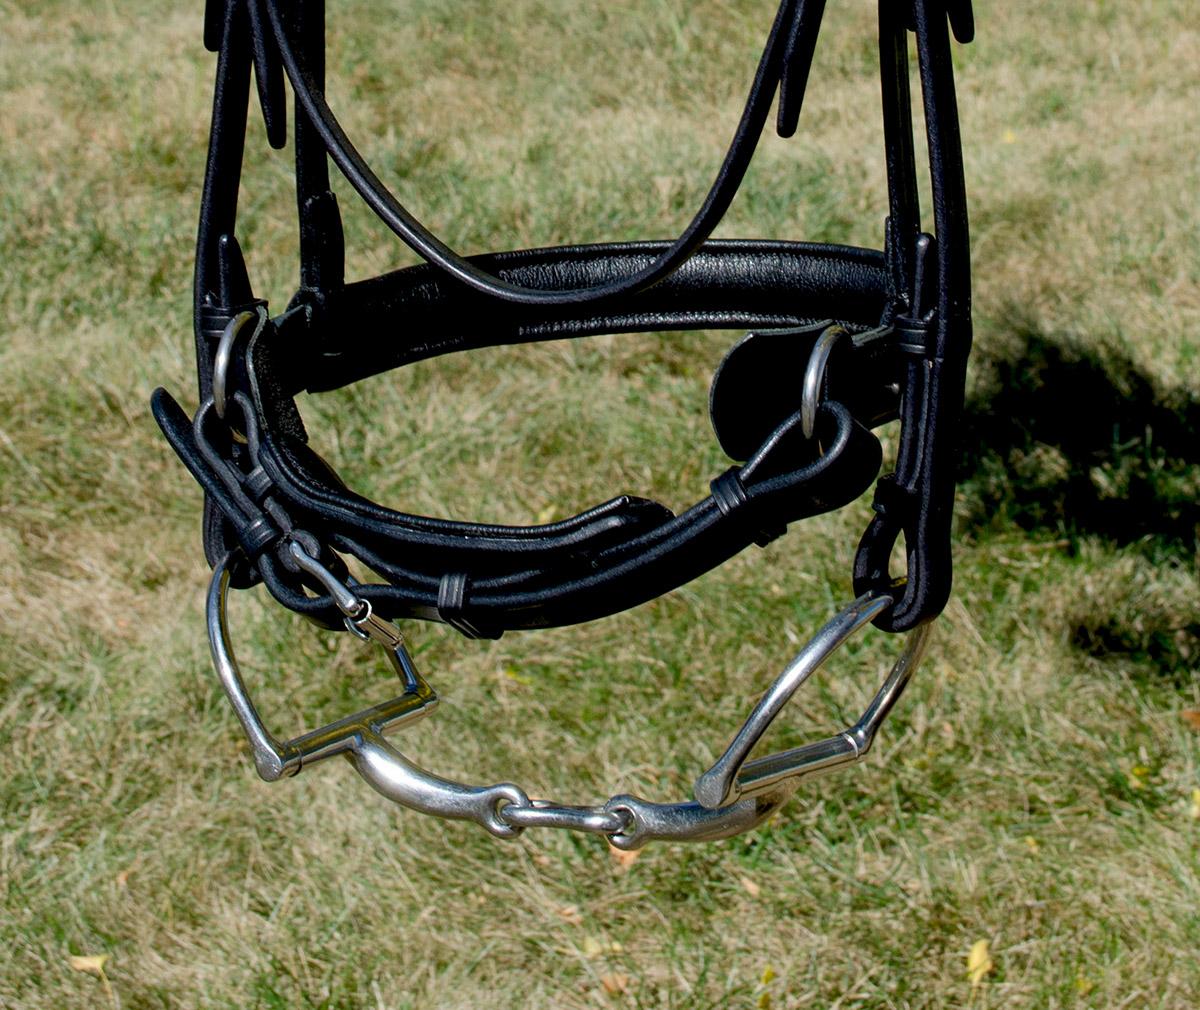
Thank you, @Tove09Tilda for your kind words. Welcome to the forum. Hope to see your work here. For the dee rings, these are a bit heavier than needed and I welcome ideas about different designs to pad them. I have seen a crank using a small ring with a tab that was buried between the end of the strap and the padding. It appeared that the tab had a slot and the stitching was placed into the slot to secure the ring. The underlying padding extended past the ring, similar to what you described, but it was a short overhang that looked tidy. I haven't found this type of ring/tab/slot at my usual hardware suppliers.
-
I have increased the foot pressure and switched to white thread. This seems to have fixed the problem with skipping stitches. I ordered thread lube and a pot, and hope to switch back to stiffer black thread with lubrication. I am figuring out how to feed Biothane while sewing close to hardware. For leather halters I typically add a wedge/welt to ease the transition in thickness and sew tight to the hardware. Biothane is stiff and springy when folded around hardware so it's a new experience negotiating the ends of the straps. The feet want to slip back down the slope as the material compresses while sewing on a slope. Beta biothane is a matt finish and relatively grippy compared to bridle leather, but the flattening of the loops as they are sewn is a new dynamic for me. Thanks for the reminder, Tim. I will check the needle/hook distance. I am settling on a size 24/25 needle, which is what I've been using for leather (cutting point, not round point) on this machine without any issues.
-
This guy says subtract an inch from your measurement for gusset length. Some day I'll test this using my heap of leftovers from bridle sides but I currently have no experience with bag making.
-
For me, the key was learning to get the knives really sharp with a ~15 deg bevel. I am mainly skiving veg tanned leathers. I place the leather on plate glass with a bit of beeswax rubbed on the glass to grip the leather because I am working on small pieces that are difficult to grip while skiving an edge. That cheap Chinese knife from Amazon does a reasonable job when kept sharp. I've been meaning to learn how to use a safety skiver and this Don Gonzales video has some tips. He also notes (in another video?) that the blade should move diagonally along the edge when skiving, not straight down the beveled edge.
-
I had a size 26 needle installed when checking the timing, and I haven't previously noticed any problems with switching needle sizes. To my knowledge, there is no shimming of the shuttle on this 441 clone. I set the hook timing 3 years ago following the same procedure and it's been working fine for leather. I rechecked it yesterday and made some minor changes. Sews fine with leather and one layer of Biothane. The missed stitches occur erratically so I am thinking it's friction and/or how I am feeding material through the machine. Thank you, Wiz. Lots of good information. I am using black thread from LMC and it is considerably stiffer than other colors. I will test out white thread and fiddle with the foot pressure and check spring tension. Guess I will order a lube pot and lube to find out what that's all about. We mostly use Biothane halters in our barns. They used to affordably priced with stainless hardware, but the prices have risen considerably so I decided to make some for us and friends. Not interested in large scale production of this item and competing on price with bigger vendors. I definitely like sewing leather better than Biothane but this is a good learning experience for me.
-
I don't have a clear plate to view the hook, and it seems to only happen with the holster plate. I'm going to reconfirm that leather sews without skipping stitches using the holster plate. I am guessing that the skipping is caused by friction on the upward stroke through biothane, causing flagging even though I'm not feeling it. With a size 25 needle and #207/#138 thread the knots were on top, even after considerable decrease in top tension, so I installed a size 24 needle and that buried the knots. I guess I could switch back to the larger needle and try increasing the bobbin tension. If I can't find the right needle and thread combination then I guess lubricating the thread is the next step.
-
I am starting to sew halters made from 2-3 layers of Biothane Beta 520 super heavy (3.5-4 mm thick) on a Cobra Class 4. I am having problems with skipped stitches, mainly when backstitching 2-3 layers near hardware. I am using a holster plate that allows me to stitch closer to a center bar buckle. I did make small adjustments to the hook timing, following @Uwe's video on Youtube. Thanks, Uwe! The machine sews leather fine. My current setup for Biothane is the Hennigan Precision holster plate with feed dog, the Hennigan narrow presser foot set, #207 thread top/ #138 thread bottom, size 24 794 7x3 round point needle, and 5-6 stitches per inch. This setup buries the knots in a single layer of Beta 520 super heavy. I have also tried #277/#207 thread with needle sizes 27, 26, and 25. I've done a limited test of cutting point needles but I like the thread tension with round point needles. I have used the stock holster plate and harness feet that come with the Class 4 for the larger thread and needle sizes. Still get occasional skipped stitches. The information for needle choices that I've read in this forum and seen on Youtube is contradictory. Most suggestions are to use round point needles that are 1-2 sizes larger than what would be used for sewing leather. I haven't yet tried thread lubricant, and I haven't played with presser foot tension. I don't notice flagging while sewing. I mainly sew bridle leather on this machine and would prefer not coating the thread path with lubricant, but I am open to suggestions. I appreciate your advice on machine setup and best practices for sewing Biothane.
-
Good looking seat. Still trying to work out how you constructed that shape. Like the valve stem caps too, and the fork reminds me of my brother's Lemon Peeler from the 1960s.
-
Ha, ha! I guess it lives up to the name in the hands of some riders. Thanks for your kind words, Ron. Thank you, @JDFred. Already planning the next one in my head.
-
Yes, the everyone is an expert mentality is particularly annoying to me with regards to science and medicine. Google/AI turns up random facts (and outright lies) without any context and these are amplified in the echo chamber of social media. Think I'll stick to leathercraft at this stage of my life.
-
Thank you, @BlackDragon. Got some positive comments about the bridle as well, so all is good. Had to look up the quote. I'm stuck in the 70s-90s with my musical selections, but I have an abiding interest in pop culture/Americana.
-
The folks at The Steel Stamp Co tweaked my logo to make a small impression. Very happy with their work.

-
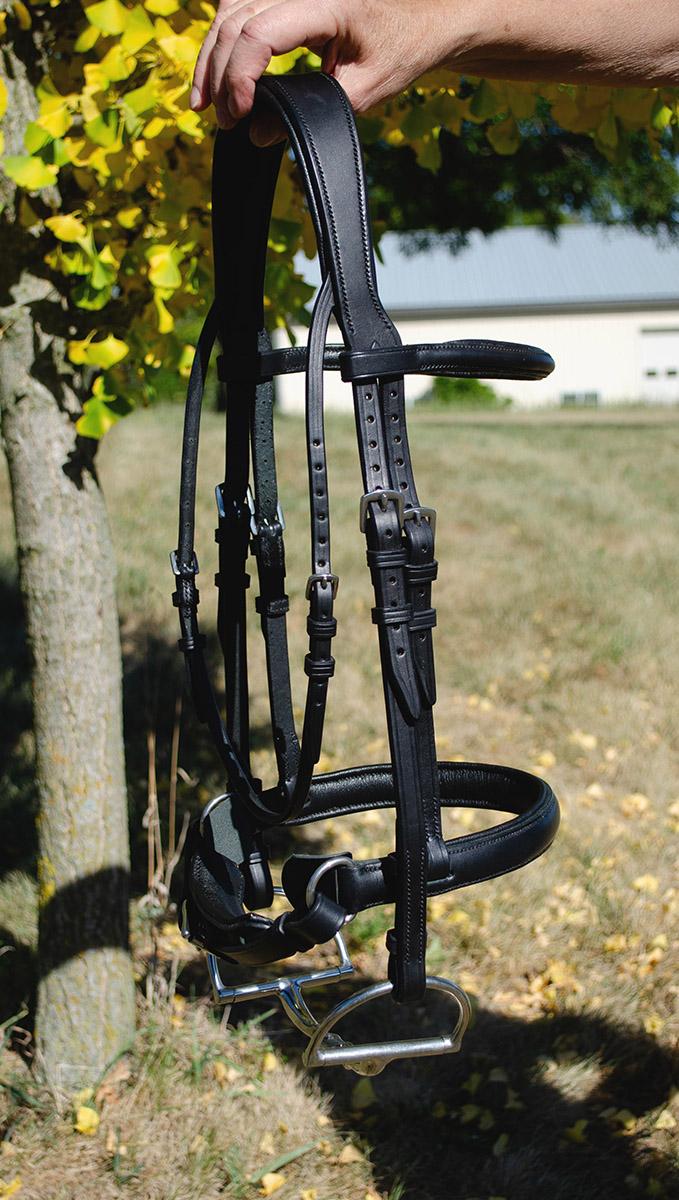
@Mulesaw Thanks, Jonas. I agree that it's up to the rider to fit their tack correctly. At FEI sanctioned events they've begun checking noseband tightness prior to horses entering the ring. I guess that new rule got the attention of the keyboard warriors. I do add a leather flap under the buckle of a simple cavesson to pad the buckle. The leather flaps under the dee rings of this crank bridle are a bit unwieldy. Next I plan to use a smaller dee ring and contour the flap differently.
-
Interesting. I thought dog fanciers are a friendlier bunch. Perhaps it’s a sign of the times.
-
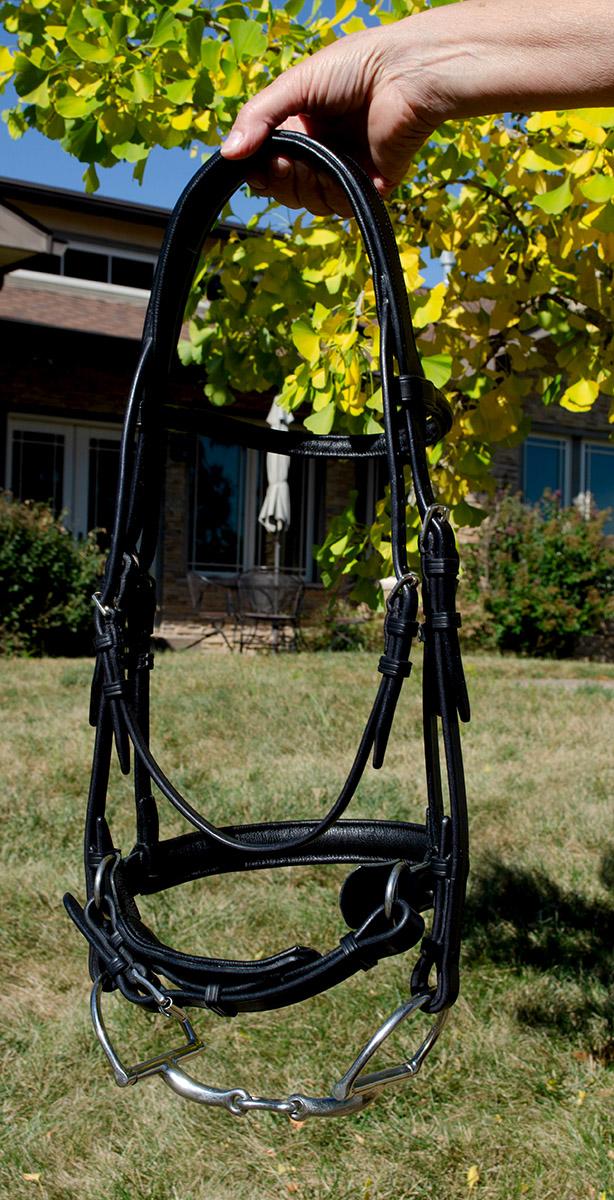
I usually make bridles with a simple cavesson noseband - a continuous strap of leather and the buckle off center under the chin. This bridle has a Swedish or crank style noseband that evokes strong opinions. The crank is two-piece construction with a padded strap that can generate some leverage when tightening the noseband. Proponents say that the crank style provides flexibility and even pressure under the jaw. Critics note that the crank lends itself to overtightening, causing discomfort. The name "crank" is a rather unfortunate choice. I posted the bridle on social media and sure enough some of the comments were "cranky." Maybe there's no such thing as bad publicity? I enjoyed making this noseband but the construction takes considerably longer than a simple cavesson. At least I have the ability if someone asks for one.
-
Good looking bridle! Very tidy work. That should last a long time.
-
That's a nice looking case! I like the shape and the blue edges. As far as price, I'm happy charging materials cost plus $40/hr shop rate to cover time spent on the project, maintaining tools and machines, etc. I figure some waste into my materials cost. I aim to distinguish my work from what is commercially available in order to set a price point that I'm happy with. Since I don't tool leather that means quality materials, unique construction, and/or or decorations that personalize the item. Most of the horse tack that I make is made to measure and I'll do free adjustments/alterations to satisfy the client. So they're paying for a high level of customer service, which gives me satsifaction and generates repeat business and recommendations.
-
Congratulations on your retirement, Bruce. This sounds like a great service for the community.
-
What thickness of leather, and do you need the bevel on straight or curved edges? I changed out some parts on a bottom feed bell skiver to create a beveled edge on 9-10 oz veg tanned leather. In the example below the angle is less than 45 deg. - probably 30+ deg - but I think I can get a steeper angle by adjusting the roller foot.
-
I'm impressed with how well the bridle leather submitted to your tooling. Very nice work. Mark of a pro is being able to fix things that aren't working out as originally planned.
-
I've had occasional problems with 2 coats of Barge gumming up my edges. I've switched to 1 thin coat that I heat with a gun before assembly. Produces a strong bond with less mess and it speeds up my process. It also solved a problem of glueing pieces that are cased to mold a raised leather feature. After a little heat the glue is stuck to the wet leather and the leather remains mold-able (if that's a word).
-
Some folks commented on Youtube that Makers sells a less expensive water based contact adhesive that is comparable to Aquilim 315.
-
Regarding the glueing of hides. Don Gonzales published an interesting-to-me video on glue strengths. The Aquilim 315 water-based contact cement produced a strong bond when applied to one surface and immediately assembled without drying. I use Barge but think I'll give this a try. I like cutting straps one at a time so I can check the quality and decide how to use each strap.
-
Not sure if I understand your question. You can make the narrow end of the strap as a separate chape that wraps around the front and back of the wider part of the strap. The wider strap would be sandwiched between 2 layers of the chape with the grain side showing on both sides of the strap. The wider strap could be lined.
-
Is that the Hennigan holster plate with a feed dog? How is that working for you, compared to the Cobra holster plate?
