


Littlef
-
Posts
456 -
Joined
-
Last visited
Content Type
Profiles
Forums
Events
Blogs
Gallery
Store
Everything posted by Littlef
-
+1 ATF fluid and acetone is my go to for frozen parts. I normally soak it for a day or two. Then, I tap the parts with a small ball peen hammer. Then, I hit it with heat. Then, I take a can of compressed air, turn it upside down, and freeze it with the freon from the can. (expansion and contraction.) Then, I try to turn it. If it doesn't turn, it goes back in the bath, and I try it again the next day.
-
Ruger Blackhawk Bisley Holster
Littlef replied to JWheeler331's topic in Gun Holsters, Rifle Slings and Knife Sheathes
That's a good looking holster! -
I like the cobra commander logo
-
That's really cool! Looks great
-
that's gonna look cool! can't wait to see the finished product.
-
Pampeano Belt - How to punch pattern for stitching?
Littlef replied to CJJ's topic in How Do I Do That?
That's cool. Good job working out the process. The final product looks great! -
Good looking holster. Love those leaves.
-
+1. The electricity and filament costs would be minimal. The challenge will be finding ready made files available for "free" download with accurate dimensions. The file is only as good as the skill of whoever wrote it. Blue gun files are out there, but there is no guarantee as to the level of their accuracy, and there's no guarantee there's a ready made file for every model of gun you would need, just sitting out there for download. You would probably need to spend time to learn to use a CAD program to be able to create your own file .... or tweak an existing file to ensure its within proper spec. That's certainly a worthy skill to have, but you would need to determine how much time and effort you are willing to put towards it.
-
good looking handles! Gave that bag a well extended life.
-
30/30 butt wrap and 6 packs!
Littlef replied to Hags's topic in Gun Holsters, Rifle Slings and Knife Sheathes
Gotcha, Thanks Hags! -
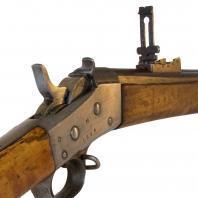
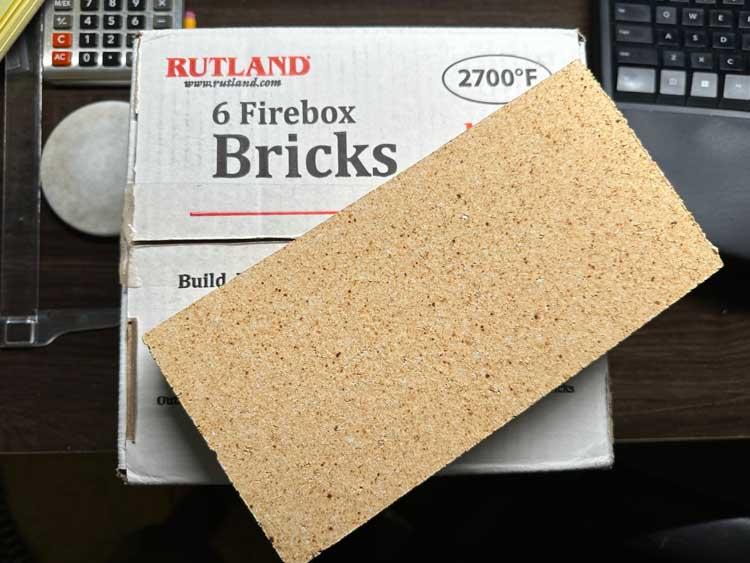
I keep a box of firebricks for when I need to heat up steel. Heat dissipates quick and it can be hard to get steel hot enough. I just stack the bricks to make small enclosed insulated space just big enough to hold whatever I'm working on, and it helps retain heat. - Might be helpful to get that stainless steel hot enough.
-
a quick google search yielded this results. Looks like good info on soldering stainless steel. (possible, but more difficult.) https://bssa.org.uk/bssa_articles/soldering-stainless-steels/
-
30/30 butt wrap and 6 packs!
Littlef replied to Hags's topic in Gun Holsters, Rifle Slings and Knife Sheathes
That looks really nice!! I've been thinking of making a similar setup for my 1873 Winchester. How did you attach the strap in the front? I wouldn't want to wrap over the top of the barrel, which would impede the sight line. I was also a little concerned of the strength of the sheet metal for the magazine tube, If I tried to squeeze in between the barrel and mag tube. -
LOL. "If you like perfection, This post is not for you", could be the subtitle for everything I make. I dig it!
-
Look on ebay. There's several out there right now.
-
Absolutely. I have a 1943 book that's entitled "A comprehensive small arms manual." Its written for a homeland militia in the event if we were invaded during WWII. It gives a very brief overview on how to use various common military weapons. Its very dated, and some of the explanations are almost comical, but it was written to give people an idea of how to take care of themselves if WWII came to the US. Today its not overly useful, but its an interesting little snapshot of the time.
-
That's a new old book. I bet its packed full of useful information.
-
You see this endless debate in firearm groups as well. As long as you are maintaining the metal surface, either oil or wax both work well. Museums tend to use waxes. They take more effort to apply, but give a longer term protection. They are also being used on items that don't get very much handling. Oil is less durable since it can be wiped off easily... but its also real easy and quick to reapply. It kinda depends. There's no one best way, and there is no one best product. If I have something that's getting handled regularly, I just wipe it with oil. If I have something that is being put away and I have no intention of using it again any time soon, I might break out the wax if I'm feeling ambitious.
-
Makarov Holster with Carved Oak Leave and Bound Edge
Littlef replied to Littlef's topic in Show Off!!
Thank you very much. You certainly have less area to work with when soothing smaller pistols. -
That's good stuff. Love it!
-
Makarov Holster with Carved Oak Leave and Bound Edge
Littlef replied to Littlef's topic in Show Off!!
Thank you very much. I appreciate that. I put a lot of hours in trying to work out how to do the leaves. The edge binding was a first time process for me as well. The foam sheet works great. I got that idea from Chakotay. It folds and bends with a little stretch and a similar thickness to leather. It gives you a much better idea of the final form and fit than just using paper, and its only a buck or two per sheet in a craft store. I regularly tweak a design after using the foam, where I would have had a poorly fitting holster if I went straight to leather from paper. -
Makarov Holster with Carved Oak Leave and Bound Edge
Littlef replied to Littlef's topic in Show Off!!
Thank you very much! -
I dig that!!! that would work.
-
That's a really cool design for aesthetics, but I don't think its practical. (1) It could only be done in state where open carry is allowed. (2) Any time you stop and get off the bike, you wouldn't want to leave the gun exposed and out of arms reach. You'd need to take it off the bike and holster it on your hip. If you are going to do that, it would be easier to just keep it on your hip all the time. -- But, its a really cool looking design.
-
love it! that's a good lookin holster.