All Activity
- Past hour
-
I would call Toledo Industrial Sewing Machines. They had some small, obscure parts I needed a while back. None of it is listed on their website.
-

Swiss Saddler Clam Drawings
ClaimedVacancy replied to ClaimedVacancy's topic in Leatherwork Conversation
My thoughts too. It’s a lot of money for such a device, and ya know, for those that need it and don’t want to make it, fine. I mean I’ve made all of this with only a handful of pictures, and doing the best to match contours and ratios that I can find. And it’s taken a good while to get here! I think I’m only in this project about $150 dollars at this rate. The most expensive part is the wood, and Baltic birch is not cheap anymore. If i had used poplar for everything I probably could’ve saved a few. Hardware is the next most expensive thing. But if you want to be real conscious of money, go to estate sales over a month every week and collect hardware and wood. I have so much antique hardware from those sales, and the sells would’ve thrown it all out had I not grabbed it! -
For that much money, it better do the sewing for me...
-

Dyeing leather
dikman replied to Samalan's topic in Dyes, Antiques, Stains, Glues, Waxes, Finishes and Conditioners.
Maybe you're just accident-prone? -
I got a call today for a paddle holster. I'm familiar with these, the paddle rides inside the pants instead of using a loop or clip. Is there anyone here that has any experience making a leather paddle? Do I just stitch leather onto a kydex or plastic paddle? Or do I use just leather, maybe skirting, and hardening it? I'll do some research on my own, but this is my first stop. I'd rather hear from someone that's done it than just looking at pictures and trying to guess Thanks
-
That's $1500 Australian!!!! Plus shipping!
- Today
-
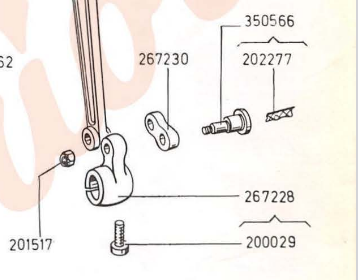
maybe this will will help
-

How Did You Start Your Business?
NerdyLeather replied to DavidL's topic in Marketing and Advertising
I started small and avoided big loans, reinvesting early profits back into the business. At first, I sold locally and online, testing what worked. One beginner mistake was underpricing and not fully calculating expenses. A major breakthrough came when I began treating it like a real business -tracking costs, building supplier relationships, and focusing on branding and customer trust. -
I will get more pictures uploaded next week. The zoomed out pictures I had would not upload so I will try again with new pictures.
-
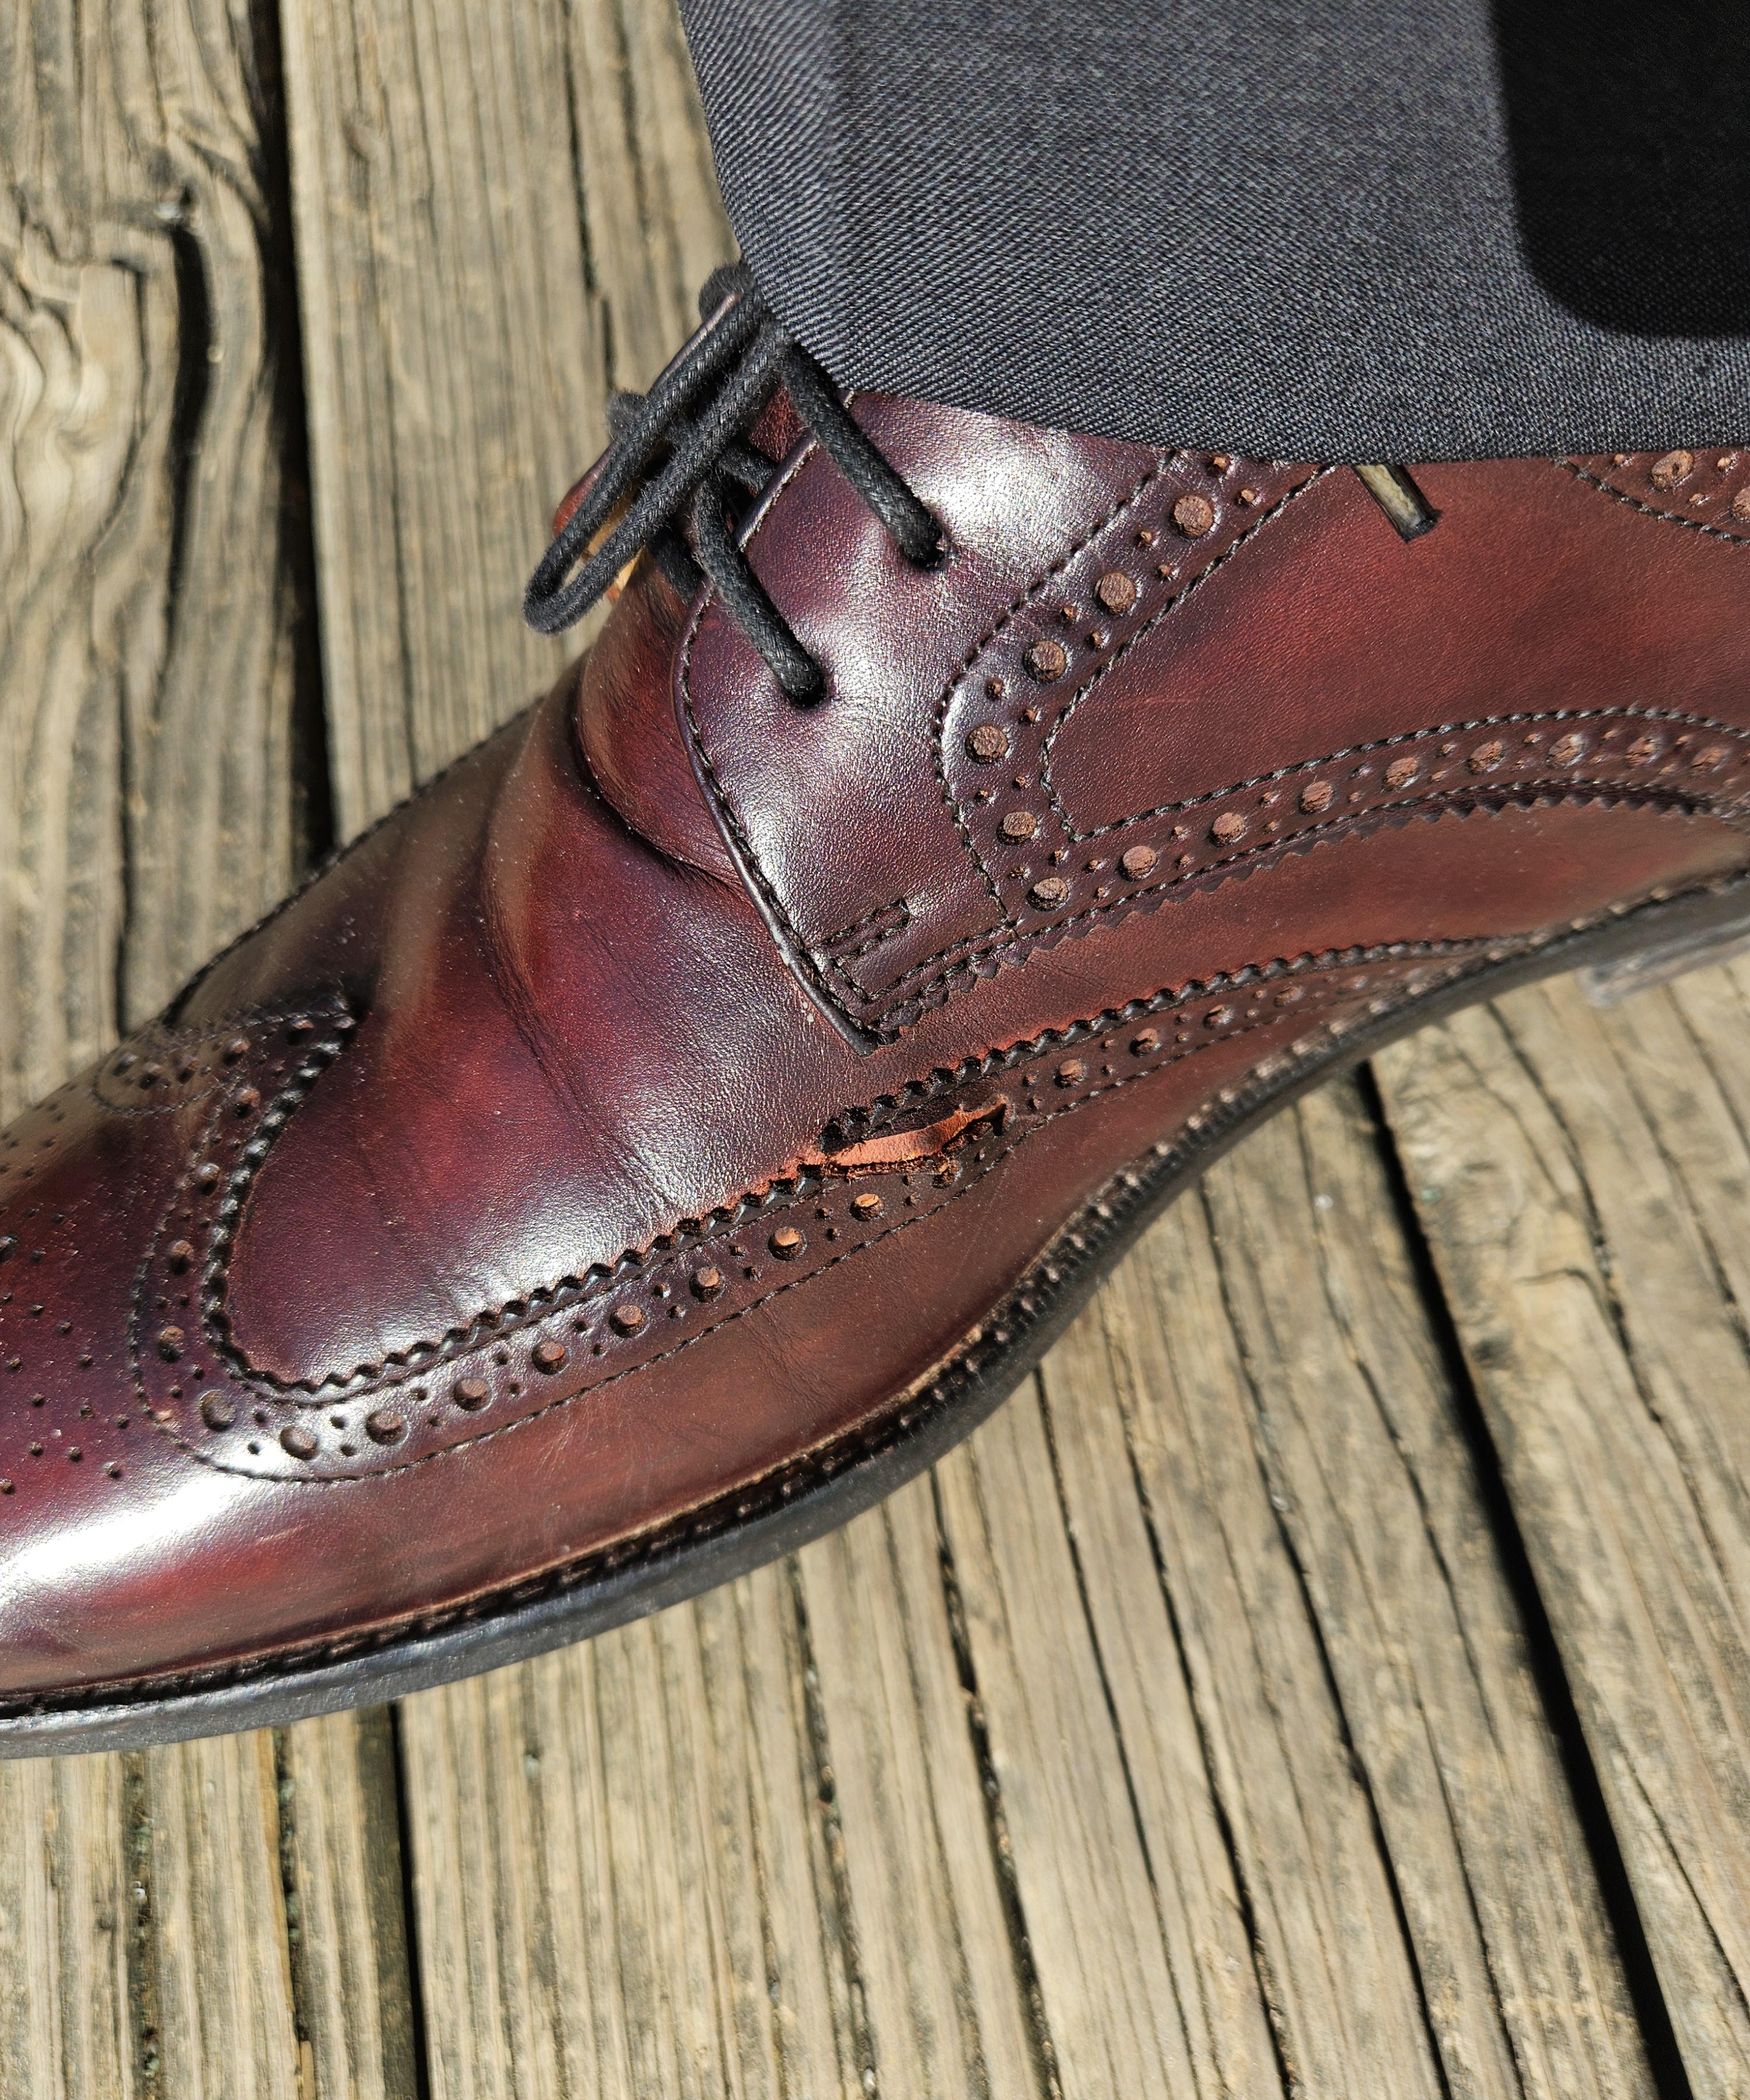
Unfortunately while trimming my new soles I slipped and sliced the upper. I've never repaired anything like this, any bright ideas?
-
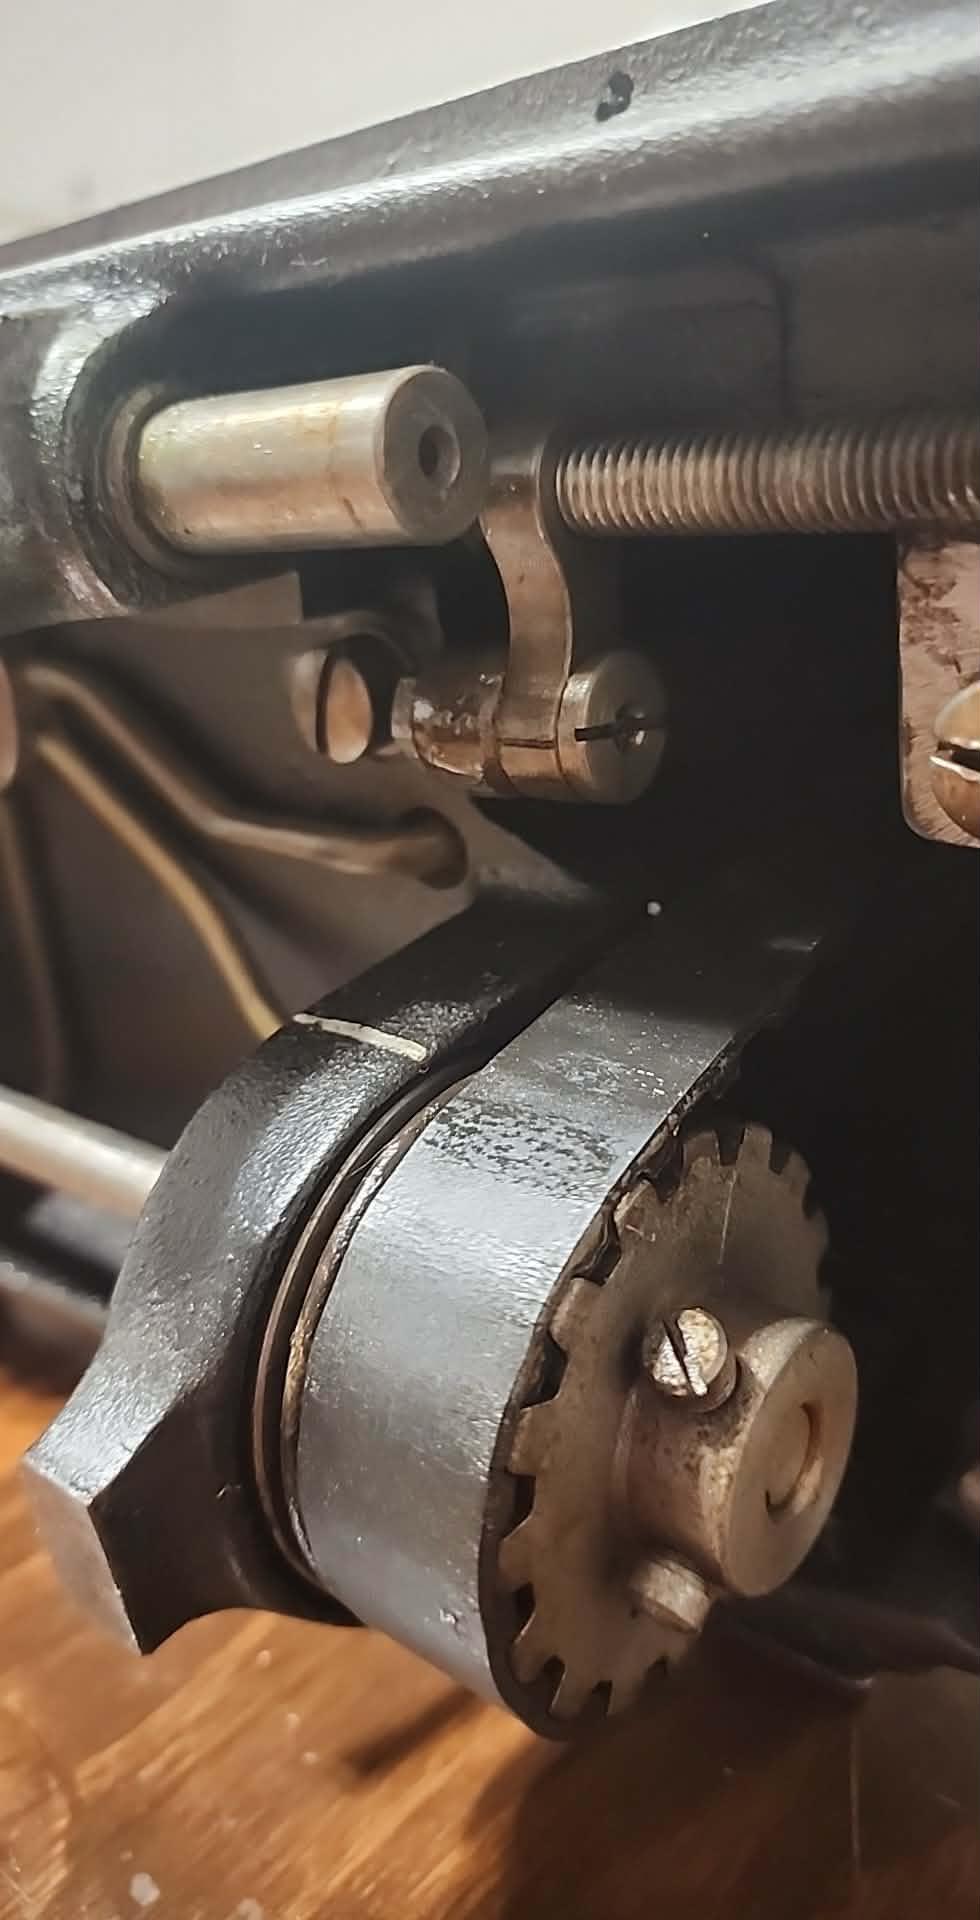
 Looks like you have the left side more or less stitching I might thread one side of it and work to get that one side dialed in, then move to the other side. By "dialed in" I mean not skipping (check forward, reverse, short stitches, long stitches, thick material, thin material). And smooth action as the thread goes around the hook (no popping sounds, no broken thread.) By the way, you can slide one of the bobbin case covers open and watch the hook as you stitch slowly. This can help you to understand the cause of your occasional skips. Using a narrow piece of fabric (or just moved to one side) makes visibility easier. Someday I'll get to use a double needle 🤩
 -

Landis #1 Early Christmas Gift
Samalan replied to alfredleatherworks's topic in Leather Sewing Machines
Now that's a Christmas gift, people can be so cool, good luck with that. Now that's a Christmas gift, people can be so cool, good luck with that. -
Antique Tools - Edge Channelers; Anyone else use these?
Samalan replied to alfredleatherworks's topic in Leather Tools
My son's doctor was asking him what he did for a living. When he asked what I did, my son said I do leather work. The doctor said, "Tell your dad to give me a call; I have some leather tools he might be interested in." So I did. My son's doctor was asking him what he did for a living when he asked what I did. My son said I do leather work the doctor said, " Tell your dad to give me a call. I have some leather tools he might be interested in, so I did. We met the next day in the parking lot where the doctor worked. He said the tools are in the trunk of my car. When he opened the trunk, there were two boxes. One of the boxes was a small old trunk, you know the kind with the wood straps, with leather campaign handles, and the top slightly rounded, really cool looking. The other box was a wooden box covered in sheet metal with a thousand rivets around the edges and a beautiful decorative design. When the doc opened the boxes, I could not believe the leather tools, Head knifes, a Gomph pattern maker's head knife, those Gomph edge slicers like you have there. All kinds of edge creasers and a pipe tobacco tin box filled with homemade stamps, all made very nicely. Also, there were letters in envelopes with dates stamped on them, 1891 - 1889. When I asked how much, he said, "Just take them." I held up one of the tools and said, "This one tool is a hundred bucks." Are you sure you want to? Just take them, he said. I said maybe you would like a nice belt or something. He said, "No, I just want you to have them." Sorry about the long answer, but yes, I do have those. I agree with you, it's so much fun using old tools. I'm a cabinetmaker by trade and have a lifetime collection of antique tools. Have fun with those old tools. -
 Schierbrockc joined the community
 -
Hobbyist warehouse contents for sale
Schierbrockc replied to joea's topic in Businesses & Estate Sales
I might be interested if you can post more zoomed out pics, especially the sewing machines. I have family that is local and could pic up for me then Id drive it back to my home later -
 misty vale leather joined the community
 -

What style and size stitching chisels/pricking irons for starting?
Dwight replied to Moyerbros's topic in Getting Started
Since you are doing holsters, belts, etc . . . go for 5 stitches per inch or 6 at the most. Either makes a really good looking and good working belt, knife sheath, or holster. More stitches makes it look like an over sized watch band . . . fewer won't hold as well. My machine is set for just over 5 . . . and I never have any problem with the item being held together. AND it really looks better whether I'm using matching stitches or contrasting stitches (think black belt with white stitches). And the plus side . . . there will be times for one reason or another . . . you will want to pull out X number of stitches . . . and 5 or 6 doesn't take long and is not tedious to do. The other side of that as well . . . sometimes when I'm doing a very special holster or knife sheath (or other stuff) . . . I use my machine to punch the holes . . . and then hand stitch the item . . . using a saddle stitch. 5 or 6 stitches per inch is sort of quick to do . . . many more than that is a real pain. May God bless, Dwight -
Grab a trailer and head over! Weather in AZ is beautiful this time of year
-
 After thinking about it for bit, I think you should start with some cheap irons, like Tandy. You should experience the struggle and frustration of the experience. You need to learn how to improve a crude tool. The first thing that I learned was that I had to remove all of the black paint from the tines. That was not enough, so then I had to polish the tines with fine grit sandpaper and finally a strop. I tried rubbing the tool on a block of wax, which also helped but it was still difficult to remove the tool because the edges between the tines were still rough and would resist removal from the leather. I learned to use a wooden block to hold the leather down and pull against it to get the tool out. Presto! These are the types of things that you can learn only by using cheap tools. Once you have gone though that experience, only then will you fully appreciate a good tool but first you must pay your dues and suffer for the craft, learning these things through personal experience. You will be better for it. Starting with good tools is kind of like cheating and is basically robbing yourself of useful experience. Start out with all cheap tools. Your projects and progress may suffer a bit but you learn a lot from it. Get some cheap irons, but nothing with black painted tines. Good stitching is possible with diamond shaped tines. You do not need Japanese style irons, they are a luxury that should be reserved for experienced crafters. Extend this logic to other hand tools such as edgers and groovers. When you have experience under your belt I would recommend Horseshoe Brand edgers. Here is a link to their super comfortable handle with changeable blades that cut a rounded corner rather than a flat bevel. Much nicer and saves sanding. https://www.ranch2arena.com/collections/horse-shoe-brand-tools/products/65-2988-qc-western-edgers Nick
 -
 Screencapped joined the community
 -
I know I’m about 14 years late but did you ever make a leather helmet? I’m in the process of making one right now.
-

Question on quality between cuts
chuck123wapati replied to DoubleKCustomLeathercraft's topic in Leatherwork Conversation
I appreciate your kind words. That would be awesome, no doubt. I would love to make it up north again one of these days. Maybe if I played the lotto more lol. There are a few folks on here I would be tippin a beer with. -
Help a Newbie Develop an Eye for Quality
wizard of tragacanth replied to OGL's topic in Getting Started
Yeah, you learned a few things. That's they way it works. Each project builds on skills and knowledge. It's a process. Nick -
That ain't no hobbyist stuff!!! Wished I was in the Arizona area....
-
Recommended Source for Hermann Oak Tooling.
chuck123wapati replied to Latigo Smith's topic in All About Leather
Dang man, you could tool a turd and make it look good!!! -
Recommended Source for Hermann Oak Tooling.
Tim Schroeder replied to Latigo Smith's topic in All About Leather
I am going to have to find a way to buy HO. Which I think looks the best. In this picture you can see the major difference in how two different leathers will turn out. Top half is W&C regular tooling panels. Bottom is HO. Even my wife said there is a noticeable difference. These are tooled and finished the exact same way. No resist just antique over raw leather. Last picture is W&C Vachetta but used Wyosheen over dye for resist then antiqued.
-
Dyeing leather
chuck123wapati replied to Samalan's topic in Dyes, Antiques, Stains, Glues, Waxes, Finishes and Conditioners.
Lol i will get kicked for sure. But it's not entirely his fault. That guy had some poor maternal upbringing there. Saw it right off, too. See, his mom had two choices: either slap him upside his head for spilling and then teach him to clean it up and pour his own milk for his fruit loops, or pour it for him every day of his life while he sits on his butt watching Looney Tunes. Guess which choice she made lol prolly an only child. Trying to spread peanut butter on a samich would probably traumatize the poor guy. See, that's a mess made from ignorance; he just wasn't taught better. But hold on, you can't write him off, you can tell he has had a lot of experience in this and has learned something very valuable at some point in his life, and it's actually a way to compensate for his lack of maternal training. Always wear the same color of clothes as the dye you are using. Now that shows some savvy right there, and if you're really clumsy, maybe paint the walls the same too.!! Now to tell on myself, about a month ago i was working on a project, and it came time to use a little nfo. Pulled out a fresh quart, opened it, poured some in a can, set it down, reached over it for a paper towel, and knocked it over, glug glug glug. Set it back up, Cussed like a sailor all the while franticly moving crap, reached over it to get a paper towel, glug glug glug hit it again. I can't blame it on ignorance. -
Yes, Reassembly went off the rails early. But I know more today than yesterday. The pocket pieces are very thin which made finishing them a challenge. I opened up a kit I had been gifted some time ago. Already making improvements there. Thanks to everyone! This forum and the feedback in this thread have been very helpful!

.thumb.jpg.327685d8c1787fa894323fed9a6b2dac.jpg)