


JLSleather
-
Posts
7,378 -
Joined
Content Type
Profiles
Forums
Events
Blogs
Gallery
Store
Everything posted by JLSleather
-

Newbie Here Needing Help With A Sewing Machine
JLSleather replied to Jason's topic in Leather Sewing Machines
If ya figger Art went to school as a boy, that list down the left makes him about 175 years old Seriously, Jason, I don't claim to be an authority but the Des Moines Sewing Machine Co. seems to know what they're talking about. (515) 288-8269 -
Edge Kote & Dye
JLSleather replied to jc3persons's topic in Dyes, Antiques, Stains, Glues, Waxes, Finishes and Conditioners.
My opinion, for what it's worth ... You can dye with wet OR dry leather, though keep in mind that with solvent (spirit) based dyes, leather dyed wet may give you more color than you wanted (the leather NOT dyed will lighten slightly, leaving a "darker" shade). I say spirit 'cause that's all I use. The difference between edge coat and dye is that dye doesn't suck -
Newest Check Book Cover
JLSleather replied to Cowboy316's topic in Purses, Wallets, Belts and Miscellaneous Pocket Items
Yet ANOTHER nice lookin' piece ... gotta ask, though, what's with the "lefty lacing"? -
Shawna Photo Album 012.jpg
JLSleather commented on Edwards Custom Saddles Tx's gallery image in Our Leatherwork Galleries
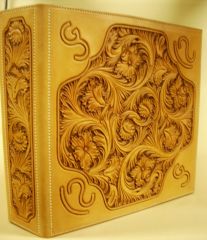 That "sheridan" stuff usually looks a bit "busy" to me, but this is PURDY! THANKS!
 -
One Of My Projects
JLSleather replied to builderofstuff's topic in Purses, Wallets, Belts and Miscellaneous Pocket Items
I agree! Everybody loves to talk about half a dozen names in leathercraft, but their "early work" wasn't nearly that nice looking. Nice job! -
Cutting And Saddle Stitch Punch Surface
JLSleather replied to jc3persons's topic in Leatherwork Conversation
That's true ... I should have pointed out the importance of setting the screw down in the block with a router or a counterbore. Recess it in half an inch or so, and you'll have room to resurface the block if you ever need to. -
LOTS of folks talking about Weaver in the past, but recent posts suggests that may not be the place. My "rant" largely concerned Ebay-ers - where I've seen stuff sell for MORE than what you'd pay at the retail store - and "re-sellers" - who seem to think that it's reasonable to charge a fella an extra $10 to cut a belt strip. But you've opened a new line of thought. To get wholesale or volume pricing, I''m sure we'd need to order larger quantities of leather than I usually buy. But, I'll see what I can find, and if someone else knows how much leather a guy would need to buy was to reply to this, I'd be willing to go in on a batch. 'Til then, when I want 8/9 I go to the retail store and buy a shoulder or a side that I can SEE and FEEL, and PICK out of the batch (even the place where I get this, I really think I get good leather only because I go through the pile and select the hides I want). Most of the belts I make are 1 1/2" - 1 3/4", which costs me less than $4. So, while I'm always interested in a better price (who isn't?) I simply will not pay more than that. Beyond that, I get lots of stuff from S-T Leather in St. Louis, MO. Their prices have gone up a bit, so you could ask them about the 2010 catalog. The phone and fax number are on the web site. I'm not a spokesman for that one company, but just by way of example, here's some stuff I use from them (2010 price), which you can compare with other suppliers ... Lacing nipper ---- 8.95 Sewing awl w/ blade --- 6.45 Fiebing's Leather Dye 4 oz ---- 3.99 (discount for 10 or more)
-
Alrightey, then ... nobody wants to point out that 24" of leather is not EIGHTEEN belts, it's SIXTEEN belts. Idea was, somebody else jump in and reinforce my point. Oh, well ... maybe one or two will see it. But, to answer that fella's original question ... 6' straightedge, skiver, bag punch (3/4" or 1"), slicking tool, stitching groover and overstitch marker(s), rivet / snap setter, round punches (up to #6 for lots of stuff, up to #10 or 12 for saddle work), and what was already listed by others. You can cut straps with a utility knife and straightedge, but a strap cutter is a good idea ... belts, billets, straps on bags of all types, etc.
-
Cutting And Saddle Stitch Punch Surface
JLSleather replied to jc3persons's topic in Leatherwork Conversation
Actually, I make long or large cuts right on the table. I bought a table about 6' long at a garage sale or something like that for like $10 (way less than the "poundo" board, though those do work). When it's marked up to the point where it doesn't work, it'll become kindling for the fire at the camp grounds. If you're thinking wood won't work, ask yer Gramma what her cutting board is made of For punching, I find that a piece of heavy scrap leather on the same table works well. A palm-sized piece of the 8 oz leather you're using already will last a good while. All you need to do is get the punch THRU the leather without bashing it into something hard, and a scrap will do that well. Idea is just to not punch through BOTH layers. A chunk of wood works good, too. Use the end grain for this (find a fella cutting trees, and ask him to cut you off a 3" thick cross-section about a foot diameter, and yer good to go). If I was going that route, I'd look for a piece slightly larger than the holsters I'm making, then drill a hole in the center for ONE screw down into the table (it won't move one you, but you can still turn it). Hope this helps! Jeff -
I'm about to rant about the "price" of leather... I'm about SO tired of "crafters" and (ughhhh) "re-sellers" going on about how expensive this is. So, the rant will be much worse than this here, but here's a short version ... My wife saw some stuff on Ebay she thought I might be interested in, so I snooped. These people are out of control! PAGES of listings for items that were ALREADY OVERPRICED at Tandy which are then MARKED UP AGAIN to post on Ebay. Wow ... There's a story this teacher used to use ... This guy decides to insulate his house, finds out to use the blower he needs some 1 1/4" holes in the walls. Goes to the store to get a drill. Salesman (that word leaves a nasty taste in my mouth) shows him a drill for $39. But, this other one is variable speed and it's $49. Then we carry this one, variable speed - forward and reverse - $69. Add the "hammer drill" function - $129. Pretty soon the guy figures out that he's gonna spend a couple hundred bucks, and he still needs the bit. So, what does he REALLY need? MOST of the students said he needs a drill. INstructor says, no - what he needs is holes in the walls. To bring that home, here's the thing ... WE need leather. This means COW-boys (the fellas that grow cows), a tanner, and a truck driver or two. What we DON'T need is a pretty display set up to show us a side of leather being offered to us by a guy who had nothing to do with supplying that hide (sorry, this is my "respect" for Tandy managers and such showing). One more example close to home ... you fellas (n gals) who bought trucks for your FARM/RANCH ... how often do you really use that "new-fangled" cruise control??? And don't even get me started about the guys who pay a nickel on the dollar for somebody's tools and then want new or near new price to RE-sell them, and THEN have the NERVE to post about "helping" other crafters. But, I promised the short version. I have a double shoulder here about 57" wide that I cut a straight edge on both sides of. Result is a rectangle roughly 57 x 24". If you're cutting belt blanks, that makes this piece of very usable cowhide about 9.5 square feet after trimming. Cost about $60. $60 divided by 24" is about $2.50 per inch width (AFTER TRIMMING). Makes cost of a 1 1/2" belt strip (which fits up to a 48or 50 waist) about $3.75 each. Not $9.99, not $12.99, whatever. If you like it simpler, 24" is EIGHTEEN 1 1/2" belts for $60 (plus a dollar for the strap cutter blade that cuts them ALL). $60 divided by 18 equals $3.33 each. And that's already figuring in the markup for the fat guy at the Tandy store who gets paid for ... well, I'm not sure what he's getting paid for. If there's a labor charge you HAVE to figure in, consider this .. I can cut ALL of this in a little over an hour without spilling my coffee. If I get $30 an hour (which is insane for something anybody can do) then you have $90/18 equals $5 each. Next step ... watch for those guys who actually will sell you that $5 belt strip for $5, but then want $5.99 for shipping and "handling" plus $1.50 for each one after the first. ESPECIALLY if you're starting out, or just seen too many ads showing such INSANE prices fed to you so they can sell you belt strips at $9 and tell you what a "deal" you're getting -- you need the holes in the wall -- not a new wall, not a "hammer drill", etc. I have much respect for the CRAFT, not the "crafter". Stohlman was GOOD, and I've learned alot from his materials, but I'm not paying $100+ for a swivel knife because it has his name in the ad. Tim just posted his checkbook in another forum, and he freely admits that he is learning pattern design. Personally, I think it looks purdy darn good and every bit as nice - if not better - than one that says "Al" or "Chan" or "Paul". Now, having said all of that obnoxious ranting, I realize the possibility than someone with a spine will ask me to put my money where my mouth is. So here it is. I'm in no hurry to sell natural leather tooling blanks. But I'd sell 12 1 1/2" that's one and one half inch) belt blanks (50+ inches long) for $5.00 each - already cut to width - just to make the point. And $5.00 ships them, one or ALL of them. The TWELVE is no accident ... that pays for the entire hide, making the other SIX belts FREE for me. Try not to be distracted from what you want to do by some that are better at BS ...
-
Newest Check Book Cover
JLSleather replied to Cowboy316's topic in Purses, Wallets, Belts and Miscellaneous Pocket Items
Couple months ago he was telling us he couldn't draw and was fixin' ta learn how to design patterns. Looks like yer pickin it up pretty well, Tim -
10% on a $30 item, nobody thinks twice about it. But we all know where our sales are going when WE start charging 10% on a $300 dollar item (much less the pricey stuff!). Yeah, that's gonna happen ... !
-
If you're going to go that route, get it now while it's on sale. They have been selling these for $500 (which is insane), but well worth the $200 price tag.
-
Al Stohlman's book "Tech Tips" is one of the clearest I've seen. That one must be 50 years old, and is still available for less than $10. Saw it at a Tandy store a couple days ago, same book I bought back in the 80's. A hundred people have "written" books since then, each "borrowing" and duplicating his "tech tips". While I'm not promoting any one guy's work, I will say that this book is very clear and detailed and the information is still valid. That said, I have TWO recommendations: 1.) Don't waste alot of time and money buying books (or videos) by people who want to get paid for telling you what was already said in other books. Save your money for the leather. Experience is THE best teacher. 2.) I'm with Johanna on this ... there's no substitute for seeing it done, if that's possible. Just a thought ... you didn't say what type of projects you were wanting to make. but for $150 you could buy half a dozen books OR you could buy a side of leather large enough to practice carving a wallet - about 75 times.
-
I'm not seeing where I've done anything that requires or even suggests anything owed ... if I helped at all that's good. I'll keep you in mind about the horse, though, since I'm going to get one somewhere could just as well be one of yours
-
Yeah, you'll want the outside holes to line up. This will put a bend in your wallet in the middle, which is good -- it's supposed to help it fold shut without "puckering" the lining in the middle. TRANSLATION: Line up the holes on the outside, and there will be holes IN THE MIDDLE where you're sewing through the carving leather but not the lining.
-
This kit has been marked down about 50%, to where it's now a reasonable price. This is all stuff that would help with what you're wanting to do, and from there you'll have a feel for where you want to go with it. There's a Tandy in Little Rock just up the road from you where you can see some other stuff that might help, but I suggest you look into the site in the next paragraph before you go ... the SAME stuff for LESS money in St. Louis. You can pay the shipping and STILL pay less. You'll need some dye, finish, etc. I use Fiebing's spirit dyes, Neatsfoot oil, and Tan-Kote. Always good results, but I've heard good things about Angelus products and have been meaning to try them, too. Spirit dyes include alcohol (toxic if swallowed) and Angelus is water-based, but your kids are old enough that it's a personal preference. I get all of that at S-T Leather in St. Louis. The link works, but the prices haven't been updated on their site. There's a phone number on the site - just ask them to send you the 2010 catalog. Always good stuff from them. They will also have the lacing punches (3/32" for wallets) you'll want, and their belt snaps work well for half the money as other places. You'll want something to cut a long, straight edge on the hide to start from. Doesn't matter what you use ... I use a glass table top that came with one of my tables (6' long and I can see the leather under it). 2/3 ounce or 3/4 oz tooling leather for wallet backs, and 8/9 oz or 9/10 oz for belts (if you're making lined belts, a 6/7 oz with a 3 oz "inside" should be fine). No way to "pick" a good hide that I can tell you with this post, and I always recommend you go pick it out ... for look, feel, smell, etc. You'll probably also be wanting a good quality stitching/lacing horse, but I'll leave that recommendation for someone else, as I'm in the market for a better one myself
-
Just a reminder - the "name brand" stuff isn't always the quality stuff. I do more "watch OUT for" name brands than I do "watch for" name brands. Some folks seem to think that the person who spent more on advertising has the better product (????). And then, there's a considerable price difference from one place to the other for the SAME product. Depending on the age of the "kids", I'd think a strap cutter and box knife could be shared while mallets and tooling blocks might not be. Books and patterns certainly need not be bought repeatedly. But if you let us know what type of projects you're thinking about it would be easier.
-
Depends on how precise you want it done, actually. Got a machine shop close to you? Ask 'em to stick it in a lathe with a tool-post grinder. Probably run about $30-$50 around here, but you'll have a precision edge like ... oh .... forever. Find a guy who knows what he's doing and you'll only lose about 1/64" on the radius of the blade.
-
That fish in the photo is about 4 1/2" long (12 cm for the european crowd), which apparently seems really "awesome" when you're 3'11" The leather stuff is easy, THIS stuff is work!
-
This is nice looking stuff! The bars theme is a bit unsettling but as a former "jarhead" I like the USMC thing (nice job of adding some texture to "break up" the black). Keep at it, nice work!
-
Thanks! ... THEY like it. Personally, I don't remember roofing being that much work ...
-
Dying Basics?
JLSleather replied to Waylayer069's topic in Dyes, Antiques, Stains, Glues, Waxes, Finishes and Conditioners.
THis wallet is done with Fiebing's spirit dyes (only). The sky and river are Navy, mixed about 30:1 with solvent. The "red" on the fish is red (not "dark red") and the green on the fish and the leaves is green (not "Kelly Green") mixed with dark brown and solvent. The guy's waders and the tree trunks are dark brown (thinned), just using more or less heavy applications. The "white" splash in the water is natural leather, not colored at all (no white). Little bit of thinned yellow on the fishing lure (about 10:1) and the brown spots on the fish and the guy's bait bag are [nearly] full-strength dark brown. I use this example because if I wanted to use a green lure, I could have painted this whole thing with 4 colors. Note the colors fade lighter as they become more distant. This handbag is done with yellow, dark brown, and VERY thinned black. The main body of the bag is one piece, and the rest is odds n ends from the scrap barrel. This was the ONLY reaosn for the dark brown ... all hides will match if dark enough. The yellow was used for contrast, so the whole bag wasn't just solid DARK leather, and the misted black for accent in the rose. These photos should open another window so you can see the photo and this text at the same time (I think). I use these two examples for this ... 1) all done with Fiebing's [spirit] leather dye; 2) shows colors mixing and blending; 3) both finished with Tan-Kote followed by Saddle-Lac; 4) no oil on either project; 5) Natural leather shows as a "color" blended into the scene, but still appears white (even with Tan-Kote). Hope all of this is of some value for you. Any more questions just ask around here, and keep in mind that photos always help. -
Dying Basics?
JLSleather replied to Waylayer069's topic in Dyes, Antiques, Stains, Glues, Waxes, Finishes and Conditioners.
That's alot of ground to cover for "basic" Without seeing what you have, I don't think anyone can make a simple set of do's and don'ts for your project, but here's a couple general things. You CAN case the leather, but it's not necessary. I've dyed veg-tanned leather with AND without moisture and been fine (I didn't add moisture so I could dye it, I just dyed it before it was completely dried from tooling). 2 things about moisture content here ... when leather is wet, it appears darker. So, if you dye the project when wet, it will appear slightly lighter when dry. On a solid color project, it may not matter. And, leather will "move" and shift with changes in moisture content, so the less times you wet it the better. If you're buying tooling leather, you shouldn't have to use a deglazer. If you can run a damp sponge over it and the water gets in smoothly, you're fine. This may be a reason to wet it in the first place ... you'll be able to see if there is anything on the surface preventing absorption. Just damp, don't "soak". Since you mention Tandy, I looked at their site. The "Leather Dye" shown here is spirit (alchohol) based, and is what I use. And I ALWAYS thin it with SOLVENT (though you can get the same stuff for about half the price of Tandy). Only dyes I use "full strength" are the navy blue (which is full-strength ONLY when used as a base coat for black), dark brown or chocolate for edges, and the black. The "Navy" is what I use for sky blue and water, though it's thinned ALOT. Any of these colors can be mixed for more colors (my "purple" is some red, some navy, and some solvent). Not sure what type of oil you're talking about, either. I use only Neatsfoot or neatsfoot compound (and sparingly) and I dye BEFORE oil. Here's a tip ... the spirit dyes all contain "particles" (sediment) suspended in the mixture. This is the "pigment", and the darker the color the more pigment present. When you hear people talk about wiping or buffing the surface and getting some of the "dye" (usually the black), this is what you're wiping off ... the little suspended particles that didn't penetrate because they don't get into the fibers. Not absolutely certain without seeing your project, but I'm guessing this is the "coppery" stuff you're referring to. When you follow the dye with the oil, it actually aids the entry of the particles (swell the fibers of the leather and "flush" in the particles). The black definitely is more "colorfast" when oiled after. I don't let the leather sit for days between coats. Example - when dyeing black, I'll dye it solid blue or green, then the black. If it's the end of my day, it won't get finished until tomorrow, but not necessary. The oil itself I let set for a whole day, as it does take a while to even out (which it will, it just isn't instant). I personally use an airbrush, especialy for large areas, but not required. My cheap model is the Paasche VL with a small compressor and an evaporator. Whole system for about $200. I have 4 of them, and reasons for that would make this post WAY too long. I always save the trim when I cut out a project, just for use for testing the dye color. DO NOT "assume" that the color you used last time will be identical this time. Hides are tanned with chemicals, and unless the leather and the chemical batch are identical, ... Even 2 hides ordered from the same supplier at the same time may not react quite the same, so always test on scrap FROM THE SAME HIDE AS THE PROJECT. I'll post one more time in a minute, with an example of what I'm talking about. -
My buddies decided they needed a new roof, since the hail insurance was putting up much of the money. This roof is 52' long, and reminding me that I'm not a kid any more ... Oh, well, they're happy and I have a good idea that it won't need it again in my lifetime 3 days away from the leather for shingles (and a rain storm), and 2 more days getting the black crap off my hands so I can even DO leatherwork ...