-
Posts
874 -
Joined
-
Last visited
Content Type
Profiles
Forums
Events
Blogs
Gallery
Store
Everything posted by Rossr
-
Shelia, nothing wrong with trying!!!! Its just a matter pf breaking it down and going step by step. ...A sewing machine would be beneficial too I am sure Stetson that is a good observation. Never thought much about it and i have connected them always tried to be careful no to cut past though......Lol.. we are our own worst critics always. Thanks for the compliment too...i view myself as still a beginner and still learning!
-

Another hatband
Rossr replied to alpha2's topic in Purses, Wallets, Belts and Miscellaneous Pocket Items
That is some fine looking arrow basketweave! Nice work Ross- 12 replies
-
- hatband
- leather hatband
-
(and 2 more)
Tagged with:
-
Yes they are heavier than I would like...but no horrible. I did bevel first and then did the pebble background last.
-
I have in the past not liked the saftey skivers. That was until I put a new blade in one and it worked pretty well. I did skive down the suede under the flaps on the inside and that was ok...but i still have all the rest around the parts where no flap. Give it a go its all about learning
-
Sure was and Thanks for that comment. Real happy with it that way actually! Thank you sir
-
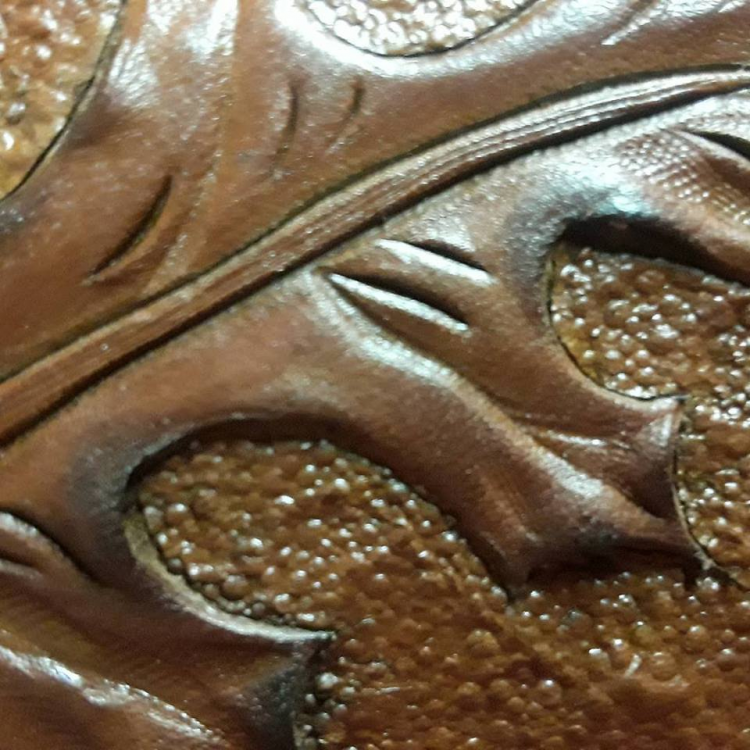
@YinTx Best I can do on the picture. It isnt great but u can see what I mean if you look at the point on the leaf on the bottom right you an see a cut line following it from the point up and to the right. I suspect it has to do with improper casing of the leather or I didnt bevel it deep enough.
-
Thanks mutt Dun that is one of the things I want to think through a bit more The pig skin wont burnish really. so for now if you will its kinda raw edge. It looks fine but long term I see it picking up some. So been thinking on better solution. I considered making the edges longer and wider skiving them down and then rolling them to the inside after the pig skin...but that would add a level of difficulty I am not ready for Shelia, The black part is a separate piece. the front and back are two separate rectangles. So the black part I glued and stitched on to each rectangle hence the puffy look. I did skive the edges of the black part down so it meets it nicely. I did this for a couple reasons. One to make the contrast easier so I could dye them separate. Secondly I figured it would be easier to fold over that way rather than one piece being of thicker leather. Bear in mind I am winging this so to speak!
-
It most likey is stiff enough....i keep watching and reading that most added something on the inside. so thats the way I went. I may make another to see what happens with nothing in it. Yea It may just be me being over critical too...doesnt show well in picture. but I may try ....Thanks for the compliment too I didnt even think of creasing them and I thought they should have something smh! I thought white on the spine might have been too much. Funny how we look at things different! Thanks. I watched the same video I am pretty sure at one point. and one of the reasons I used a inside board. I will have to check out some matboard to see what it is like!
-
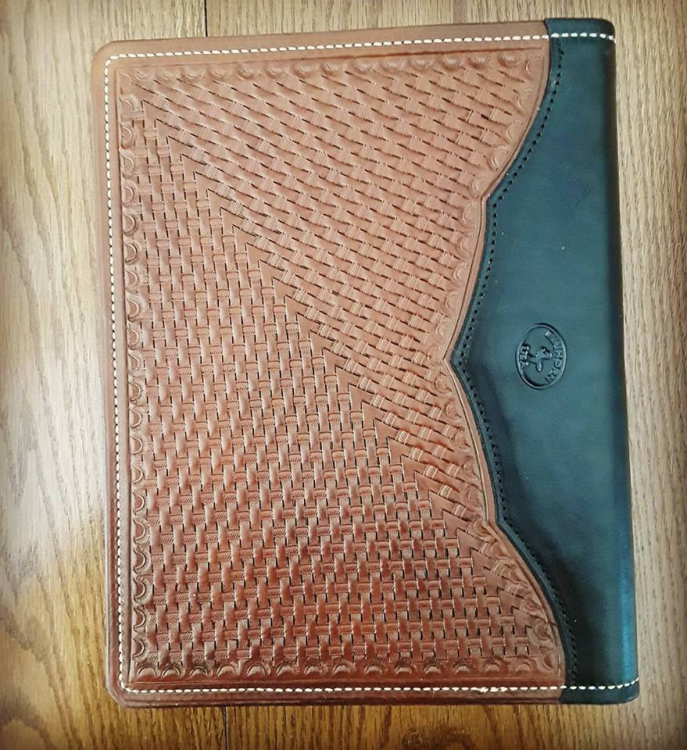
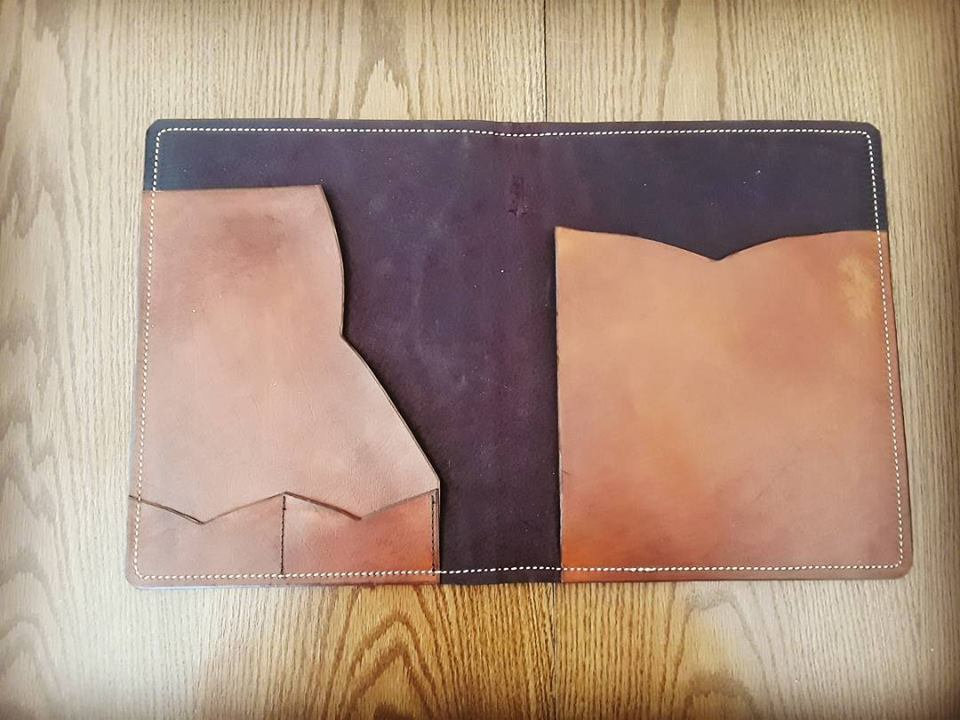
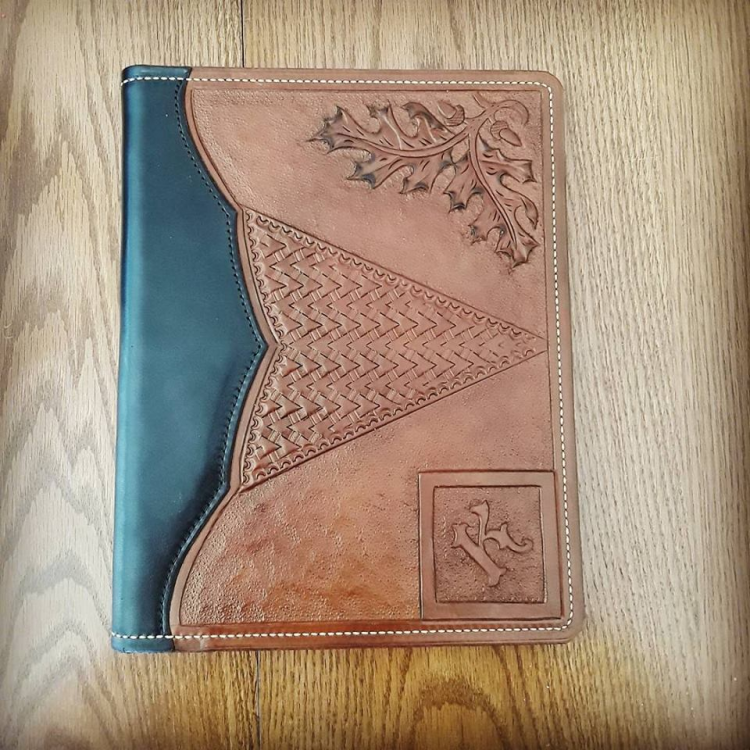
Well I showed my first around and a good friend of mine wanted one...so I figured practice is practice. So this is take two. I did a few things different I used cereal box cardboard for the inside this time cut down on weight compared to the plastic I used in the first and it seems stiff enough. I also rounded the corners which I like more. Really just a style thing. Outside was 8-10 ounce wicket Craig Carved and tooled The Black center is Wicket and Craig 6-7 ounce Dyed Black tooling. Inside is a Merlot waxed Pig suede. Veg tan for the Flaps inside maybe 2-3 ounce. Color is Fiebings Golden Brown. IFnished with Tan coat. Slicked the edges with saddle soap. I did white stitching this time which gave a nice contrast I thought. Open for any constructive criticism...I have plenty of my own of course! I did notice I could see some of the cut lines on my carving...I seem to have this issue on thicker leather, It appears after I use the dye and finish. wondering if I am cutting too deep ...
-

31 Pen Pouches
Rossr replied to Rolandranch's topic in Purses, Wallets, Belts and Miscellaneous Pocket Items
Thats great for selling them all and working towards your future Keep up the great work and keep moving forward!! Tip of my cap to you and your brothers. Best wished for a successful future Ross- 26 replies
-
like the horse a lot.. great work
-
Lot of fun...look forward to seeing it
-

31 Pen Pouches
Rossr replied to Rolandranch's topic in Purses, Wallets, Belts and Miscellaneous Pocket Items
They look real nice and the pens your family makes are also stunning. I am curious are you also under 18 and adding to your college fund with leather work?- 26 replies
-
Jake what daryl said just follow the link its easy.. few of us pop on every couple days at least and chat leather
- 100 replies
-
Thanks. You are too kind!
-
Thank you and exactly...got to try you will only learn and improve by trying....give it a go!
-
Gary and all, I did a quick google search and found this video about it. Around the 7 minute mark is the how to. He just does one arrow row, but you just reverse and come the other way to make more. Thanks for the kind words Thank you!
-
Eric I like that idea....and it would make it a little easier to stitch too...cause I actually stitched that to the liner and then went around the rest. That would eliminate that step Fills the whole screen on mine.... Thank you
-
Yin the only dye I used was fiebings mahogany. Its more red in person which i like...looks darker in the picture. That pattern really isnt that hard...and I have errors on it but I resisted the urge to restart. I got that pattern from the Paul long sheath video. you still work off a line when you start its just different orientation! I know you could do it!! exactly Alpha2 thats why I know I have one. I mean I had three already....granted nothing as fancy as this...but I sure didnt need one for function sake Thanks Dun.....if I can do it anyone can....really! Wedge...I cheated and used a machine.... Thank you for the kind words looking forward to seeing yours Once you get on it the basket weave isnt too bad
-
Thank you sir....still much to improve though!
-
Well made up a padfolio for myself. Never made one for a full sized tablet before. Veg tan flaps inside and business card holder and front and back parts. Dyed Fiebings Mahogany. Black part was wicket and Craig veg tan dyed black. Oak leaves carved and petal lifted(First time trying that and I like it) Letter R and Shield also carved. The back and parts of the front stamped using a basketweave stamp to make the arrow patterns. Sewing was don't by machine on a Juki LU-563 using 138 Black Nylon Thread. Inside the Blue is Pig suede. Just liked the look. I only had 8-9 ounce leather on hand for the front and back In the future I would use thinner...6-7 ounce at most I think. Although it made it nice to carve and stamp. Fun project and it came out ok in my opinion. Always learning Ross
-
Concur
- 100 replies
-
Looks pretty good to me. If you used an overstitch wheel to make the holes and then an awl to punch through. Once you stitch go back and run the overstitch wheel down the thread it tucks it in and gives it a nice finished look. Picked that tip up years ago from a long time leather worker. When i did my first sheaths all I used was a groover, then the over stitch wheel, an old ice pick for an awl and hand stitched them. worked fine. There are so many ways to do it and with practice you refine your techniques and improve! Ross
-
Wow that is real nice....too nice for a drill on a job site lol Great work
-
I got this picture from google I have no affiliation with this company. This is how these dies are. Its a thin piece of steel set in a board. the steel is sharpened to a point. The board holds the metal in place. Hope that makes sense. For what its worth I think the all steel ones are better and would hold up longer but that is just my opinion from having some of those around too Ross


