toxo
-
Posts
2,263 -
Joined
-
Last visited
Content Type
Profiles
Forums
Events
Blogs
Gallery
Store
Everything posted by toxo
-
Handmade hard leather purse
toxo replied to YDdesign's topic in Purses, Wallets, Belts and Miscellaneous Pocket Items
Nice job. I might have gone lighter on the leather. I don't like the strap clip riding on the leather. It will scuff up over time. There's a few ways of avoiding that But well done. -
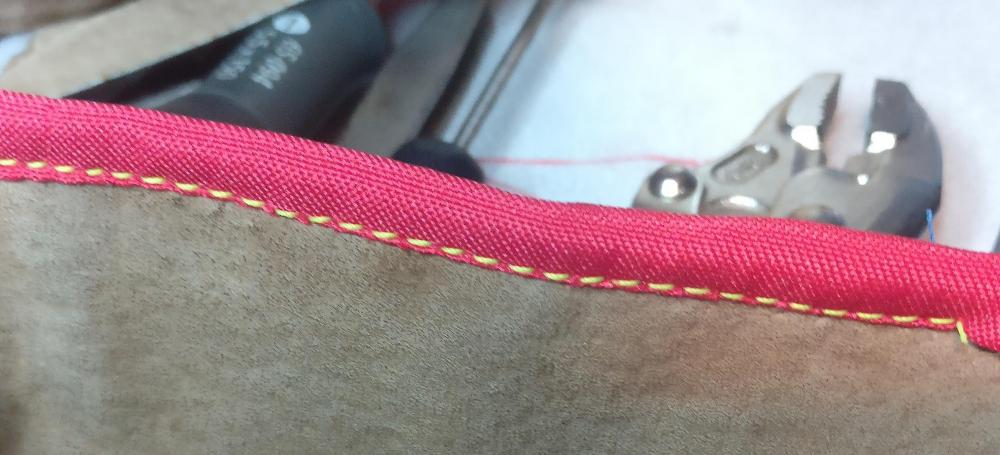
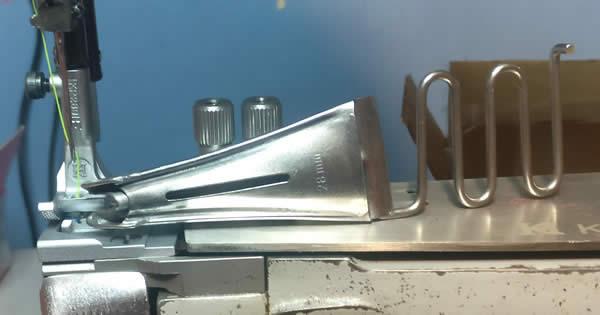
I cut the back out of the 28mm double folder. I also had to cut out the tab that stops the binder from moving forward. Still needs work but hey, I'm binding. The pic shows the 28mm double folder turning over a raw edge tape. They offered me new ones and wait or half my money back. I told them I would work on them in return for a free repositioned 25mm binder. They haven't replied yet.


-
New member saying hi
toxo replied to PhilDimashq's topic in Purses, Wallets, Belts and Miscellaneous Pocket Items
Welcome Phil and well done. Looks like you've learned well. Each new project will bring different challenges but it looks like it'll be nothing you can't handle. -
No I won't send it back but it gets my back up when some companies know something's wrong and make their money from the people who don't bother to return and say nothing. They've already said there seems to be no problem from the same photos I posted here. Watch this space.
-
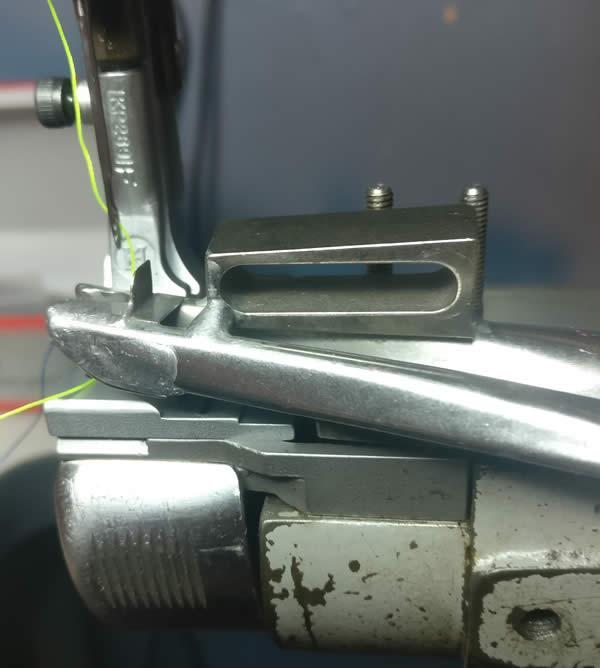
Slot is much too far forward. And this one is a double fold which leaves about a 6/7mm bind on each side. Gonna see if the seller will change em.
-
Got mine from Partwell in UK so I d'on't think that's of much use.
-
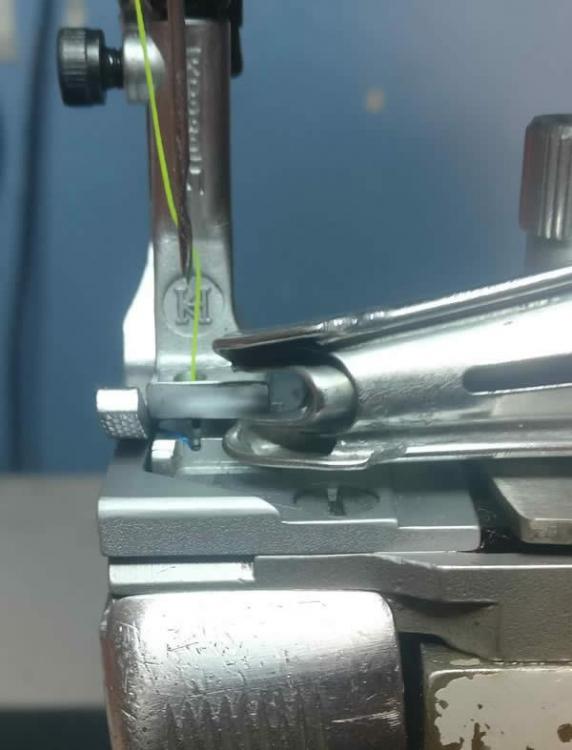
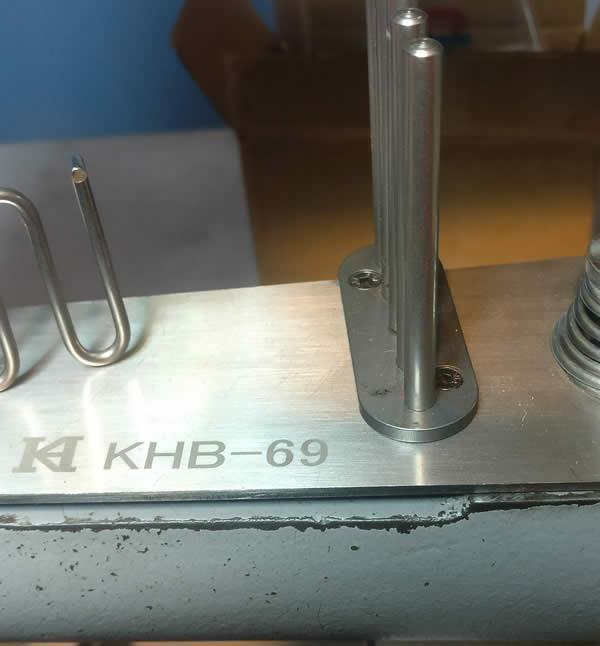
Thanks guys. I just wanted confirmation before I set about the bloody thing. Obviously I bought it on the understanding that it would fit the 69 and they both have the rectangular box with the long slot that Uwe was looking for. There isn't much room to extend the slot without breaking through the end so I might have to make up something. Thanks again guys. Bit by bit I'm learning about this binding lark so as well as getting frustrated, I'm still having fun.
-
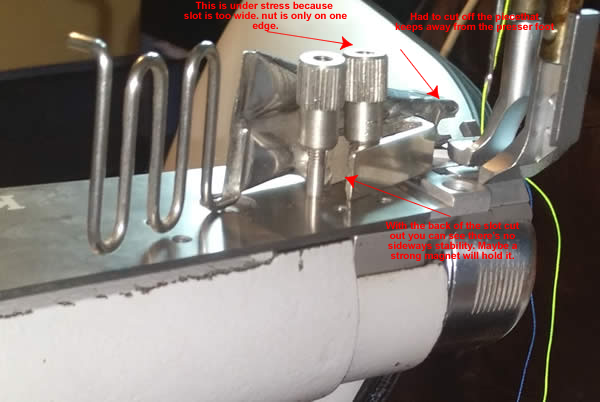
Two tape turney things have arrived at last and I'm no closer to doing any binding or understanding what's not right. Please look at these pics and tell me what bit is at fault. I can't get the business end any closer to the needle and any ttempt to bind something sees the stich line a few mm from where I think it should be. Everything is new and as I say I have two of these and they're both the same so either I'm missing something or something's wrong.

-
I'm gonna make a marzipan hat
-
If Constabulary doesn't come along with the correct answer I'll eat my hat. But in the meantime I'll throw this in, my Durkopp 239 and the 111s share a lot of components but that won't help much. The inside dia of my original Durkopp handwheel is 12.22mm. I would advise you to measure yours properly. When I did my Adler 69 I measured it at 14mm but I couldn't tighten the taperlock bush (the best way to do this). On measuring again I found the shaft was 13.5mm. Fortunately the shop where I bought it was just a 5 min drive and they were more than helpful so I was able to change it. I did a post on this inc a link to a short vid but I can't find it in my profile. IIRC apart from the 40mm pulley on the servo I think the whole lot (I posted the invoice) inc the 250mm pulley and the taperlock bush cost around £30
-
Scabbard for a Scoped Sharps Rifle
toxo replied to Josh Ashman's topic in Gun Holsters, Rifle Slings and Knife Sheathes
I'm a bit of a philistine when it comes to tooling but that rifle absolutely deserves it. Well done. -
Not really. You don't get any idea of the size. Those big ones are an inch across. I tried to do a big boys vid but my brain fried. Maybe one day. Sigh!
-
It's not very long but you get the idea. Gonna have to move em soon.
-
Adler 269 Forward and Reverse Stitch Length Adjustment
toxo replied to Eitan's topic in Leather Sewing Machines
Bummer! It's the same as my 69 so I thought it might be standard. -
Adler 269 Forward and Reverse Stitch Length Adjustment
toxo replied to Eitan's topic in Leather Sewing Machines
-
I had a quick look and got fed up almost immediately. There are errors on the site and it doesn't flow nicely. As has been said, the pics aren't great either. I would advise condensing the site and make it more user friendly. Only put up the best and most popular items and add to them as time goes on and don't even think of including items that won't pass close inspection.
-
OK the reason for a machine Vs handstitching is well established and accepted but in answer to the question "when do I buy one ", I would say "When you're sure about what you want it for". After faffing around trying to sew light stuff on my Adler I dug out mums old domestic and I love it. It just does the job. No complaints, zig zag, buttonholes. It does the lot and goes through two layers of thin leather easily. I'm not suggesting you buy a domestic for leather, I'm just highlighting the fact that if you want one machine to do it all you'd better be sure about what the "all" is before you start looking. I know what machine Ill be sewing handbag lining with in future but I won't be getting rid of the adler or the Durkopp.
-
These clones are really confusing. I have a black one but I think I paid around £90 for it. Some are sold for a lot less. Are they the same? When I first got mine I struggled but once I found it's limits (and mine) I'm quite pleased with it and the different sized rollers make it quite versatile. I think matching the bade to the work is important. At first I struggled to find the thicker blades that you can actually sharpen because they must have the two holes. Then I found this. Problem solved. https://www.amazon.co.uk/GLASS-CERAMIC-SCRAPER-CLEANER-Replacement/dp/B07BH7CNC3/ref=pd_yo_rr_rp_1/262-3653917-8140800?_encoding=UTF8&pd_rd_i=B07BH7CNC3&pd_rd_r=bb669e5c-56d0-40b4-9ad9-c33f52c38b28&pd_rd_w=BJJ5N&pd_rd_wg=aHcSF&pf_rd_p=8a2b88d0-ae09-45b1-af48-973e10ea57a3&pf_rd_r=97X2XFHGNFKYBVVJ61A0&psc=1&refRID=97X2XFHGNFKYBVVJ61A0
-
I like that a lot Matt but it doesn't look like you can do edges with it.
-
I also have a couple of sets like this. If you're using em with an arbor press don't forget the magnet. makes it really easy to use.
-
I have the cheaper black version of this one, although saying that i think I paid a lot more than £46. I must say I didn't hold out much hope but I get more impressed each time I use it. The trick is don't try to take too big a bite.
-
https://www.leather-patterns.com/shop/bag-patterns/2
-
Almost done with briefcase
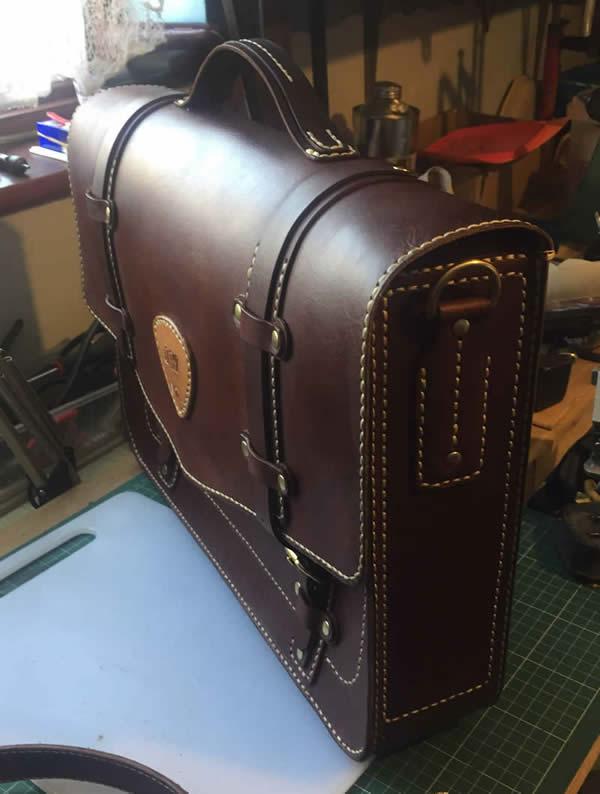
toxo replied to Simplejack1985's topic in Satchels, Luggage and Briefcases
It was the first piece of leather i'd ever bought. I think they called it pull up oil tan. I bought two shoulders and I still have one waiting for the right project. Because I don't do tooling I'm leaning more and more toward chrome tan. -
Almost done with briefcase
toxo replied to Simplejack1985's topic in Satchels, Luggage and Briefcases
I did his Motoko 3. Great value if you buy Motoko 1/2 and 3 together. This was my first ever proper leather project.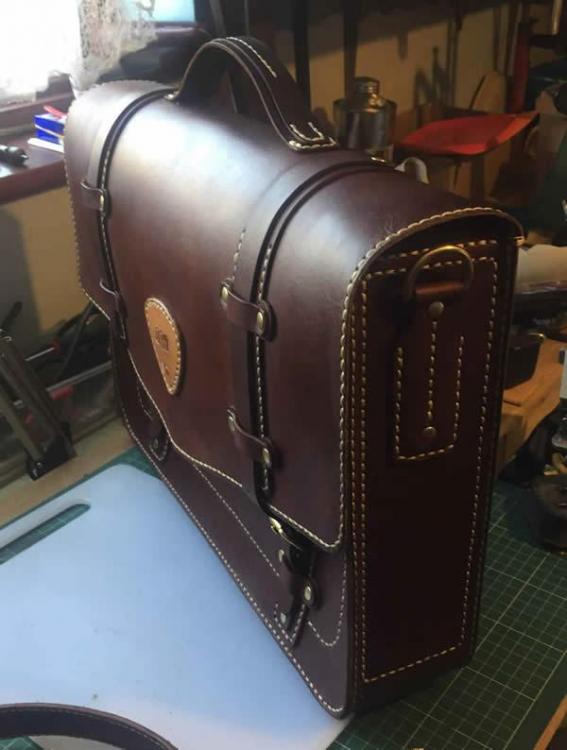
-
Well said Tug. Tandy doesn't figure in my leather world. Here in the UK they've closed all but one store and that one is too far. But as you say, if they're trying to pick up they'll need peeps to give them a chance. I'm willing to bet there's a few peeps around who owe them something for the help they got when starting out.