


Halitech
-
Posts
1,229 -
Joined
-
Last visited
Content Type
Profiles
Forums
Events
Blogs
Gallery
Store
Everything posted by Halitech
-
unless your imprerssions are that shallow, can't see why it would all wipe out. can you show the piece after it's been wiped off
-
is your soft cloth nice and fluffy? try using paper towel, that's what I use and normally don't have an issue with it wiping out of the tool marks
-
 Everything looks good except 1 thing, the location of the snap strap. Strap looks like it is already loose so once the sheath itself loosens up some, that knife could and probably will jump out enough that when he goes to reach for it, instead of grabbing handle, he's grabbing blade and now has an emergency on his hands. retention strap should be as close to the blade as possible to prevent the knife from jumping out and causing injury
 -
Can I do bag/case from 8-9 oz leather (or what to do with it?)?
Halitech replied to Jaor's topic in Getting Started
all belts will start to curve and take the natural shape of your body. If you are concerned about it stretching, stitch both edges, it will help control any stretch you can certainly make bags or cases out of it (tough cell phone case anyone?) but it's going to be pretty thick. You could also do bracelets but again, will be thicker then some want. -
the one I have, if there is a difference in the spacing, it's not enough that you can tell by eye. Having said that, I prefer my chisels over the wheel unless I can't use the chisels
-
Recent Knife Sheath
Halitech replied to Sporty1's topic in Gun Holsters, Rifle Slings and Knife Sheathes
overall, not bad but I did notice a few things 1. stitch line for the end of the blade over runs the stitch line for the belt hole on t he left side 2. can't tell if there is a welt around the blade to prevent the sharp edge from cutting the thread 3. no retention strap or other way of holding knife in the sheath as stu pointed out 4. Personal preference but I would have included a back guard between the right belt hole and around the top of the blade -
Some new stuff
Halitech replied to aguilerag's topic in Purses, Wallets, Belts and Miscellaneous Pocket Items
just a personal preference thing but on the koi long wallet, either you should have stitched all the way around or you should have stopped the stitch grove where you were going to stop stitching. By going all the way, it looks incomplete. And since you lined it (or looks that way from the image) it should have been stitched all the way and closer to the edge -
since the pricking irons are not used to actually make holes, why not use the over stitch wheels? heck of a lot cheaper
-
it may look better if you skive the lining end down to where it "disappears" behind the flap and then just sew up to the end and rely on the snap to hold the end in place instead of sewing across the belt
-
good idea on the bungee cord, never would have thought of that. I either stitch or lace the ones I do but might try the bungee cords
-
Tool Pouch
Halitech replied to CaptQuirk's topic in Purses, Wallets, Belts and Miscellaneous Pocket Items
ok, wasn't sure what type of stamp you were looking for and I've bought from him so I know his work. I think he does do some metal work as well but not as much so he doesn't advertise it very well. -
Tool Pouch
Halitech replied to CaptQuirk's topic in Purses, Wallets, Belts and Miscellaneous Pocket Items
The round punches, I've used so much they are almost a required tool for me now, don't delay too long Check with Studio-N on getting your stamp made, he's a member here and is cheap on making custom stamps. Business cards, check out vistaprint. I get all mine done there and they are cheap and relatively fast the wife's purse, well, I don't have one of them any more so up to you where you want to put her as a priority lol -
Tool Pouch
Halitech replied to CaptQuirk's topic in Purses, Wallets, Belts and Miscellaneous Pocket Items
then do yourself a favour and go to SLC and pick up these 3 punches http://springfieldleather.com/Chisel-Curved-30mm http://springfieldleather.com/Chisel-Curved-20mm http://springfieldleather.com/Chisel-Curved-10mmOUT $21.00 plus shipping for all 3 and they are well worth it. They aren't as pretty or polished as some tools but, they are sharp and will save you a ton of headaches when trying to get your corners rounded -
Tool Pouch
Halitech replied to CaptQuirk's topic in Purses, Wallets, Belts and Miscellaneous Pocket Items
glad to confirm what you were thinking -
Studio-N can probably do them for you, along with a few others but honestly, if it's for a 1 off project, find someone with a 3D printer and use a C clamp to press them
-
Tool Pouch
Halitech replied to CaptQuirk's topic in Purses, Wallets, Belts and Miscellaneous Pocket Items
nice work and that's the idea, provide better then what the customer expects. Only suggestion would be to round the corners at the top so they don't dig into his sides when moving around -
good to know, and probably a better option then the plastic clip quick release buttons they use on the cheap collars at the dollar store
-
I noticed you did the black one with the button studs, how do you find they work with active dogs? any issues with them being pulled off?
-
Hand stitching type? (not saddle for sure)
Halitech replied to mayorblurps's topic in Sewing Leather
Thank you for that profound statement and educating me that sewing machines use 2 threads, I would never have guessed that despite having a sewing machine of my own. I'm glad that you are happy with your machine stitch compared to your saddle stitching, however, that doesn't change the fact that you cut a thread on a sewing machine lock stitch, and it is going to unravel where the saddle stitch will not. -
chances are, you won't be changing the color, at least not to the color you want. usually most commercially available products use chrome tanned leather which is dyed at the time or tanning and then finished to prevent color change. you could try the deglazer in a small area that is not noticeable and then dye it but I'd be surprised if it works
-
Check the info here http://beebeknives.com/html/make_a_sheath_tutorial.html I use this but instead of just placing the knife beside the line, I actually place the edge right on the line then roll the blade over to 1 side, like the suggest when making a gun holster. Another option, instead of having it all encased like a knife blade, make a cup to hold the bottom and use a strap to hold it in place at the top
-
Hand stitching type? (not saddle for sure)
Halitech replied to mayorblurps's topic in Sewing Leather
easy, take 2 pieces of thread, tie them together, get the knot in the middle of your leather, start stitching. splicing and finishing off, good luck :D -
Hand stitching type? (not saddle for sure)
Halitech replied to mayorblurps's topic in Sewing Leather
Saddle stitch is over kill because she probably can't figure it out. It's a backstitch as ENC said and has the same inherit flaw as machine stitching, cut one stitch and the whole thing unravels. -
Hairdressing Holster
Halitech replied to venator's topic in Purses, Wallets, Belts and Miscellaneous Pocket Items
would love to see the inside set up to see how you put it all together -
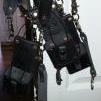
I do the same thing with my radio straps except I use vinegaroon to make them black then I paint the letters.