Halitech
-
Posts
1,229 -
Joined
-
Last visited
Content Type
Profiles
Forums
Events
Blogs
Gallery
Store
Everything posted by Halitech
-
First show booth featuring my leather work
Halitech replied to Dan Miller's topic in All About Us and Off Topic
I'm booked into 6 shows this upcoming fall season and the most expensive one is 40.00 for an 8' table. All set up, tables, chairs are provided and I just need to show up with my stuff and put it on the table. -
Since you know the "customer" will be outgrowing the belt, you could get a little fancy and put the initials as Dwight suggested then split the length in 3 sections and put the child's birthday on it or mom and dad's initials then when he is done wearing it, it could be put away as a keep sake to show his future wife when he gets older
-
if you had a pic of what you are working with it may help us come up with ideas. pics of front and back would be helpful
-
you need to do all wet forming/molding before you apply your top coat (in this case, resolene)
-
My only suggestion would be to stitch close to the edge around the area where the leather will rub on the d ring and then rivet the end up in place.
-
toss the speedy stitcher and get some proper needles and go watch nigel armitage saddle stitch on youtube. If you want to tool or stamp, your only option is veg tanned. The others won't absorb water so you can't tool them. Far as brand, if tandy is close, get the mid grade stuff from them since you are starting out. If not, see who is close or check the companies above and see what the shipping is like to you
-
The best thing is you are here, you are asking questions and you are trying to learn. That will help you a lot down the road. Probably the reason you are having an issue with burnishing is because the leather you are using is probably chrome tanned which will not absorb water/gum trag/etc so you can't burnish it. The black you are using looks like some lamb that I have here. It's great for a liner and even for making a complete wallet interior but you have to get creative with the edges. Even thin veg tanned can be a challenge to burnish properly. A suggestion for your stitching, use a straight edge and "mark" a line by pressing into the leather a bit. Then go to the kitchen and grab a fork. Yes you read that right, a fork. Press the tines into the leather to mark where each stitch hole should be. It won't be as accurate as stitching irons or an over stitch wheel but will be closer then eyeballing it.
-
Construction Phone Case
Halitech replied to Halitech's topic in Purses, Wallets, Belts and Miscellaneous Pocket Items
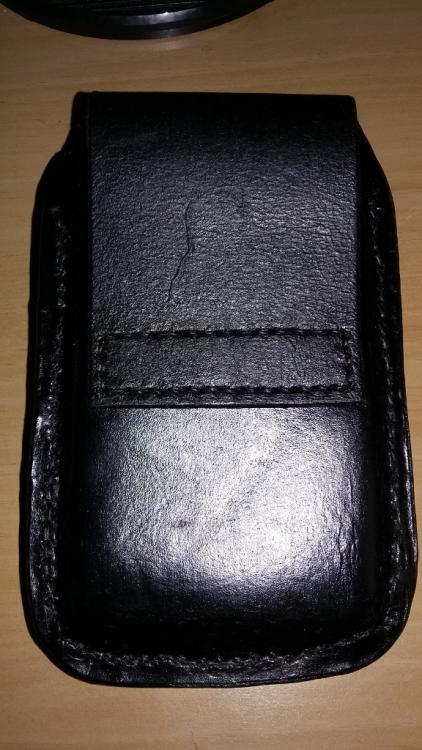
I won't say it's up to the military standards like the phone is but it will probably outlast the guy that bought it -
Construction Phone Case
Halitech replied to Halitech's topic in Purses, Wallets, Belts and Miscellaneous Pocket Items
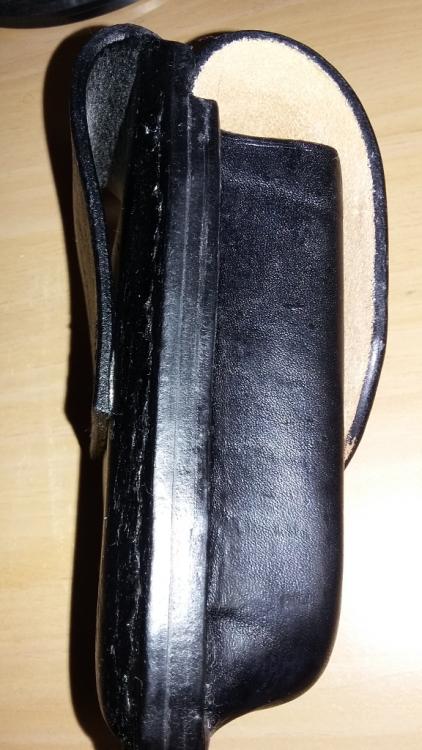
Thanks kiwi. The back stitches aren't as nice as I'd have liked but 1/2" of leather is a bugger to get through, especially when you can't lay it flat due to the belt loop -
just to toss ideas out to you, maybe if you had the top bar be adjustable from both ends you could have something more usable with all the sizesand only have to make 2 pieces instead of the 4 like tandy is using. I think that would be more sturdy then their.
-
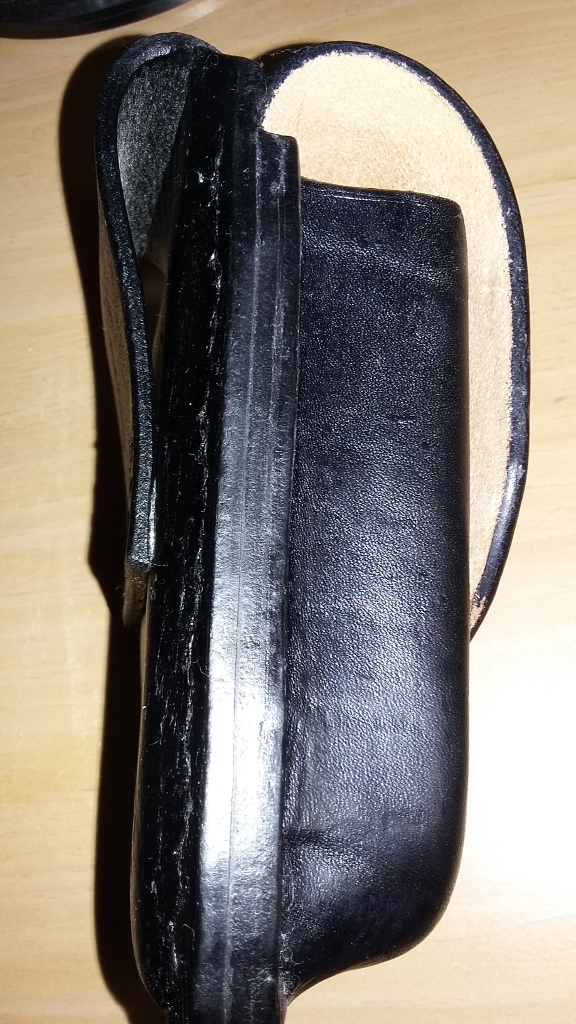
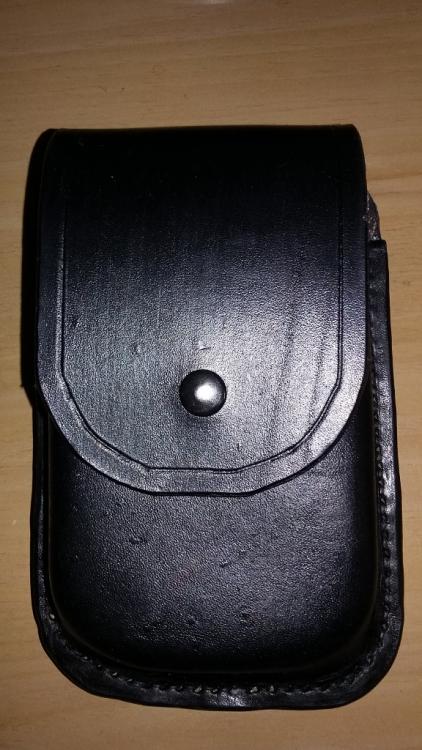
Been doing mainly coffee sleeves lately so this was a nice change of pace. Local businessman approached me a few days ago and he wanted a phone case for his Sonim XP7 phone. For those that don't know, the XP7 is a military grade phone designed to withstand a tank running over it lol The customer is stucco and stone installer so he needed a case that was tough and would protect his phone. He also wanted a pocket for carrying 3x5 index cards. This is what I came up with. All constructed with 9oz veg tanned leather except the liner covering the snap on the inside. Hand stitching 27oz of leather was not fun but I managed to do it.
-
I agree, yours is better if you only use 1 size stamps. I'm not sure how well their adjustable one will stand up to use over time though Personally, I put down a long piece of green painters tape and line up my letters with that. May be low tech but it works for me
-
Looks great Colt and I'm sure he will be very happy with it
-
What to use to highlight basketweave before staining?
Halitech replied to SouthernCross's topic in How Do I Do That?
usually you go stain, antique then finish though, not antique, stain then finish -
Veg tan (no dye), how to stop water or gum trag stains?
Halitech replied to CJW306's topic in How Do I Do That?
Doesn't matter if you are dying or not dying, you need to finish it with something. If you aren't dying it, a light coat of supershene may be all you need which will prevent most waterstains but still allow it to develop it's natural patina. If you want to give it an "artificial" patina, apply a coat of snowproof then melt it in with a hair dryer or heat gun. Test on a piece of scrap first to make sure it turns out the way you want -
I use Maine Thread and it doesn't look like anything I've gotten from them. Chances are it's commercial only and something for a heavy duty machine if it's a mass produced wallet
-
you could also lace the edges with Mexican round braid instead of sewing. It will cover the edge and hold it together. Not sure if it will give you the look you want but it's an option
-
typically couches are using a chrome based tannage which will not absorb water so you can't use it to mold shapes. You can use it for book covers but you won't be able to do the wrinkled look
-
Due to the nature of leather, making it truly waterproof is almost impossible. Your best bet would be to use an oil tanned or latigo type leather as they would be the most water resistant. However, they are not toolable, dyable or wet formable. If you are wanting to tool or dye, you can try something like snow proof to give it a water resistance
-
I don't think it's a blanket ban because the girls at the store closest to me are always working on something and the store is always well stocked and customers are looked after
-
Vegetabe tanned leather scratches and dotted Helpp
Halitech replied to Christanto Deng's topic in How Do I Do That?
If it is a scratch, think of it like wood, no liquid or action will fill it back in. If it's a water stain or bend mark, you can try a deglazer to remove the mark. Posting a pic of what has happened to the leather will help us identify the issue -
I'm with biker on skulls and western carving, not my thing but if I can use them to improve my skills then I don't have an issue. Now, if the image or post is nothing but F bombs, take it to the adult section. Like most of us, I've probably heard and used it more then I should have and still do on occasion but a general board like this should not be promoting its use. The good news it the posts seem to be gone so I'm sure someone else also found them offensive
-
New wallets
Halitech replied to jakc3's topic in Purses, Wallets, Belts and Miscellaneous Pocket Items
You may be right but the angles of the images are hard to tell. Even the additional pics he posted to imgur don't show for sure but to my eye, it looks like the inside edges are stitched to the inner piece. -
New wallets
Halitech replied to jakc3's topic in Purses, Wallets, Belts and Miscellaneous Pocket Items
Stitching looks good and your basic design is good but I have to ask, what function does the top piece of leather on each side of the card slots serve? Also, is the cash slot lined? if so, it should be stitched all the way around to prevent it from separating. -
Not sure where to direct you for patterns but 1 thing you will need is a mold of yourself. Put on an old tshirt, have a friend wrap you in saran wrap and then duct tape. Then cut up both sides under your arms. Tape the mold back together and fill with something to keep it's shape. Then you have something to work on. If it's for someone else, wrap them up