-
Posts
2,220 -
Joined
-
Last visited
Content Type
Profiles
Forums
Events
Blogs
Gallery
Everything posted by Uwe
-

First leather sewing machine: Pfaff 545-H3-6/01 or Singer 111G156?
Uwe replied to johnny91's topic in Leather Sewing Machines
Yup, those are mounting holes for edge guides, like home-made. You may need a KB09 adapter bracket in order to install one of the popular KG867 edge guide or similar. Both are readily available from various vendors on Ebay end elsewhere. You’re missing the manual foot lift lever, by the way. Easy to replace and not a big deal if you plan to hook up a pedal or knee lift to operate the presser foot lift. If you’re buying a new manual foot lift lever, make sure you get the correct version for your H3 model. That part varies between the H1/H2/H3/H4 models, if I recall. -
Gotta work on your search skills!
-
I doubt the take-up lever timing is adjustable and you will not find instructions for how to do it (because it’s impossible) The reason for this is that the needle bar and take up-lever movements are locked to each other by design. The needle bar (and thus take-up lever) movement is the master and everything else is timed based on that movement. Chances are that something else is off. Hook timing being a likely culprit. I’d check first to make sure that the stitch cycle does NOT pull thread through the tension unit at the wrong moment. The ONLY time thread should be pulled through the tension unit is when the thread take-up lever is at the very TOP of its movement. Do some very slow hand-turned stitches and observe the thread in the tension unit closely. If thread is being pulled through the tension unit at the wrong moment, it will be impossible for the take-up lever to pull the knot tight, regardless of thread tension settings. Often this is caused by the thread snagging somewhere in the hook area, or the hook timing being off. Sometimes the often-ignored check spring is the culprit. Or the bobbin case opener isn’t doing its job. One general rule to look for is this: When the hook pulls the thread around the farthest part of the bobbin case, that is precisely the time when the take-up level must be at the LOWEST position, providing maximum slack for the top thread. If the take-up levels is not at the very bottom at that moment, then more thread may be pulled through the tension unit. The way to fix this is by adjusting hook timing, not trying to adjust the non-adjustable take-up lever.
-
I suspect that this kind of tape folder isn’t really intended to be used with your synchronized binder plate, so the mounting holes may not be in a suitable position. You may have to modify the tape folder mounting bracket to increase the adjustment range. Dremel/grind out the mounting holes to make them slots, or something like that. The key view is the one you don’t show us: the backside of the tape folder to show us what the mounting bracket looks like. You may have to fabricate your own mounting bracket or extension and glue/screw/solder it to the tape folder.
-

Presser Lift Eccentric Assembly/Disassembly help need Singer 211G165
Uwe replied to BdB's topic in Leather Sewing Machines
I just made that little video earlier today for my initial reply, so it wasn’t to be found on my YouTube channel or anywhere else before today. I don’t actually have a Singer 211, so I can’t make machine specific videos and, apparently, I’m one of the people confused by the various uses for that particular eccentric assembly on that machine. -

Presser Lift Eccentric Assembly/Disassembly help need Singer 211G165
Uwe replied to BdB's topic in Leather Sewing Machines
I think that’s the feed (and stitch length) eccentric, not the presser lift eccentric. The disk with the spiral groove should pull straight away from the mating disk. It may be glued in place by dried oil varnish. Use a hair dryer to heat up the assembly, or use more penetrating oil or acetone to break down the dried varnish. Here’s a brief video on how the assembly comes apart when it’s removed from the shaft: -
Great, now Cowboy is actively trying to confuse people with their model numbering. The Cowboy CB-6900 is clearly a clone of the Juki LS-1341, and not even remotely related the Adler 69. Why they don’t simply call it the Cowboy CB-1341 is beyond be. I’d avoid the Cowboy CB-6900 just because of the stupid name. Whoever came up with that model name needs to be slapped. The original Juki LS-1341 is a very nice design in my opinion, I’ve been trying to get my hands on one for a while now
-
We need to see the view with the clutch rotated 180˚. That little hook catch only engages when you reset the clutch. The actual hook shaft driving connection is on the opposite side. That clutch looks pretty chewed up along the rim, indicating it has caused trouble for previous owners, or previous owners caused trouble for the clutch. Here’s a video that goes into more detail about these safety clutches:
-
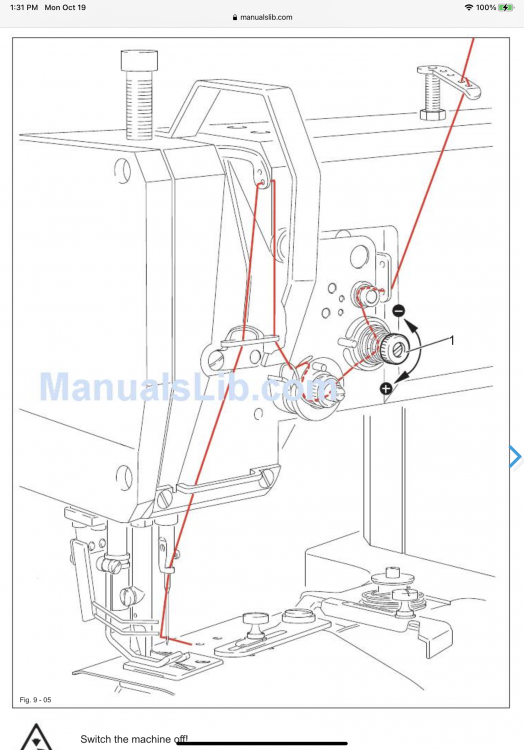
Also double check your top thread path, it doesn’t look quite right in your picture. This is the correct way to thread the machine:
-
My slightly educated guesses here are as follows: Parameter n0: top motor speed 500rpm - 3,000rpm Parameter n1: motor rotation direction (clockwise, counter-clockwise) Parameter n2: Needle Positioning (NP) enabled/disabled (disabled or ‘“0” unless NP sensor is installed) Parameter n3: Needle stop position up/down (only if NP is enabled) Parameter n9: Motor speed while positioning needle (only if NP is enabled): 800rpm-2,000rpm Based on the above assumptions, I would recommend the following: - You can safely ignore parameters n2,n3, and n9, since they likely deal with needle positioning operation and you don’t have the required sensor installed. Don’t change those parameters, you will either get an error message or it will have no effect. - Use parameter n0 to adjust max speed of the motor with pedal all the way down. I’d recommend a setting this parameter to “7” for 700rpm maximum motor speed to start with. Change as desired. - If your motor spins in the correct direction now (arrow on belt cover), then you don’t ever need to change parameter n1. Once it’s correct, you don’t have to change it for the life of your machine+motor+table configuration. - I don’t think the starting speed of your motor is adjustable. It will likely always start spinning at around 300rpm when you press the pedal.
-
I’d recommend getting a Juki LS-1341 or a clone of that design. The head will be identical to the flatbed you’re already familiar with. These rarely come up on the used market because folks who have them hang on to them. Search this forum for cylinder head related topics. You’ll finds dozens of discussion about the relative merits of the various designs. Post some pictures of the bags you’re making and the gussets you want to sew. Much depends on your actual sewing projects and how tight the corners are.
- 6 replies
-
- cylinderarm
- sewing machine
-
(and 1 more)
Tagged with:
-
There’s no manual available online for these motors from what I can tell. Contact the people you bought this machine from. They may have a manual and just forgot to give it to you. In general, with that control box user interface, you press the P button to enter parameter change mode. Press P again to cycle through available parameters until it show the parameter you want to adjust. Then pressing the S button shows the current value/setting for that parameter. Pressing S again will cycle through the available settings for that parameter. Pressing P again stores the setting for that parameter. You may need to press P again or just wait a few moments for it to go back to normal sewing mode displaying the P with a twirling circle. If no manual can be obtained, you may need to create you own manual by exploring the interface: 1. Press the P button ONCE to enter parameter mode. Write down what the display shows. 1a. Press P again repeatedly and write down all the different parameters it cycles through. 2. Then, do the above again but stop for each parameter and repeat the following: 2a. Press the S button ONCE and write down the current setting. 2b. Press S again repeatedly and write down all the possible the settings for that parameter. Make sure you cycle until you see the original setting again that you first wrote down. Post a picture or a text version of your notes that show all the available parameters and their possible settings. We may be able to deduce which parameter and setting means what. You’ll spend less time doing this than I spent researching and writing this post. Also post a picture of the back of the control box that shows the connectors. This video shows somebody else changing settings on a similar motor with the same control box buttons. Perhaps it helps a little.
-
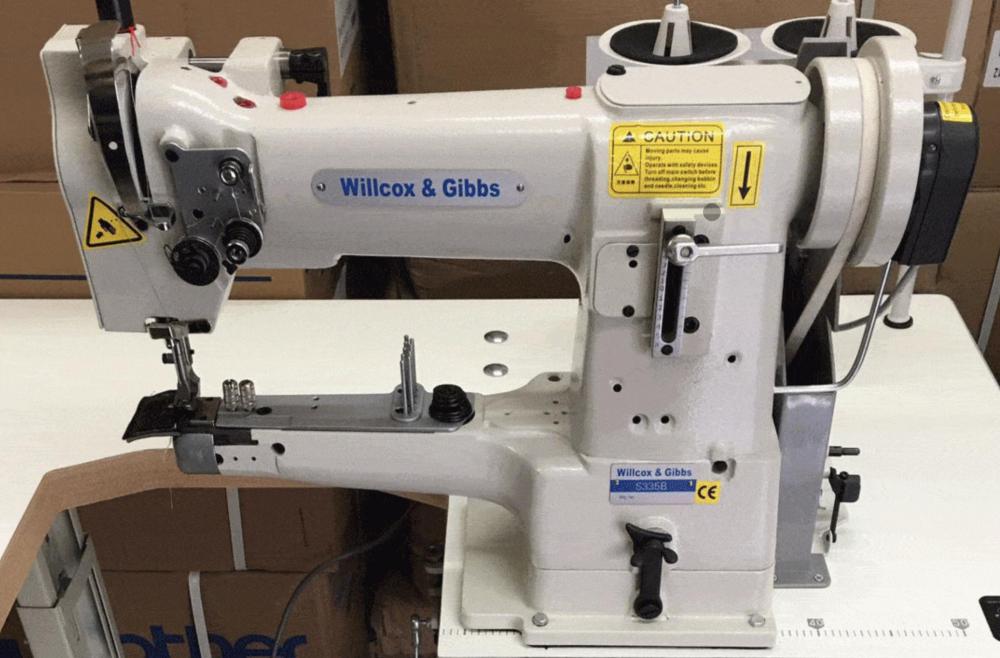
I believe this is the machine we’re taking about, essentially an old casting Pfaff 335 design with a modified feed lever mechanism and set up for binding:
-
This video may help if your motor control unit works the same way: Post some pictures of your machine, front, back, and also the model type label. Also pictures of the motor control unit that show model number and control buttons. You may have to resize the pictures to upload them here. You need to be able to post pictures here to have any hopes of meaningful remote support. I suspect the manual for your clone machine is actually written in Chinese, and it’s unlikely to be better or more informative than the original Pfaff 335 manual.
-
The marks are normal. There are things you can do to minimize them. Lots of factors determine how visible the marks will be - foot print area of the presser feet, foot spring pressure, leather type and age, etc. The marks on your sample aren’t really that bad. Expecting zero marks when machine sewing veg tan leather is not realistic. As mentioned earlier, there are DOZENS of topics in this forum talking about machines leaving marks on leather and what, if anything, one can do about it. It’s not about that particular machine design, any other heavy duty stitcher will leave similar marks.
-
There are various factors that determine how precisely you can control motor speed input. One factor is the mechanical linkage between the foot pedal and the speed input lever on the motor controller. Depending on how close to the pivot point you connect the linkage rod to the pedal and to the lever on the motor controller, you can either exaggerate the pedal movement, or you can minimize the effect of pedal movement on controller input. For maximum control, you want a large pedal movement to cause a small speed input lever movement. On your Enduro motor the second factor is how much pedal movement does it take to make the sensor go from receiving full light to zero light. Full light means stop, no light means full speed. It’s like looking at a flash light and moving your hand in front of the flash light to adjust how much light hits your eye. A small movement of your hand covers the flashlight completely. (That’s how the Enduro works out of the box) Instead of just your hand, you can hold a clear strip of plastic with a gradient in front of the flash light. That plastic strip is going from clear on one end to black on the other end, with increasingly darker shades of gray in the middle (or increasingly dense sharpie pen lines). The longer that gradient strip is, the easier it is for you precisely control how much light hits your eye.(that’s the video above) Instead of the gradient plastic strip you can also hold a pennant shaped piece of cardboard and move it leading with the pointy end in front of the flash light. This also makes it easier to change precisely how much of the flashlight you cover. (That’s what I did) Modifying the Enduro is not very hard to do, but it does take some fiddling and experimenting.
-
@AmyK Don’t give up on the machine head, it’s the motor control that’s causing you grief. That poorly implemented speed ramping control on the Enduro motors is a real problem. Speed control is done via a light sensor and speed varies depending on how much light hits the sensor. The factory combo of sensor and light blocker is WAY too sensitive, jumping between full light to zero light with the tiniest of pedal movements. I also ended up making a special triangular light blocking “flag” to get any sort of real world ramping of speed. The motor is indeed capable of graduated speed control, just not with the factory bits. Whether you want to bother modifying the speed control on your motor is up to you. @toxo thanks for the demo and details on your hand wheel pulley. That speed control looks just about perfect to me, sweet! I’m very much in favor of this pulley-as-a-hand-wheel solution. I really don’t care for the in-between pulley speed reducers. @Gymnast the 100 RPM starting speed is the lowest I’ve seen on the motors I’ve researched. Just for reference, this is the kind of speed control I’m getting with my servo motor and a standard hand wheel:
-
Nothing wrong with installing the smallest possible pulley on the motor (usually 45mm or 50mm) - I order my motors with the smallest possible pulley to start. A larger hand wheel or a large pulley to replace the hand wheel may be a little trickier to find, depending on the machine. If that puts your machine in the speed comfort zone, you’re good.
-

Advice on Machine Purchase, $2500 budget range
Uwe replied to Adriayna's topic in Leather Sewing Machines
Many folks have unrealistic expectations when they transition from hand stitching to a sewing machine. Craftspeople often use rather thick thread when hand stitching sheaths and similar projects because it looks really nice. If you told the sales guy that you want to use thread larger than size 138, then he was correct in guiding you to a heavy duty cylinder arm stitcher. The Durkopp Adler 205-370 is a very good design, but it’s complex and expensive to build. The simplified design of the Juki TSC-441 is popular and available in various cheaper clone incarnations (Cowboy 4500 or 3200, Cobra Class 4, etc.) The Durkopp Adler 205-370 cost around $5,000 in the early 90’s and they sold a LOT of them. That’s about $10,000 in today’s money, adjusted for inflation. Yet somehow people today think that it is absolute insanity that a high quality heavy duty sewing machine should cost anywhere near that much. The Juki LS-341 class machines (Cobra class 26, anything with “341” in the name, etc.) are very nice LIGHT/MEDIUM duty machines. They will not sew thread beyond size 207 reliably, if at all. Size 138 thread is really the max most of the medium duty machines are designed for. Material hardness and thickness is another factor. A few layers of hard veg tan leather for a sheath may well overwhelm most medium duty sewing machines. There’s a general tendency among beginners towards wanting to use a machine for something that is far beyond what it was designed for, instead of using a machine that is comfortable with the sewing projects. Cost is obviously a factor. There are options available under $2500 that will stitch hard leather with thick thread, just not from that dealer you spoke to. The Cowboy CB-3200 and other short-arm 441 class clones should come in around $2,500. The 25% punitive US import duty increased the price of many made-in-China machines in recent years. What used to cost $2,000 now costs $2,500 - be sure to thank your senator for that. Occasionally, clones of the Adler 205-370 design sell for $2,500 (i.e., I have one of those for sale) In any case, you’ll need to get comfortable with machine maintenance. This may be challenging if you’re not mechanically inclined. Dragging these monsters to a repair facility every time something goes out of alignment is not really a good option. Using a machine beyond what it was designed for all but guarantees that it will have frequent adjustment issues. -
The Enduro motors have no setting to adjust starting speed (just the initial time delay) and they do start at around three hundred RPM. I’ve had Enduro motors before and I don’t really like them. You can always sell yours on CraigsList again and get a better option. The “Family Sew” style knob control motors mentioned above are decent, but old-school in terms of servo motor technology and not without their own problems. I personally don’t like the motor brushes that wear out, the useless motor brake pad that just gets in the way unless you remove it, and the motor torque (punching power) is rather low at slow speeds. These motor do really require a pulley speed reducers to work well for leather work. The motor plus pulley speed reducer will run over $300, not exactly cheap. But it’s what the North American market settles for. It’s what’s readily available through dealers and Ebay here in the US. There are modern servo motors available with full low-end torque and very good low speed control systems that allow you to sew at stitch-per-second speeds without requiring speed reducer pulleys. They also a support needle positioning, which apparently you either love or hate with no middle ground. Unfortunately, most of these motors are not sold in the US. The only exception I’m aware of is the SP1100 motor, sold by Keystone and SewPro. Of course EFKA motors are an option, but US consumers are generally unwilling to pay for that level of quality. Personally, I’ve been buying my motors directly from manufacturers in China. Alas, that is not everybody’s cup of tea and requires a sense of adventure as well as self-reliance in terms of repairs. But I do love those motors and haven’t had a dud yet. If you need somebody to call when things go bump in the seam, settle for what’s available locally and buy from a dealer who offers support.
-
If you think $111 is far too expensive for that set of parts listed above, then you’re in the wrong hobby or you haven’t been paying attention. There’s a fine line between being frugal and being high maintenance. You can always experiment and make your own solutions. Just buy a tape folder thingy and install it on your machine, perhaps with a little custom bracket to bring it into the right position. Post a topic here when it works. Binding is an art and science, frustrating to many who attempt it. Many people experienced with binding will simply say “take my money!” when they’re presented with a solution that actually works. Then they don’t touch the binding setup after it works properly - they simply buy a second machine for whatever else they might want to sew. The “72” in your model number is the subclass and usually relates to the details of the feed mechanism your machine has. The ‘E42” is likely the gauge set (throat plate, feed dog, feet) that was installed at the factory. There are dozens of gauge set configurations possible, E42 is just one of them. Odds are, it no longer is the configuration you currently have installed on your machine, so the E42 may be meaningless.
-
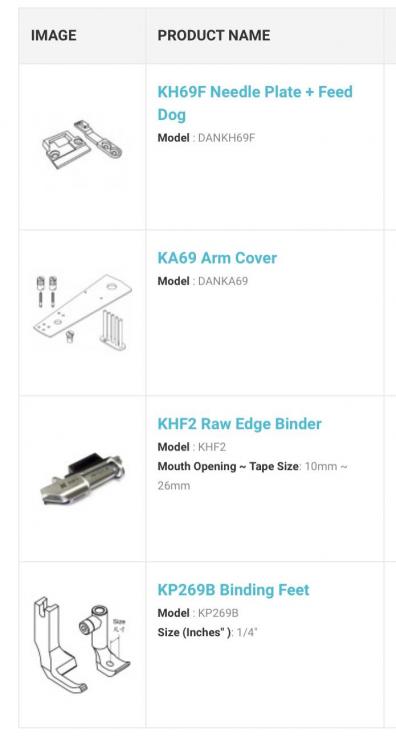
This topic covers most of it: Kwok Hing in Hong Kong is one manufacturer who still makes all the parts you need for binding on an Adler 69. You can order directly from them at http://khsew.com (create an account to see pricing) College Sewing in the UK may also offer these parts, for easy local ordering. Here’s the parts list as of October 2020:
-
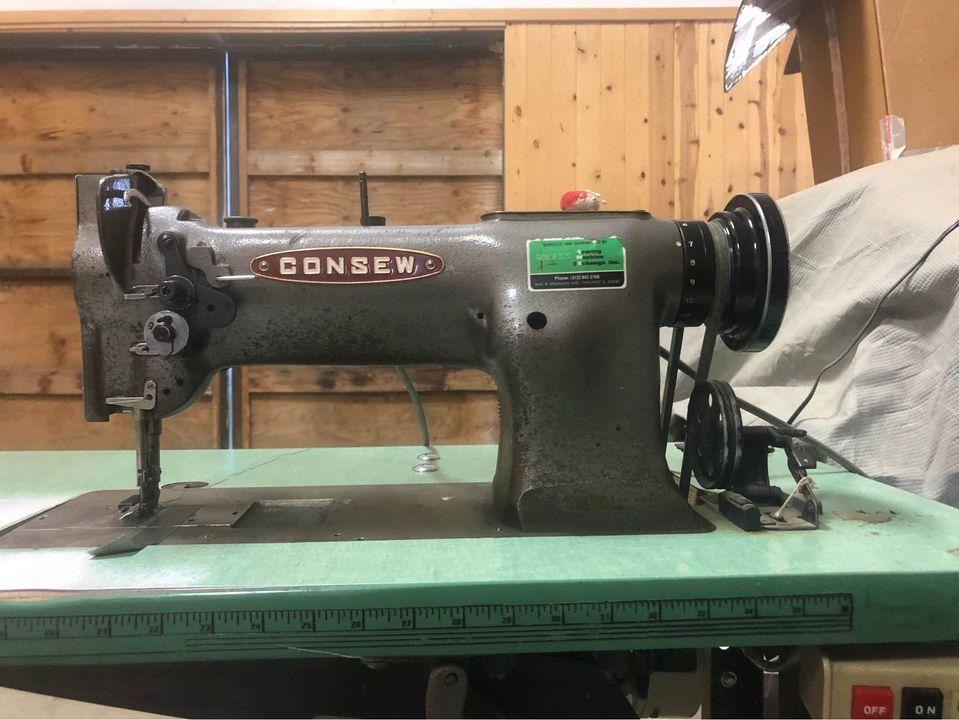
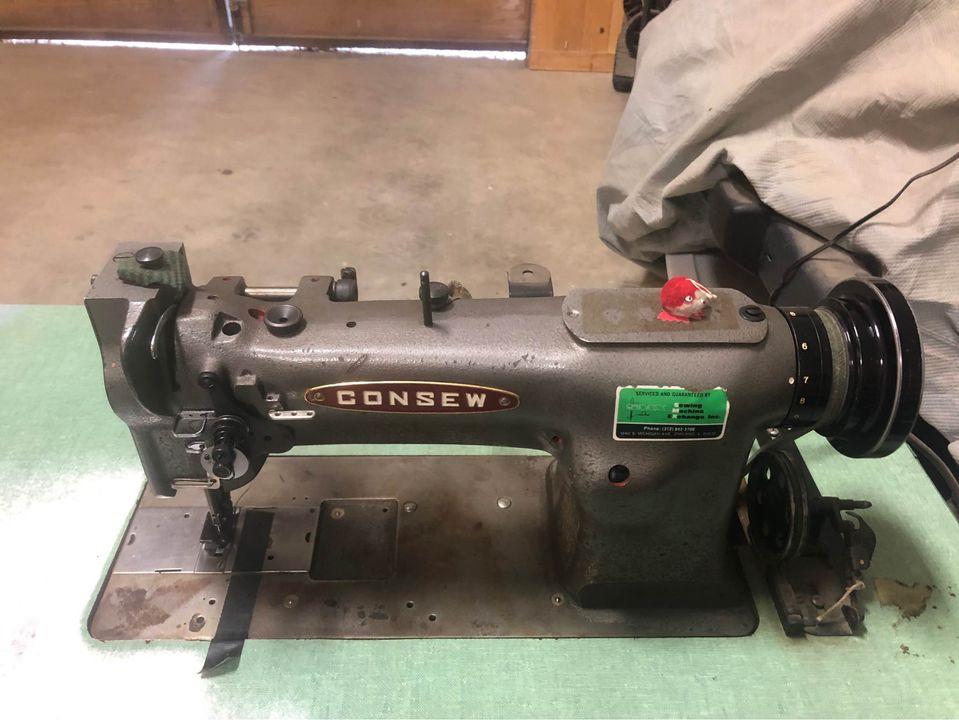
I’m just just posting the actual photos since the facebook marketplace link will stop working eventually. I agree it looks like a late model Consew 225. Worth perhaps $250-$400, if its serviceable and complete. They’re good starter machines, easy to work on to learn sewing and machine maintenance. Plan to replace the clutch motor with a modern servo motors for about $150-$200.
-
This video shows how to reset the safety clutch at the 1:20 mark:
-
Maybe you turned the stitch length to “0”? A little quality time with the manual may help: https://www.manualslib.com/manual/364311/Singer-111w112.html#manual This is how the feed regulator on your machine works:


