


Tugadude
-
Posts
2,656 -
Joined
-
Last visited
Content Type
Profiles
Forums
Events
Blogs
Gallery
Store
Everything posted by Tugadude
-
Thanks for sharing that. Interesting concept. I went to the link and the ad explains clearly the intent. Good stuff.
-
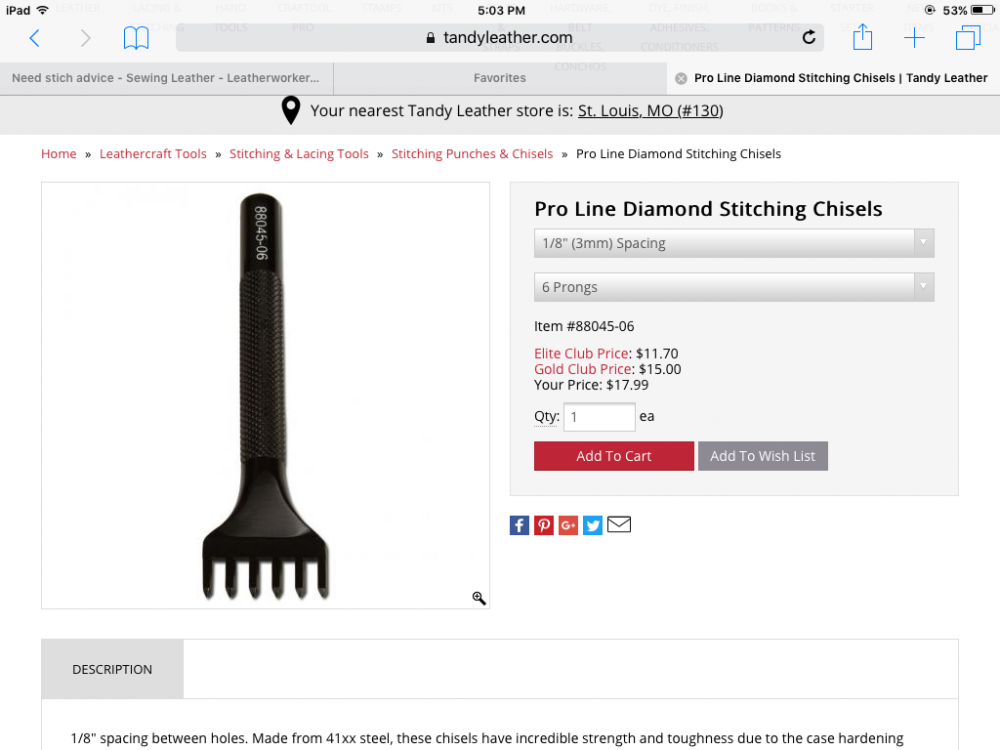
The Craftool Pro Chisel makes a slit, not a true diamond shape. There is a little widening of the hole in the middle, but it resembles more of a slit than a chunky diamond. I own both the 2.5mm and 3.5mm. The 2.5mm works good on fine items such as watch straps while the 3.5mm is good for larger items where you don't want to or have to be so fine. An 0.8mm thread is best for the 3.5mm chisel I think.
-
Charon, thanks for explaining that. I don't use store bought templates and have configured mine to work with my chisels as you described. It didn't occur to me to point out the fact that you can adjust the height of the tab on the T-slot, but you did and I'm sure it will help the OP. That is why it helps to have different folks chiming in!
-
I like the way you constructed that Northmount. It still takes considerable skill to make it look clean, but it is attainable for most workers. I'm assuming you used a bone folder to encourage the creases to lay flat? Thanks for sharing!
-
It is always an issue. Obviously you want to have a full stitch at the top of each pocket to help secure it and keep it laying flat. Personally, I try to lay the stitching pattern out before punching. So what I do is start at the bottom corners, where I know I will be putting a round hole to act as a "hinge" for the thread. I then begin at the top T-slot. I lay my diamond chisel on the stitching line and press down lightly, marking where the hole might be if I punched it. I work my way down to the second T-slot and this is where I fudge a bit if necessary. I continue down to the bottom, making sure to leave the last hole an appropriate distance away from the round corner hole. I then move up to the top and continue "north" of the first impression and continue upwards to where I want to terminate the stitching line. I do the other side, mimicking the first side really, since it is a mirror image. Finally, I fill in the bottom stitching line from corner-to-corner. If it all looks copacetic, I go back and punch. I don't think it takes any longer to do it this way and I'm assured to have the slots secured and the stitching consistent. I may have to fudge a stitch or two, but nothing major. Beats beginning to punch and going "Whoops" when you realize you just sliced into the top of a pocket and it will now be flapping in the wind. On most wallets I try to stay with smaller stitch spacings. I typically use a 2.5mm diamond chisel. Been getting good results with this one. Wish it was a little steeper angle, but with the right thread it works great.
-
That is an accordion gusset. Try google, you might find tutorials, they are out there. I warn you up front, they are for intermediate to advanced leatherworkers. Taint easy.
-
Leather can be wet formed over many things including watches. Probably best done in a vacuum former but I'm sure it can be done manually. If you are serious about doing it, maybe someone familiar with wet forming in your area could help. The concept is simple but going over a watch is more involved than what you typically see. I found this example and it seems pretty easy to make. They just wet formed over a round dowel.

-
 Just when I thought I'd seen every wallet design Mutt whips out a new one. Very nice! Only thing I'd consider is moving one pocket from the left to the right for more balance. But it looks fine as-is.
 -
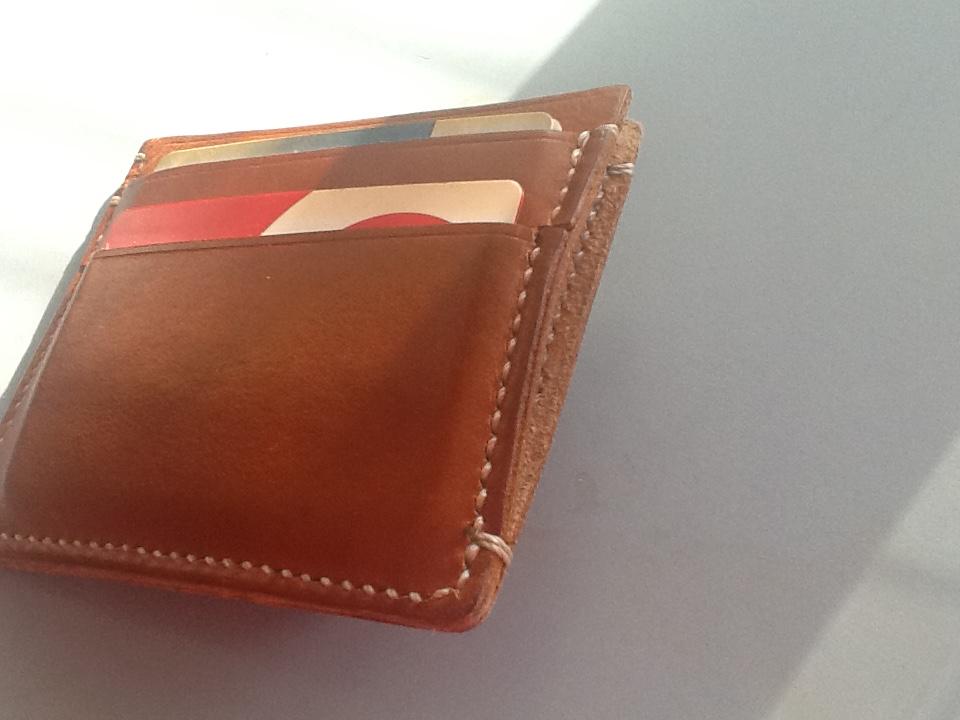
Don't know of a special name for the middle pocket. I made one similar and frankly got tired of prying it open to return the cash so I just left one whole side open on the next one. Much more convenient. YMMV. This one has been my EDC for about a year. Holds 8 plus cards and cash. Front pocket friendly.
-
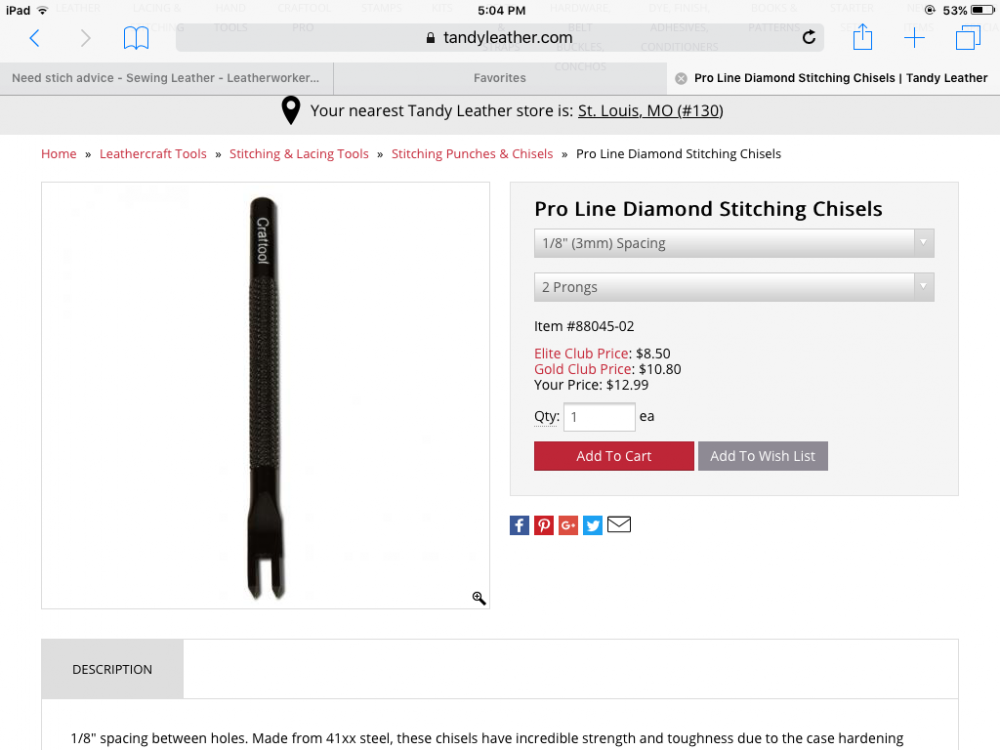
These chisels work great and pair well with 1mm thread +/-. Use the 2-prong to go around corners. There are lots of sellers online that feature diamond chisels. I haven't bought any but others have with varying degrees of success.
-
For most holsters you could probably go with 5 to 6 SPI. I never use an overstitch wheel. I find them unnecessary. I suggest the Tandy Craftool diamond chisel as a good starter tool. Make sure you use a Poundo Board or a similar to protect the chisel. Keep the chisel straight and level to get the best result and to prevent bending tines.
-
wallets WALLETS - Specifically card slots/edging for them.
Tugadude replied to samNZJP's topic in How Do I Do That?
One way of stitching the bottom of the pocket piece...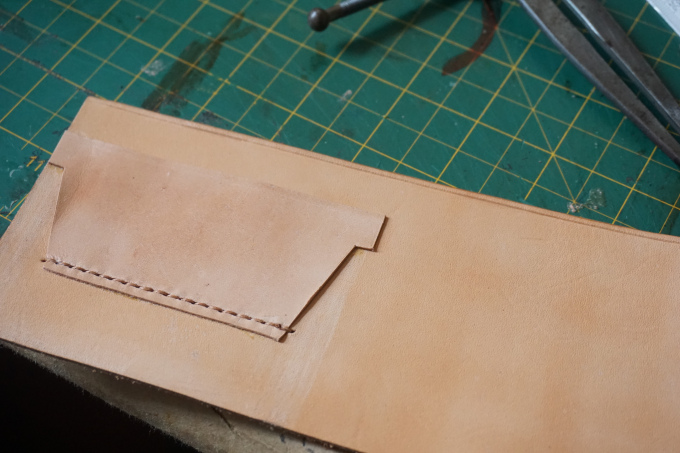
-
wallets WALLETS - Specifically card slots/edging for them.
Tugadude replied to samNZJP's topic in How Do I Do That?
This should help. http://makesupply-leather.com/leathercraft-tutorials/4-tips-for-making-a-bi-fold-wallet/ -
wallets WALLETS - Specifically card slots/edging for them.
Tugadude replied to samNZJP's topic in How Do I Do That?
There are a ton of wallet-making video tutorials on youtube that detail how to construct what you are after. Essentially all of the pocket pieces are identical except the outermost one. The back pockets are typically cut in a "T" fashion in order to minimize thickness on the edges. The pockets are "stepped" one on top of another and each pocket is sewn to the one behind it, except for the front pocket. This prevents the cards slipping down to the bottom. Again, this is detailed in numerous videos. If you are using glue to lay up your pockets, remember to take a bone folder and open the pockets up after stitching. This may be why some pockets are tight. If you cut things right all the slots should fit the same. -
Not uncommon for waxed thread to pick up dye or glue from a project. It should clean up easily though. Just rub lightly with a clean cloth, or brush.
-
Yes, very nice indeed! Nice decorative stitching element also. I appreciate the oval holes. Round is fine, but that is what you typically see so this gives the belt some degree of separation from the typical right off the bat. Only problem I see, and it isn't really a problem per se, is the fact that when buckled, your ornate stitching becomes invisible. So only the owner is going to know it is there. It is a shame that the public will not see your good work.
-
Pretty darned good for a first attempt. Nice creases on the slots. The stitching will come in time. Heed the wise advice above regarding getting too close to the edge. You can always trim later, but if you are too close to begin with you can't fix it. Isn't it cool to make a perfectly useable wallet by hand? Keep it up!
-
Boriqua, what a cool thing you did to help folks. Time well spent and I'm sure it will be appreciated! Paying it forward in information that is hard-learned. I salute you!
-
Thanks for that link. Wow, just wow. The designs, colors and the stitching are amazing. Especially the fine stitching.
-
Kept this one simple
Tugadude replied to Boriqua's topic in Gun Holsters, Rifle Slings and Knife Sheathes
Very nice, clean work. Simple is good! The thing about simple though is that the more you look, the more you see the details that added up to a tasteful, attractive piece. The dye job, edges and stitching all pop. -
I like hand stitching and am quick enough at it ( it took awhile to get up to speed ) that I don't consider it a burden. I know machines have their place but I have never thought to my self, " Wow, look at that machine stitching!" However, I often get blown away by some of the traditional saddle stitching on here. Nothing is perfect and the imperfections that come from hand stitching can be managed and add an aura to the product that is inimitable through machine. Like I said, machines have their place and if this pursuit was about money and production I'd be first in line to buy a good one. For now, I carry on and try to raise the bar every chance I get. Mostly it has been satisfying. Just saying all of this to encourage our friend from Ireland to keep on stitching!
-
A lot of work (for me)
Tugadude replied to MorningStarL's topic in Gun Holsters, Rifle Slings and Knife Sheathes
Very nice! They present very well, good smooth edges, color, everything. Hopefully your next order isn't as stressful. -
Great job and thanks for showing the interior. I think the round strap end looks fine but maybe a shield shape is what you are thinking of. Saddleback products feature a shield look and it is attractive.
-
Wallets and a Luggage tag
Tugadude replied to stormcrow's topic in Purses, Wallets, Belts and Miscellaneous Pocket Items
I'm a detail guy. I typically see things others gloss over. Helps me in my job, but can be a pain when judging my own work. Your details are spot on. -
Saddle Stitching - Looks Good on the Backside
Tugadude replied to superpacker's topic in Sewing Leather
That's what it is all about, doing your best. I'm a hobbyist too but love the craft enough to study it and reach for higher levels of skill. I respect your passion too Mutt.


