


dikman
-
Posts
4,847 -
Joined
-
Last visited
Content Type
Profiles
Forums
Events
Blogs
Gallery
Store
Everything posted by dikman
-
That is a domestic machine and they generally are not suitable for sewing leather. Sorry. Don't waste your money.
-
Leather sewing machine for 3oz leather
dikman replied to Texan417's topic in Leather Sewing Machines
Simple fact is for that work you need an upholstery-class machine, they typically have walking feet, 3/8" clearance under the feet and handle #69 thread (and sometimes #138). Singer 111/211, Consew, Seiko, Juki are all good solid machines in that category. All you can really do is keep looking, something is likely to turn up eventually. If you come across something and aren't sure or need advice post info/photos on here. Good luck with your hunting. -
Very impressive work!
-
What Chuck said, you don't have to apply contact cement to both surfaces to use it. You could just coat one piece and put them together while wet but you would have to be careful not to move the piece until it is dry.
-
All is not lost, go over it with an antique paste, that should bring out the stamping and give it a nice used look.
-
Main thing is you figured out what was wrong.
-
Nice work, that belt looks pretty solid!
-
Photos of the machine and any bits that you're not sure of always help.
-
You might be struggling to find screws to fit as Singer used their own proprietary thread sizes. It might be easier to re-tap the holes to more standard threads.
-
If you're spraying acrylics there's a huge range of ready-to-spray paints available from model-making stores, also used by fishing lure makers.
-
Adding pulleys to slow down a Consew 206RB
dikman replied to melinda's topic in Leather Sewing Machines
A servo will have more than enough torque to run your 206RB. If you're concerned about it get a 750w version and if you need even more torque fit a speed reducer too. I spent a lot of time messing around with a clutch motor, pulleys and speed reducers until I finally saw the light and swapped to a servo. Don't waste your time trying to tame a clutch motor, trust me, a servo is the only way to go if you want to sew leather. -
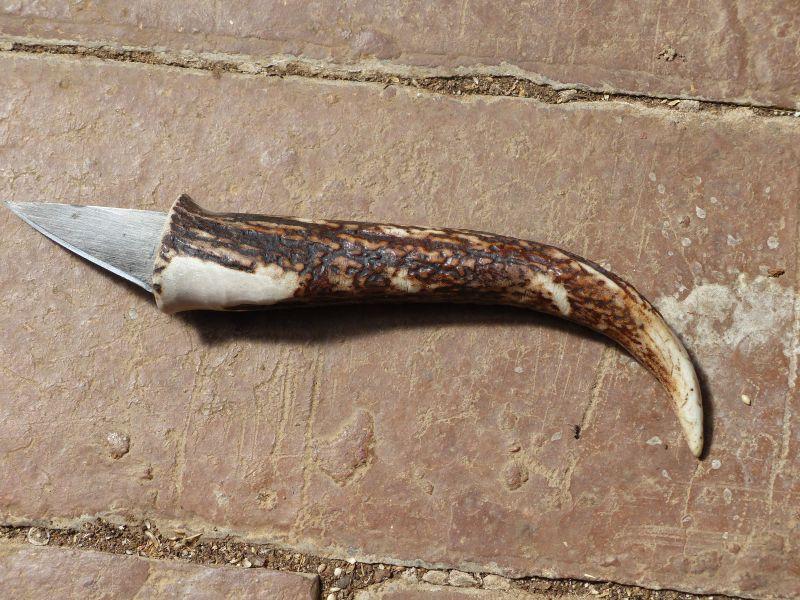
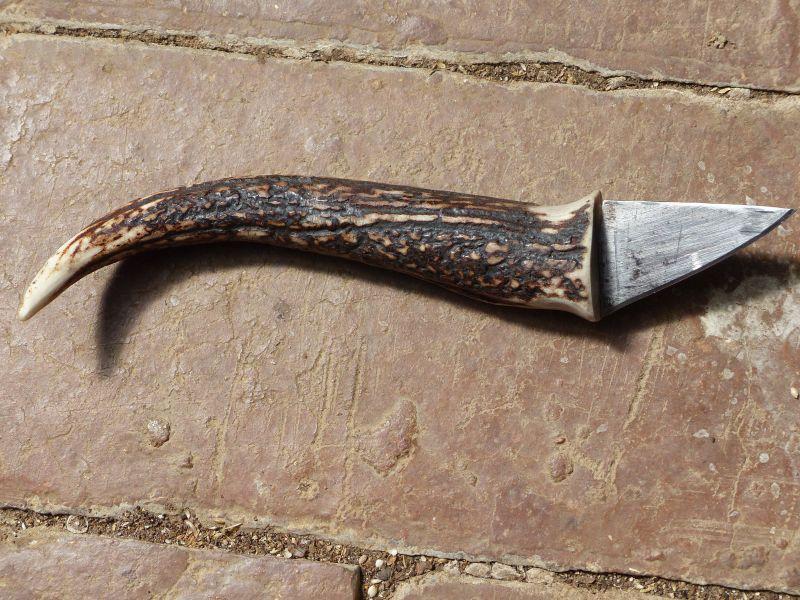
Chuck, non of the native species have antlers or tusks (not even drop bears!) they come from introduced (and now considered pest) species. This tine came off a youngish fallow deer, unfortunately they tend to have thinnish antlers with large palms and lots of smallish tines, so it's difficult to get a lot of material that's useable as knife handles. The palms look really nice but so far I haven't figured out a use for them (too thin). There are several species of deer across Australia, I just take what I'm offered. I did have some off a Rusa or Sambar that was nice and thick but I used it up making grips for my revolvers. And yes, I've got to work on the blade a bit, this was in way of an experiment so I'll play around with it a bit - when it gets cooler, it's supposed to be 42*C today!!!!!
-
I've got these antler tines that I don't know what to do with, so......it can be held like a pen and the tine curves over the back of the hand, or it can be held like a pocket knife. Now I just have to work on the edge, I just can't seem to get them sharp enough lately, they'll cut but......
-
GP, that kit should be fine. The black airbrush is what's termed an external mix, the paint is sucked up by venturi action, they do not do as fine a spray or have the control of a double action gravity feed (the other two) but are great for covering larger areas. They are also much easier to clean! If you bought that kit as Beehive mentioned it might be worth considering adding quick-release air fittings, they're not necessary but do make it easier to swap between airbrushes.
-
As Beehive said colour mixing/matching is trial-and-error. As for compressors I have several (different sizes) two of which are the generic airbrush types, they are identical except one has a tank. While the tank-less one works ok my advice is to get one with a tank if possible. These are often sold as a "kit" with a double-action airbrush, try and get a gravity feed airbrush and one with a reasonable capacity cup (some of them come with different size cups, which can be useful).
-
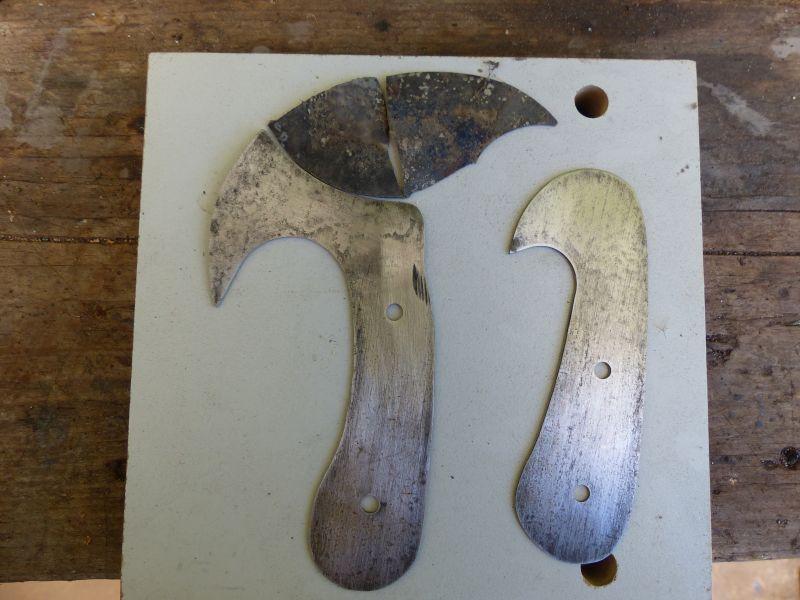
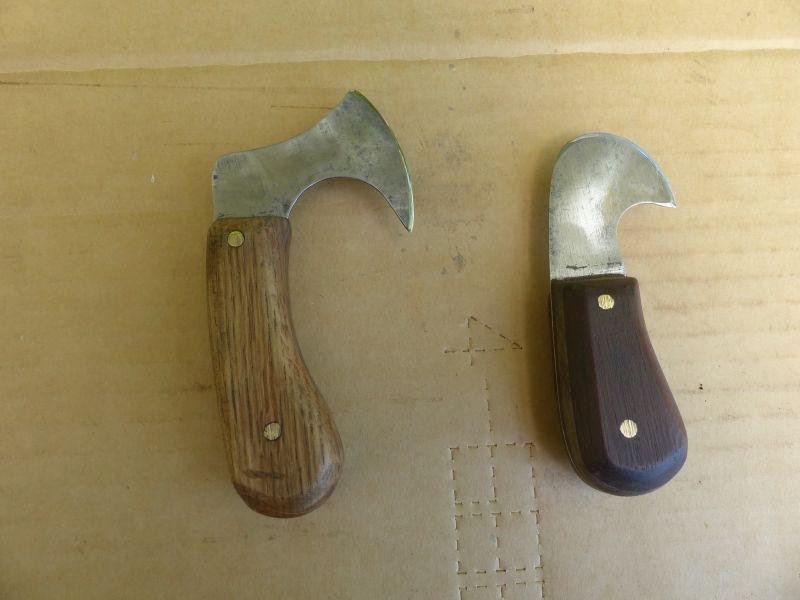
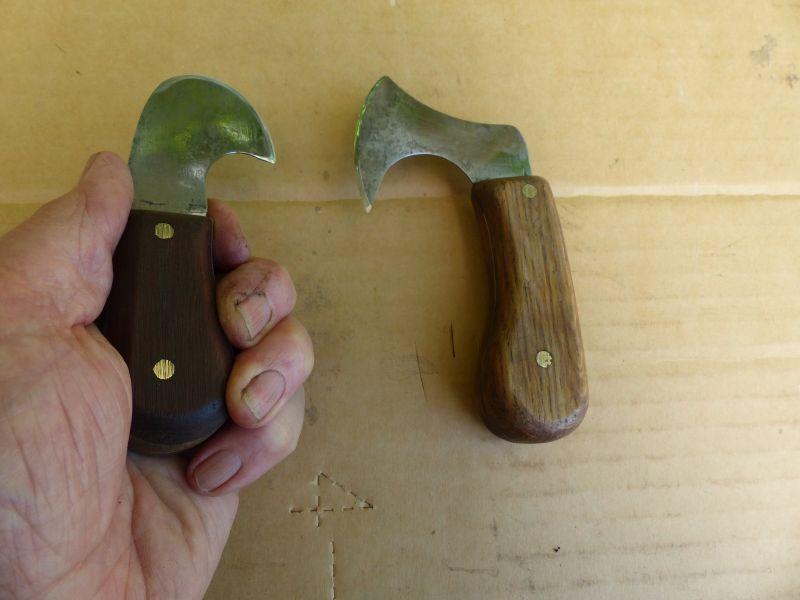
I decided to make a smaller (1/4 round?) knife from the saw blade and while drawing it out I thought there's enough steel to make a 4" wide round knife with an off-set handle. So I cut them out and thought the bigger one was going to make a very nice knife. Unfortunately the Knife Gods thought otherwise! I heated the bigger blade and quenched it in water and it promptly took on several interesting curves!! Me being smart reheated it, quenched it and quickly shoved it between two steel plates to flatten it. As I tightened the vise holding the plates there was a lovely "ting" sound and I knew what had happened. I overlooked the fact that the steel being so thin cooled too quickly. It's pretty good steel though, goes really hard when quenched! Anyhow, I looked at what was left and figured I might as well make something out of it but didn't want to waste time doing a fancy handle so I found some very old oak (from a wine barrel) in the scrapheap and used that. It's surprisingly hard wood to cut. Gave it a coat of BLO and called it good. The other little one has a laminated handle made from the oak and some redgum, I heated the handle and put on some paraffin/beeswax mix, which looked nice, until I put it on a buffer and the nice white wood went dirty! The final problem I had was sharpening them, I used the paper wheel setup and could get a beautifully polished edge but could NOT get that really sharp edge you need for cutting leather. In the end I used a 1000 grit diamond stone to shape the edge then the strop, that seems to work. I think I might make a short straight blade next, as it shouldn't warp when quenching, and maybe use up some of the antler that is too small/too much pith for a bigger blade.
-
Regarding masking tape you could look at modelling shops (plastic kits etc) they will have suitable masking tapes. I have several airbrushes of various types (don't keep them in dark places, I think they breed!) some are "cheapies" from ebay/aliexpress and they all work fine. One thing that can help is to carefully polish the needle tips. I also have one like fred showed, I thought it might suffer from pulsing but it works surprisingly well. You might be able to find used airbrushes/compressors cheap on ebay/google marketplace, could be an inexpensive way to start.
-
Strange grey spots on new veg tan?
dikman replied to Yukonrookie's topic in Leatherwork Conversation
That's excellent service. It's becoming something of a rarity in these days of internet shopping. -
Juki LS-321- What’s under the table??
dikman replied to Avalaynah's topic in Leather Sewing Machines
That machine requires a compressed air line attached to the air gauges at the left and uses the air to operate the foot lift, amongst other things. The right side foot pedal is normally used to lift the feet. I wouldn't want that machine unless it was virtually given to me because of all the complexity built into it. None of it is really needed for sewing leather and if it develops a fault will be expensive to repair. If it was given to me I would remove the motor and associated controls and replace with a servo motor. Just my thoughts on it. -
Can you tilt the head back and take photos of the inside? There must be a connection point inside for the chain.
-
Bruce, I google-searched head knife and then round knife then clicked on images - it's amazing the variations out there! It's given me a couple of ideas.......which raises the question just how many round knives does a person need?
-
Thanks mate, when I started leatherwork and came across head/round knives I thought what a strange shape for a knife. Then it slowly got weirder as I kept coming across all manner of variations in their design. Fascinating.
-
Single head knife - yeah, I can live with that.
-
https://leatherworker.net/forum/topic/122906-new-look/ It's not intentional, the site was hacked and Johanna managed to keep it going with a simpler layout. She's still hard at work restoring the site.
-
Angle grinder with a cut-off wheel. Toxo, I agree, head knife seems an odd term, given the shape of the blade. I've also seen this particular shape referred to as a bird's-head knife, which seems more fitting. It's a funny thing to use as I thought it would work by pulling towards me and using the large curved part but it just doesn't like to cut using it like that, very strange. It works better by using the pointed section.