Dwight
-
Posts
5,247 -
Joined
-
Last visited
Content Type
Profiles
Forums
Events
Blogs
Gallery
Store
Everything posted by Dwight
-

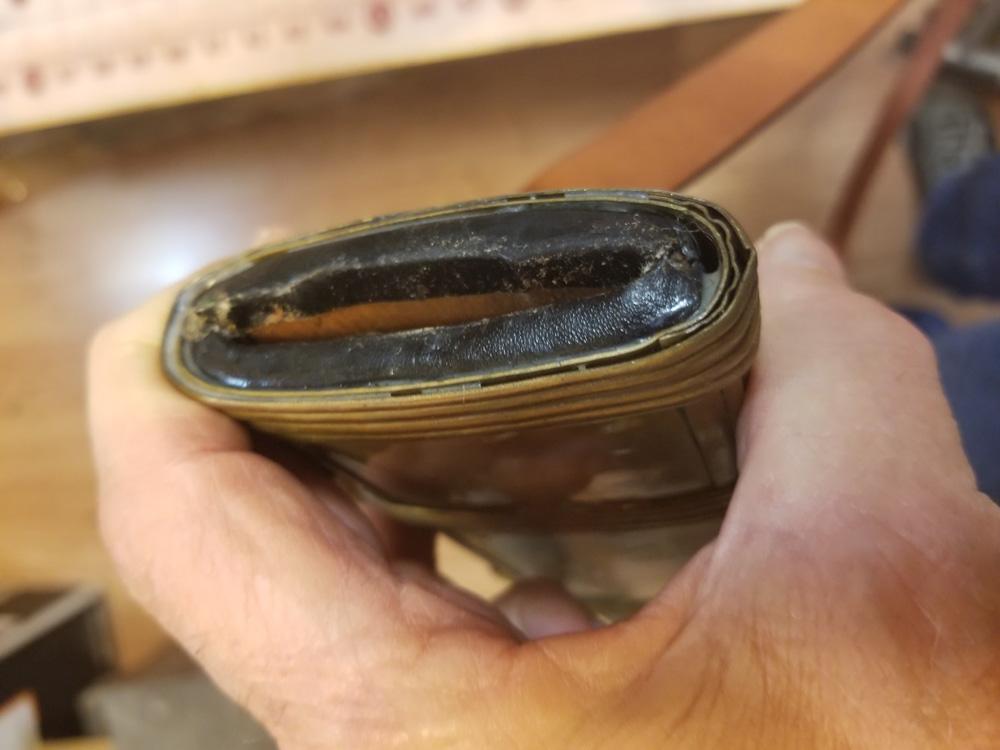
Wally World Purse
Dwight replied to Dwight's topic in Purses, Wallets, Belts and Miscellaneous Pocket Items
Actually Cattledude . . . that was the original intention. I just had a scrap of leather from some long ago project . . . nice and smooth on the hair side . . . this is the flesh side. It's a prototype . . . kinda playing with the design . . . actually did go back and pull that 207 thread . . . put 346 in its place . . . it looks a huge bunch better. I have some thinner leather I might do that with at least once . . . the original I saw was canvas . . . sewn and turned inside out. Just playin for now . . . see where it goes. Keep up the comments guys. May God bless, Dwight -
Wally World Purse
Dwight replied to Dwight's topic in Purses, Wallets, Belts and Miscellaneous Pocket Items
Funky tanned leather . . . cut it even is best anyone can do . . . May God bless, Dwight -
A friend's girlfriend has a similar purse . . . it is where I got the idea. This is basically 6 inches by 8 inches . . . Built to hold a cell phone, keys, driver's license, and a credit card . . . Perfect to go shopping at Wally World. Seriously . . . what do you think of the concept? My buddy's girlfriend loves her little bag . . . it's made of canvas with a zipper on top . . . I had trouble with the zipper . . . so I sliced it off and put on a flap with a magnetic catch. Gonna give it to a friend's wife . . . let her put it thru it's paces . . . get some feedback from another user. Also had some issues with the sewing machine . . . looking to replace that thing fairly soon. Anyway . . . send me your comments . . . good, bad, or ugly . . . May God bless, Dwight

-
I looked at all those things you mentioned . . . and quite honestly . . . you and I are the only ones looking at them. As long as it is not blatantly obvious . . . John Q public puts it on and wears it . . . and goes on down the road. My Boss will make a very consistent stitch . . . for belts . . . holsters . . . and some billfolds. It can be a bit finnicky when it comes to some other stuff . . . but one thing I do love about it . . . the hole punching is the next thing to el perfecto. For certain holsters here and there . . . I have hole punched them and then hand stitched them . . . and I dare anyone to find fault with that arrangement. Hand stitching a belt is something I don't do . . . although I have on occasion done the tongue end for one reason or another. Again . . . Boss punches the holes . . . ol Dwight hand stitches them . . . and it does not take long. I'm looking at adding a Cowboy 3200 . . . the dealer is only 100 miles from my door . . . with a great warranty . . . I'll use it for some more delicate things I want to add to my leather offerings. May God bless, Dwight
-
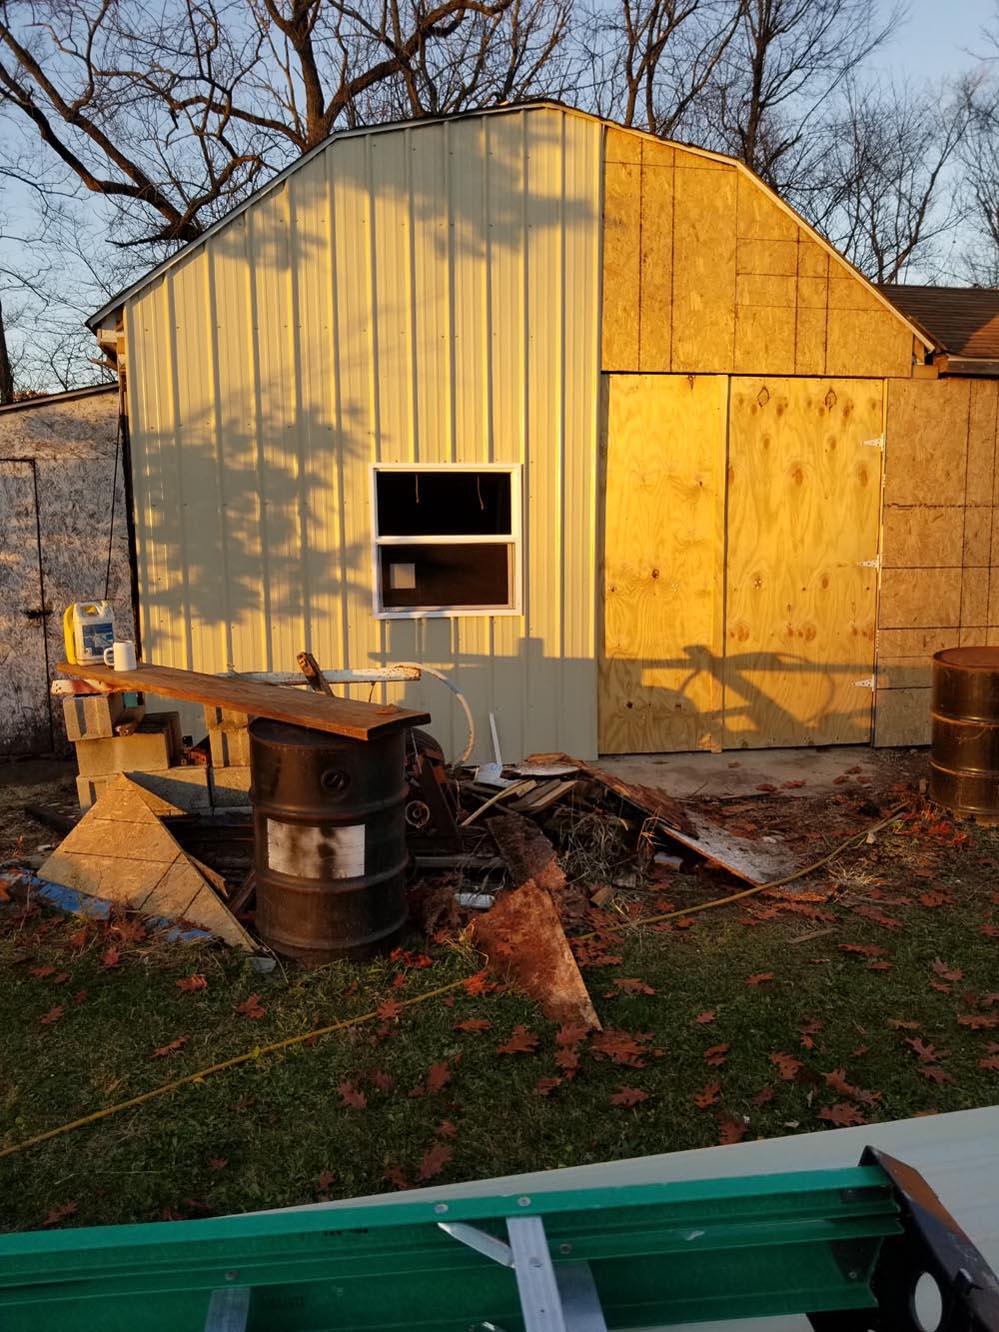
If you buy a Tippmann Boss . . . you can use two C clamps and clamp it to that black table there . . . put a chair out from it . . . and you're in business for some $1400 or so. Oh . . . and yes . . . it is a good machine . . . mine is in the 20 yr old range . . . and still works fine. May God bless, Dwight
-
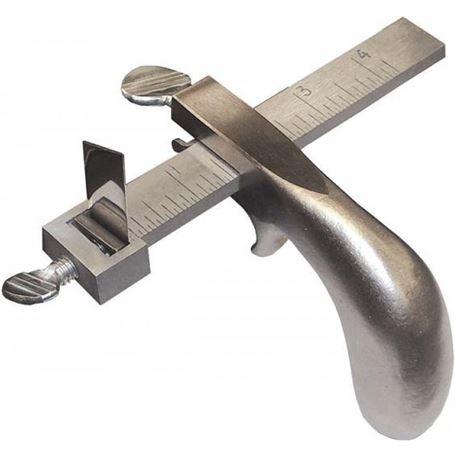
My brother in law found this one laying in a drawer in a piece of used furniture he was refinishing. He told me to take it home . . . been using it for close to 20 years . . . was at least that old when I got it from the looks of it. I would not buy a wooden one when I can have a metal one that will never warp, crack, bust down the middle . . . etc. And it is every bit as accurate as any strap cutter could be. I break utility knife blades in half and use them. May God bless, Dwight PS: This is just an image . . . not mine . . . but mine looks like it other than being several decades old
-
Honestly . . . I got lost in the description . . . and after seeing yours . . . it makes my arm and head hurt to think some day I'll take a whack at one similar . . . but I keep trying to talk myself into it . . . for my Marlin lever action .44 mag rifle. Any help is always appreciated . . . and I am definitely a newer novice when it comes to basket weave stamping. May God bless, Dwight
-
A Belt Thank You
Dwight replied to Dwight's topic in Purses, Wallets, Belts and Miscellaneous Pocket Items
Thanks, Bruce, . . . knowledge is one of those fun things you can give and give and give . . . and still have your tank full. Looks like a link I may spend some time with........... May God bless, Dwight -
Just wanted to drop a "Thank You" to all who encouraged me to not give up on basket weaving . . . I bought a couple of stamps . . . been messing with it . . . and had a lady come in looking for a belt for her hubby for anniversary. She gave me full reign to do it "my" way . . . just so it was the right color, size, and had his name on it. Well . . . it will never win a show prize . . . but she got his belt . . . or at least will get it when she picks it up. Thanks again . . . have a Happy Thanksgiving . . . may God bless, Dwight

-
Really nice . . . but my arm hurts thinking of that basket weave . . . May God bless, Dwight
-
Hey, . . . Handy Dave . . . Go out on Google or someplace like that and tell them you want to download a copy of Adobe photoshop elements . . . the version I have is 2.0. When you get it down loaded . . . File / Open will open any picture on your computer all you have to do is point it there. Once the photo is open . . . go to Image up on the top level there . . . click it . . . and the choice you want is "Resize". Clicking it will give you a couple of options and the one you want is "Image Size". When it opens up you will be able to choose either th e height of the image or the width of the image. I pretty much always choose the width and go with 1000 pixels. Put in the number and tell it OK. Next hit the red "X" in the top right corner of the picture . . . it will ask you if you want to save it . . . and there is a slider bar there that you decide how good a picture you want. Down at the bottom it will tell you how many "K" it is using . . . 250 K to 350 K is almost always good enough. Move the slider until you hit where you want it . . . click OK . . . That picture will load then. This is one I took today . . . and it started out at around a 5 meg picture . . . until I "Photo Shopped" it. I actually have to do that with any picture I want to put on the internet . . . my phone will not take small pictures . . . they are all at least 3.5 megs . . . so I just fix em. May God bless, Dwight

-
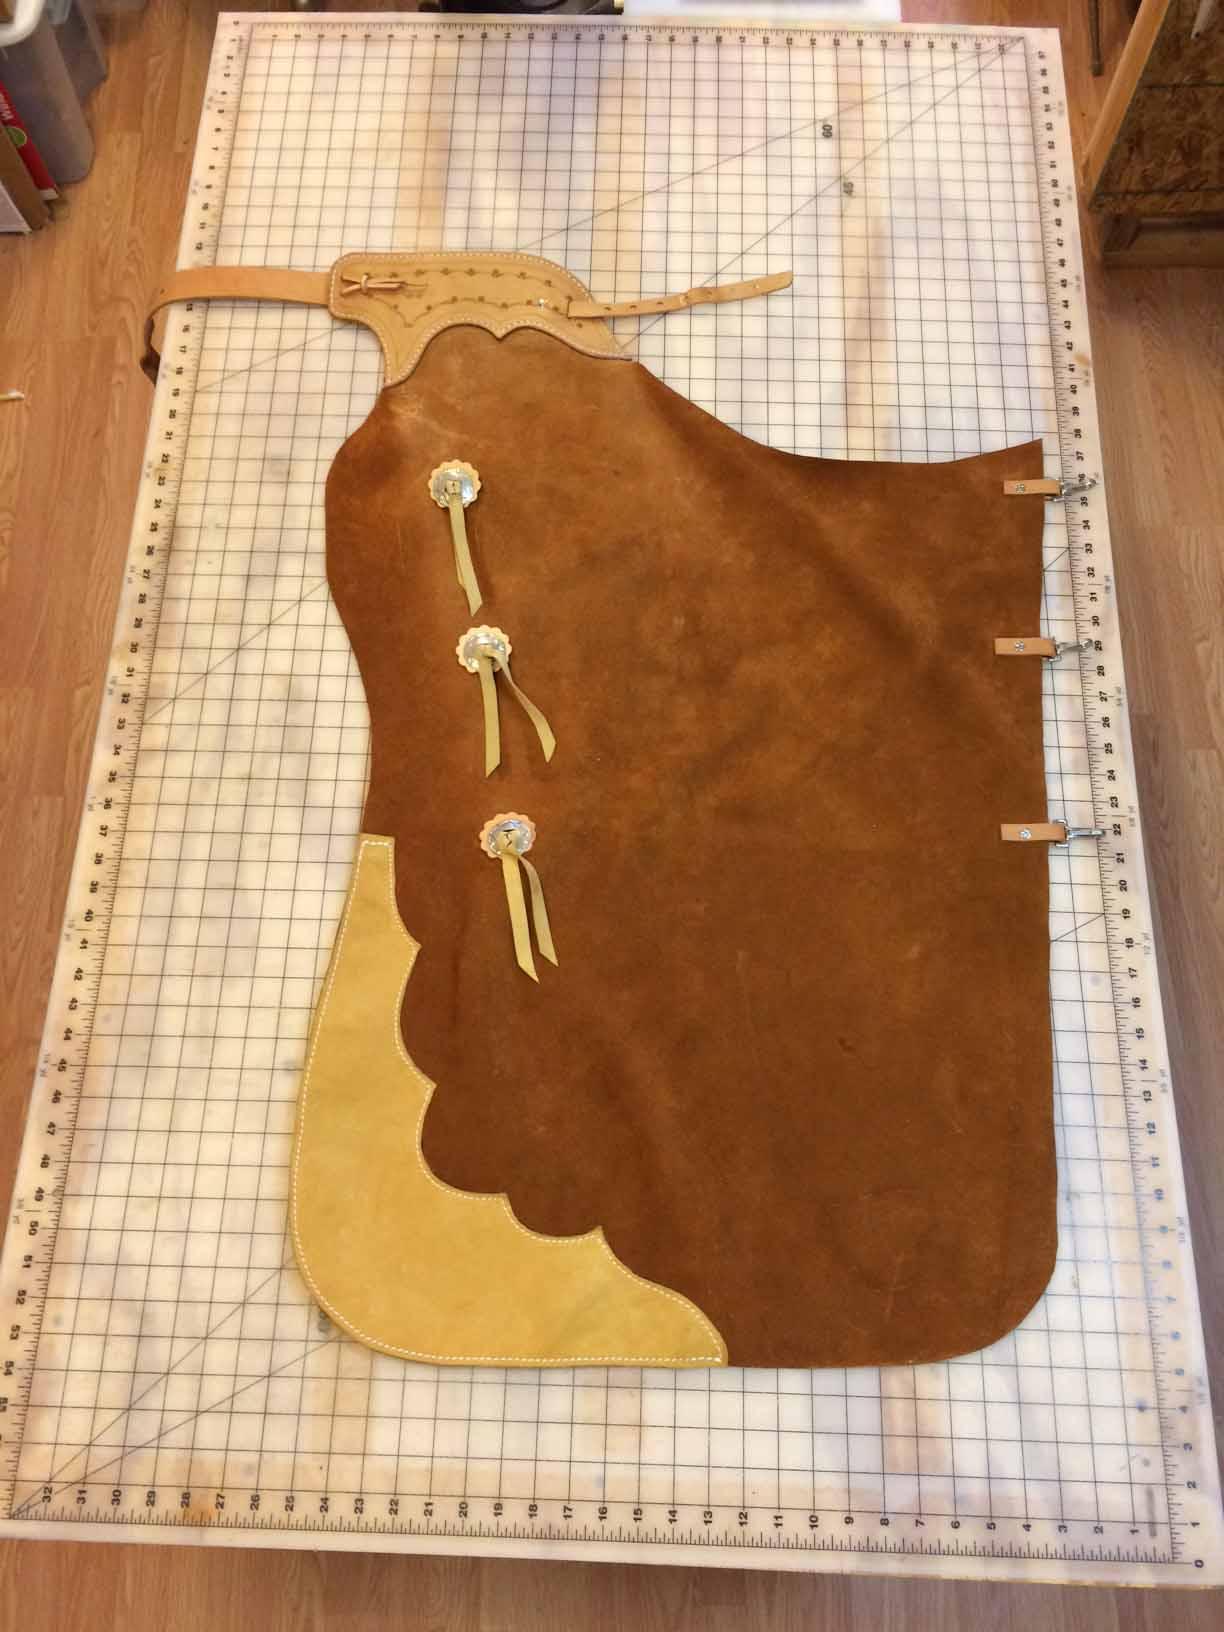
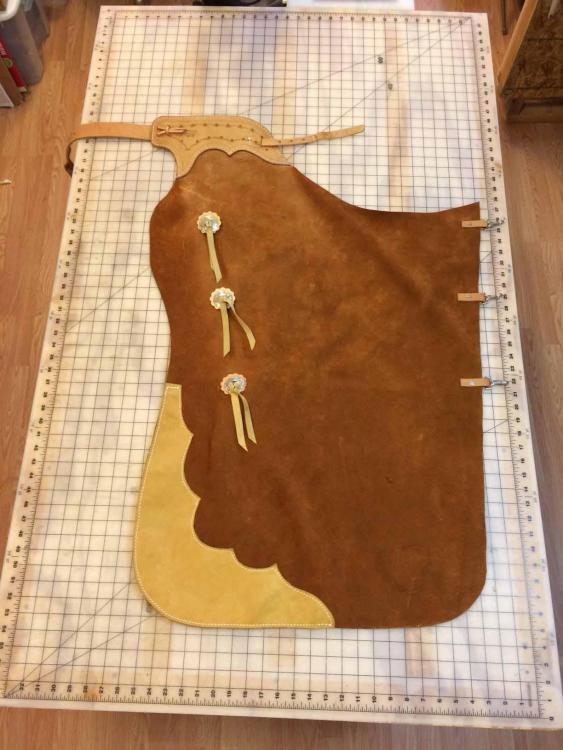
Here is the picture of my personal chaps and the pattern I use for me. The table is laid out in 1 inch squares . . . so you can work out the pattern from there. This is the right let of the chaps. And yes . . . they wrap like the diagram on the right side of your post. Each of the conchos has a ring behind it that the hooks snap in to . . . that's how they work. May God bless, Dwight
-
Mmmm . . . I really like the looks of this one . . . nothing against the original post . . . just not my style . . . but quite well executed for sure. May God bless, Dwight
-
Any reason not to use PVA instead of contact cement?
Dwight replied to Rocky143's topic in How Do I Do That?
If you want to use glue . . . just get the white kids stuff they use in school . . . or get white carpenter glue. Both work quite well on stuff you want to glue for some reason other than contact cement. Personally . . . Weldwood contact cement has never disappointed me . . . so why should I change? Besides . . . I can have something stuck together with Weldwood in a matter of maybe one minute . . . it's at least an hour with glue. May God bless, Dwight -
Suspenders
Dwight replied to Dwight's topic in Purses, Wallets, Belts and Miscellaneous Pocket Items
Not glue . . . Weldwood contact cement . . . way better stuff May God bless, Dwight -
Suspenders
Dwight replied to Dwight's topic in Purses, Wallets, Belts and Miscellaneous Pocket Items
Here you are my friend . . . the grid on that table top is all 1 inch squares . . . The white piece with the kinda circle at the top is the back piece . . . add 2 1/2 inches to what you see there on the grid . . . that is to fold under and rivet. The shorter white piece is the adjustment piece up front with the buckle . . . add 5 inches to what you see . . . to fold under and rivet. I make the actual suspender straps 1 1/4 inches wide or 1 1/2 inches wide . . . depending on what they are doing . . . etc. The brown strap is part of a test pair I use to measure the person with. I had to take them apart for another reason . . . and don't have them back together or I would show you them. But anyway . . . that's the pattern that will get you the suspenders I made shown earlier in this thread. Have fun. May God bless, Dwight
-
Suspenders
Dwight replied to Dwight's topic in Purses, Wallets, Belts and Miscellaneous Pocket Items
What I do is simply measure from the belt loop in the center of the back . . . up over the shoulder . . . to the front loop on the britches. Then it is a matter of deciding "Y" shape or "H" shape . . . making a pattern for the pieces . . . and going from there. I don't have time right now . . . but later today if I can . . . I'll show you my patterns laid out on the work bench for that last pair. May God bless, Dwight -
Suspenders
Dwight replied to Dwight's topic in Purses, Wallets, Belts and Miscellaneous Pocket Items
No . . . if they are adjusted to the right size . . . and have smooth leather on the inside so they slide easy . . . they're no problem. That's the 4th pair I've done in the recent past . . . none had elastic . . . no complaints at all. May God bless, Dwight -
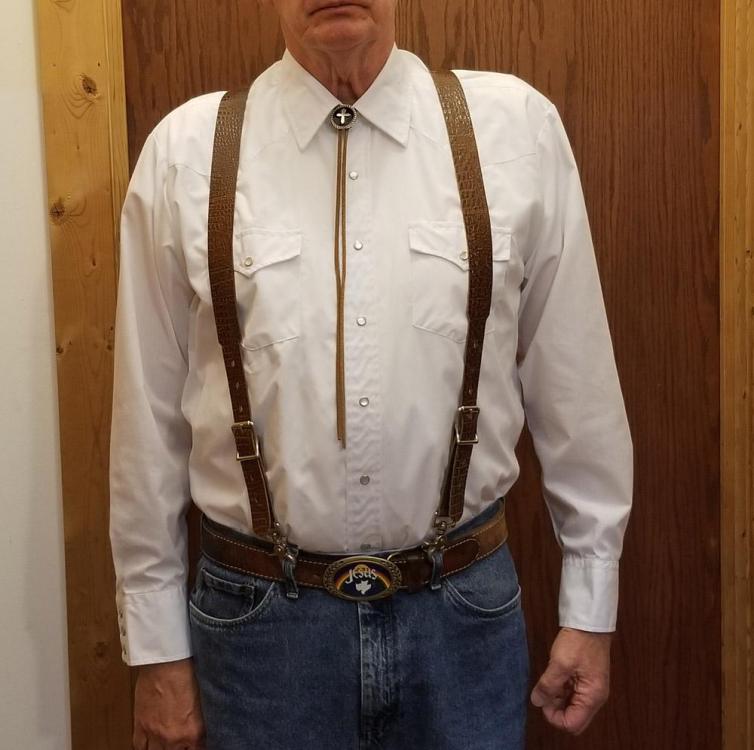
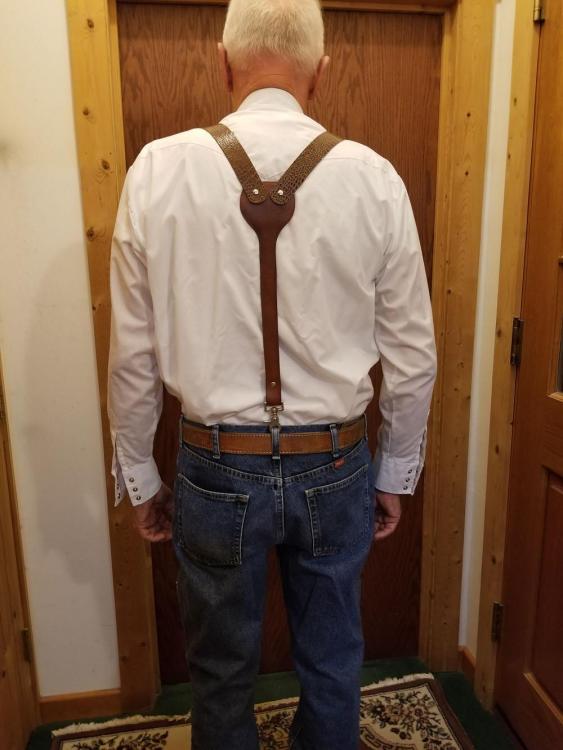
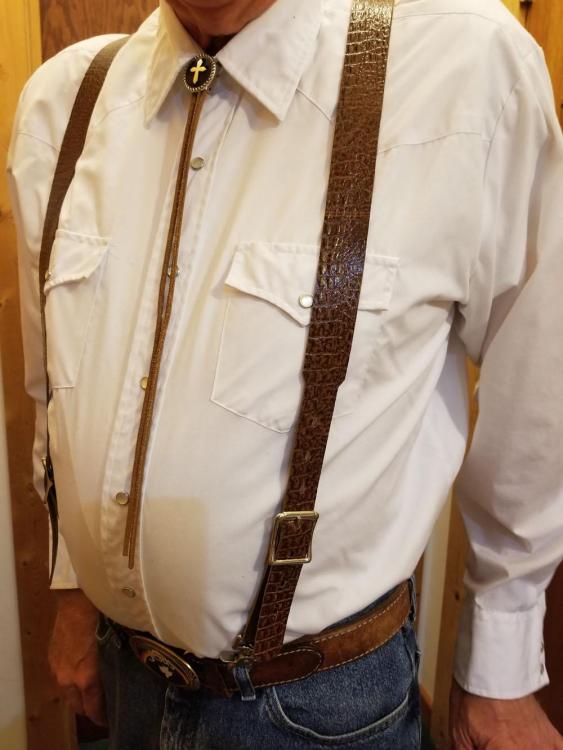
Three of the last 5 projects have involved suspenders . . . of one sort or another. Finally . . . I got to do just a pair of suspenders for a preacher friend of mine. It's imitation gator hide . . . two layers bonded back to back with Weldwood . . . horse tack to hold em on the belt loops . . . buckles up front to adjust with. Just might up and make me a pair. May God bless, Dwight
-
It probably is industry standard for those promoting gunbelts with stiffeners . . . but that is very much like saying that Chevrolet is the industry standard for trucks. Just one opinion . . . that may or may not be shared with the rest of the world. May God bless, Dwight
-
What kind of stamping are you planning on doing . . . That will be the first determining factor. May God bless, Dwight
-
Total New Rig Design For Me
Dwight replied to Dwight's topic in Gun Holsters, Rifle Slings and Knife Sheathes
Ummm . . . that belt he's wearing I made 10 or so years ago for him. It's over 50 inches to the most used hole. May God bless, Dwight -
Total New Rig Design For Me
Dwight replied to Dwight's topic in Gun Holsters, Rifle Slings and Knife Sheathes
Thanks everyone for the good words . . . It was a case in itself . . . after we first got started . . . he had to go out west for a few weeks . . . got covid . . . Came home . . . took a long time to get well . . . Original plan of front to back double suspenders wound up getting scrapped in favor of the three legged design . . . Had to add legs to the holster and mag pouch that way . . . I got a bunch of interim orders I would work on when he wasn't available . . . all in all it took a bit over a year to get it on his shoulders and out the door. But it was fun. May God bless, Dwight -
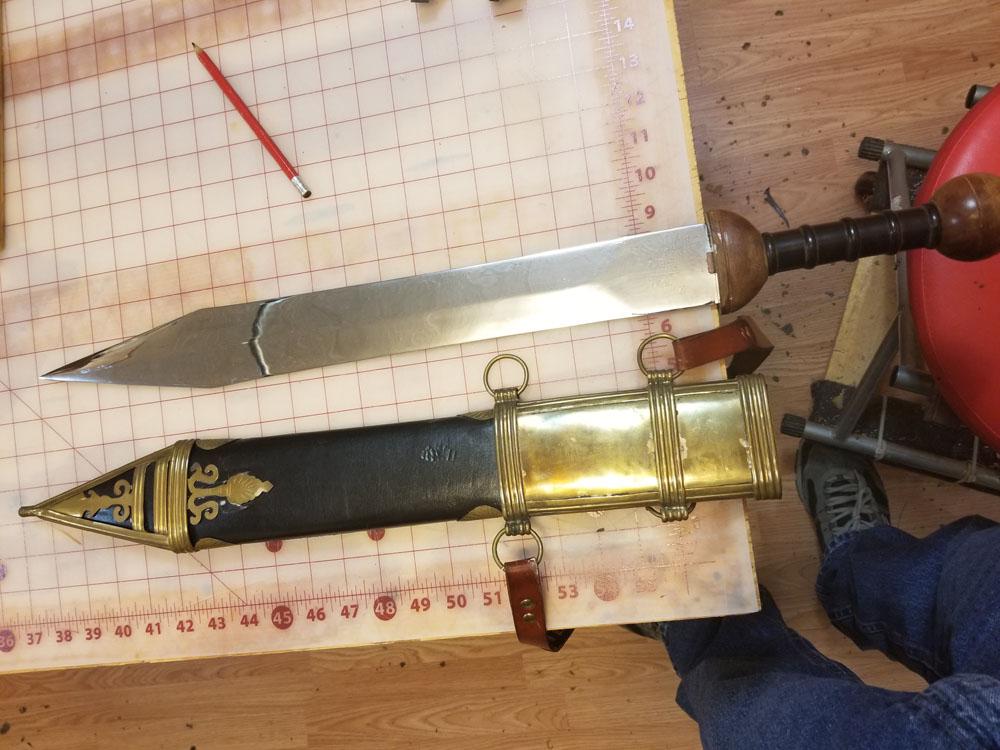
If you use 4 layers of veg tan . . . say 10 oz . . . 2 of them put together with Weldwood contact cement for the front and 2 for the back . . . you can put neatsfoot oil on the two interior layers to keep your sword from rusting. The contact cement will keep it inside the leather. Make sure to put a welt all around the outside of the sheath . . . and cut it so it fits within 1 1/16th of an inch of your blade. The welt should be 8 oz or so. Contact cement that welt to the back slde of the sheath. Next . . . mold the leather to your sword . . . by wrapping your sword in 8 or 10 mill plastic sheeting (two wraps is plenty) . . . and wet mold the two halves to your sword. Lay down a very smooth 1 x 4 board . . . cover it with parchment paper (your wife has it in the kitchen if she bakes). Lay down the back side . . . insert the sword . . . put on the front, carefully aligning the edges all the way around . . . more parchment paper . . . and another very smooth 1 x 4. Add several wood clamps the length of your sword and tighten them uniformly up and down the sword . . . not super tight . . . just enough to get the mold of the sword impressed into the center two pieces of leather. Leave it for an hour or so. Put the sword and leather parts in a cardboard box with a couple of 100 watt lightbulbs at the bottom . . . put a thermometer in there and keep an eye on it . . . don't let the box get above 145 farenheight . . . but you do want it to get up to 130 degrees. In at least 3 places . . . wrap plastic . . . then masking tape . . . to keep the pieces lined up while they dry When it is fully dry . . . it will be really hard . . . you can probably knock someone out with the scabbard alone. Oil the inside two halves of the scabbard . . . SPARINGLY . . . and if you want to do any stamping on the outside . . . put the sword back in . . . lay the bottom (keep it dry) on a couple of towels . . . and gently dampen the top outside layer with a sponge . . . and stamp your leather. Put it back in the box to dry. Contact cement the top to the bottom . . . sand the edges smooth . . . bevel . . . sew it and finish the edges . . . and you will have probably the best scabbard in your knights group or whoever you are "swording" with. You can from time to time oil your blade . . . just be careful about getting the inside of the sheath super wet with oil. That was the process I had devised for my own sword (see pictures below) as one of my alter egos is Centurion Salvatorus Antonio, the Centurion of Capernaum. I got behind in my schedule . . . and just ordered my scabbard . . . and it turns out it is leather made in a similar fashion as I explained. I would never hesitate to use that scabbard as a weapon itself if it was all I had. I think I could knock out a prize fighter with that thing. May God bless, Dwight
-
From what little vinyl experience I've had . . . just one note of caution. You will have to have that foam trimmed REALLY close to the shape you want it. Even marine vinyl . . . thick and tough as it it . . . it also is unforgiving if there is a valley or hill in the foam. That valley or hill will show up worse than coal soot on newly fallen snow. AND . . . actually cutting the foam just a tad bigger allows the vinyl to cover up some of those problem areas. Leather is much more forgiving (and problem hiding) than vinyl. May God bless, Dwight