-
Posts
5,257 -
Joined
-
Last visited
Content Type
Profiles
Forums
Events
Blogs
Gallery
Store
Everything posted by Dwight
-

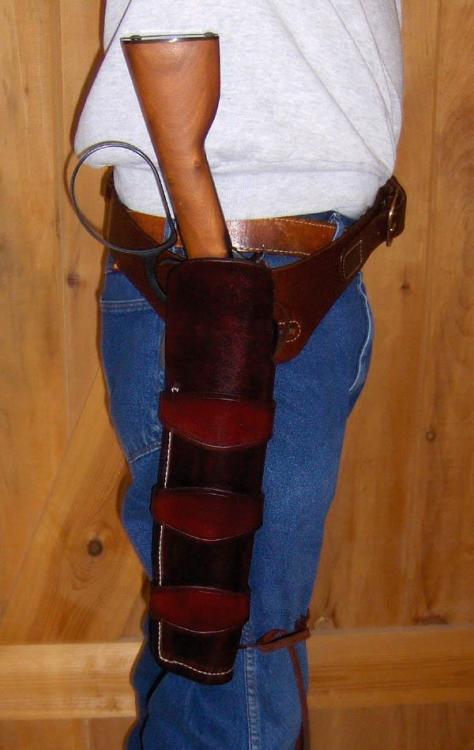
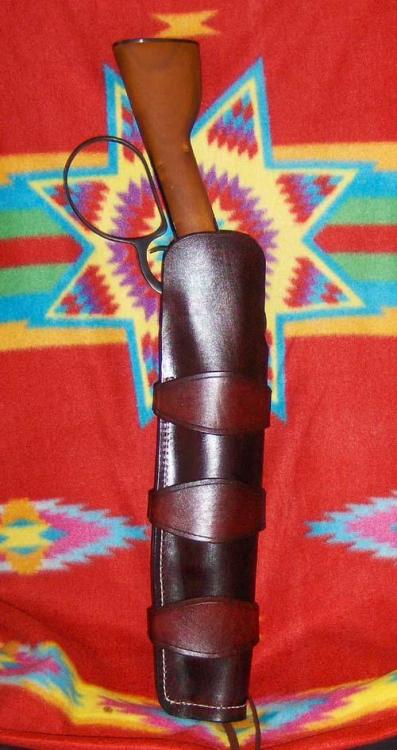
mares leg hip holster plans
Dwight replied to leatherguy71's topic in Gun Holsters, Rifle Slings and Knife Sheathes
-

Is this stitching weakening the belt loop?
Dwight replied to GeneH's topic in Leatherwork Conversation
RockyAussie said it first, . . . but is worth quoting, . . . darn good job in my book. PLUS, . . . I had to kind of chuckle, . . . I'm in the process of building a little coal forge, . . . a Shawnee pattern tomahawk will be one of the first products from it, . . . and I was kicking ideas around in my head the other day for the carrier for it. May God bless, Dwight -

How do I sew some heavy webbing without a big sewing machine?
Dwight replied to Gymnast's topic in Sewing Leather
I'm not sure what you are attempting to do, . . . but I've used a plastic $99.00 Brother sewing machine to sew multiple layers of heavy webbing to themselves for pulling straps, . . . and to canvas to make a makeshift carrier for a human body (long story, . . . totally legal and above board). The secret is doing two things: 1) put the pieces together first with contact cement, . . . and leave them together for 24 hours under some small weights (a board and a 5 lb sack of flour), . . . then 2) sew it and use carpet thread purchased from Joann fabric. The strength of that "union" defies common belief. AND, . . . it can be done with your basic home style sewing machine. May God bless, Dwight- 18 replies
-
- webbing
- jerk needle
-
(and 2 more)
Tagged with:
-

Chest rig for a revolver
Dwight replied to Josh Ashman's topic in Gun Holsters, Rifle Slings and Knife Sheathes
Thanks, Josh, . . . looks good, . . . especially the 1911, . . . my favorite. May God bless, Dwight -

Chest rig for a revolver
Dwight replied to Josh Ashman's topic in Gun Holsters, Rifle Slings and Knife Sheathes
That is some good looking leather work, for sure. Just one quick question though: John, . . . any chance of a couple pics with it being worn??? My chest rig is a lot different, . . . would like to see yours "in action" so to speak. Thanks, . . . may God bless, Dwight -

Best Glue For Leather To Leather, And Leather To Fabric
Dwight replied to CCPhotog's topic in How Do I Do That?
Gene . . . . mistakes like that are the reason folks have been using leather for centuries. Like the old saying about Timex, . . . takes a licking and keeps on ticking, . . . leather is the same. But we are talking sporadic, unintentional, mistakes, . . . a steady diet of dunking leather in gasoline or other materials like that will dry it out, . . . it'll crack like crazy, . . . ain't worth carrying home after a while. My saddle is nearing if not past the century mark, . . . and if I still rode, . . . it would be good for decades more use. I'm sending it to a friend in Arizona just for that reason, . . . he can use it, . . . I'm done. But seriously talking about glue, . . . I use Elmer's white glue if I need to move something around after I stick it the first time. Other than that, . . . it's Weldwood. I found using only a couple of products allows me to know what I'm going to get using it. May God bless, Dwight -

Best Glue For Leather To Leather, And Leather To Fabric
Dwight replied to CCPhotog's topic in How Do I Do That?
If you are having trouble with Weldwood, . . . you are not doing something right. Flesh side to flesh side adhesions, . . . once set (several hours after initial contact), . . . you will pull leather apart making them separate. Hair side, . . . you have to take sand paper or a wire brush (better) and scuff up the hair side, . . . then the same will occur as above. Flexible after cured, . . . yes, . . . but you have to remember that layers of leather are like layers of wood. Instead of "plywood" you have "plyleather", . . . and it will be significantly less prone to bending and flexibility. Yes, . . . for all tense and purposes . . . . water proof. If you have to have something solvent proof, . . . leather is the wrong product to use to begin with. Oil should not bother it either, unless you soak it, . . . in which case you probably ruined the leather piece as well. Accidental and incidental spills of water, oil, and solvent should have been taken care of by the topcoat you put on the product. May God bless, Dwight -

IWB 1911 holster
Dwight replied to glockanator's topic in Gun Holsters, Rifle Slings and Knife Sheathes
Good lookin, . . . May God bless, Dwight -

IWB 1911 holster
Dwight replied to glockanator's topic in Gun Holsters, Rifle Slings and Knife Sheathes
Would sure like to see the rest of it......... at least the other side. May God bless, Dwight -

First (and maybe last) belt
Dwight replied to Mike Wise's topic in Purses, Wallets, Belts and Miscellaneous Pocket Items
Good job, Mike Wise, . . . and you are a much more industrious man than I. I complain to a certain extent having to sew belts with a Tippmann Boss, . . . a 20 minute to 1/2 hour process for me (74 yrs old and enough arthur-rightus to make pulling that handle a bit of a chore). A 42 inch belt runs something near 500 stitches, . . . and my right shoulder fusses with me the rest of the day. But again, . . . nice belt, . . . wear it happily and proudly. May God bless, Dwight -
Kydex and rivets like the manufacturer supplies. May God bless, Dwight
-

Help needed, my leather wouldnt harden :(
Dwight replied to Suntailhawk's topic in Historical Reenactment
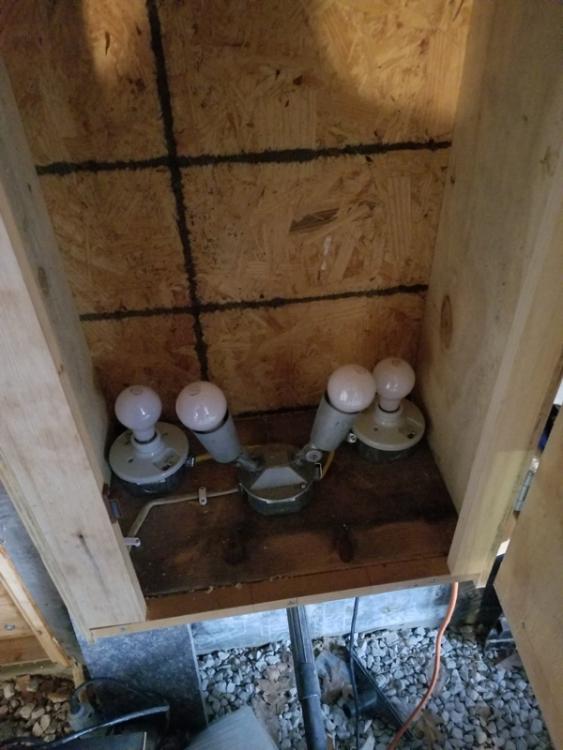
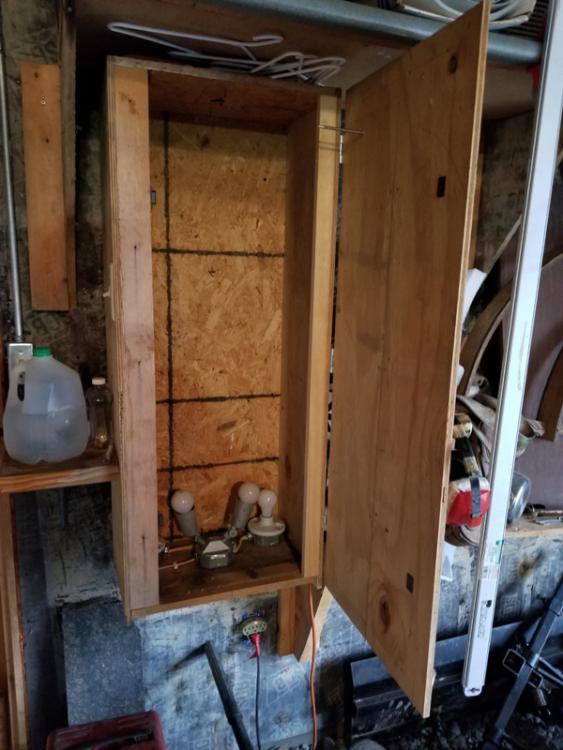
Here are some pics, . . . actually used 4 bulbs, . . . thought it was only three. Go to Lowes, . . . buy the lumber and usually they'll cut it for you. At least I can usually get them to do it, . . . I explain it has to fit in my Jeep. You can't see the hooks in the picture, . . . they are at the top, . . . put a coat hanger in there with whatever needs dried / hardened. I will probably go with smaller bulbs later on, . . . this dries em out just a tad fast for me. May God bless, Dwight -

Help needed, my leather wouldnt harden :(
Dwight replied to Suntailhawk's topic in Historical Reenactment
Actually all I did was mount 3 porcelain pull chain fixtures to the bottom of the box, . . . wired em up, . . . put a switch on the box, . . . installed the bulbs, . . . voila, . . . it works. May God bless, Dwight -

Help needed, my leather wouldnt harden :(
Dwight replied to Suntailhawk's topic in Historical Reenactment
Actually the "drying bag" is an extension of my "drying box" I have. It's about 12 by 18 and 48 inches tall. Full door on the 18 x 48 front. Put a couple of hanger hooks in the top, . . . 3 each, 100 watt incandescent light bulbs sit on the bottom, . . . thermometer sticks out the door up topside. I've never heard about the 180 deg water for hardening leather, . . . but I can tell you for a fact that 135 to 145 deg dry heat from those light bulbs will dry out and harden a holster almost to the point you could use it as a weapon. Don't recall who (someone on here) sparked the idea, . . . but I ran with it, . . . and use it occasionally if I see a real need for it. The bag is a cheap alternative. May God bless, Dwight -

A couple of Holsters
Dwight replied to SickMick's topic in Gun Holsters, Rifle Slings and Knife Sheathes
Mike, . . . can I throw you a constructive criticism, if you don't mind??? Your barrel end is a tad tight, . . . give it just a bit more leather. Western holsters should be more rounded, . . . instead of profiling the outline and symmetry of the weapon. THEN, . . . go to the hardware store, . . . buy a slick and varnished claw hammer handle (one of them wooden ones), . . . cut the top off it where the hammer head would go, . . . sand that smooth and varnish it, . . . use that hammer handle to open up, smooth, and pattern the barrel part of the holster. I about laughed myself silly when I saw John Bianchi do that in one of his videos, . . . as I was trying to think ahead and see how he was going to do things, . . . when I saw that trick I about lost it. Had a broken hammer handle in the shop, . . . got it fixed up, . . . been using it for over 10 years, . . . makes the nicest and prettiest holster bottoms you can imagine. Anyway, . . . just a couple of suggestions. May God bless, Dwight -
Here you go: https://www.tandyleather.com/en/category/rawhide May God bless, Dwight
-

Help needed, my leather wouldnt harden :(
Dwight replied to Suntailhawk's topic in Historical Reenactment
OK, . . . what you want to do is wet the pieces, . . . hang them in as near the shape as you want them, . . . get a 55 gallon drum liner, . . . make a bag that hangs open end down, use a garbage can lid or something to keep the top nice and big, . . . the heat will hang tight up in the top of that bag, . . . hang the leather in the bag, . . . and put a couple of 150 watt incandescent bulbs below the bag, . . . Check it every hour or so until you see how the first pieces come out. OR, . . . if you have a furnace with floor ducts, . . . it might be hot enough if you hang the bag right over one of them. THEN, . . . get a bottle of Resolene, . . . mix it 50/50 with water and coat each piece inside and out. After about 3 or 4 coats it will harden it up really good. It'll also shine the heck out of it. TRY . . . a piece with the metallic paint first, . . . the resolene may go over it with no problem, . . . but it will have to be dry first. If not . . . take a piece of steel wool and lightly scuff the surface of the resolene, . . . then paint over top of it. Have fun, . . . may God bless, Dwight -

Help needed, my leather wouldnt harden :(
Dwight replied to Suntailhawk's topic in Historical Reenactment
OK, . . . let's go back to the original: wanting to make armor. Must stand up to LARP standards. NOW, . . . what size piece are we talking about?? Are you making a full body armor such as Roman generals wore, . . . or is it "fish scale" type armor made up of small 4 to 6 sq inch pieces, . . . or is it something totally different. PICTURES would certainly help. May God bless, Dwight -

Help needed, my leather wouldnt harden :(
Dwight replied to Suntailhawk's topic in Historical Reenactment
One other thing you can do, . . . get it wet again, . . . but before you do, . . . find a place (not an oven either) where you can regulate the heat at 130 to 140 degrees F, . . . closer to 140 the better. Then get it wet, . . . not sopping, dripping, drooling wet, . . . just wet, . . . adjust whatever molding you want to, . . . then put it in the heat, . . . and leave it for about 3 hours. If that don't do it, . . . then send me a PM, . . . I've got another trick or two for you. But that really should work. It always has for me. (quick question, . . . how thick is your leather??) May God bless, Dwight -
Welcome from Buckeye land, . . . Transplant from Carter Co, . . . Have fun and enjoy. May God bless, Dwight
-
Congrats, . . . glad it worked out. I just the other day tossed a holster I had quite a bit of time and material in, . . . simply because I could not make it work. I wanted too much out of the leather, . . . it said "NO" so I pitched it. Sometimes it works out as it did in your case (and I'm very glad it did), . . . and sometimes the waste basket is the best option. May God bless, Dwight
-
Sometimes when I walk in there, . . . I think the cash register does a little dance, . . . "He's Baaaaaaaccckkkkkk". May God bless, Dwight
-
Once you get your pattern, . . . make a test cover with fabric backed vinyl purchased at JoAnn fabric. Get their 50% off coupon off Google, . . . buy a yard of it, . . . it'll be 36 by 48, . . . so you'll have plenty enough to mess with. Leave 3/8 to 1/2 inch extra, . . . all the way around, . . . take a pair of dividers and mark that all the way around the edges of the pieces. Then, . . . staying about 1/16 of an inch away from your scored line, . . . coat each piece with Weldwood Contact Cement, . . . a thin coat is adequate. When the cement dries, . . . (I use a heat gun to make it happen a lot faster), . . . slowly and carefully put the edges together, . . . and re-mark them now in the inside, . . . and sew that line. You can use a sewing machine, . . . with carpet thread, . . . also bought at JoAnn's, . . . and a lot of machines will do that. I had a Brother machine I bought at a yard sale for $25 that would sew that all day. The seam will then need to be laid over so that it all points down toward the pavement. Have fun, . . . show us pics when it's done. May God bless, Dwight
-
One sure fire way is to not saddle stitch, . . . use a lock stitch like a sewing machine would make. I know, . . . "saddle stitch is the only authentic, . . . " (ad nauesium), . . . but if you can, think of the number of holsters and belts that are in use in the world that were never even thought of in terms of saddle stitching. I don't know the official ratio, . . . but I'd bet it would be at least 10 to 1, . . . machine stitch vs saddle stitch. My Tippmann boss makes the prettiest white stitches you could ever want, . . . May God bless, Dwight


