RockyAussie
-
Posts
3,265 -
Joined
-
Last visited
Content Type
Profiles
Forums
Events
Blogs
Gallery
Store
Everything posted by RockyAussie
-
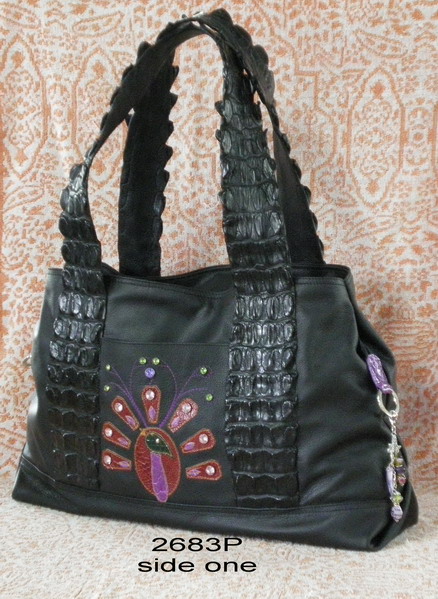
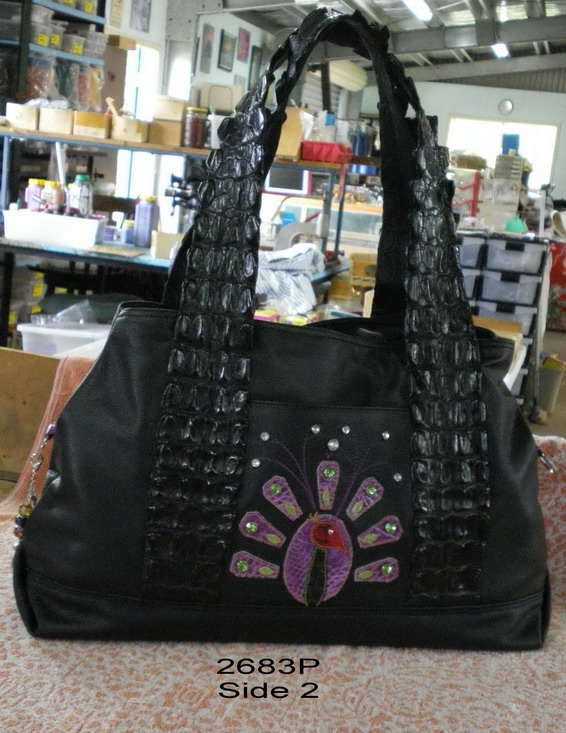
The brush version is a common thing to see in the shoe repair trade but funny enough I have never seen it in use in the leather goods manufacturing before.I use one here nearly every day and the version I made is fantastic for small seam lines around bag edges and watch bands and heaps of other little bits.You can see in my web page where the girls here stick flowers and leaves and all sorts onto the bags and purses and before they are stitched this is commonly used to stick them in place. This bag is a good example of what I am talking about.
-

Skiving Machine and Stitching Seams
RockyAussie replied to SonderingSusan's topic in How Do I Do That?
On the bottom of this answer you should see my You Tube Channel in blue. This will take you to 3 videos on using a roller foot on a skiver. Glad we could help solving the problems. Regards Brian -
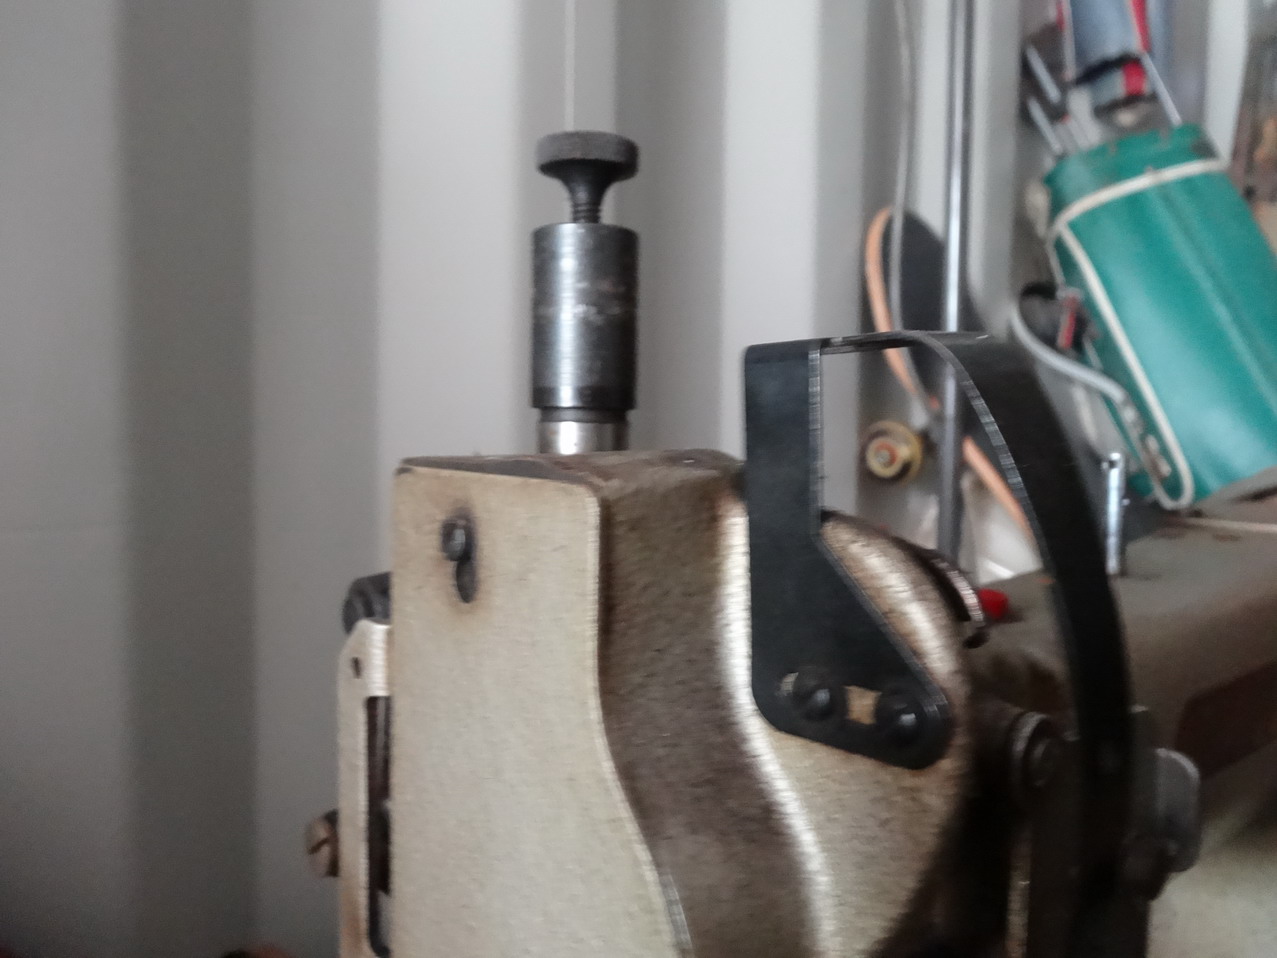
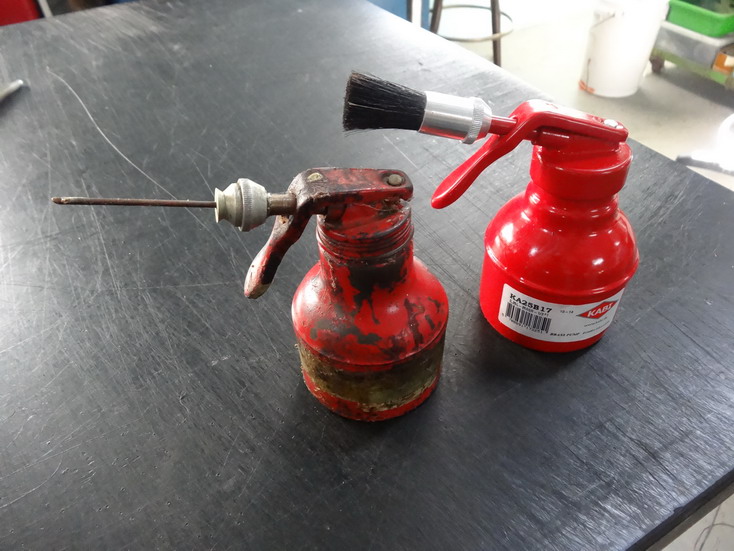
If You are doing a fair bit of glueing you might find this of help. The brush version you should be able to get from a shoe repair supplier there and the tube version is what I came up with for fine tip glueing with contact cement. The brush part can be separated and this leaves an aluminium part that has a hole through it. From a craft/hobby supply store I was able to get a brass tube about a foot long that fits this hole pretty neat. I cut this down to length and then with a pin punch gently heat and flair one end a bit. This stops the tube from pushing out. A few punch hits on the aluminium around the tube lock it in nice and tight. A bit of brake tube squeezed of on one end acts to cover the brass tube and stop the glue from drying out between uses.The army food container thing with thinners in was my best answer to keeping the brushes supple and ready between uses.Have fun it work very well.
-
How to properly stitch a zipper?
RockyAussie replied to panchoskywalker's topic in How Do I Do That?
Oh!! I just remembered, I think you can get from Ohio travel goods a clip open style pull that fits some zips like the YKK and maybe some others. As I said the pulls are often the culprit. If you have trouble finding it let me know and I will search through my endless bookmarks. -
How to properly stitch a zipper?
RockyAussie replied to panchoskywalker's topic in How Do I Do That?
I am glad you got the problem fixed. As for the zipper being able to be replaced at a later date easily I guess you could design it that way if you want. Perhaps 2 or 3 clips to hold a pocket of sorts but Of course then the clips would fail. I have to say that I don't hardly ever get returns for my own zips but some of my customers have the hide to send me other manufactures bag and purse zips to replace. I charge good for those. I do as my conscience tells me after inspecting the return and being fair as to how they have treated the product. Normally I would not get one back for a couple of years at least. Normally they are happy to pay a fair part of the cost when they do. Regards Brian -
How to properly stitch a zipper?
RockyAussie replied to panchoskywalker's topic in How Do I Do That?
Ok. What is failing here is most likely the slide. The slide on zips have a lot to do with how they work. If a heavy machine were to press its foot down on one side of the slide it can tilt the angle of the slide which only has a bar in the middle.Any hammering down on the slide edge could do it. Once this happens one side is tight but the other becomes loose and will no longer feed the zip together properly. In the past when doing zipper repairs often all that is necessary is to carefully squeeze the pull down a little on both sides at the back smaller end. The slide must be right back at the start first before squeezing.When zips get worn a lot and start coming apart a little squeeze will generally do the job.I use a small set of blunt nail pullers that allow you to reach over the pull and press at the back. This is not at all common and I think just a bit of bad luck, the chances of it happening again would be very unlikely. -
How to properly stitch a zipper?
RockyAussie replied to panchoskywalker's topic in How Do I Do That?
How is the zipper failing and what method did you use that makes you think it is your fault. If your putting on the zip slide yourself I recommend always checking the slide functions well before stitching in. If you do that already then the only other thing I can think of is if your foot is dragging on top of the zip when your stitching. If that is the case then you need to get a foot that stops that from happening. If you don't want to use a zip you could perhaps put some clip down straps across or an overlap flap depending on the pocket style. -
Yea likewise with the welcome Chuky, had a couple of Bonnies myself but not quite so pretty as yours.I'm up in Rocky if the name did not give it away already.
-
Now that is a different fishing style I reckon.Fly fishing I guess.
-
Woolies in the fruit section I think.
-
Walking foot - feed dogs marking leather
RockyAussie replied to jakc3's topic in Leather Sewing Machines
OK. I did it quite a few years ago and the pics above of Uwe's 145 may have made me think that the spring rested on the doo hicky. As long as it works,as it did for me that's the main thing. -
Although the thickness you want to sew can help, knowing the types of product would be better and how far your budget can go. There are just to many machines suitable for various applications and sometimes no one machine can do the job either. I regularly use 6 different types in my production and have many more not so useful past purchased ones in storage.Knowing as close as possible to what you are wanting to make and getting the right advice here can save a lot of $$$. Regards Brian.
-
Walking foot - feed dogs marking leather
RockyAussie replied to jakc3's topic in Leather Sewing Machines
I think by raising it as I have done the outer spring has less tension on it and the inner spring then allows more of an adjustment. As I did this for wallet type work I would say if you wanted it to do heavier type work you would only take the sleeve up 1/4"(6mm).In the location I have this one the adjustment bolt does not feel to touch the inner spring until about 3/4 way down. As for my 335.... its staying in the sin bin.The Adler 69 as Uwe pointed out has a more logical adjustment system and I only every use that when I want to do thick bag handles and such. The 331 does most things just right, It's just a shame they stopped making them. -
Walking foot - feed dogs marking leather
RockyAussie replied to jakc3's topic in Leather Sewing Machines
It deserves it. It's got one foot tooo many for my liking.. -
Walking foot - feed dogs marking leather
RockyAussie replied to jakc3's topic in Leather Sewing Machines
Here's the pics of the 335 with the sleeve pulled up about 3/8". This still allows the screw when wound down to come into play and have some meaning I guess. Note the sleeve is no longer visible from inside against the outer spring. Sorry the pics are not the best, it is quite dark down the back in that container.
-
Walking foot - feed dogs marking leather
RockyAussie replied to jakc3's topic in Leather Sewing Machines
Just found a pic that shows the 331 and it's adjuster.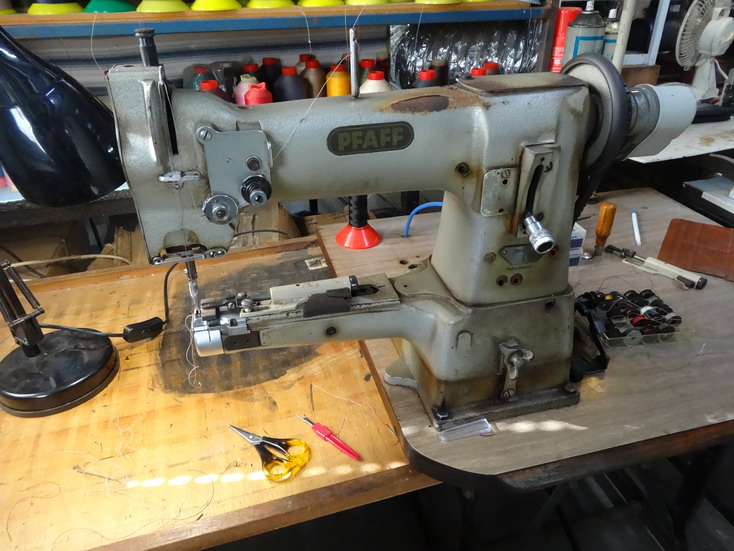
-
Walking foot - feed dogs marking leather
RockyAussie replied to jakc3's topic in Leather Sewing Machines
I will try and take some pics tomorrow of a 335 I have put away in a storage container. From what I can see it looks as though I have lifted the as Uwe calls the extension up about 1/4 to 3/8" and run with that. From memory I think it required vice grips and ample swearing.My 331 has a far nicer set up (Like the modern one a bit) but inside of it there is a rod that when you screw the extension down it pushes the inner spring down. As I use very small feet and on light duty leathers I take that rod out thus making the inner spring do nothing. I gauge the tension by lifting the foot by hand first then adjusting the pressure until the job will just not lift when the needle pulls up.When I use heavy veg I put it back in. -
Well said!
-
I have not had to deal with charred edges from a laser before. trying to sand clean inside those little thumb holes and such would be hard and time consuming I think. I would try using an edge coat thinned 10% first and see if the edge can be become stable enough to hold. In the video of this link you can see me applying edge coat to belts and I can assure you I have seen some of these belts many years after being made with the edging in good condition.
-
I have a piece of steel rod made up to the same diameter with a pointed dome shape on the end to help push it through. I normally put in over night to help the leather to set in that shape.Sometimes a bit of powder is still necessary.
-
Although the racks come in handy for repetitive work the application technique with the edging method I think should be useful on one off projects as well. I hate seeing people playing around with pencils and little brushes and such when I know a good finish must be applied quickly and evenly. If I do a single key tag it's pretty much the same technique. Regards Brian
-
29K1 Pre Christmas Barn Find :-)
RockyAussie replied to Constabulary's topic in Leather Sewing Machines
Somehow I missed this thread before and I must say I have never seen such a nice patcher set up ever. Very nice work. On another note, that bell crank needs replacing for sure or at least rebuilding to get any stitch length at all. I did grind down the adjustment band (the square band with the thumb screw in it) shorter once and that gave a noticeable improvement in stitch length.The higher it goes the longer the stitch. -
First major project
RockyAussie replied to Leatherhips's topic in Purses, Wallets, Belts and Miscellaneous Pocket Items
WOW!!!! for a first major project I don't know what to expect when you become an old hand at it -
Front view of croc+ pink leather tote
RockyAussie commented on RockyAussie's gallery image in Gallery- Our Leatherwork
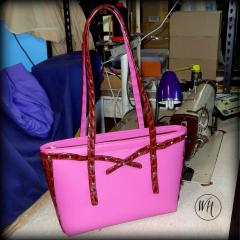 Thanks. Its a nice change from the full croc all the time so much.
 -
Thanks for the encouragement.