RockyAussie
-
Posts
3,265 -
Joined
-
Last visited
Content Type
Profiles
Forums
Events
Blogs
Gallery
Everything posted by RockyAussie
-
 @Uwe Thats a crying shame mate. I think 90% of the work I do on this machine would be done on this dog foot and throat plate, be that I have been grinding the plate some to suit my purposes. Its now shorter on the left side to enable closer in work. Getting all effeminate about whether on some machines only one hole lines up is a sad loss to the limitations this machine suffers without it. I think these 2 pieces could be ordered separately without the other feet as well. Having the other 2 feet is not that big an issue as I am always chopping up feet to suit some purpose or other. They would work quite well for the intended purpose but a few adjustments would have to be done when changing from 1 foot set to another and I get too pushed for time to bother with that generally. Last time I checked this post it has had over 700 views so I think it is of of interest to some here on LW if not more in the WW. If you really don't want to further re stock, let me know as I will pursue it further. Thank you for your help in this to me so far. Kind regards Brian
 -
Problem sewing multiple layers with 211g165
RockyAussie replied to jrbeasley's topic in Leather Sewing Machines
I think if you could post a picture of the work and the feet close in could help. I think I understand the problem but would like to see it before possibly leading you wrongly. It may not be practical but would it work to spin the job around and tackle it in reverse? Shorter jump off point to go over I'm thinking and no back foot to hold it up then. Brian -
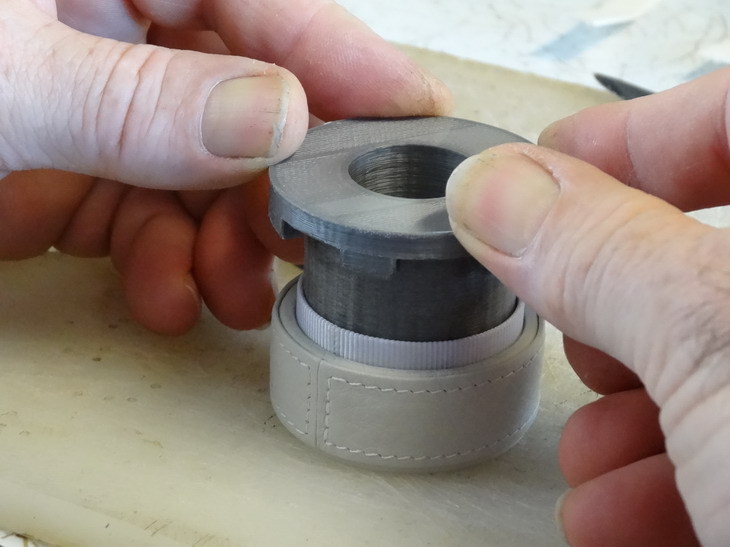
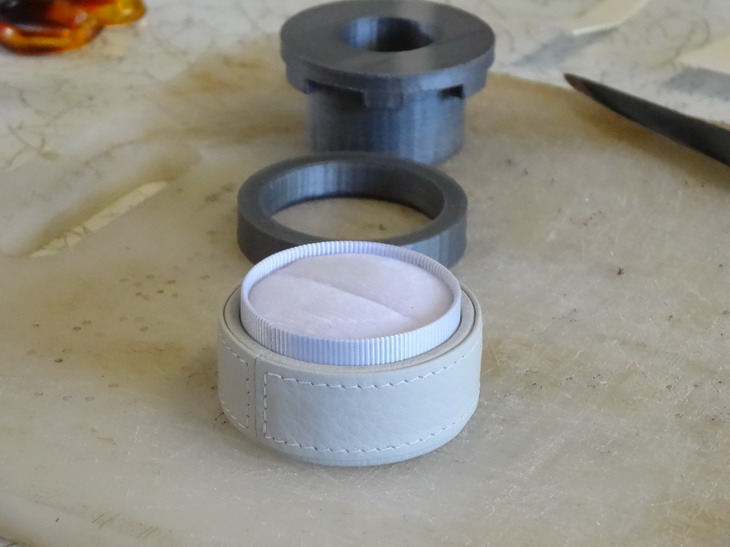
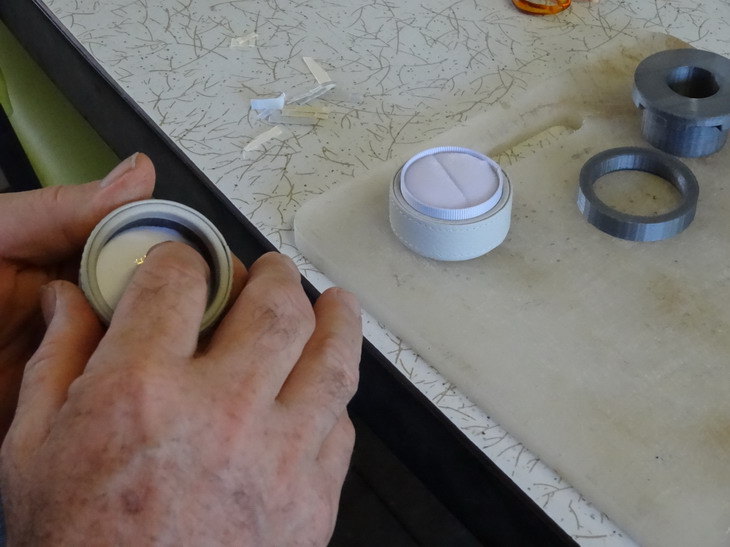
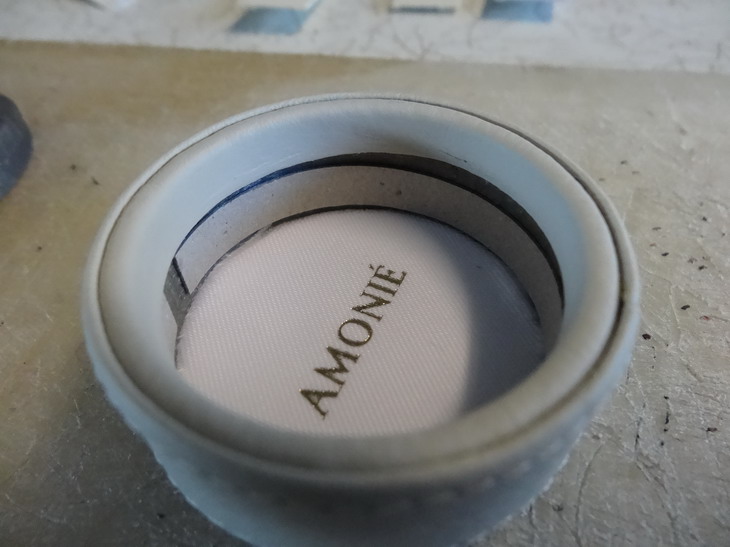
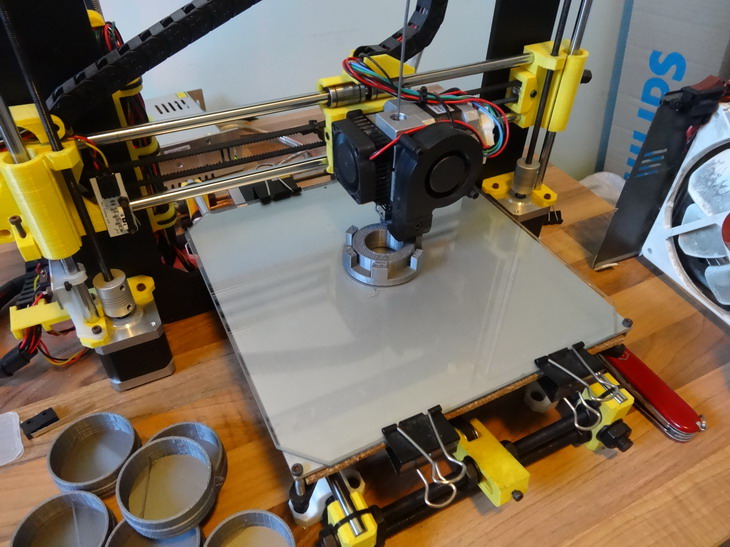
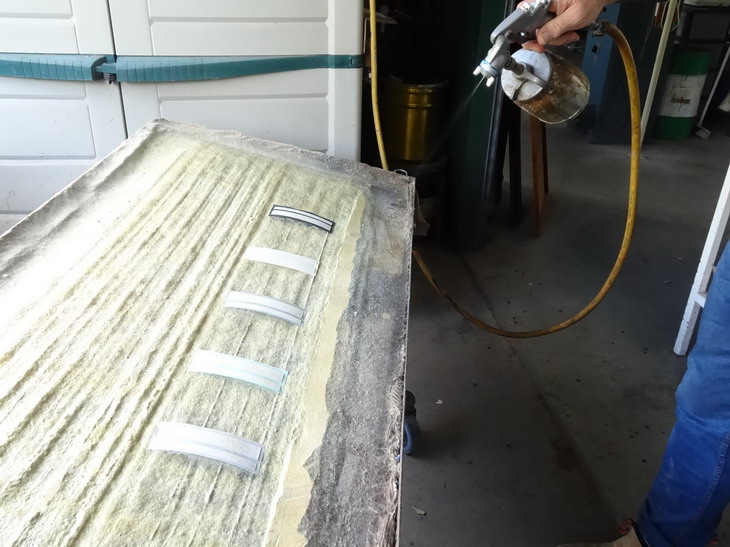
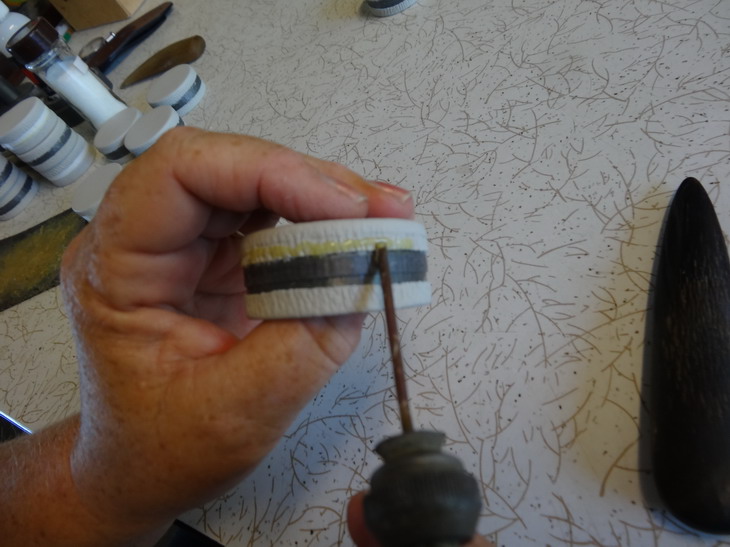
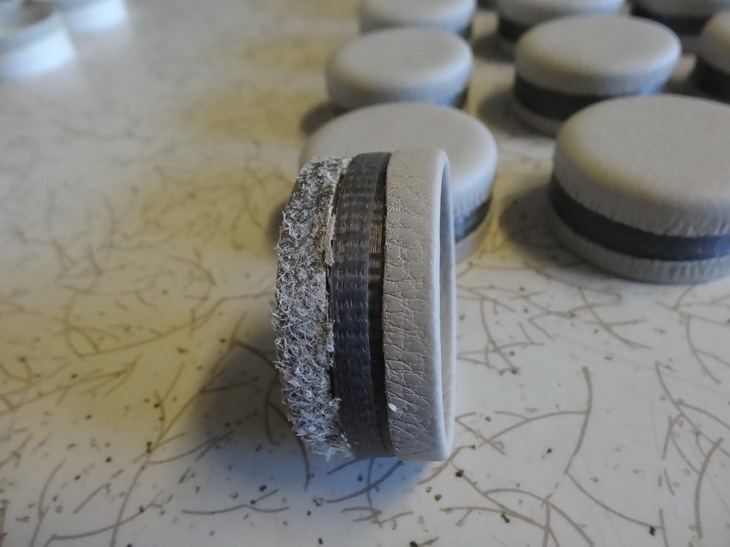
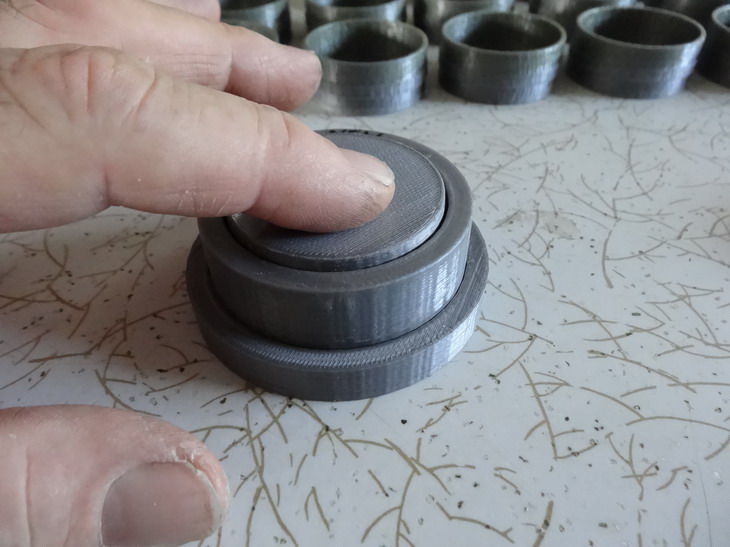
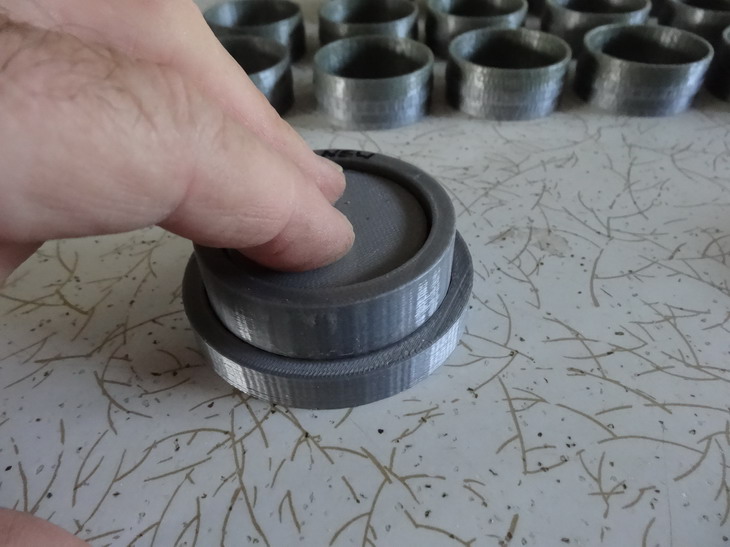
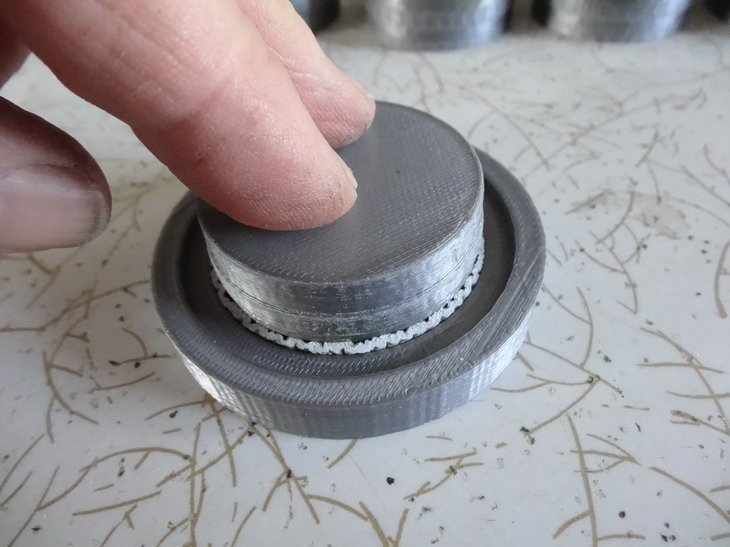
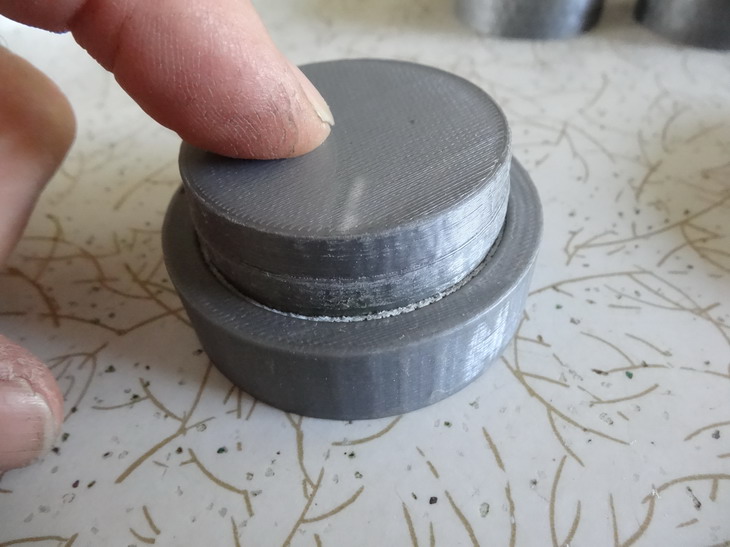
Glad to hear you like it. I've been thinking its got to boring. Should be getting close to finished now. I use mostly Auto Cad for the drawings as that is what I've used for years with the pattern work and then convert the files to stl files. Any 3d printer will work with them and Cura is where the instructions get sorted. For instance the block being printed above is at 30% density and the cups are printed at100%. There are quite a few free various versions out there now. I will now show how I insert the foam section. A few dabs of pva glue work well here. A new locating ring helps to position the foam and acts like a piston ring compressor.The same tool is used to form the velvet over the foam block before this step. A little push in here sits it into the glue as well. Next is the lid section and first is to insert the satin embossed logo. A dab of contact holds this in place and is further held by lids Grosgrain piece. Below I am preparing a packing strip before the Grosgrain strip goes into place. Next picture shows thepacker strip attached and it now gets a layer of contact put on to hold the Grosgrain strip in place. After this I allow the contact to dry for an hour or more. Next steps should be the finish off pictures.
-
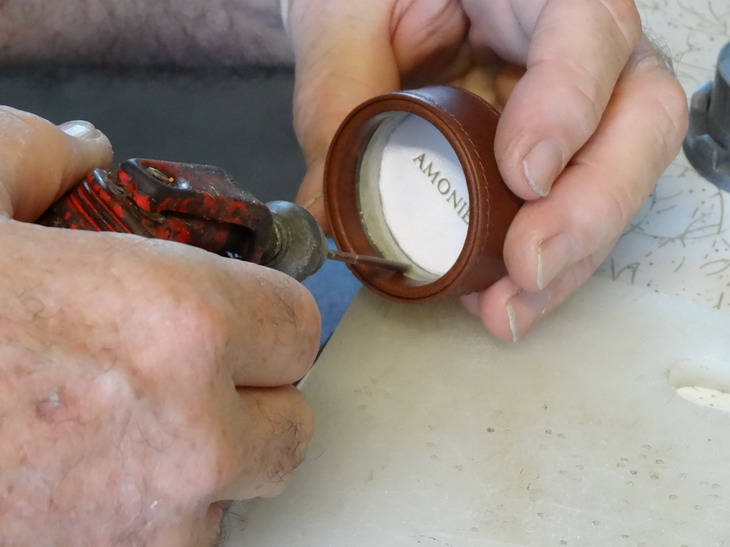
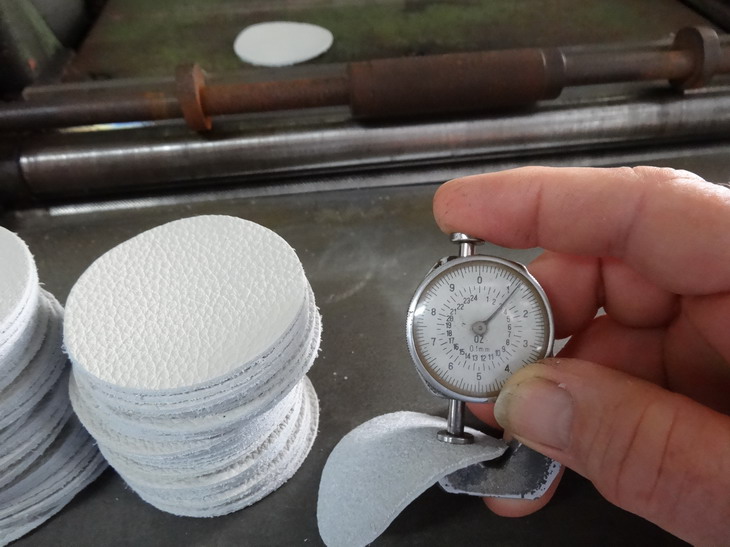
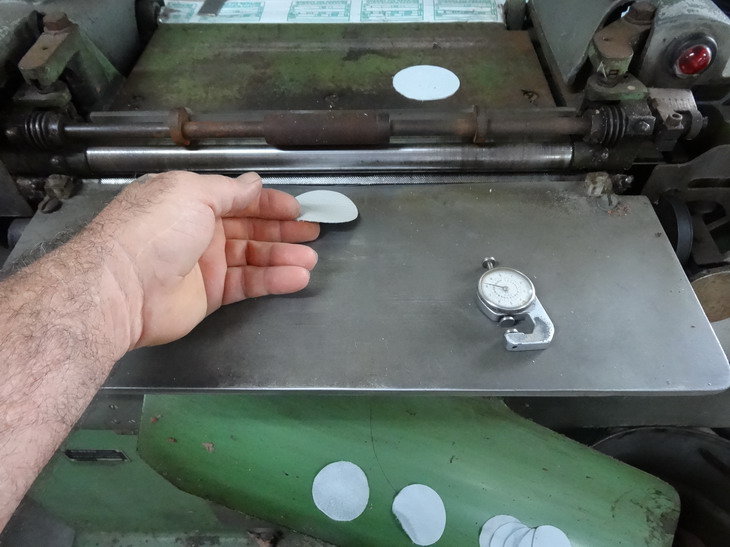
I agree. I will have to see if I can find any stones small enough for the job. The top section is only 7mm dia.I've done a fair bit of engraving in the past and with this the burr just skips across the surface.Tested the burr on some mild and no problem. Regards Brian.
-
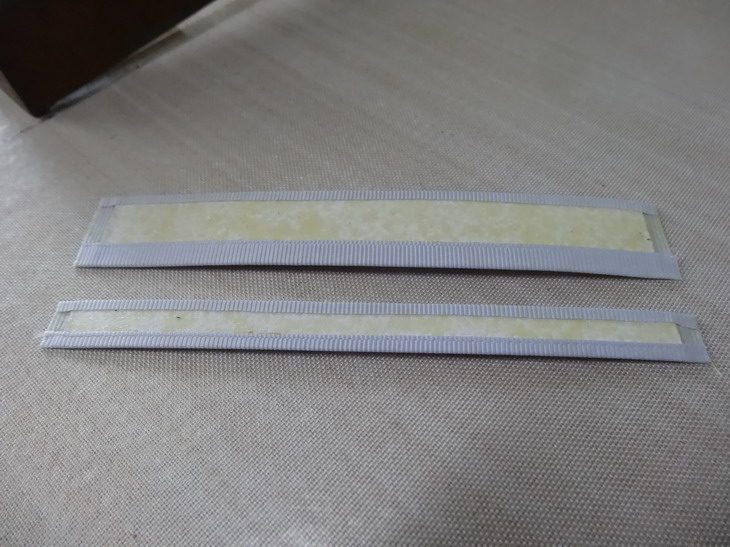
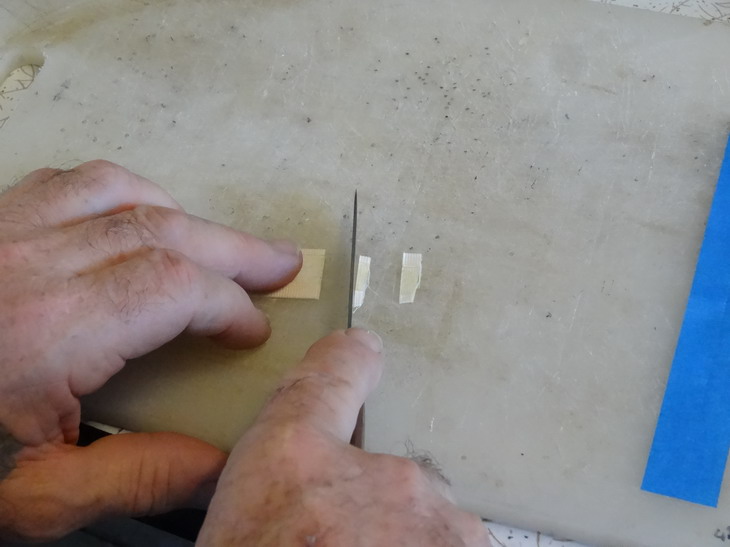
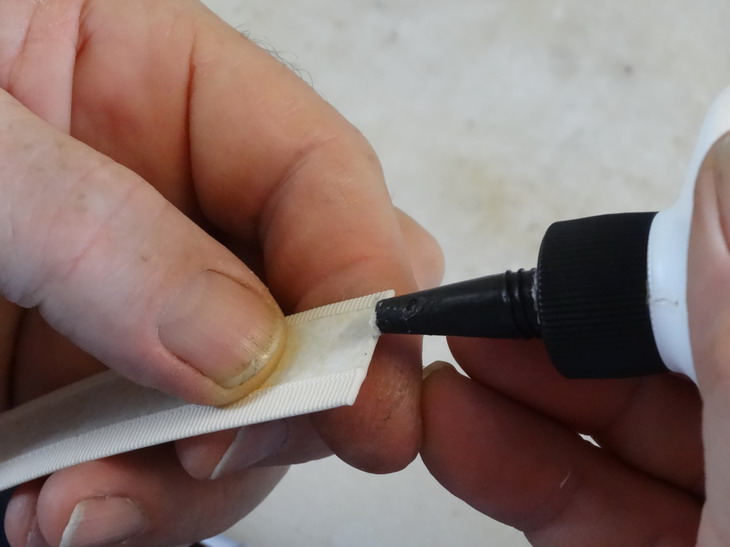
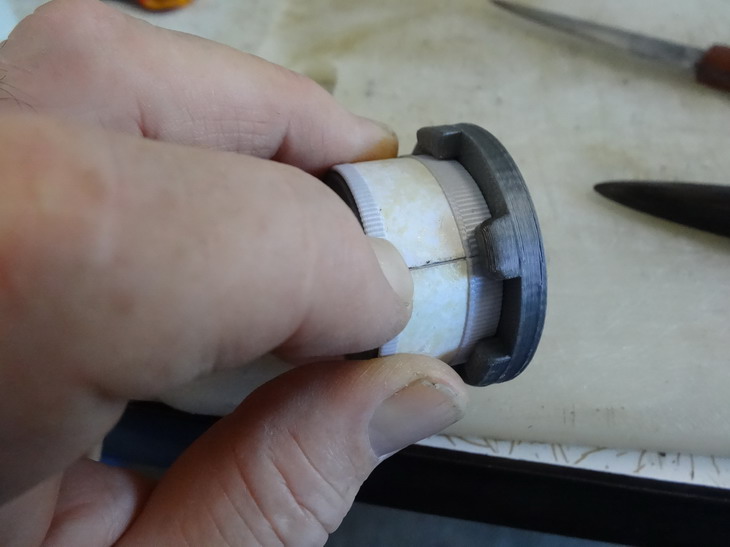
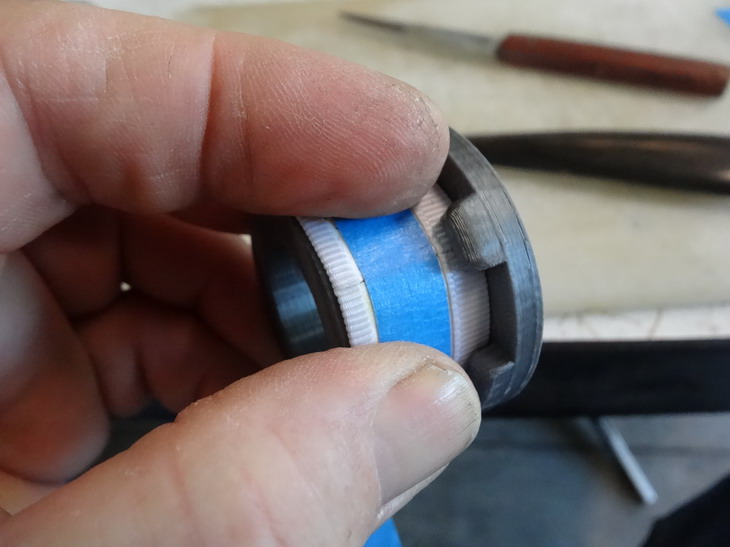
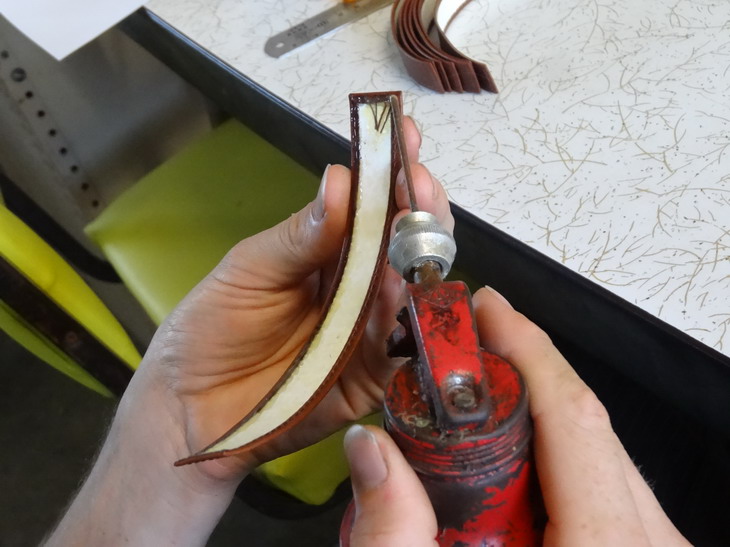
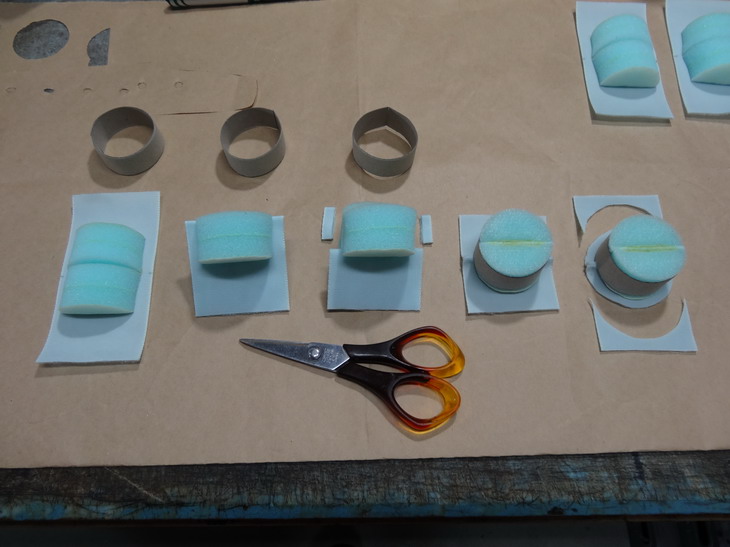
Next step is to cut them all up the middle and fold. The spray glue test worked. After tis is done the ends have to be trimmed and formed into a circle. As there were so many I thought best to make a holding block to help form the shape more quickly. So you see below the printing of this while I trim the ends. A very sharp knife is needed to not have the Grosgrain fray out everywhere. Once they are cut I put an edge of pva glue to stop any future fraying. This section has been changed and can be seen in the video when done. Now I test the new holding block. The short legs hold the shape while I tuck the join in and under and then with tape I completely surround the section. The next step is to now insert into the bottom cup in this case fully and then the tool can slide out. It is a firm push in and an easy slide out. Just what I wanted. More exciting stuff next.
-
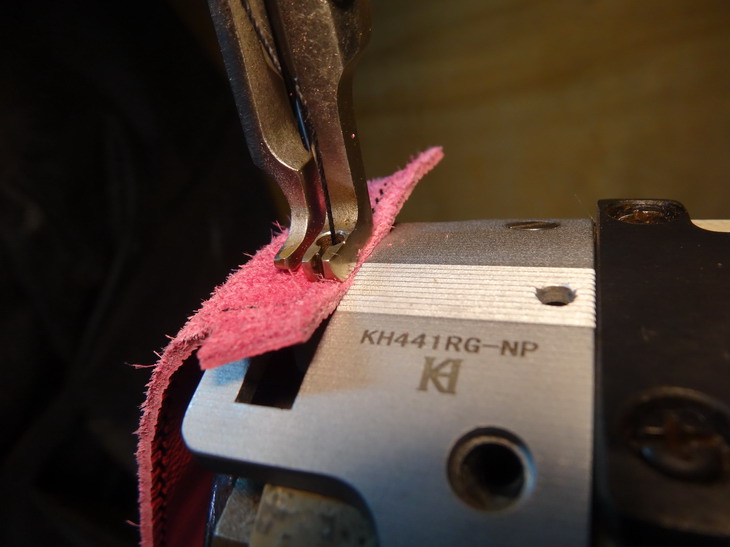
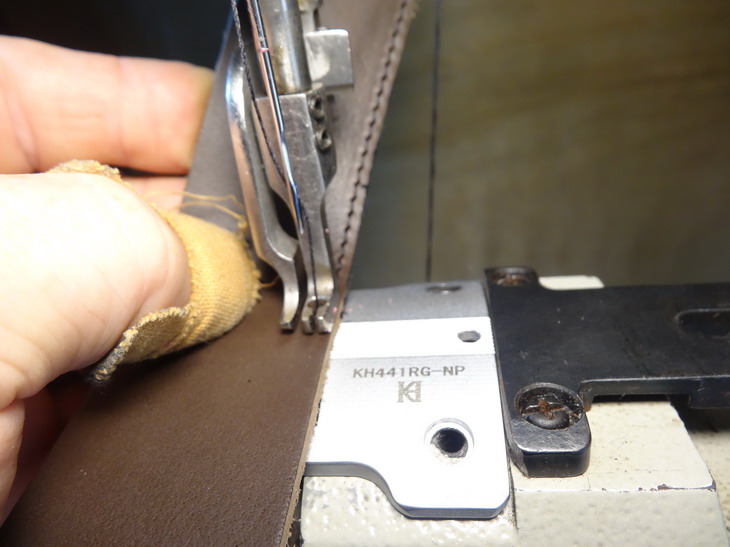
Uwe's the culprit. They work great but they are not the normal Chinese cheese so opening up that hole a bit even with a carbide engraving burr is near to not possible. 1/2 cutting and gained 1/2 a mm. One hole holds down well anyway.
-
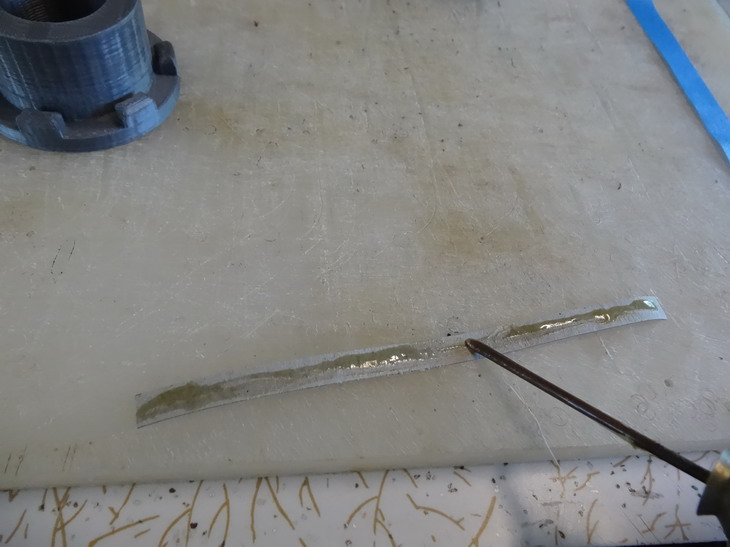
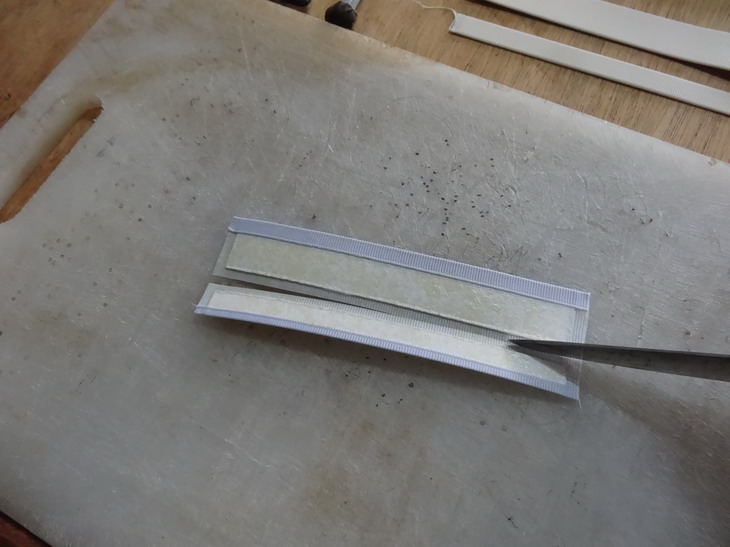
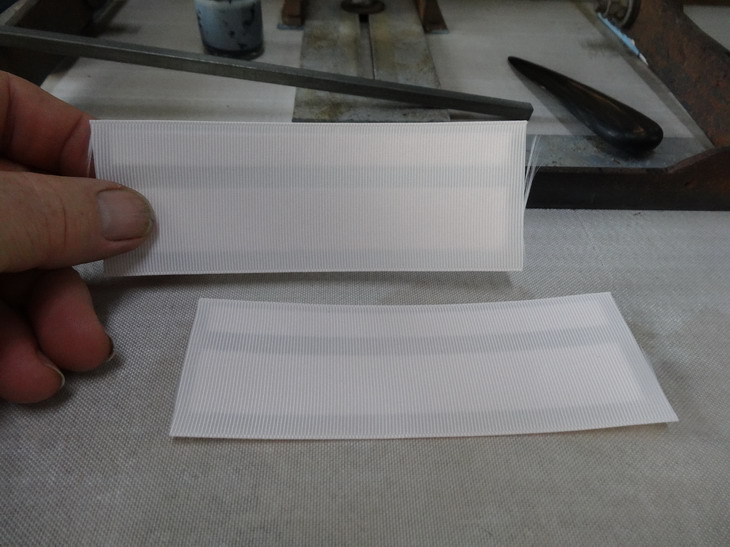
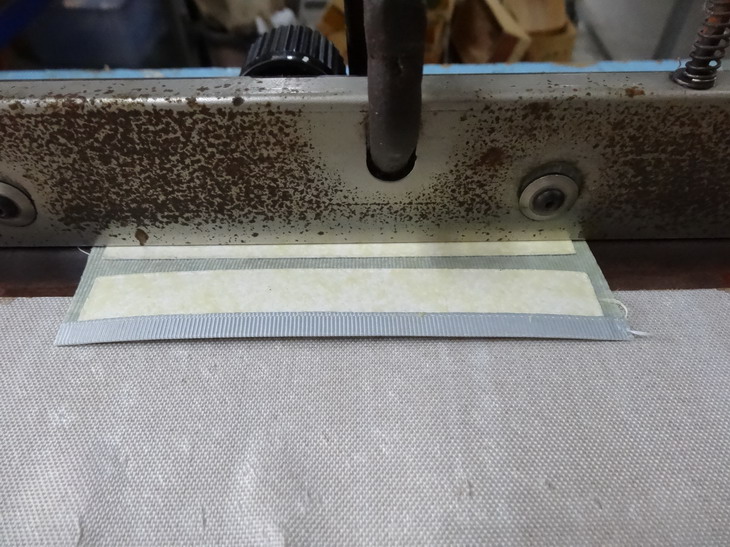
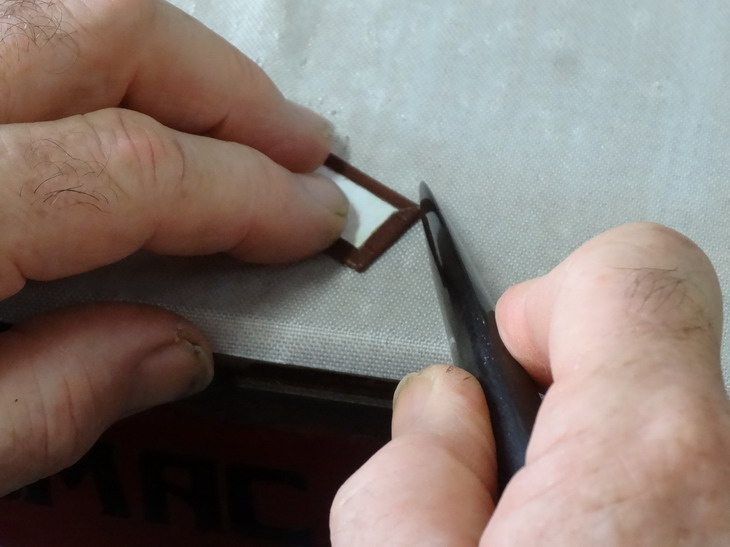
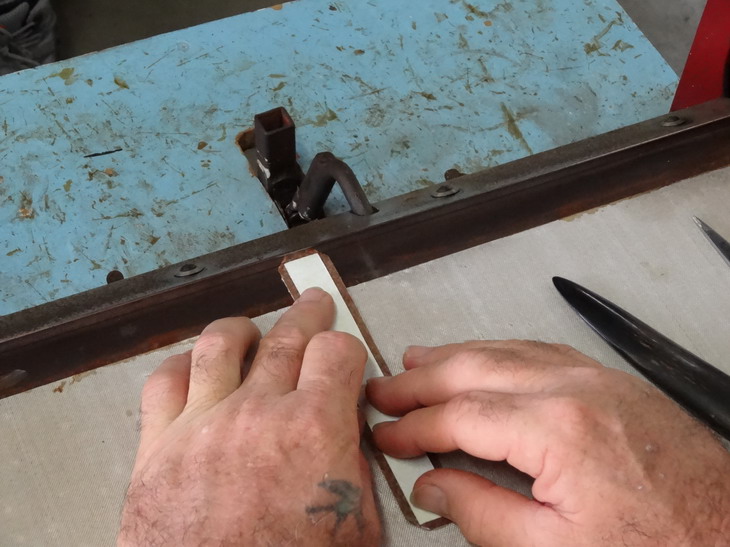
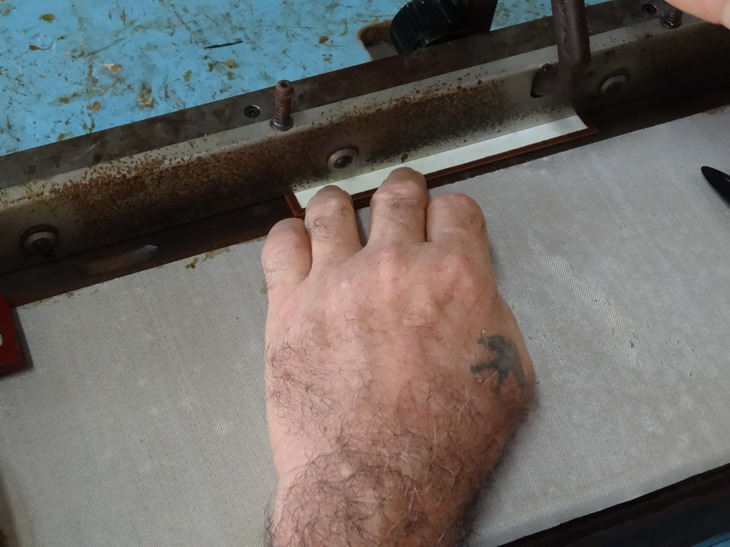
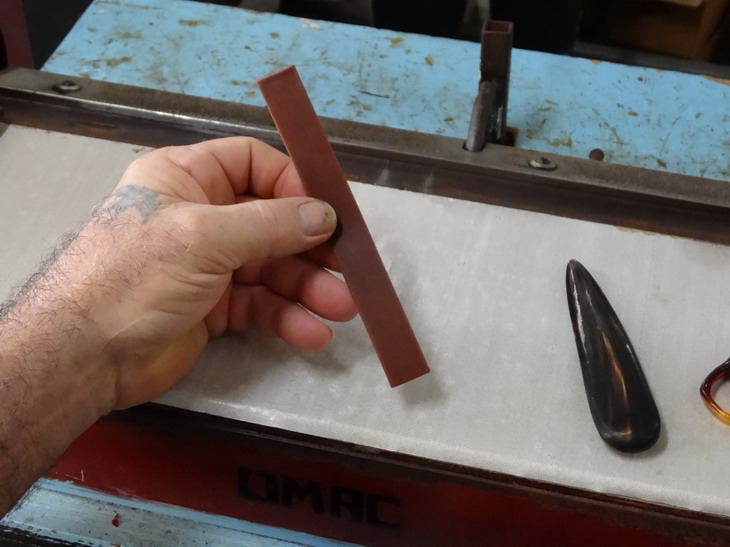
More of the boring stuff. Note that as this is my first production run some of this is already superseded but the changes should show up in the Video when I get it done. In this picture below it shows the application of this Kwik Grip water based contact adhesive that is clear. After a lot of experiments I found that it has the advantage of staying tacky for days. Below I am setting the Grosgrain up to the stopper in my line up machine. A 7mm key steel could be used instead at this point. If you care to check my You tube channel you will see this line up machine in action and some more details of somewhere on LW. The making of I think. Next here I am applying a strip of .6mm pasteboard to the Grosgrain. The following shows a 6mm key steel to separate the next pasteboard strip that later goes into the lid section. Some firm pressure makes the contact hold well to the Grosgrain Following this you could glue up and fold by hand with a bone folder as done below. I fold both outer edges then cut between as shown in the next picture. After this cut the two inner edges get folded. At this stage I decided to see if I could get away with spray gluing before folding and as the lighter colour Grosgrain can be very transparent I though best to test one of each colour first. The next picture shows why at the first stage it was necessary to use a clear glue. The next few pictures I think explain themselves and the end result worked well.


-
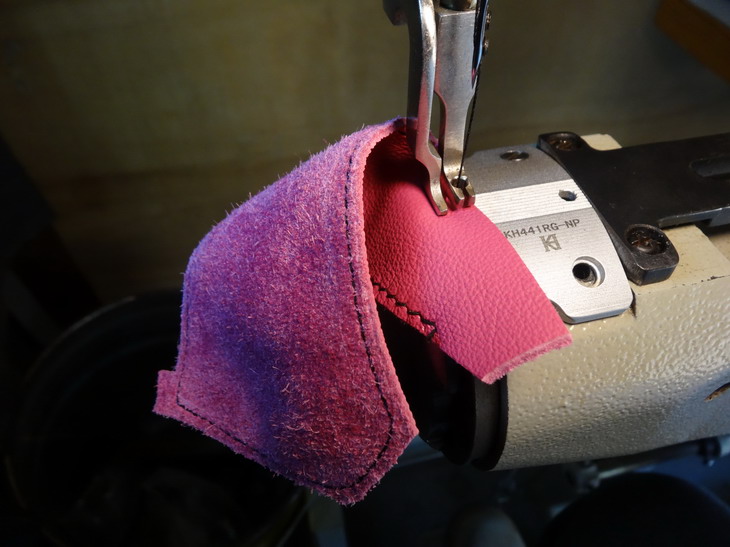
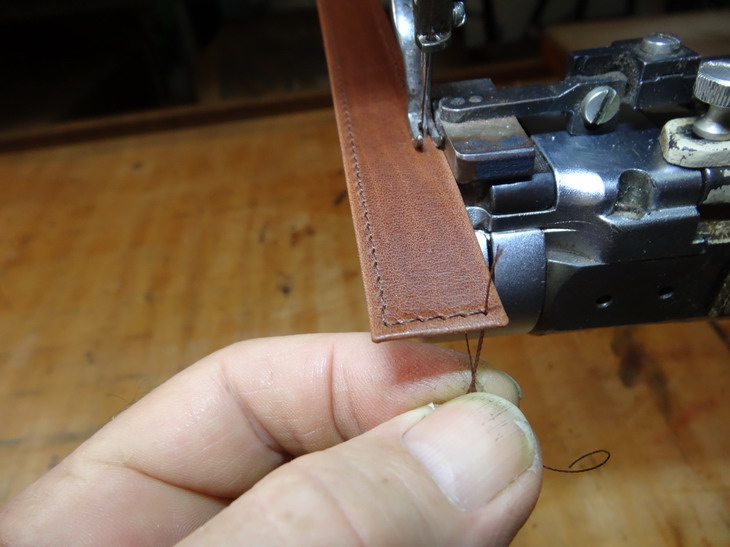
Bit rough but what the hell I'll give it a go. Notice I opened up a slot in the centre foot today and that sure is a pleasure when threading up.
-
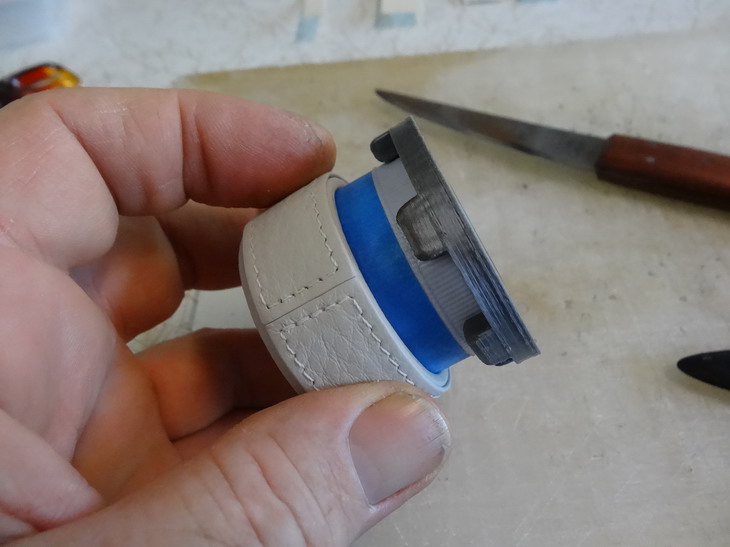
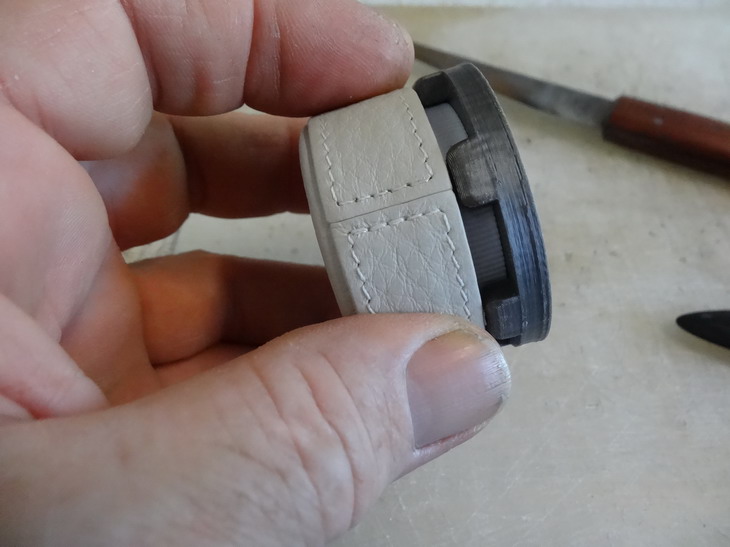
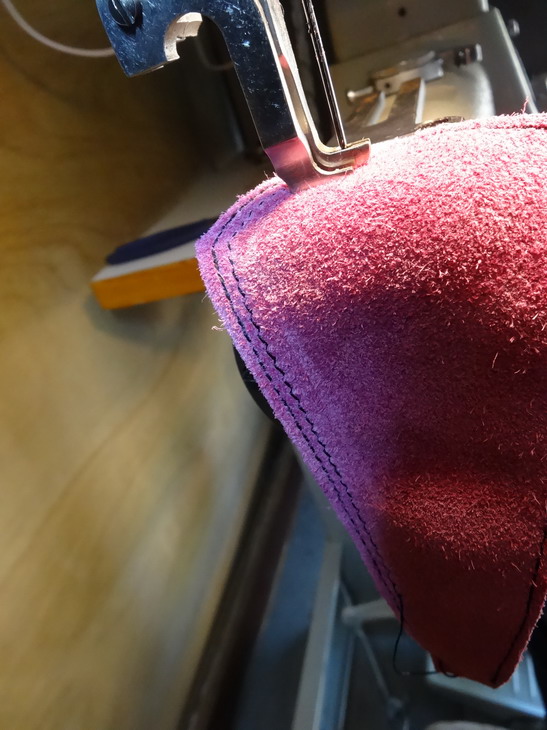
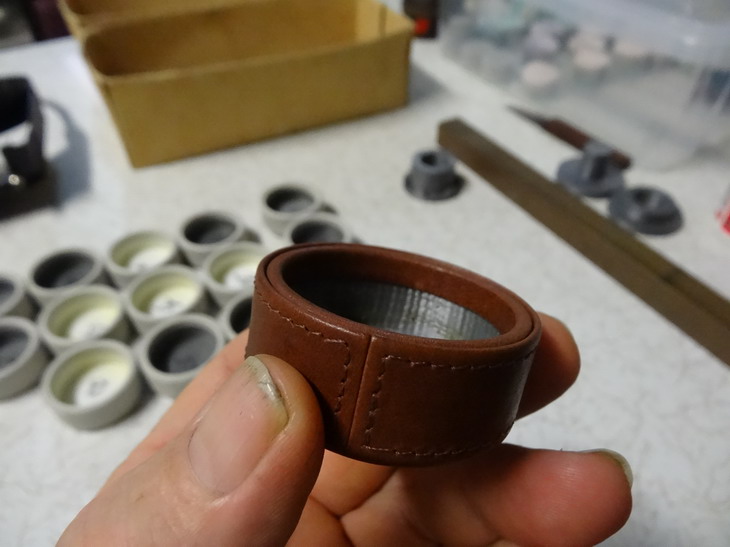
Good news. The parts have arrived and are now tested. By putting in the dog foot and needle plate I can sew to 2.5mm from the edge and not have the job sink down the hole. I just stitched some soft garment leather (1.6mm)4oz without even adjusting the tensions and just look at them pictures. The holes in the needle plate did not line up but it holds very well with the one anyway. I'm happy. Hassle Uwe if you want one. I'm off to try a wallet now. Regards Brian
-
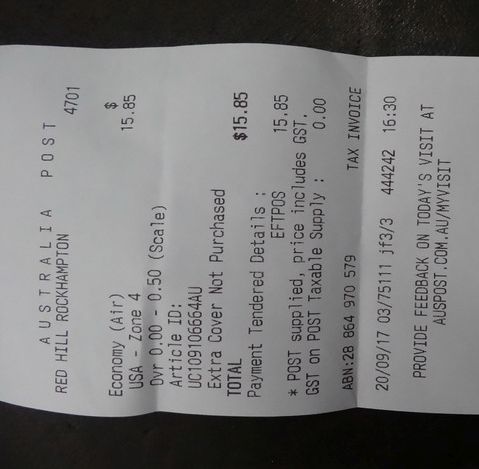
All sent gratis Dwight. Should take about 2 weeks at worst but I just recieved today some feet and stuff from Uwe and that took about 3 or more weeks. Its only economy air so not trackable so here is the info in pic following. Regards Brian
-
Here you go. Height is 19mm (about 3/4" I think) Pm me where you would like it sent to if you want still. Regards Brian


-
Hey Dwight I have one here that I haven't used in years that measures 1 5/8" x 5 1/2". It is made for clicker press work though. It does have holes for speedy rivet attaching but they can be removed if you wanted. You can have it for the postage cost ( probably around $10.00 AU). I will do a picture if you think it could work for you. Regards Brian
-
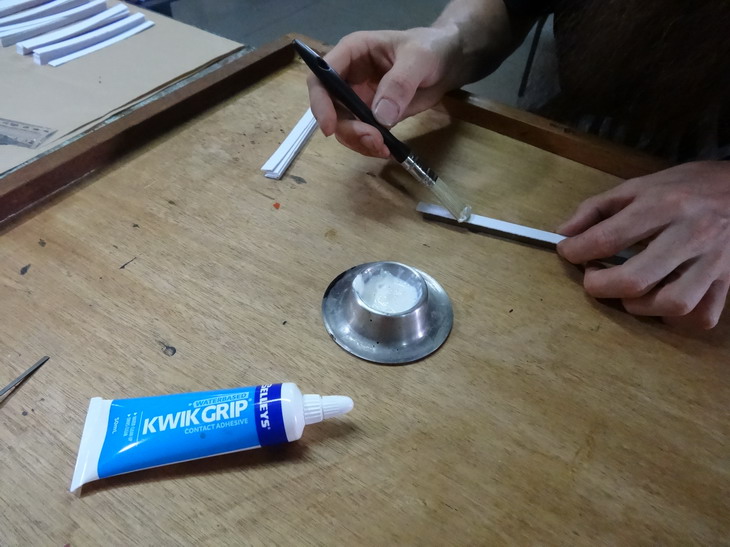
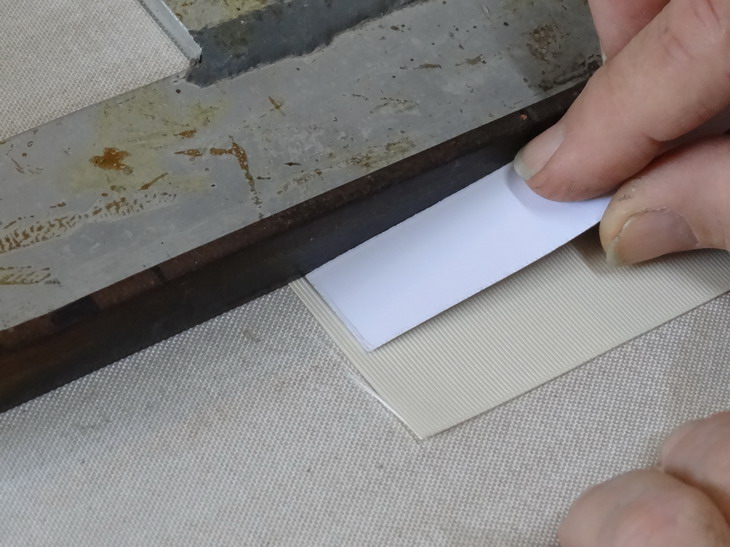
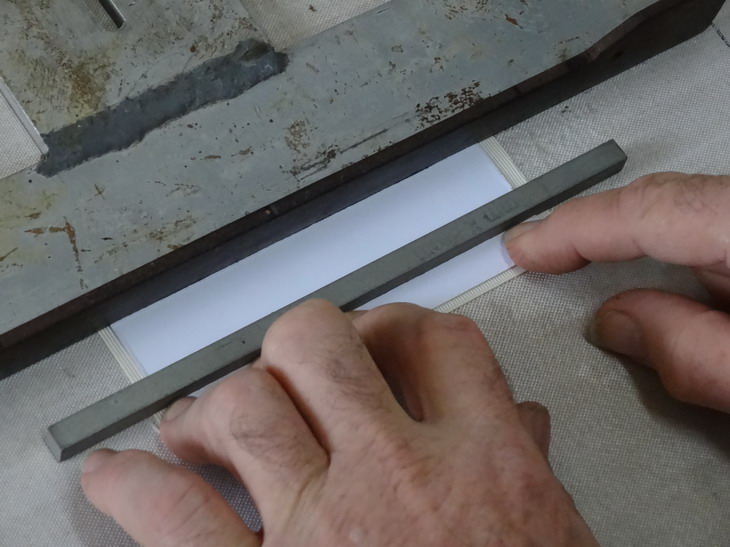
Your welcome. Following is a step that I hope to not have to do in future boxes. This was necessary due to me making the top and bottom leathers a little thicker than what I had planed when I printed the pla box inserts. The cardboard shown wrapped around is .2mm and I have changed the new insert to now allow for this. This helps to keep the sides nice and level ...ish. Firstly I've marked where the glue line is safe to go up to then below shows the procedure of then gluing up. A fine tip is very handy to have when doing this. With the cardboard applied it should look as below. We are now ready to apply the side strips. In the next picture you see where I have again marked the edge for the glue line but this time I have scratched it in deeply to match up with where the thread will be touching. Now the side strips and this part can be glued as shown. Note the threads have been already glued down well before this step. Using the printed jig above and below I am able to keep the side strip exactly level with the edge and as well use it to apply considerable pressure as I roll it into shape. Also this gives me something hard to press against when closing the join with the aid of a cow horn slicker/folder. Above I am using a 1" brass bar to help get a firm pressure over the full side. The next steps will go through the process of making up the Grosgrain ribbon inner supports. Thanks for following and please make any comment or ask questions if I seem to have missed anything so far. Brian

-
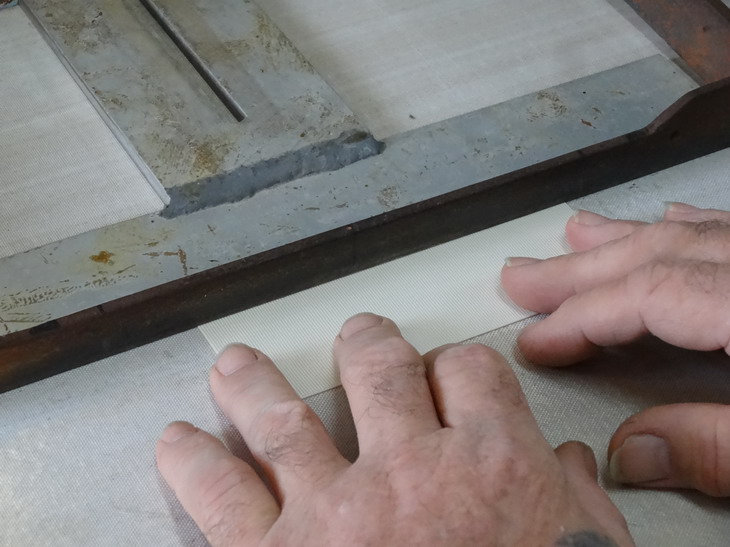
Next we have to stitch the side strips and note I prefer to pull the thread down before taking the stitch over the top Holding the threads firmly underneath helps to give a tidy finish Next will show how these strips are attached.
-
Leather squeezing out from bottom side feed dogs
RockyAussie replied to SaltyKate's topic in Sewing Leather
Just a thought it may help to lower the pressure of your foot tension. The leather looks really squishy and if you come up to a thicker change the job will want to push out on you. The shiny area where your foot has been makes me think that is possible. The pictures here also make me think that you are too close to the edge but that may not be the case in the other areas. If the leather your going over is skived it will also give you this problem and that would be solved by taking your skive further in. Brian -
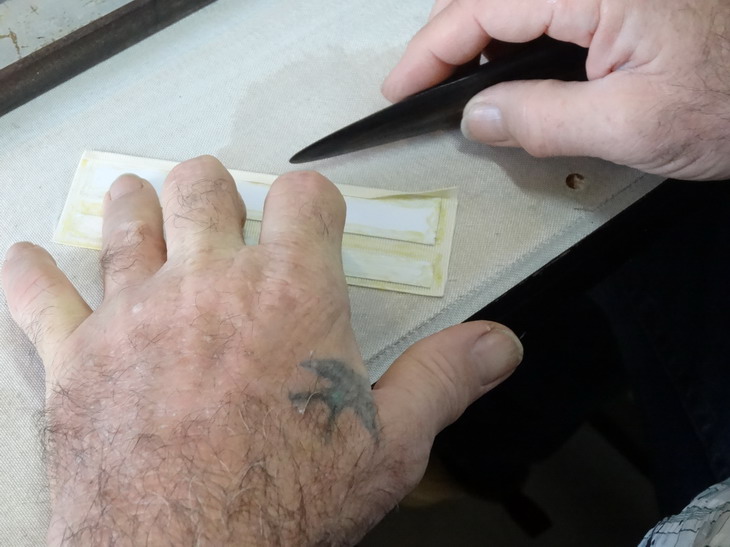
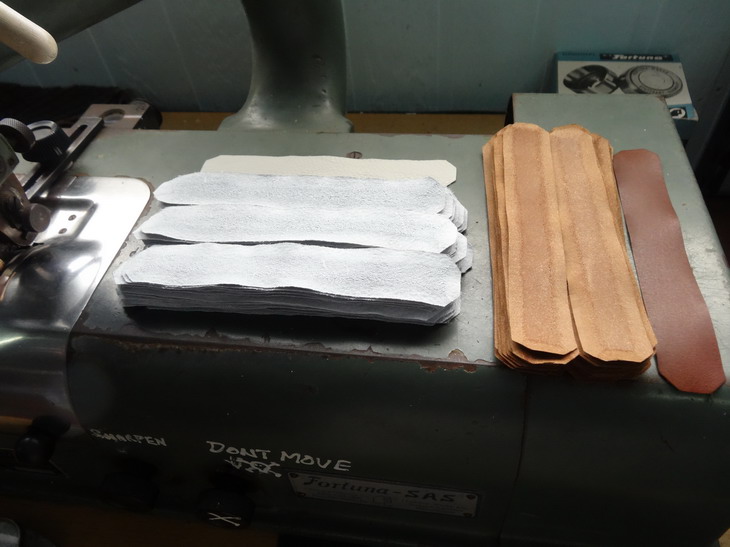
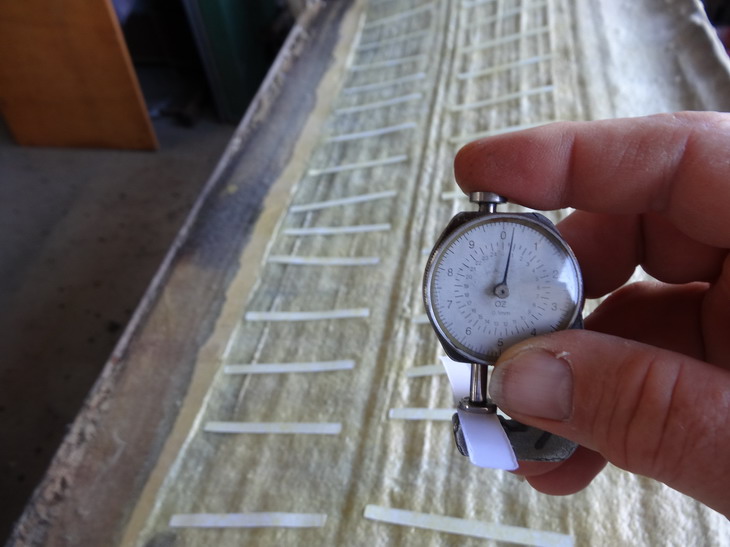
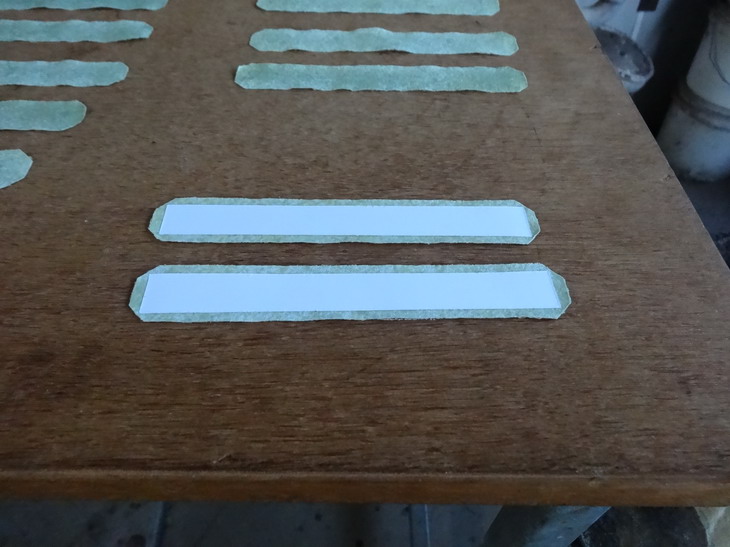
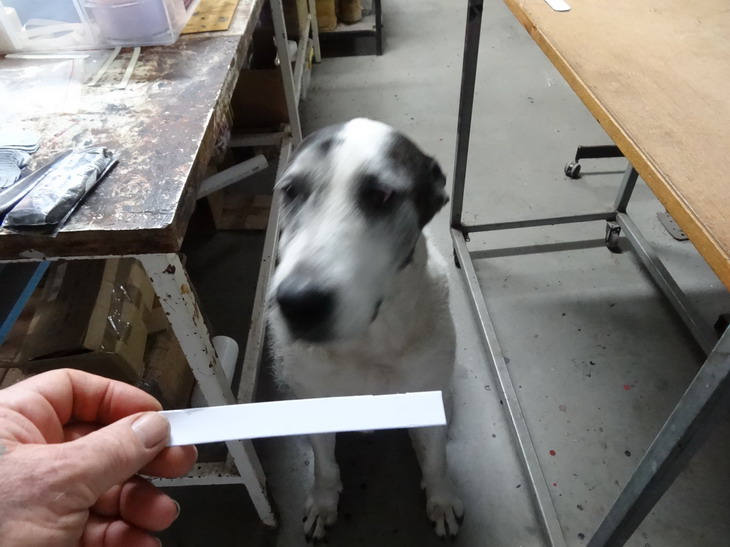
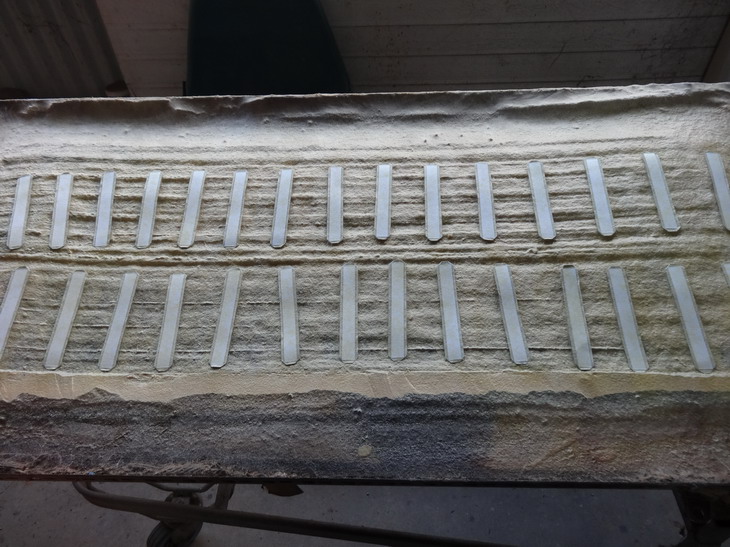
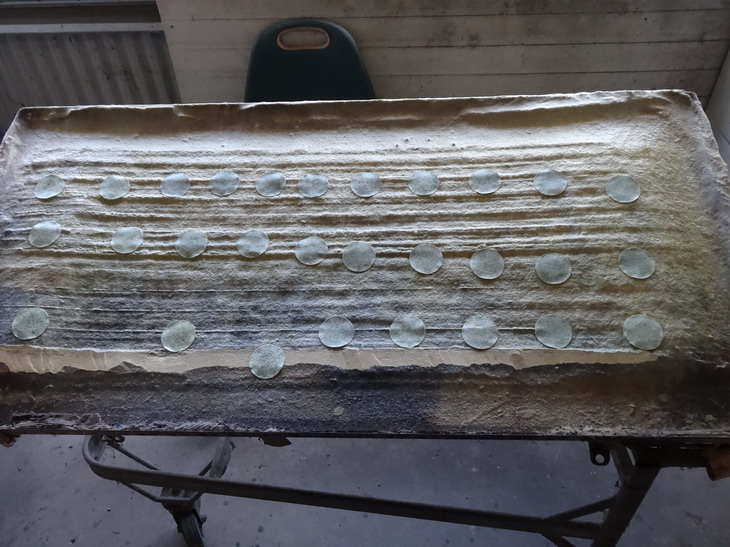
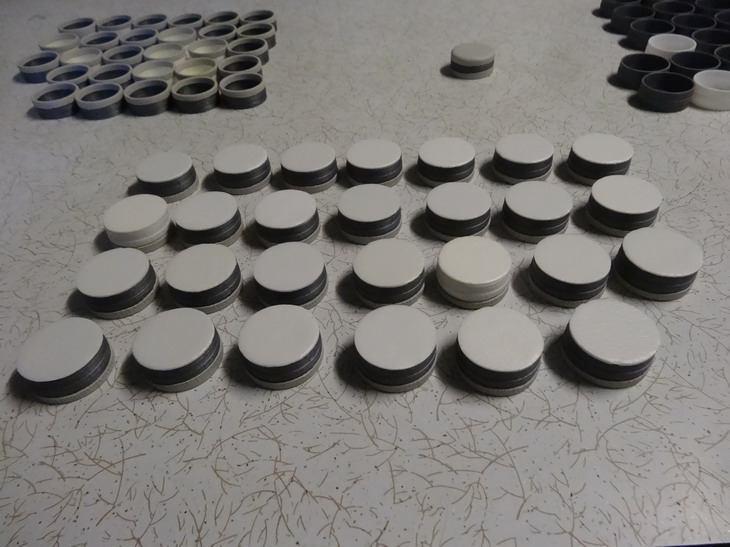
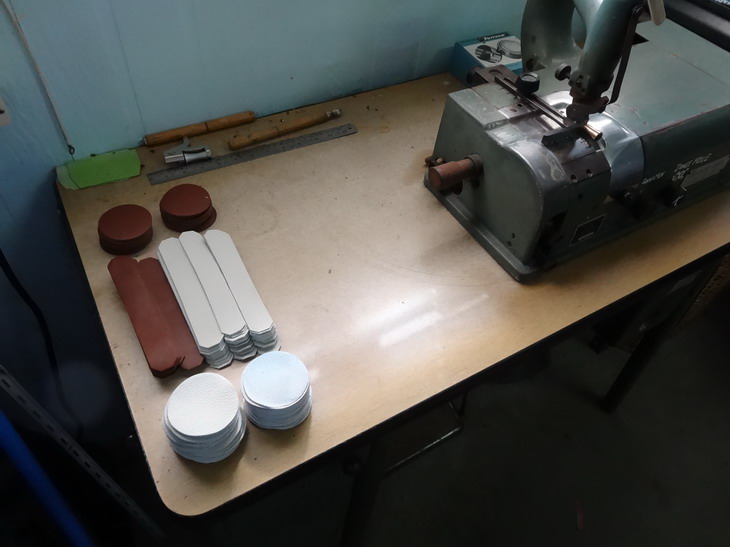
Sorry for taking so long and thank you all for the complements. I had made a couple of small changes from when I did the prototypes like from .5 to .6mm thicker on the top edge fold and it came back to bite me. This was done to make the tops grab onto the bases a little stronger than the did previously. As quite a few of these were pre sold and due, I had to get these done and make a few more tools to quicken things up at the same time. I will catch up on some more pictures tomorrow and hopefully get them on by nightfall. There are heaps of pics and getting them in an order to make any sense will take a bit of time. As per I have started some of the parts into videos and they make a lot more sense to me, but the editing (mostly cutting out the bad words) takes me quite a while I will load a couple over the next week and with some luck will evolve it into all of the steps combined at which stage I will delete the bit versions. If it is of interest to you it might pay to follow me here or on my you tube channel. I will notify here on LW at any rate. I have to be honest and say I get most of the joy creating how to do the project than I do making the product itself. I find that part boring normally after the first few and then the challenge starts again on how to make it even quicker and easier and better. Now if only I had Uwe to come and do the videos we'd have a video really in the "How its Made" quality. I will do my best. For now I will load a few pictures of the making of the side strips that wrap around later. Earlier you will see where I split these pieces and skiving is the next step so..... Above the strips have been skived and below shows the skive goes from around .3mm at the edge and tapers up to 1mm in the middle. Here I have used a thin cardboard about .2mm thick and spray glued to attach to the side strip leather as shown next. Molly my quality controller showing her disapproval of this poorly cut strip. After attaching all the cardboards to the leathers strips and spray glued again they are transported down to be folded the next day. These can now be folded with the use of a bone folder if you prefer or as I do in a modified folding machine as per the next three pictures. Stitching these comes next. I think the videos may be a lot clearer. Until tomorrow Regards Brian


-
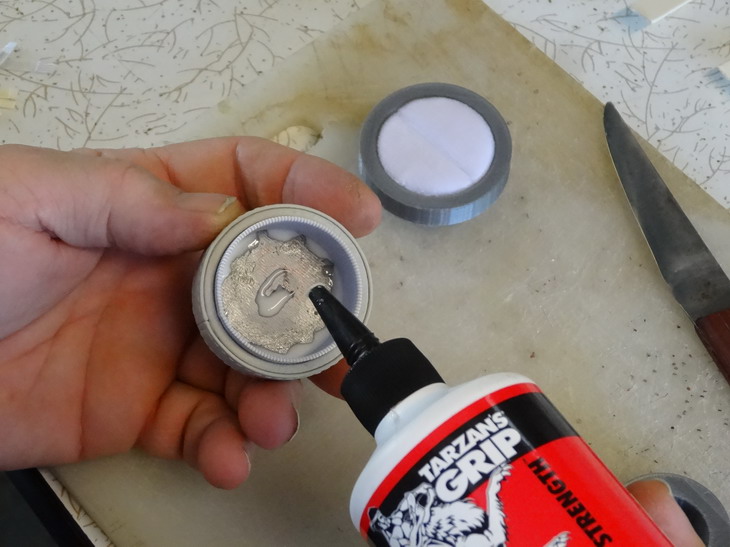
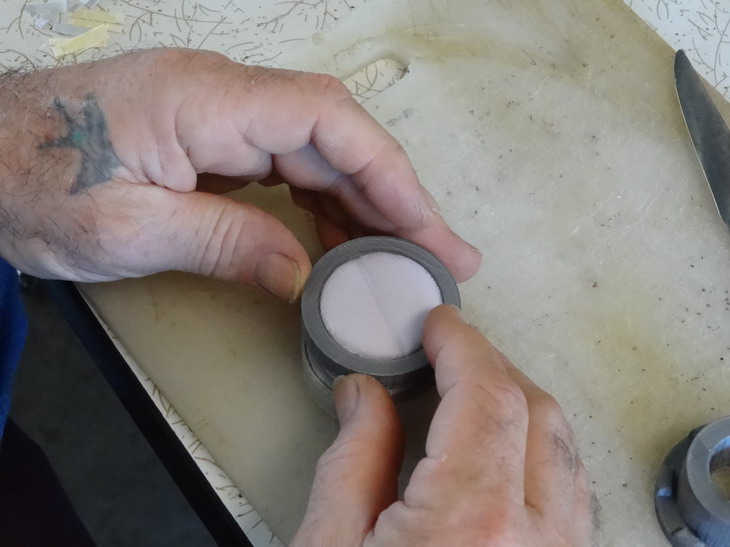
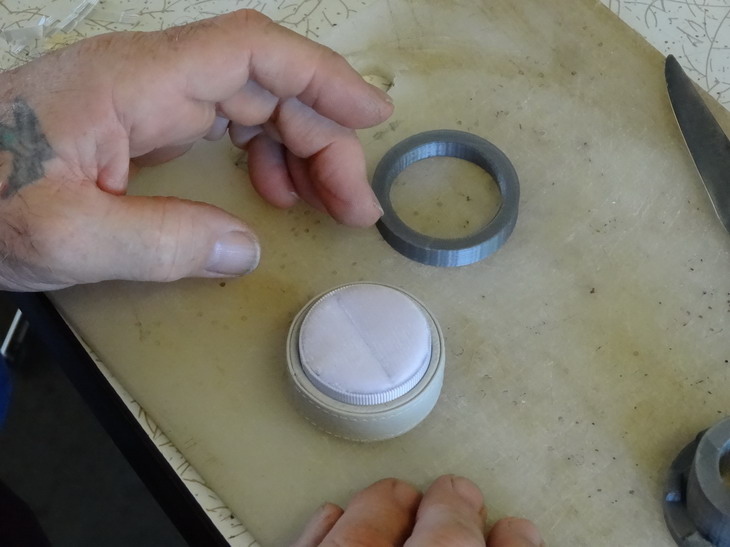
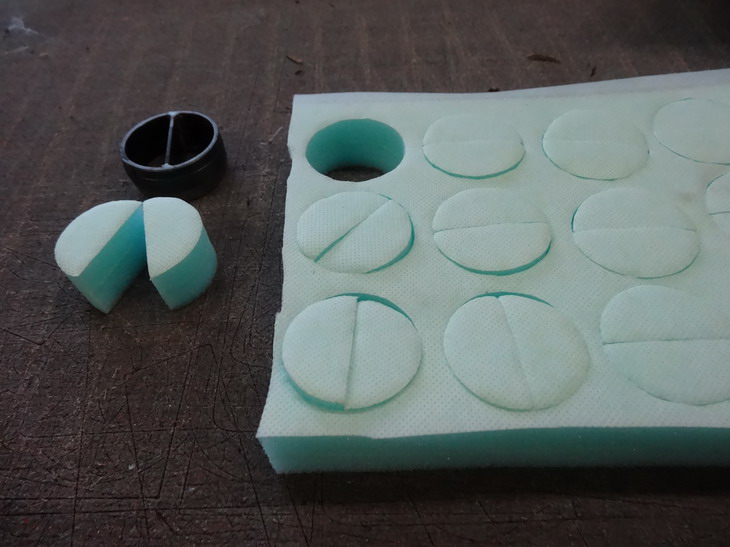
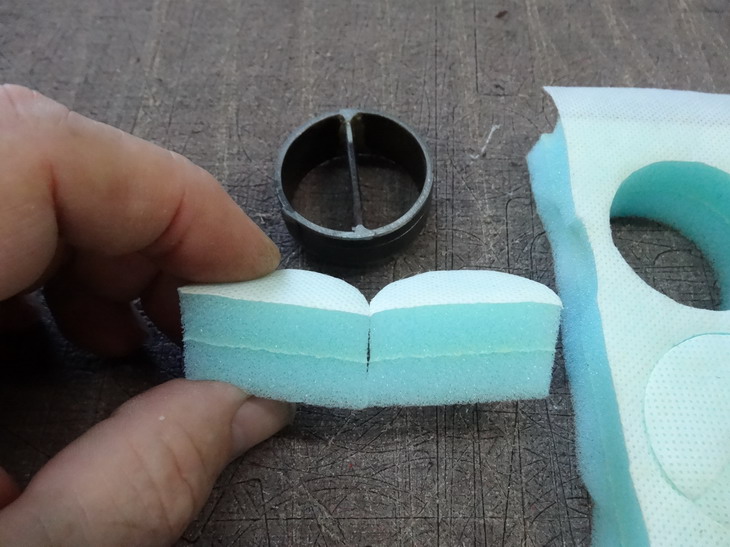
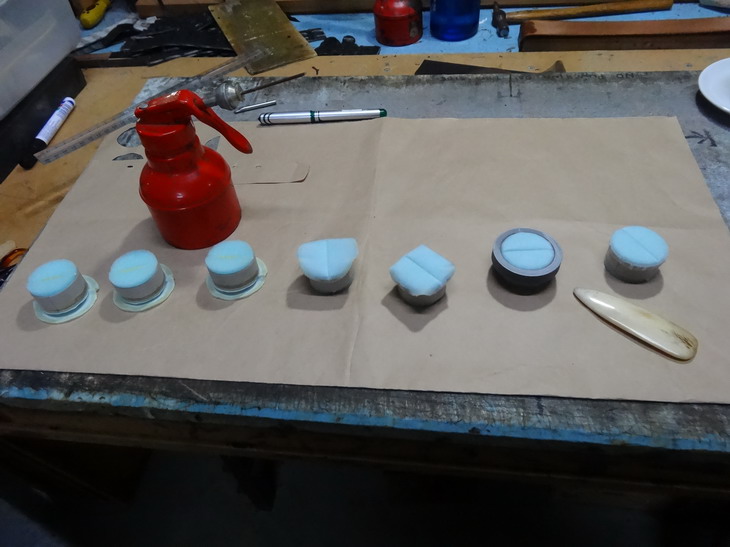
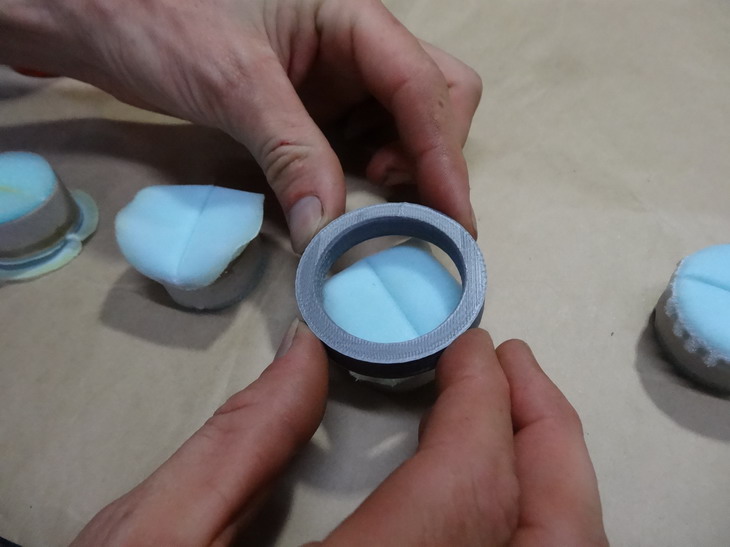
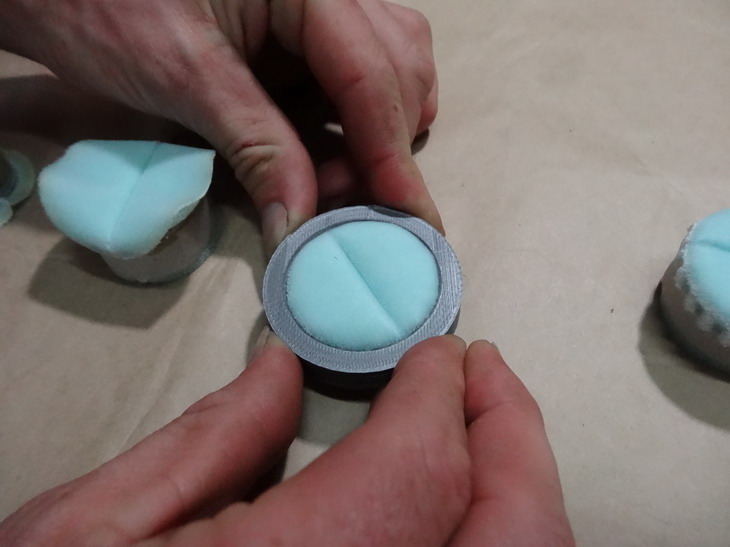
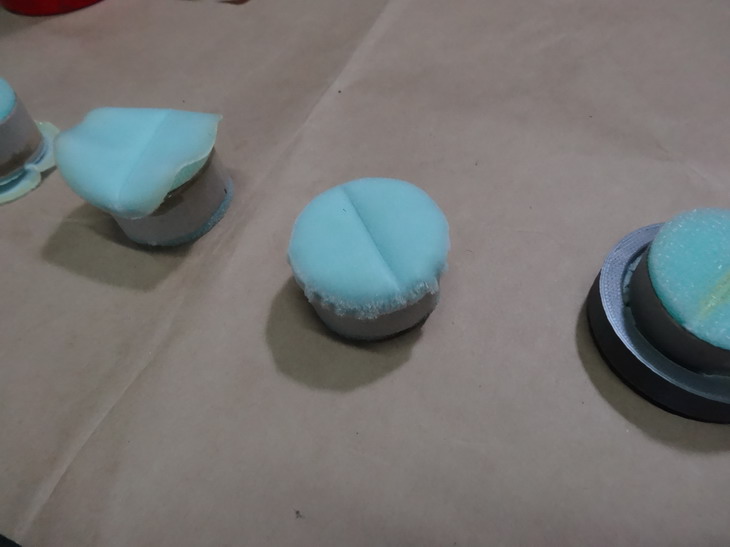
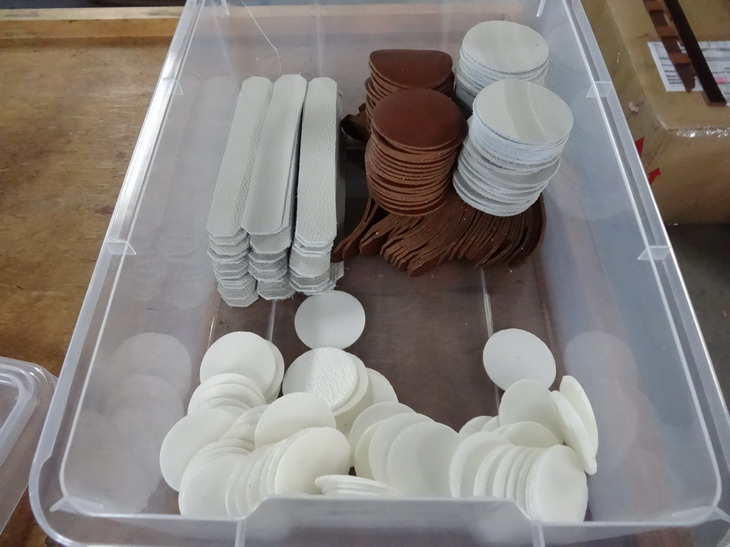
Your welcome, I had to look up Macaroons and they do look similar but I think they would taste much better. Certain aisles I am not allowed in on the rare occasion I go shopping with the missus. If only I could just wiggle my nose and there they be I would be so happy. As for genius my wife is still laughing and I do gotta admit I should have done a couple of more samples before starting this run. I agreed to do a rush one for today for a wedding this weekend. NOT GENIUS. I got it done alright as promised but found I had to come up with another tool to expedite the velvet application to the foam process. That is the pictures I will load next. Thank you Bob. I think I will have to tidy this post up a bit and redo it. I might think about doing a video on one if a few people think so as well. The following 9 pictures are limited to how I do the velvet and foam parts. This above shows a knife that I had made for doing the cutting of the foam. This could be done with just a hole punch and cutting through with a knife later as I did on my prototypes. Note here in the close up I used two foams that I glued together and then covered with this white fabric. This was necessary to get the right depth and the fabric is because the green shade of the foam showed through on some lighter coloured velvets. This picture shows the velvets pre cut now and the cardboard rings to hold the foam in shape in the bucket behind. This shows a few of the stages of the foam being attached to the fabric. Just a thin glue line in the middle as yet. Here are some now glued and pressed into shape. The three on the left are contact glued and drying off ready to get to the next stage This one shows the new ring I did that helps the pressing into shape. As you see when it presses down it nicely contains and shapes the velvet. That's this part finished ready to be inserted later as seen in the following box I did today. Yes it had to be monogrammed as well. More on Friday. Brian
-
Thanks Darren, I would be good to see what they looked like but I have not had any luck finding any pictures. I will advise how the one's I've ordered from Uwe go when I receive them. All else failing I may think about getting some cast if a few here want to notify if they are interested. The site shows over 400 views so far on this post so I guess it may be possible. I think I will be wanting another set as I often chop and grind these things up to suit whatever the job needs. Regards Brian
-
Card holder and watch strap
RockyAussie replied to Petewon's topic in Purses, Wallets, Belts and Miscellaneous Pocket Items
Very nice work. The edging looks good and the stitching and even the covering of the snap. -
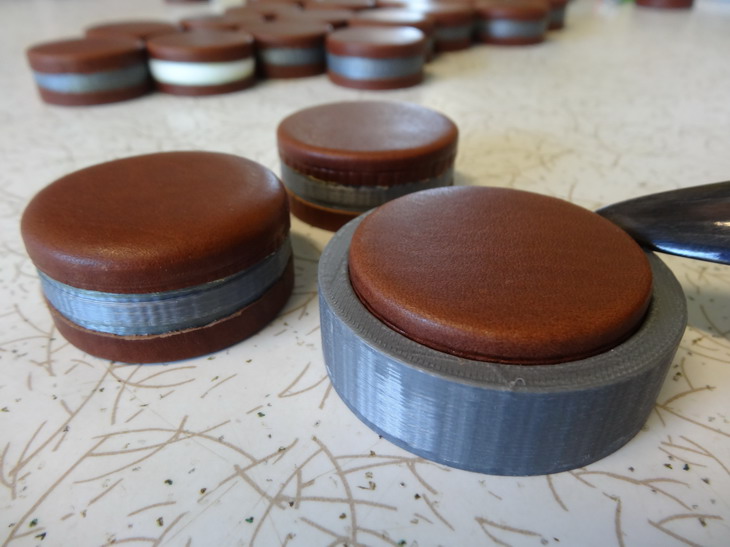
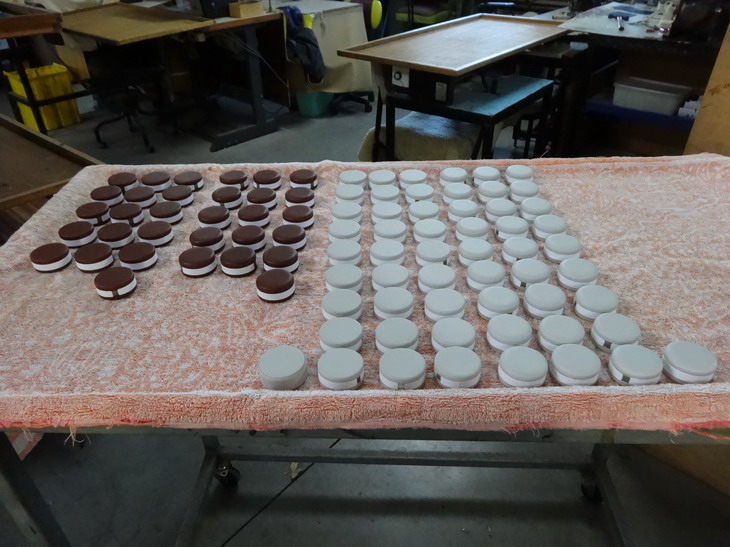
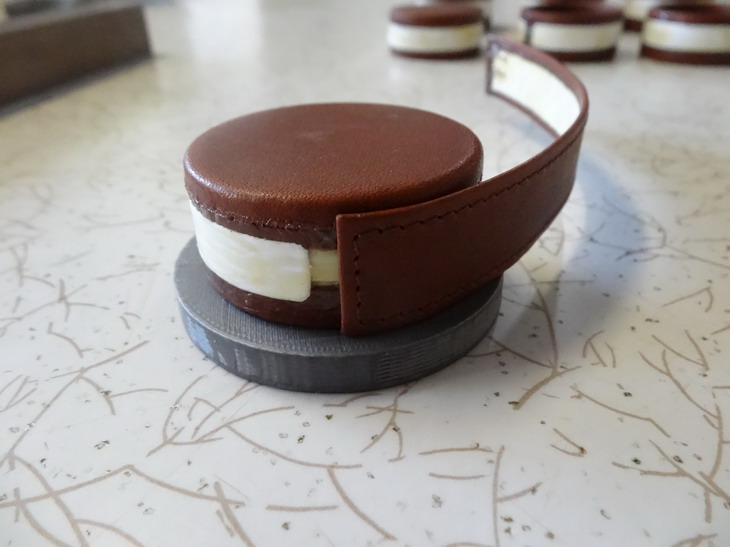
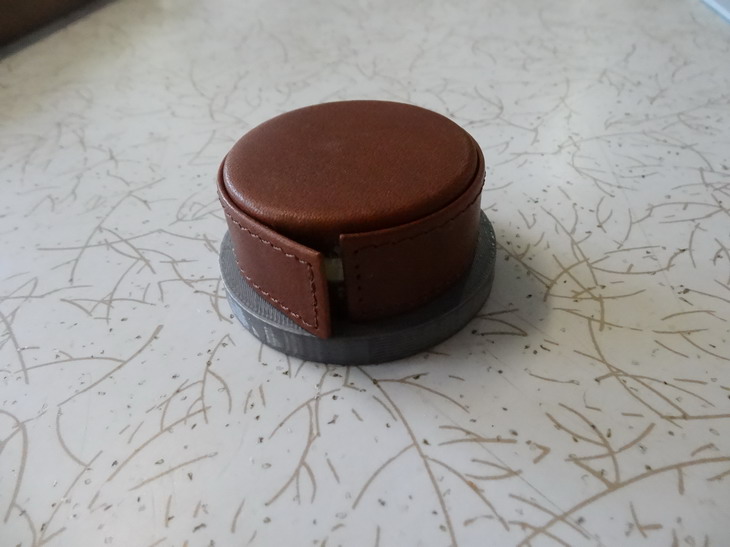
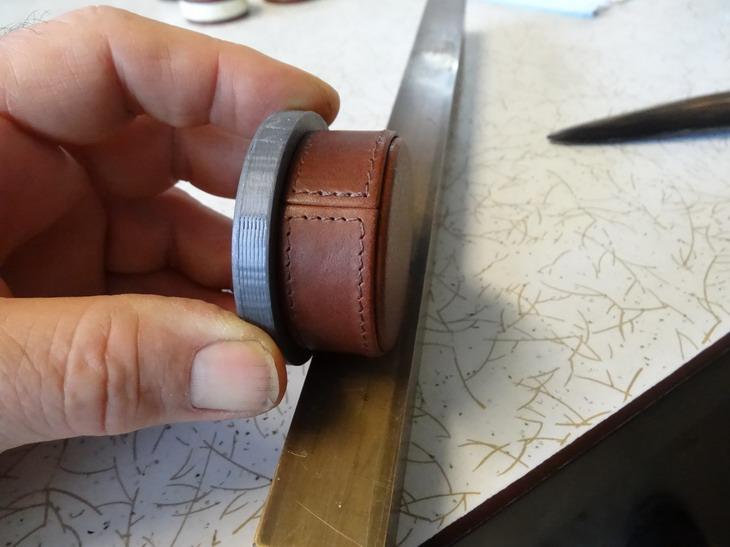
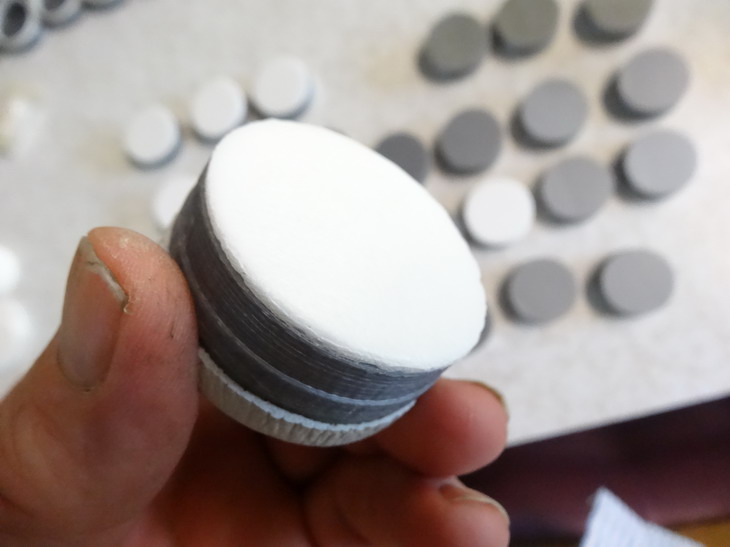
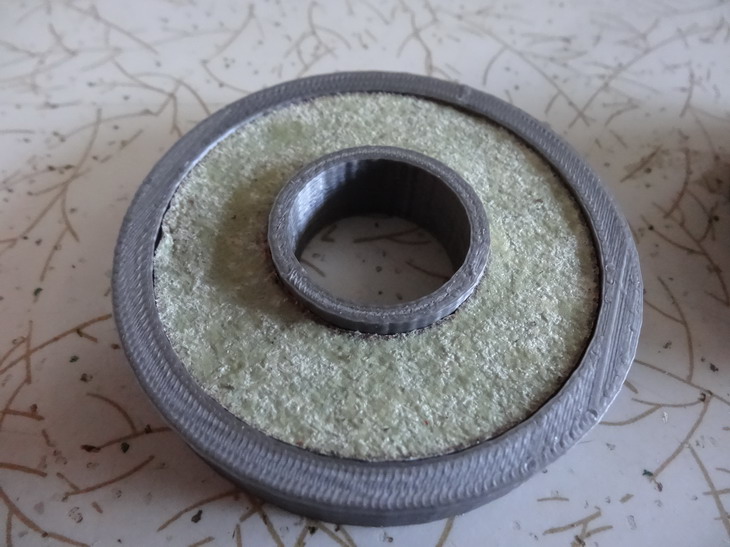
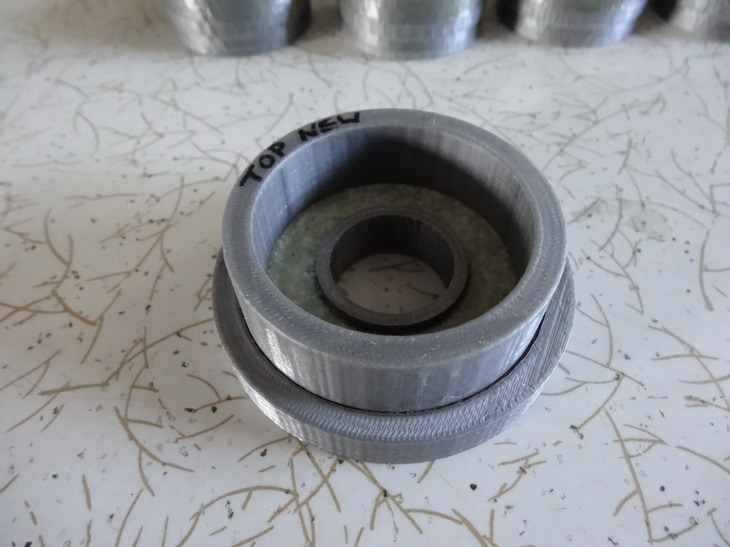
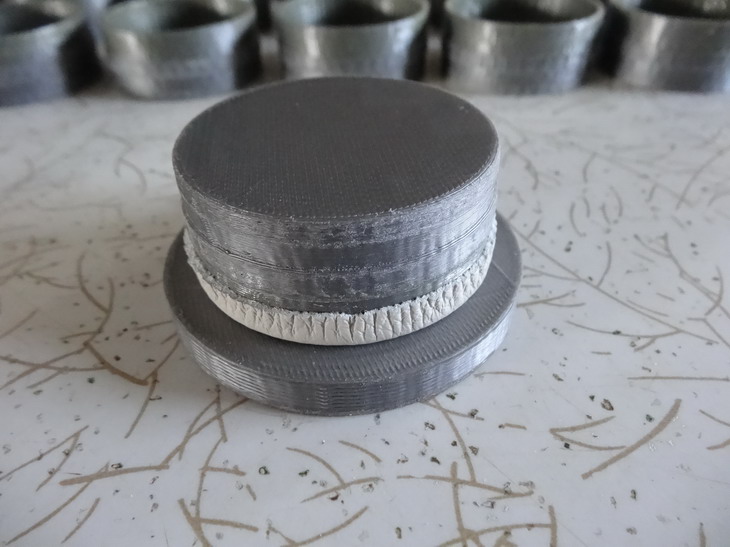
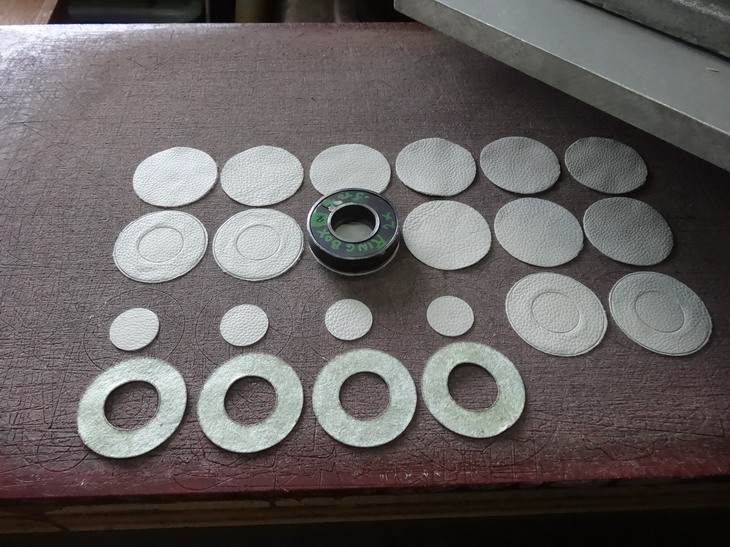
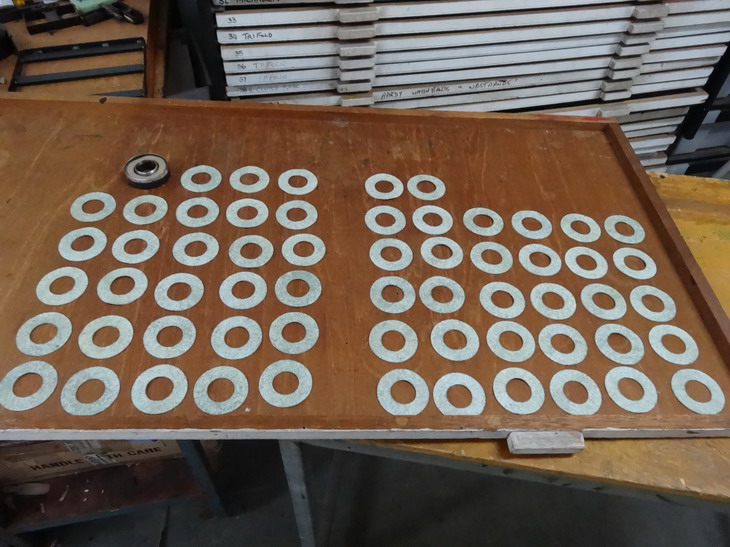
At this stage I decided to test a couple and make sure it works alright. Better than making 88 wrong and find out. Glued up and ready to attach Leather fits in Ok Guiding ring placed Cup pushed in but was very tight Took way too long to get guiding ring out and off. Note that the soft leather has crept up over the ring in the middle. This is a problem. I quickly redrew the guiding rind to be .5mm larger in the hole size. I set it printing next as it will take about 45minutes to complete. While this was printing I all the top and bottom skiving. Pre glued the tops and sides Spray glued the leather tops The new ring worked good and I got the tops and bottoms done in around 90 minutes I think except where I got my counting wrong. As you see the contact works awfully well on this PLA stuff. More tomorrow
-
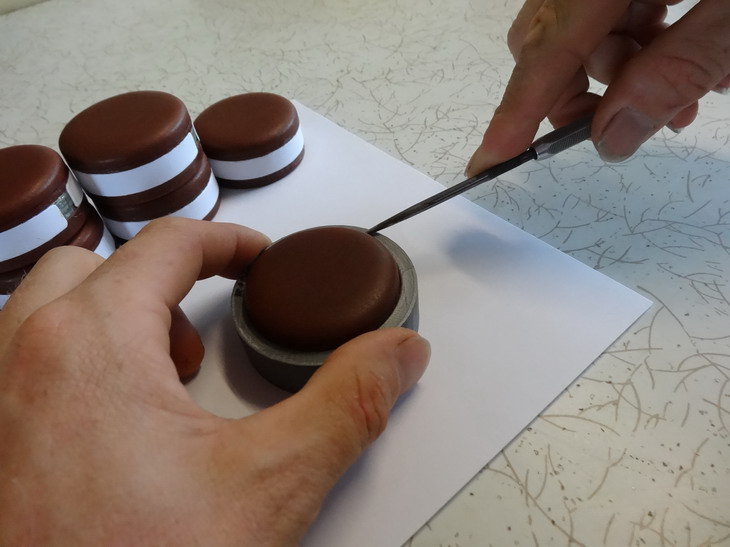
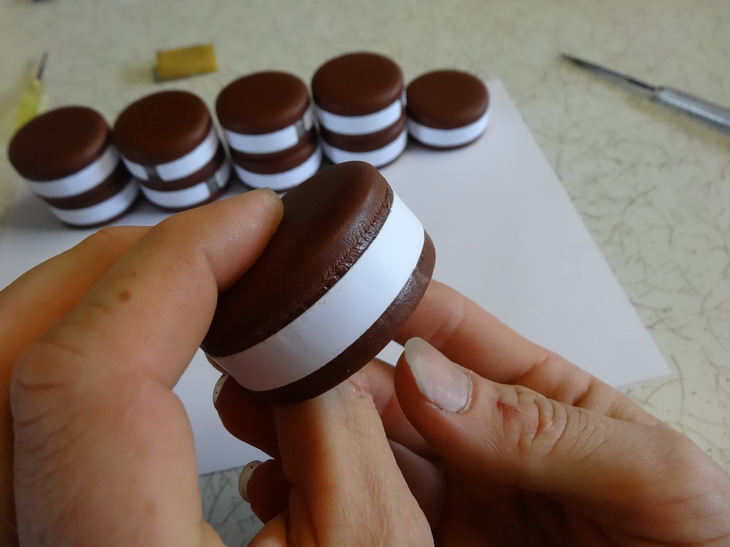
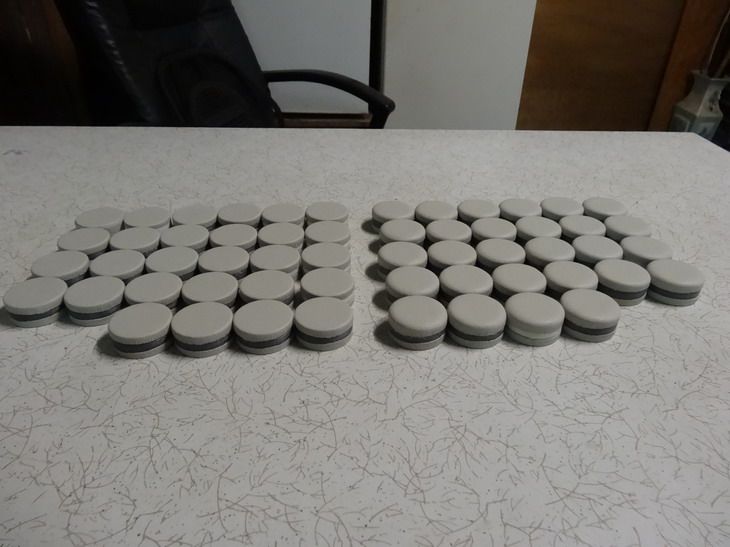
Thanks but I wont say that until i finish them. Couple of hick ups today. Yes they are all glued down construction and as I found today very well glued down construction. You have to rip the leather to get it off. I did one to many tops which meant I had one base short. I started with too many but then more orders caught me out. Here is today effort and trials. This shows all of one colour with the top+ bottoms done in the middle This next step shows the top with foam attached Only need to contact glue the tops here All attached in about 5 minutes. Now to prepare the leather for tops and bottoms. both top and bottoms split to 1.1ish mm I decided to split the side strips while I'm at it to .8mm The next step is skiving. I decided .5mm at edge tapering in about 13mm A roller helps a lot on this soft leather I've done one of the other colour to show you the skive better. More to come


-
Cant do that but I like it a lot. Brian
-
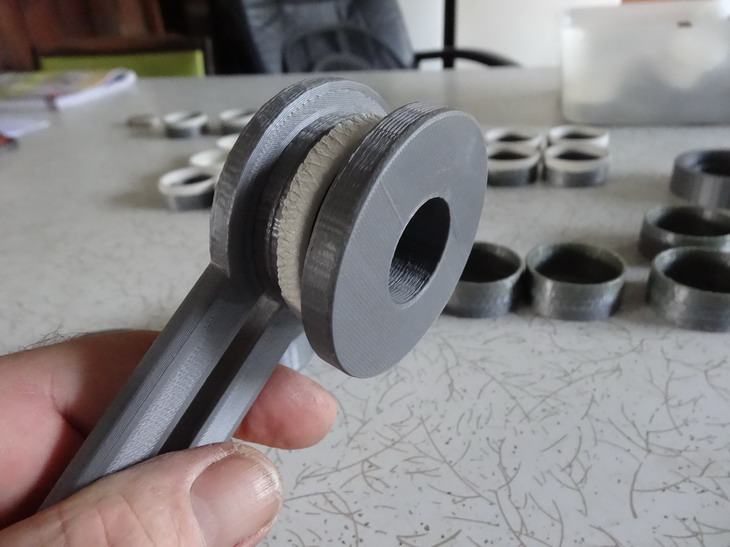
Will do.Time to see some more of yours I reckon. I can only say I wish I had this technology around 20 or more years back. The ease that so many different projects can be brought to real life is truly amazing. Following are a few more pictures for today. Picture below shows gluing the inside and outer side of the cups. This should be a good amount pre glued to start putting together. First I locate the leather into the 1st folding jig This ring jig helps to position the cup into position exactly Cup into position and ready to push down Above shows after pushed in and ring jig removed Here I am pushing the ring cup completely through the ring jig to tighten the outer edge. Note the inner leather is still loose and now goes down onto the next jig This is a very firm fit Here I use a holding tool and spin the inner jig out. This creates pressure and heat and helps the contact glue to stick well. (and it does) Presto more to come
-
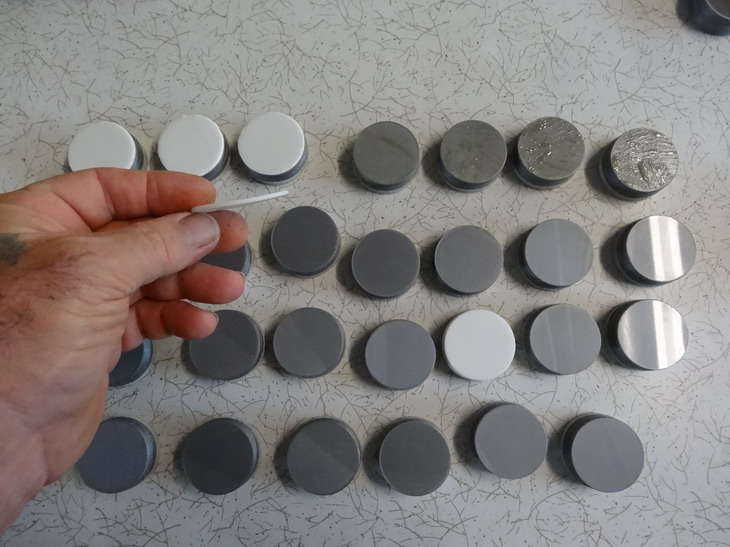
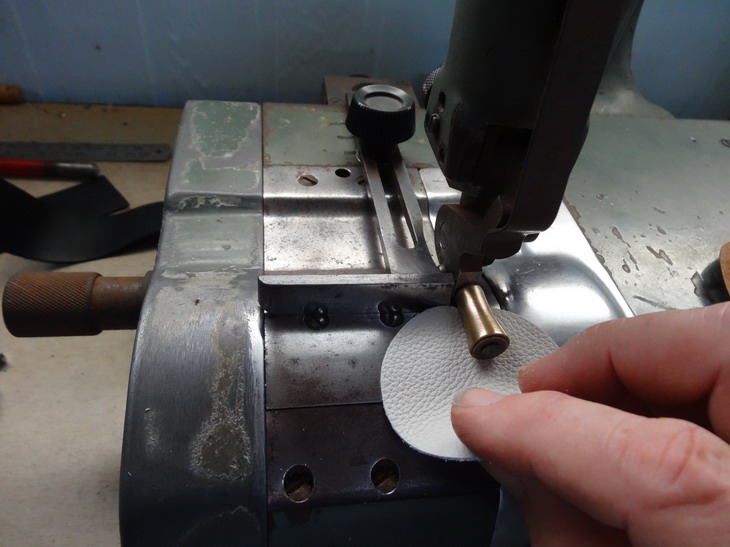
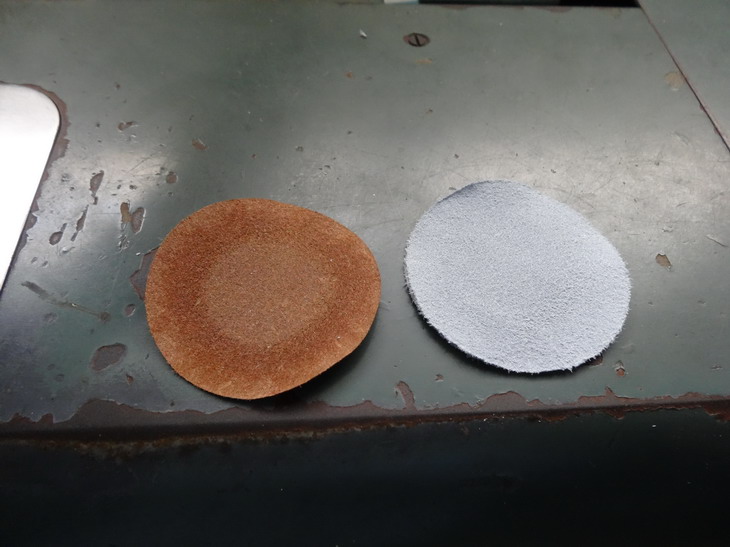
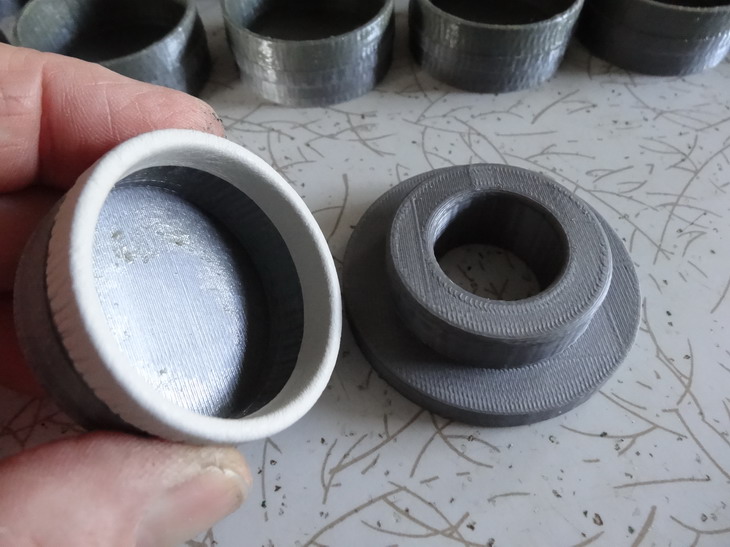
Following are a few more of the steps I've done today. Shows a few of the parts cut and ready for splitting. Here I am splitting the leather to about .6mm. these pieces will be used where the cups come together in the middle. I did it this way as I did not want any joins at that part. Here I have elected to use spray glue to save time. They could be done after the next stage of cutting but I found it a bit fiddly to hold and glue. At this stage when they have tacked off well they are ready to have their second cut. This picture shows how I have used a clicker press to do the cutting.
-
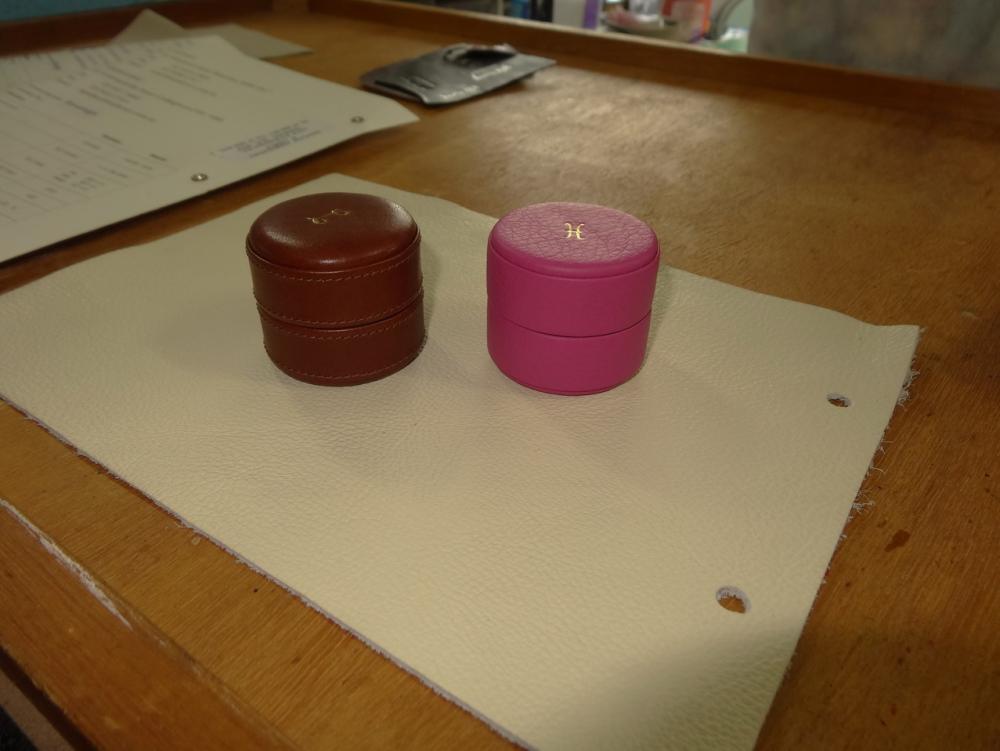
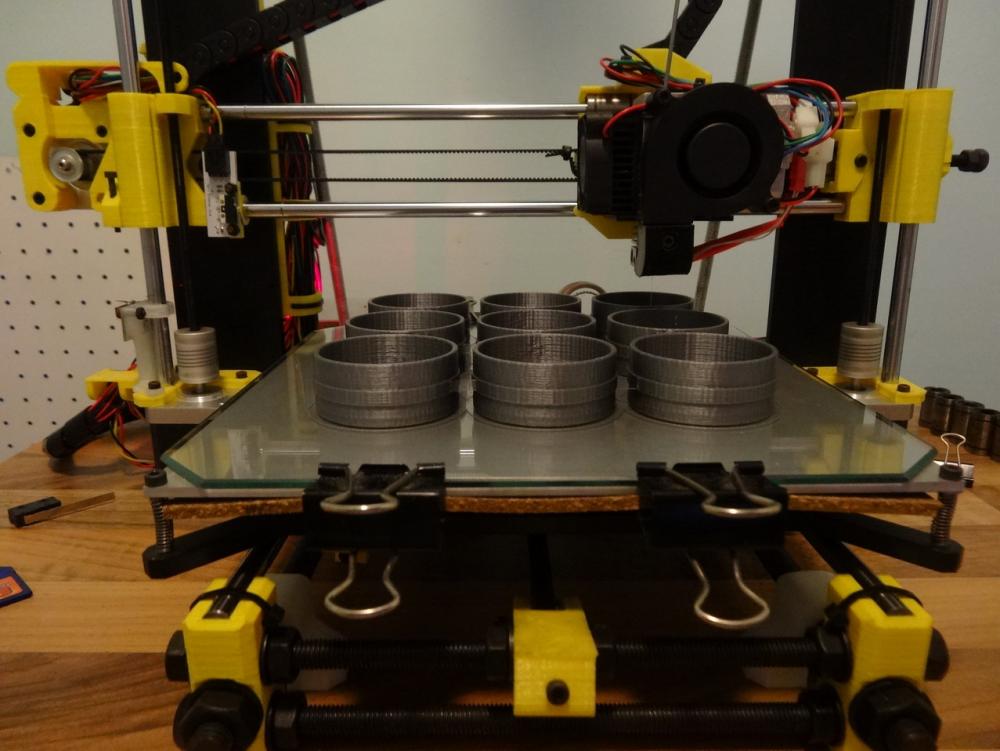
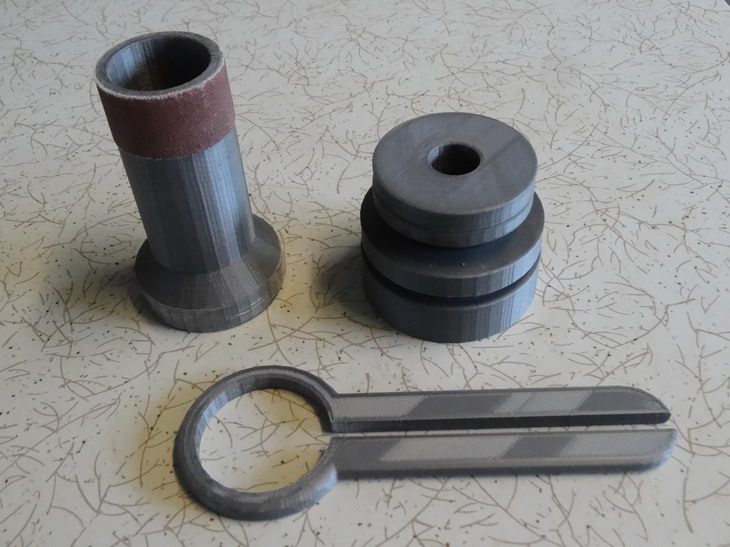
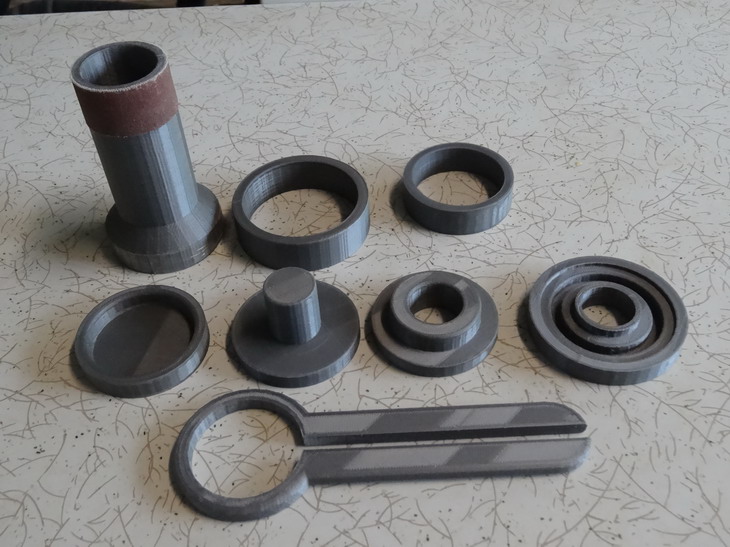
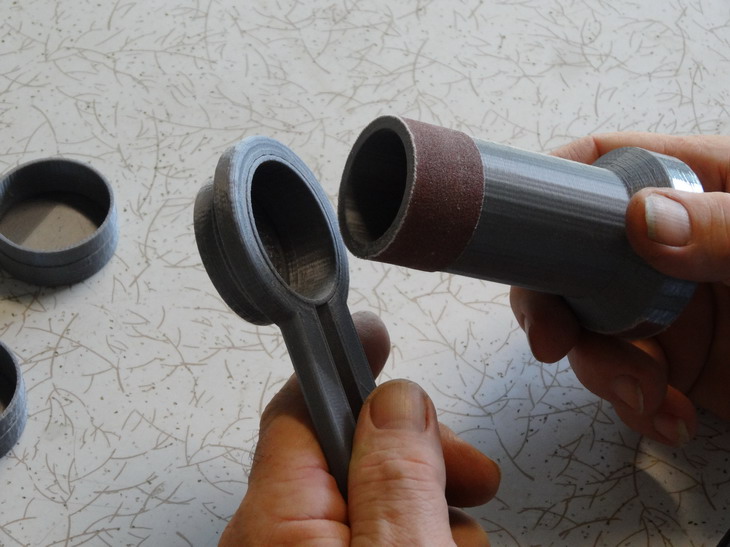
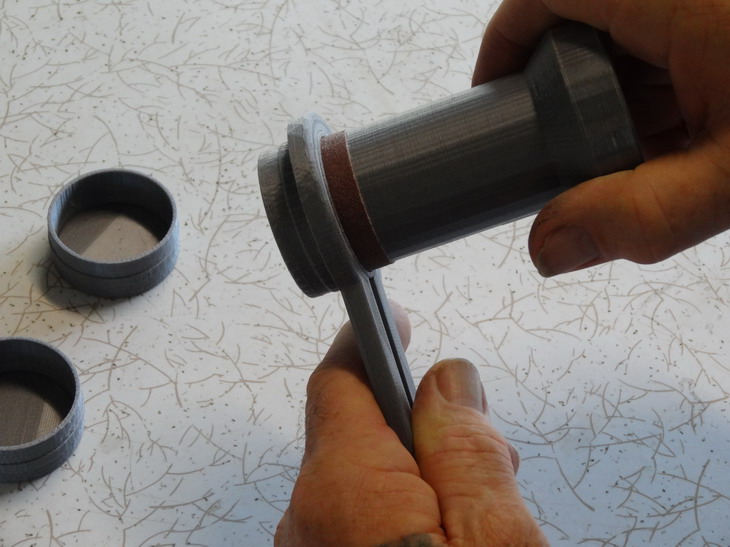
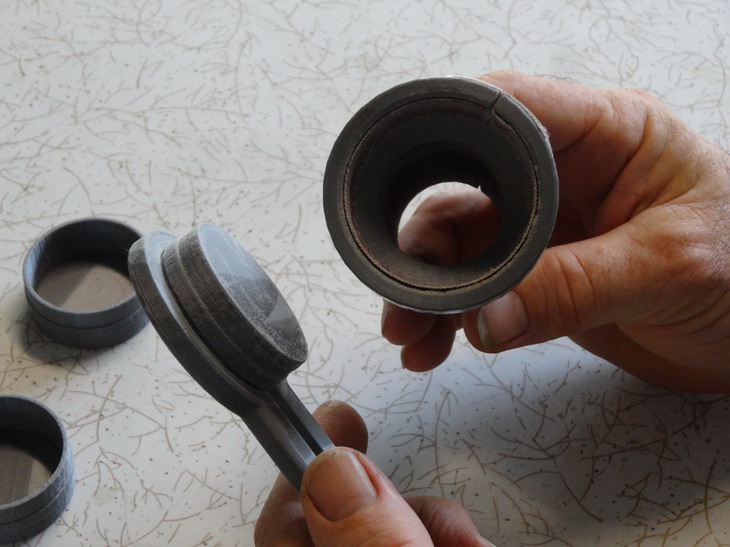
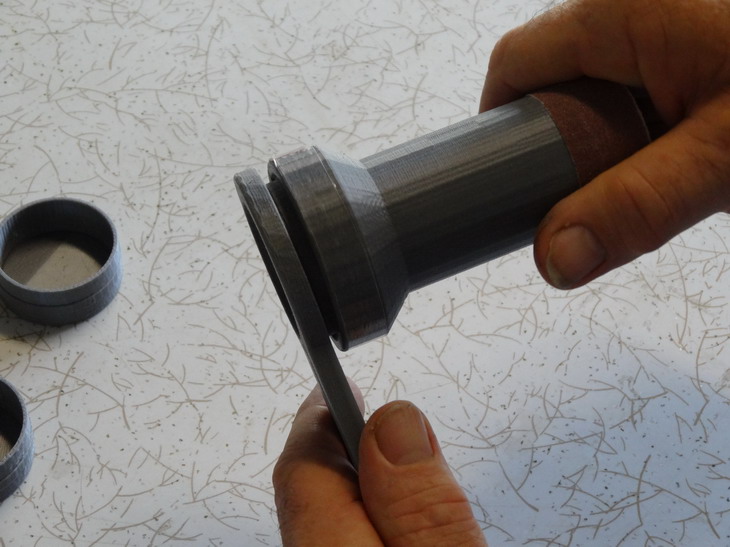
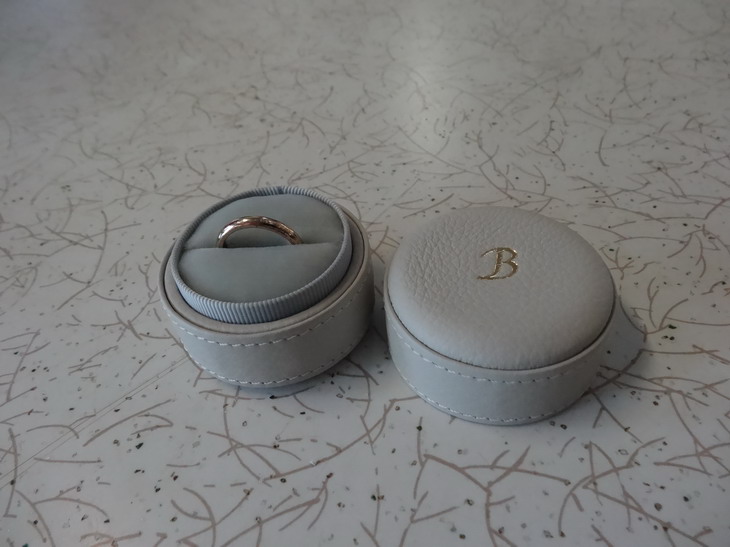
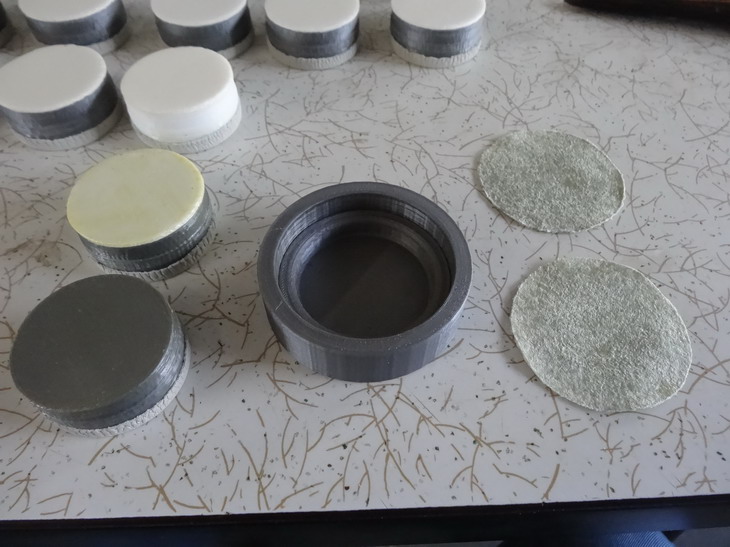
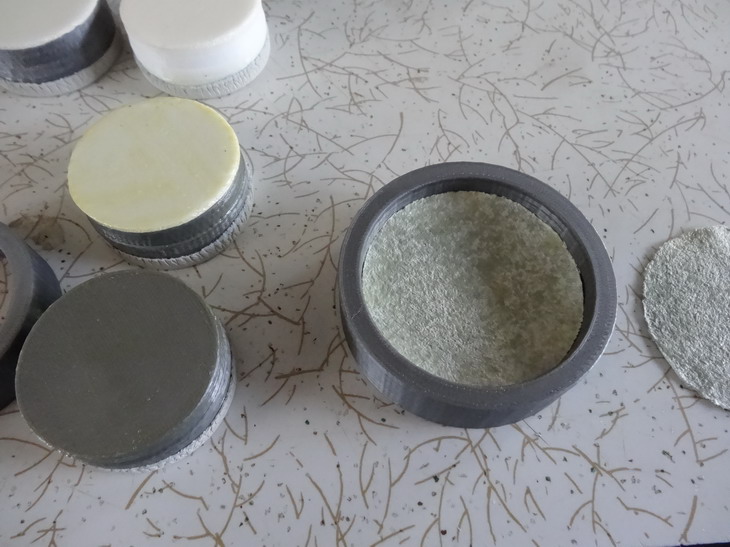
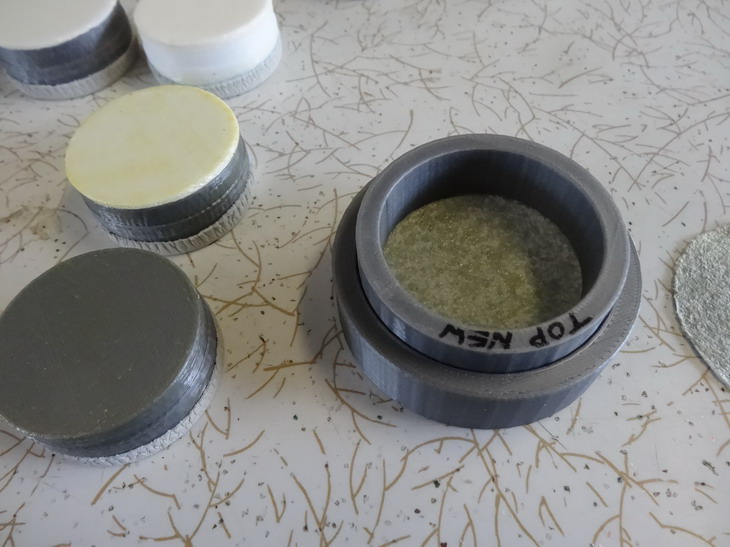
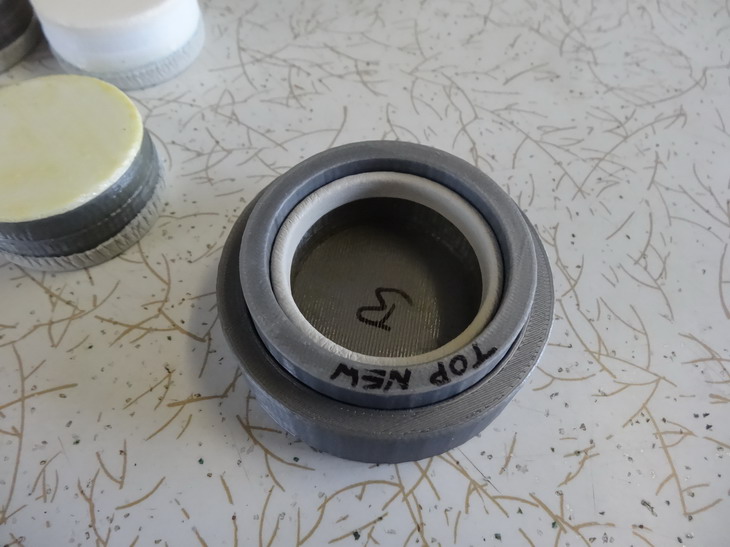
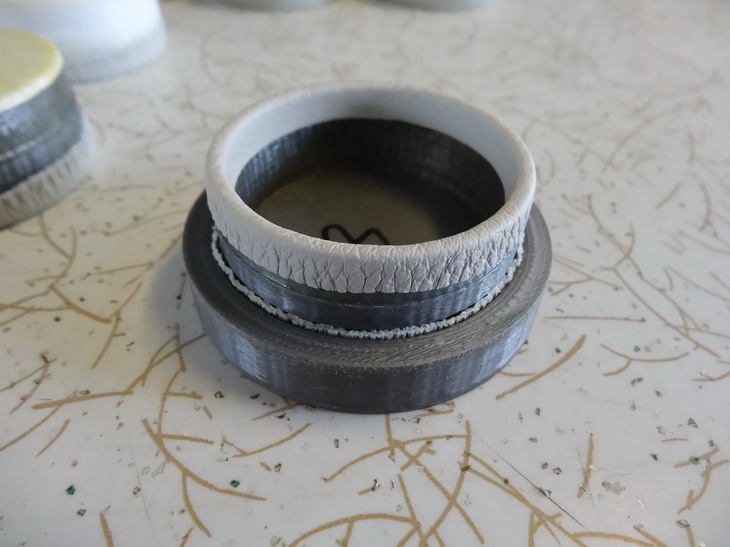
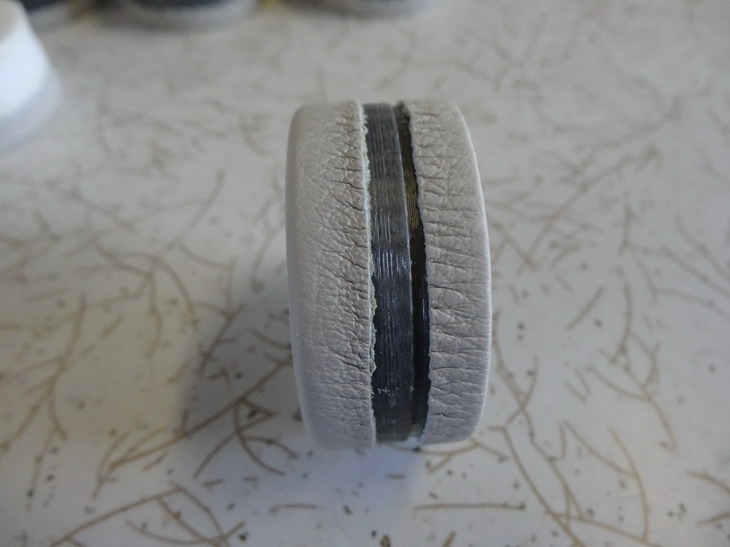
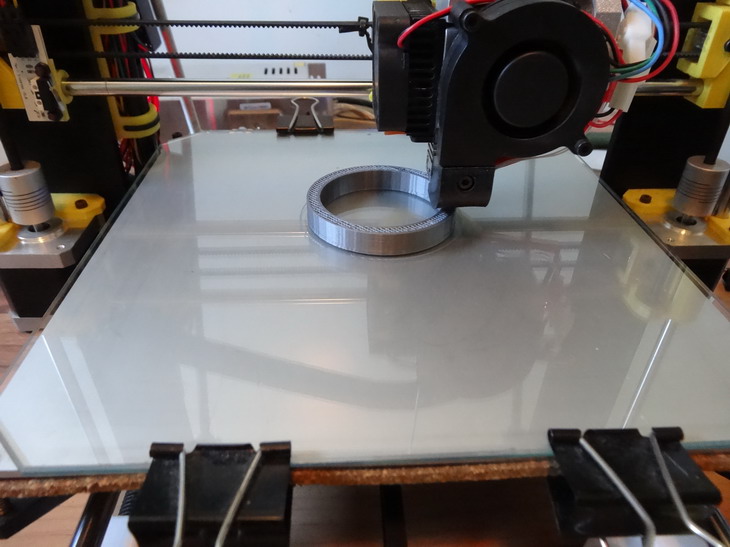
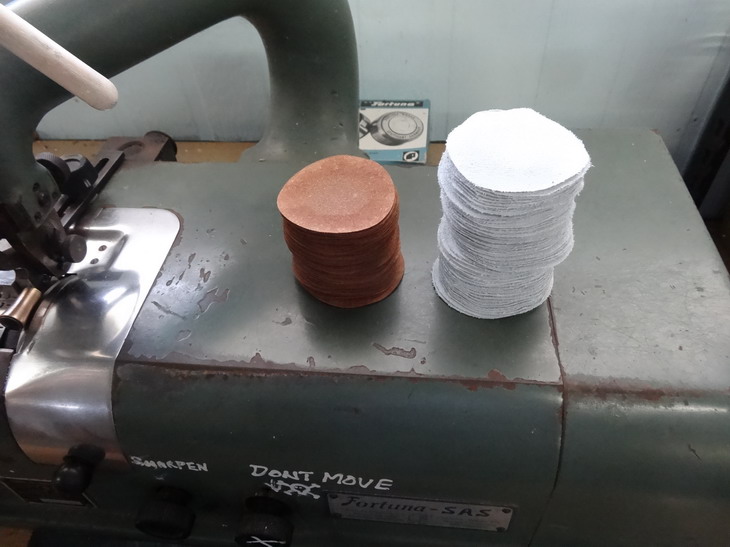
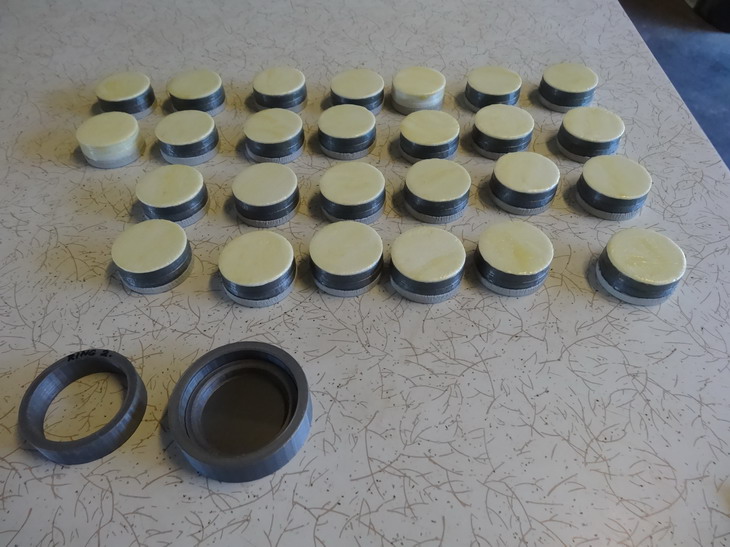
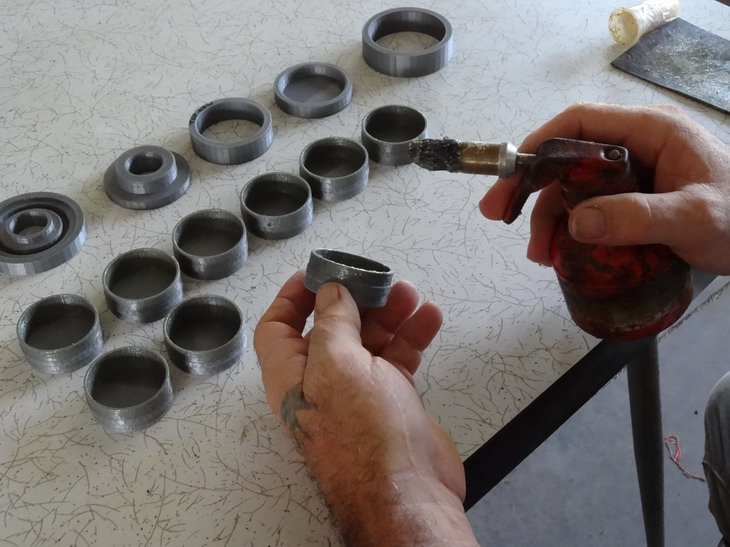
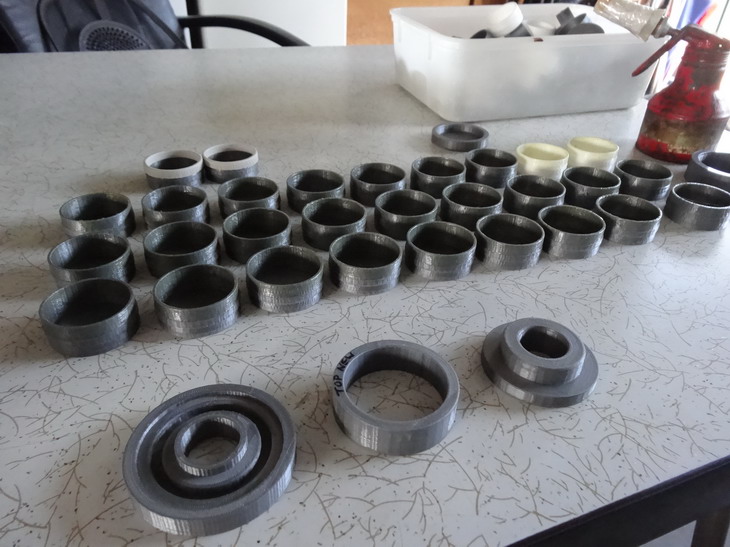
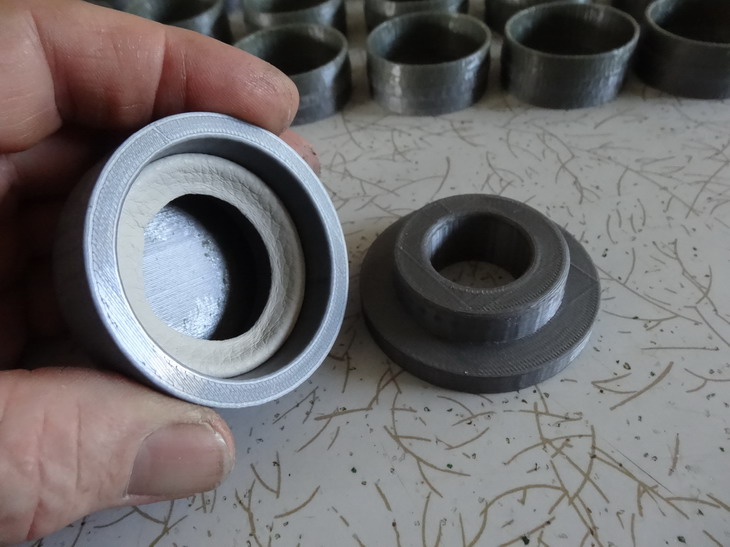
This is my first production run on these wedding ring boxes so for future reference I am a taking a heap of pictures as I go. Due to a few rush jobs I have now only one week to get a minimum of 44 of these done. Many are pre sold and I don't think they will be happy if they don't arrive for their wedding. . Details may get a little sketchy as I go.Just ask if you're interested. These show the first prototypes I made This picture shows the cups I designed being printed on a second hand $400 au printer I bought. Here are the tools I printed to help me form the leather to the cups. Actually they come apart to look more like this picture. The large one at the back left is a sander to clean up any roughness inside and outside the cups. Placing the sandpaper part into the cup and spining to remove roughness. Same thing for the cup outside. After this step the cups should all be ready for gluing up. Next step is cutting the leather parts and splitting them to the correct thickness.