Treed
-
Posts
294 -
Joined
-
Last visited
Content Type
Profiles
Forums
Events
Blogs
Gallery
Store
Everything posted by Treed
-

Lots Of Questions About Tooling/forming Leather
Treed replied to niteshiftfromkc's topic in How Do I Do That?
Have had good luck in using a hard wood as the plug or form for forming the leather. Wet the leather and form around the plug in what ever manner that you use. I then let the leather dry back to the dryness that cased leather needs to be. Layout the pattern and tool on the form before removing.... Same technique used in tooling the swells on a saddle. After tooling and applying any antique or paints dry and remove. -
Has Anyone Made A Jr. Bull Riding Rig
Treed replied to Slow Learner's topic in Patterns and Templates
For Jr Bull riding equipment look for saddle barn equipment..... It is the most used for beginners just starting out. The time and money involved in learning to make a bull rope is going to be very high. I do not know your experience in braiding but Bull ropes require expertise in getting the handle right, the plats correct etc. It is a very specialized area of expertise and have watched bull rope makers. They are very time consuming and why good bull ropes cost. -
Saddle Scabbard & Pommel Bags
Treed replied to Josh Ashman's topic in Saddle and Tack Accessory Items
Hey look'n good..... -
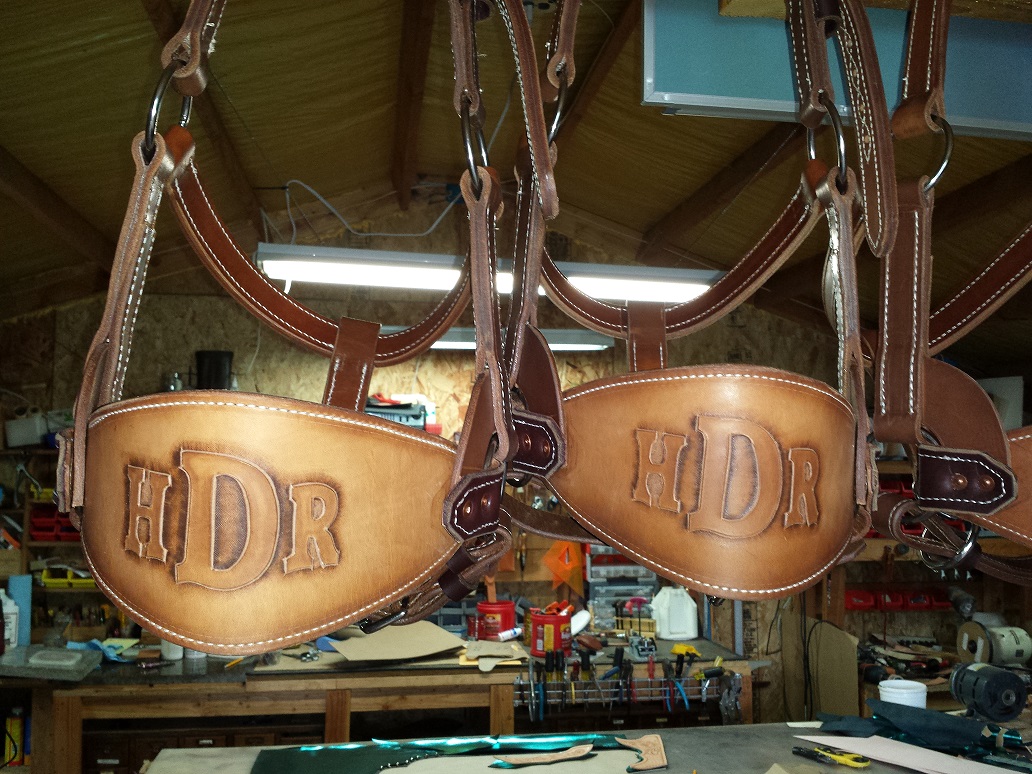
Harness leather will take a stamp and I have tooled a lot of it. I use it for lot of rodeo gear, bronc halters, flanks and other Items. Here is a couple bronc halters that are drying after oiling

-
First Gunfighter Stitch Belt
Treed replied to Red Cent's topic in Gun Holsters, Rifle Slings and Knife Sheathes
Looks great -
Second Pair Of Chaps Done. Arizona Shotguns
Treed replied to thenrie's topic in Clothing, Jackets, Vests and Chaps
Step in's are all I will wear also. Great job -
Looks like what I get with the Sheridan brown past that Fiebings sells. They have a large number of colors in their paste antiques.
-
Knife Sheath For Old Timer
Treed replied to Quillleather's topic in Gun Holsters, Rifle Slings and Knife Sheathes
Good Fit -
These type of belts I oil before adding the lining, making sure that there is a long dry time before lining.
-
Gator On Horse Back (Butt)
Treed replied to camano ridge's topic in Gun Holsters, Rifle Slings and Knife Sheathes
Really nice, always love that color -
Dip Dyeing
Treed replied to Red Cent's topic in Dyes, Antiques, Stains, Glues, Waxes, Finishes and Conditioners.
I only let the dyed piece drip off excess dye for seconds if it is running off, then hit it with the paper towel and start my buffing. I want to get the initial soaking of dye to be uniform and do not want any excess to stay on the leather as any excess will over dye in the areas that it is left. When I buff the project it is with mostly a circular motion. I only use the blue shop towels, the white house hold towel will not hold up and will leave pieces everywhere. The 5-6 you dyed how much was the dye cut with alcohol as this will affect the leather when dyed or it could have been the leather. I only use Herman Oak and after I dye I use a good coat of neats foot oil on the project. I bounce back and forth between dyeing before I construct and dyeing after construction depending on the look, the project or what else is on the drying rack or dyeing table at the time. As I said earlier practice with scraps. As it have practice on scraps i make notes on the back for future reference as to the dye alcohol portions. Also I don't have much in climate control in my shop so different times of the year I have to adjust my procedures. -
Dip Dyeing
Treed replied to Red Cent's topic in Dyes, Antiques, Stains, Glues, Waxes, Finishes and Conditioners.
Red.... of course the biggest thing as others have said is the quality of the leather. I have struggled as others with dye when I first started and learned a thing or two. First any leather you will use has spots that absorbed differently.... Next is that dye is a solid suspended in a liquid. Any leahter that you are going to dye will have oil, waxes and other impurities that are left over from the tanning or picked up from handling, around a shop etc. 1 When I am ready to dye I clean my leather with a oxlic acid,,,,(numerous threads on other products). 2 I dampen my project with water to open up the pours in the leather (drying back to original color) 3 I shake my dye to mix everything up, the dye will settle to the bottom and the liquid will move to the top ( I use Fieblings pro dye mixed 50 50 with denatured alcohol, like lighter colors) 4 I select the pan and pour the dye.... I pull off 3 to 4 sheets of paper towel ( I use the blue shop paper towel... better absorption and don't come apart) 5 I then dip my project making sure that the whole projects is covered well. Remove and let excess dye run off just a couple of quick shakes. 6 I grab a towel and start buffing my project to remove all excess dye. I buff and buff making sure any dye that has not penetrated is removed from the project. 7 No matter what the dye job looks like I set it aside and let it dry. Some areas will absorb more and some areas less and with drying time the dye will move or migrate to the dry areas evening out the dye job most of the time. I then oil and dry to see how the whore process took. There are some leather that need touching up after. This process works for me but as in leather there are as many ways of doing the same thing as there are leather workers. The biggest thing is removing any dye that has not initially been absorbed. If this is allowed to set on the leather it will evidently be absorbed causing a darker area or will dry on the top leaving a solid dye that will rub off onto clothing or hands. When people have rub off issues most of the time it is because of dye not being absorbed (do much dye, bad dye, bad leather, old dye, etc) or because the initial dye looks blotchy they keep adding dye and evidently there is more dye than the leather can absorb. It takes a lot of practice and practice to find the right process... I know living in the Northwest that my process in the summer is different than winter with all the rain and humidity. PS..... holsters are really hard item to get the dye job to match the belt. As you mold and push the leather around on the holster you compress the fibers making it tougher for the dye to absorb. The belt does not get this treatment so its absorption is greater. When doing a matching set I usually will use a glass creaser on the belt to compress the fibers trying to even out the absorption rate. -
Really nice, great job.....gets me thinking for xmas already
-
Help-Drawing Your Own Patterns
Treed replied to BarABarLeatherworks's topic in Patterns and Templates
Joe Its not the first time I have been all wet behind the ears! I know that it has taken me over 40 years to just get to the point I am now with work and study. I do know that I have studied work of the masters in leather crafting and have had the pleasure to work with some of these guys.and have never seen a computer used and most were well before computers were around. I have to wonder what computer mother nature uses when she does layouts. I guess I had better get off my butt and look more into this with using computers thanks for pointing out how wrong I am. -
Help-Drawing Your Own Patterns
Treed replied to BarABarLeatherworks's topic in Patterns and Templates
If you are going to try and go anywhere in this business with tooled items you need to learn layout and hand drawing. There will be many times that you will have a unique size or shape to fill. The computer help is useful but cuts into profit with the amount of time involved..... Its just cool to do your own and if I can learn it then most everybody can. Start with Bob Parks book and go on from there, is book will make the rest of the books make sense. Learning to draw your own will also give you a better understanding of the layout and flow improving your tooling outcome. -
Have You Purchased Leather From.......
Treed replied to Red Cent's topic in Gun Holsters, Rifle Slings and Knife Sheathes
I have not been able to find a chart.....It is mostly based on the tannery as to how they label them. Herman Oak is A and B are premium hides with little or no blemishes..... hides are very uniform in thickness and firmness. The TR's have more blemishes, may have brands, cuts, can vary in thickness and firmness. The only thing that I really pay attention to is the brands and amount of blemishes. I can work around any thickness issues as holsters and books are small and the thickness issue is very small. I can work around any firmness issue with holsters coming out of the firm parts and books getting stiffeners fixes that issue. For the price difference I have found that the TR's work great. -
Have You Purchased Leather From.......
Treed replied to Red Cent's topic in Gun Holsters, Rifle Slings and Knife Sheathes
Unless it is a special custom order for Hamley's or such, I pretty much use the TR 1's and for antiqued rigs the TR 2's. The advantage is living close enough that I can hand pick the hides. When you call ask for Abdul and explain what you are looking for. Tell him that I refereed you. He knows pretty much what I like and use for holsters.... another reference for them is the same leathers that A.E. Nelson Leather of Scio, Oregon (Holster and leather company dates back to 1938). TR's are going to have some range scars and blemishes, but for the savings I can work around them. -
Have You Purchased Leather From.......
Treed replied to Red Cent's topic in Gun Holsters, Rifle Slings and Knife Sheathes
They are one store basically the only problem is that Montana and McPherson's carry Barry King tools and they sell them 5 bucks cheaper than Barry and they don't carry them in Portland.... Trying to remedy this. Usually can't go wrong with a company that has been in business as long as they have and keep employees long enough to retire. -
Have You Purchased Leather From.......
Treed replied to Red Cent's topic in Gun Holsters, Rifle Slings and Knife Sheathes
My Holster and belt leather comes from Oregon Leather in Portland.... I only live about 40 miles from the Portland store and can go in an hand pick each hide that I want. They have also been in business for over a hundred years.....Its a family run business with stores in Portland, Eugene, Seattle and Billings Mt. I use Herman Oak leather and their prices usually beat everyone else..... doing business with them for over 30 years. Both these business have employee turn over only when there is a retirement. -
Have You Purchased Leather From.......
Treed replied to Red Cent's topic in Gun Holsters, Rifle Slings and Knife Sheathes
All my chap leather for over 25 years. Almost every order placed with Rodger -
Mexican Loop Bowie Sheathes
Treed replied to Josh Ashman's topic in Gun Holsters, Rifle Slings and Knife Sheathes
nice work, really like them -
How Do You Hold Your Project Down When Stamping And Carving
Treed replied to Pappys Leather's topic in How Do I Do That?
Wrong glue.....use rubber cement as it is met to be able to come apart. There are two different things floating around here. One is the means to stop the leather from stretching during the tooling process. This is done with the use of packing tape, shelf liner, cardboard etc. The second thing that is talked about is securing the item so that it is not slipping around during tooling. The extra large cardboard or plexy glass glued to the piece will cover both needs. The taping the item to the table can work except that it is difficult to move the item when needed during the tooling process. The shot bags are great and very easy to make. -
Nice job looks great
-
Dog Collar Made With Cowboy 3200
Treed replied to Jess Jones's topic in Collars, Cuffs, Leashes and Leads
Great job, only suggestion is to bevel around your letters to make them pop and look more hand custom done -
Great job! Where did you get the canteen?