hidepounder
-
Posts
1,808 -
Joined
-
Last visited
Content Type
Profiles
Forums
Events
Blogs
Gallery
Store
Everything posted by hidepounder
-
A little different inlay
hidepounder replied to DCKNIVES's topic in Gun Holsters, Rifle Slings and Knife Sheathes
Bautiful Dave.....really classy the way they match! Bob -
Here we go. saddle tree test. Carbon fiber verses hide
hidepounder replied to SITTINGUPHIGH1's topic in Saddle Construction
Boy Denise...you just said a mouthful! You're so right! If you stood three Quarter horses together, a cowhorse, a showmanship horse and a halter horse...the only similarity you could find between them would be the breed registry on their papers! Kind of sad too..... Bob -
Has anyone used Hadlock & Fox Saddle trees?
hidepounder replied to SITTINGUPHIGH1's topic in Saddle Construction
Elton! (...laughing...) That's really funny! Bob -
Vey nice Pete! Clean and elegant! Perfect example of how less is more! Bob
-
Beautiful work David! I love your stuff! One of these days I'm going to figure out how to incorporate some tat art like you do, into some of my floral tooling. I'm always impressed with how clean your work is! Mine always looks "overhandled"....it probably is! Keep it coming...want to see more! Bob
-
I sand on a stationary belt sander also....really works great. I get feathering at the edges, but that is removed when I edge. I've found that I get better final finish by allowing the speed of the belt to produce a slight scorch to the edge while sanding. I would like to try the spindle sander...but can you elimimate the oscillating feature? Sounds like a great way to finish edges.....you could wrap a sanding tube with saddle soaped canvas and you could add a wood slicker as well. Has anybody tried this? Does anybody know if the oscillation can be turned off? Here is an edge finished mechanically with soaped canvas. Bob

-
I'm surprised to see that no one is using a head knife! I dampen the leather, make a strong mark with a stylus, and then cut freehand with a headknife. I've found that I can cut within a pencil mark. I used to use a straight edge and utility knife, but inevitably, something would slip resulting in disaster. The width of a head knife is such that there is so much blade in the cut, that cutting straight is almost easier than a cutting a curve! It goes without saying that your knife must be very sharp! Using a head knife seemed awkward at first, but I assumed there was a reason why all the pro's used them. Now I know! If I need two pieces to match identically...I cut the first piece, then use it as a template to cut the second piece. This is usually adequate. But if not, I wait for them to dry, then I use blue 3M tape to hold them together and I sand the edges to a "finish" line on a stationary belt sander. This is what I do, hope it helpful to you..... Bob
-
Thanks Marlon! I can see it, now that Peter explained it. The clue is that the "false" billet end is not stitched. He amazes me! BTW, I have one of the modelers...it's about the only modeler I use... Bob
-
A couple of new belts...
hidepounder replied to hidepounder's topic in Purses, Wallets, Belts and Miscellaneous Pocket Items
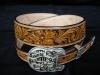
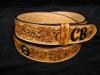
Thanks leather1214, I trace the center line so that the main cuts are all fairly uniform in size...the rest of the cuts are freehand. --------------------------------------------------------------------------- Thanks Josh! They're not masterpieces, but I appreciate you saying so! ---------------------------------------------------------------------------- Thanks Troy, I really appreciate your comments. I wanted a flower that kind of fit the Sheridan mold that didn't take so long to cut. Flower center is Barry's. ---------------------------------------------------------------------------- Thanks Nick, The background is done with a set of Barry Kings #25 bargrounders. Bob -
Here's a couple belts I just finished. They are tooled on 7-8 oz HO leather, split to approx 5 oz, then lined with 5-6 oz HO. I used Fiebings Cordovan spirit dye and Fiebings Lt Brown antique, then finished with Neat-Lac. They are sewn with Rice #99 white thread at 9 stitches per inch. The lining is finger carved and finished with Tan-Kote. I designed the three piece buckle set and had it made by Red Bluff Buckles is NM. As always, all comments and critiques ae welcome! Bob
-
Thanks for showing those to us Marlon....as usual, another "over the top" product by Peter! I have a question.....is the billet lining overlaid on top of the tooled lining to form an edge that can be burnished? I'm interested in how Peter constructed these..... Bob
-
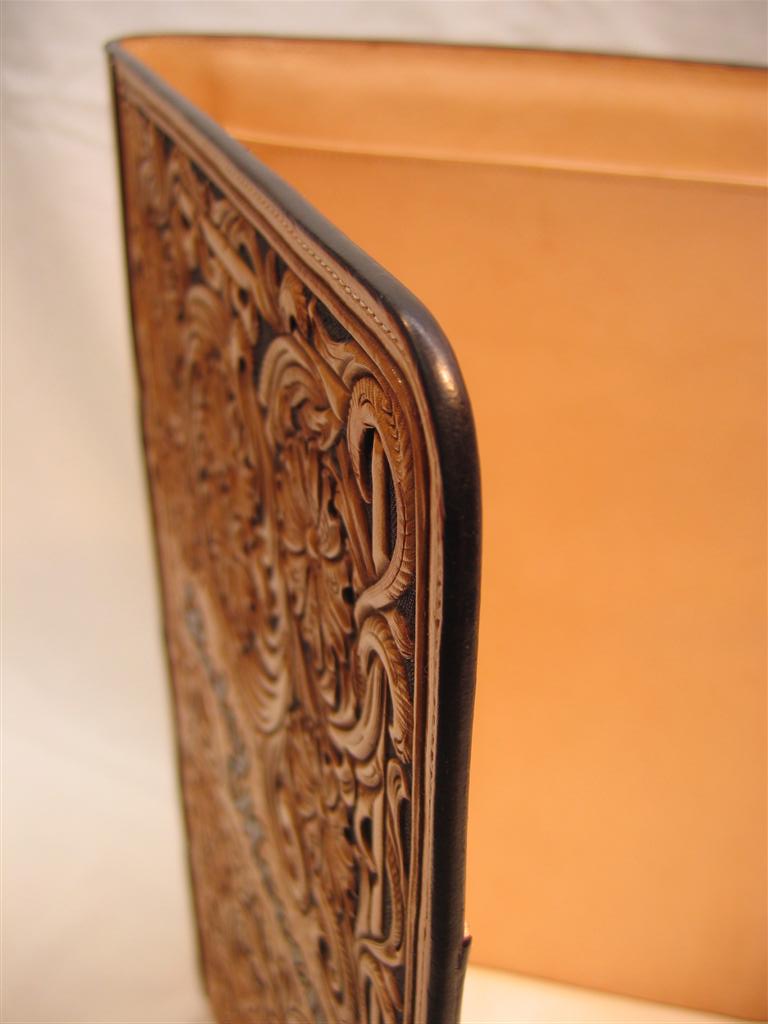
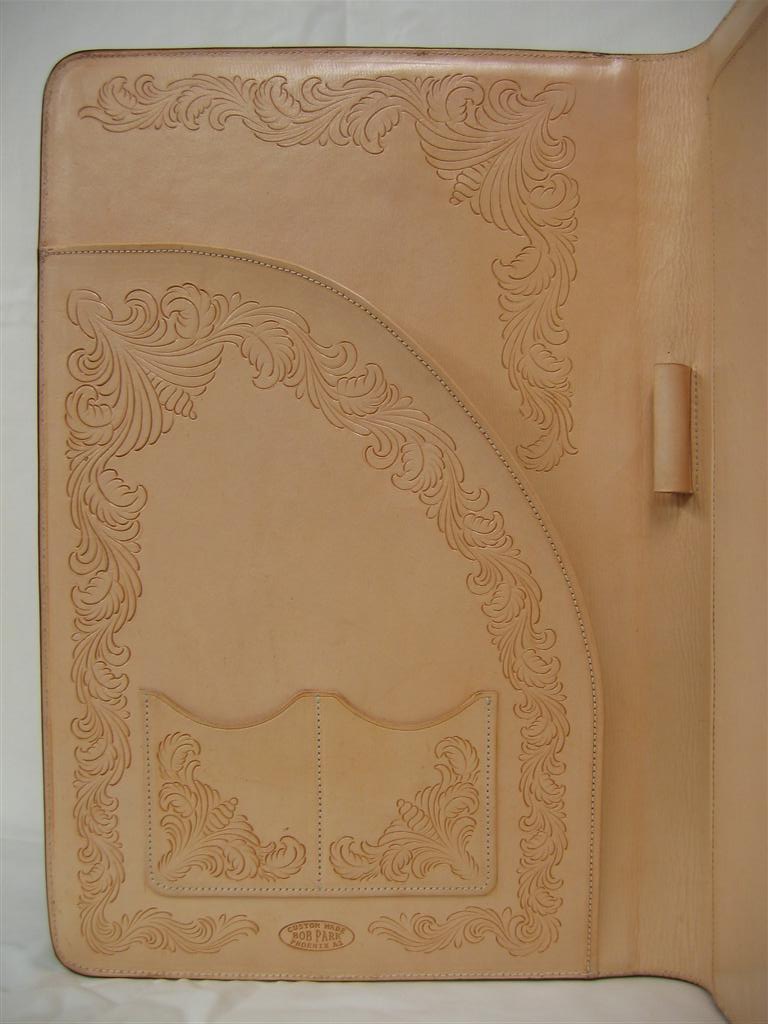
I like and use hardwood slickers...but take a look at my edges on the "legal size pad folio" and see what you think...they're done with canvas! I woudn't put too much stock certain types of wood having more impact in the final result. I think it's the process that matters. Bob
-
using peice of glass before carving?
hidepounder replied to MADMAX22's topic in Leatherwork Conversation
Wow Troy! Just beautiful! You are amazing! I slick with glass before I start tooling also....wouldn't consider NOT slicking, now! I also use Barry's glass slicker...one of the best buys I ever made. I cross slick in all directions. Not only does slicking smooth out some of the inconsistencies in the surface of the grain...the process slightly compresses the leather resulting in cleaner, crisper tooling. An I agree...it helps make dying and coloring more consistant. I say YES to slicking....my final answer! Bob -
Thank you both David and Tina! More to come! Bob
-
Thanks David & Bree.....I appreciate your comments! Bob
-
The horses and flowers in 2008.
hidepounder replied to bobocat's topic in Floral and Sheridan Carving
Very nicely done Bobocat! Great composition, beautifully executed! Bob -
Bobocat, You're a gracious speaker and a Master tooler! I can't wait to see more of you're work. It's very inspiring to me and the others who recoganize your talent! Bob
-
Here we go. saddle tree test. Carbon fiber verses hide
hidepounder replied to SITTINGUPHIGH1's topic in Saddle Construction
This has been a facinating discussion to watch and I just can't restrain myself from making a few comments...maybe from a slightly different perspective. First, let me state that I am not a saddlemaker! Worked in a couple shops, seen some saddles made, decorated a few of them. So I have a basic understanding of building a saddle. Secondly, I am not a novice in the saddle, gathered cattle in some pretty grueling country on our Arizona desert ranch, roped since the age of ten...still do, forty plus years later, even managed to make AQHA's top ten on a few occassions the past few years. I'm no expert, but do have a basic understanding of being in the saddle! All that said, I am exasperated with this discussion of fitting a saddle to a horse. Just what does that mean? Are you going to fit him when he's standing...or when his back's rolled handling a steer....or in a sliding stop? It doesn't equate for me....that's three different trees! Oh...and are we going to fit him when he's a little heavy from non-use, or after he's been ridden hard for a couple weeks? Here's something I know for a fact! The horse I start out on in the morning is not always the same size when I put him up in the evening. So how are we going to get this tree to fit this horse? The answer is simple.....we're not! And because of this, I just don't see the real value of applying highly technical equipment to "fit" an ever changing dynamic! It's kinda like saying you expect to wear the same size pants your entire life. It's just not a reasonable expectation, nor a practical one! I read an article that Dusty Johnson wrote a year or so back that I really like. Dusty quoted someone who said, "the saddle is both the central and the stabilizing force wedged between two very flexible and changing objects" and then Dusty said, "To consider the saddle as having primary control over fit versus the ever changing rider is simply absurd." He's dead right! So, what I need is a saddle that provides the least amount of discomfort to my horse and myself, while enhancing our ablity to complete the task at hand. And so we don't fit the horse...we fit the type! It is also interesting that the most concern about "fit" is expressed by those with the least experience. I think this is because experienced horsemen and saddle/tree makers don't expect one saddle to fit everything, and recognize the impracticality of having a saddle for every horse. Referring again to Dusty's article, and I know this to be true from my personal experience, that most successful horse trainers ride three or four saddles on fifteen to twenty horses, during every single session! Because they're saddles fit the types. There is something else I've noticed over the years, and I invite you to dispute this. The most complaints about fit come from those who purchase the cheapest thing they can find! It's especially true in the roping community...those of you who are familiar with this bunch, and it's a fraternity to which I belong, are nodding and laughing! What I'm sneaking up to is, that the quality of the product we put on our horses back, matters! It makes a difference! . Not every saddle/tree maker is necessarily good at what they do. So, if you want a better product, you have to belly up to the bar and get it from those who can provide it! It's not rocket science...quality takes time, time is money! And yes, if you're really committed to only using the best on your horses back, you'll have to find a decent used saddle to ride for a year or two until the custom one gets here! And it's gonna cost you! Cadilacs cost more than Chevys! Carbon Fiber? Sure, why not? Show me the advantages...but forget the tire test! And no more talk about fit...I'm not interested in seeing comparisons which have no practical application. Show me the benefits of carbon fiber when utilized as the "central and stabilizing force wedged between two very flexible and changing objects" and I'll sign on. Until then I'm sticking with the tried and true...because I'm a coward at heart and I'm just too old to become a pioneer......... (pioneers get arrows)! Okay!!! All done!!! "that's all I have to say about that!" (except....thanks for the opportunity to spout off!) Bob -
Art, I get the Journal and not Shop Talk...do you get both? I'm curious about how they compare... Bob
-
Bob, Question: Do you slick by hand or use power slickers and the like? Marlon, Here's my process: I edge, wet the edge, liberally apply Fiebings bar saddlesoap to the edge, mechinically slick with heavy canvas sparingly impregnated with Fiebings paste soap (approx 1750 rpm). Next, I hand slick with a rub stick and then dye the edges, making sure I get good penetration and full coverage (spirit dye). When the dye is dry, I wipe off the residue (re-dye anything I'm not ahppy with), slick again mechanically with parafin coated canvas (1750 rpm), remove the residue with a cloth, polish with a clean, dry soft cloth. And there you have it! I will say, however, that this process is continually evolving as I learn new tips and discover new products and methods. Hope this helps.... Bob
-
sodapop, Art, Bruce, Crystal, Rick, Troy, MADMAX22, HARVEY, Bree, Jim, Hilly, 8thsinner, Tom, pete, Kevin, Johnny, Bonnie, McJeep, Marlon...... Thank you all for your comments and kind words, I appreciate them all! The support received here LW is inspiring......so, more to come! Thanks again, Bob
-
Great rack Art! (that sounds funny!). Great tool rack Art! Nicely done...can't wait to see the cover for it!
-
Roo...we were just talking about achieving the illusion of depth in over on the "Sheridan" side. This is a perfect example! Great job! Love your stuff.....want to see more masks..... Bob
-
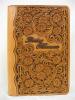
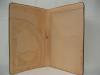
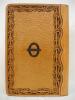
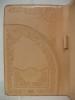
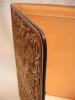
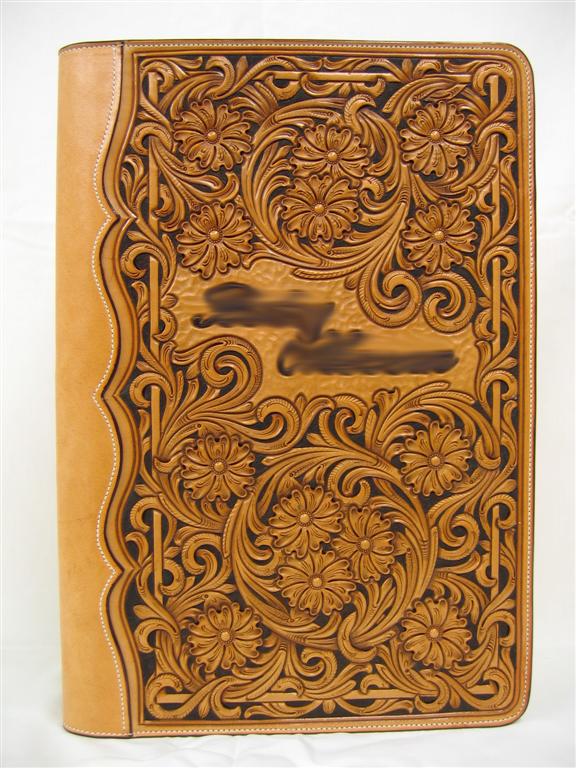
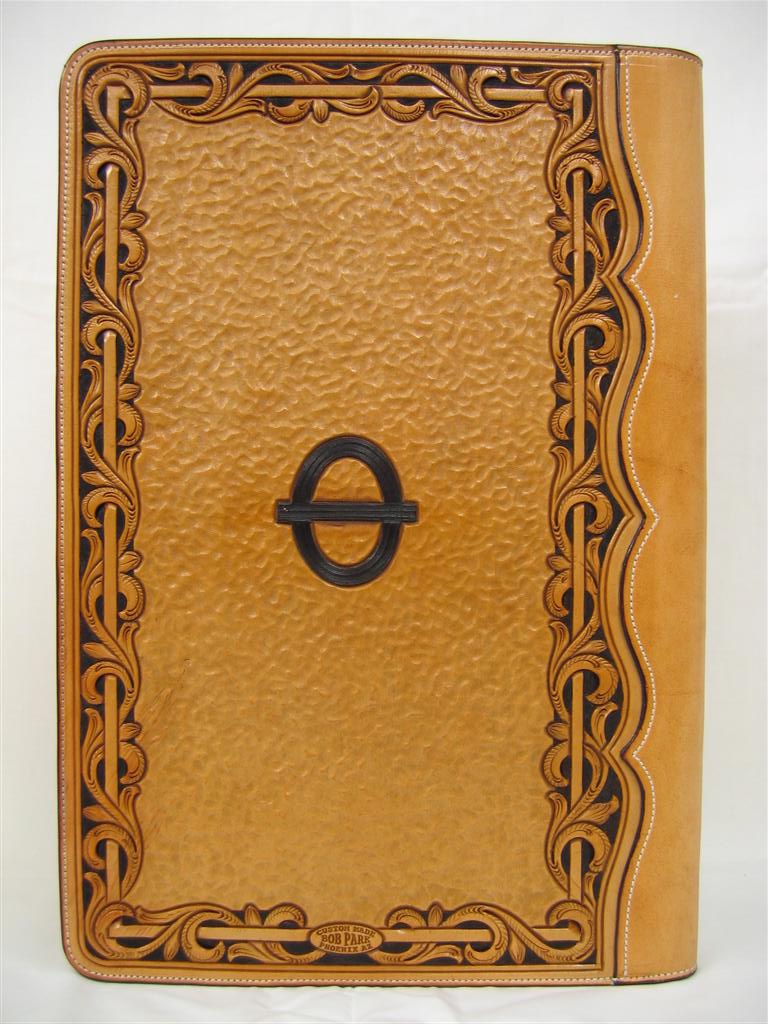
Here is a project I finished last week. It's a legal size pad folio. I have smudged the name because it's an XMas present....so if you know who it is....PLEASE DON'T SPILL THE BEANS! It detracts from the photo...but I didn't want to take a chance. This is a Sheridan style pattern with a "Parkway" twist. I really struggled with this one...the customer wanted a basket weave border, but because of the unusual size, the border just didn't look good. Instead, I created a second, wider border inside the outer border and wrapped a vine around it. I then wove the main pattern in and out of the vine on the border. The inner border doesn't show as well as I'd hoped, but overall, I think it's okay. The back side has the same border. The exterior is constructed of two pieces 7-8 oz leather and the binding is split down to 5 oz. All three pieces have stiffeners under the liner. The tooling is antiqued and finished with Neat-Lac. The exterior edges were slicked, dyed and sewn with Rice, white #138 thread, top & bottom at 9 stitches per inch. The lining leather is 2 oz, natural, finished with Tan-Kote. It is sewn with Rice, white #69 thread, top & bottom, at 12 stitches per inch. All the edges are either turned and stitched or slicked. The back side of the lining components are finished with a tan nylon fabric. These photos aren't the best, but will have to do until I can update my camera. As usual, all critiques and comments are welcome.....and I'm thick skined, so don't be afraid to tell me what you think! Bob