RemingtonSteel
-
Posts
183 -
Joined
-
Last visited
Content Type
Profiles
Forums
Events
Blogs
Gallery
Store
Everything posted by RemingtonSteel
-
My first westernrigg
RemingtonSteel replied to caperseven's topic in Gun Holsters, Rifle Slings and Knife Sheathes
Great looking first rig to go with those matching Ruger SASS New Model Vaqueros! You should be proud of it. Very clean yet rugged looking. I can't tell from the photo, but are the holsters lined? I agree, much prefer a separate shotgun shell belt, that I can have sit a little higher than my gun belt. Plus I don't like wearing a gun belt backwards to have quick access to the shells and cartridges. Looking forward to seeing your shotgun belt when you finish that. -
Very nicely done!. The holster and belt work really well together. I like the tooling on the chape and billet which offsets the simplicity of the more plain gunfighter stitched belt. Then throw in the carved and tooled holster, and you have a winning combination. I also think the dye color used is the perfect choice for this rig. My only question is, Will the billet tip even reach the second keeper if belt is buckled through the middle hole on the billet? I can only see five holes in the billet, from the photos above. Regardless, I would be proud to wear that rig. More importantly the customer loved it.
-
Forward cant Western holster?
RemingtonSteel replied to dikman's topic in Gun Holsters, Rifle Slings and Knife Sheathes
To better understand what you mean, could you let us know which hand is your strong hand, Right or Left? -
Buscadero Belt Buckle Question
RemingtonSteel replied to noobleather's topic in Gun Holsters, Rifle Slings and Knife Sheathes
I agree with Josh, as there is no reason you cannot use your SSAA buckle. There are however two benefits to the frame style (Heel Bar Buckle, Center Bar Buckle) buckle, which may make it a better choice for a gun belt over a plate style buckle. First, there is a chance, however small, that with a plate style buckle you could catch the buckle edge on something that may cause it to become undone. With the weight of a gun ( or two) hanging on the belt, you just might find the results of this unintended action, is the belt falling down around you ankles. Embarrassing at best, fatal at worst. Second, if it is one's desire to wear a gun belt tightly, a frame style buckle allows one to use a little leverage to cinch up the belt tight. In Cowboy Action Shooting (SASS), we are often making sudden movements from one shooting position to another on a stage, with some stages having the most interesting props that can get in the way. I personally would not want my belt buckle catching on a prop when moving, with the result of having my gun belt fall to the ground. In addition, it is these exact same movements which makes me want to wear my belt as tight as I can comfortably get it. The combination of slender hips and a loose gun belt could be equally as disastrous, even if the buckle does not come undone. Just some food for thought. -
Forward cant Western holster?
RemingtonSteel replied to dikman's topic in Gun Holsters, Rifle Slings and Knife Sheathes
Wizard of Tragacanth, my comments were not actually a rebuttal to your comments, as I was writing my reply the same time you were writing yours. You just submitted yours a few minutes before I submitted mine. As a matter of fact, I agree wholeheartedly with you that the best cant is one where your wrist resides at it's natural angle without any bend to it, when drawing your weapon, even it that means no cant. Just like a lot of things in life, there are no hard and fast rules set in stone, relating to cant angle for holsters. I am a big proponent of the adage "If it is not comfortable, one is not likely to continue doing it" So that is why I suggest setting a cant angle that is the most comfortable to the shooter, and each shooter is different. I just thought of something else. The cant can, and maybe should, be different for strong side vs weak side holsters depending on shooting style. As and example, I shoot Cowboy style, and not Gunfighter style. What that means is that I am always shooting with my strong hand. So when I draw my revolver from my weak side, I place my thumb on the revolver's top strap, and my middle finger on the front of the trigger guard, so that the grip is free and unobstructed. That way I can easily (and quickly) transfer the revolver from my weak hand to my strong hand for shooting. The wrong cant, or too severe of a cant, could make this type of draw uncomfortable or difficult. Just something else to be aware of when designing a cant into a SASS holster. -
Forward cant Western holster?
RemingtonSteel replied to dikman's topic in Gun Holsters, Rifle Slings and Knife Sheathes
Dikman, I am an active member of SASS, (I shoot with both "The California Rangers" and "The Outlaws"), and there is no good reason that I can think of not to have a cant. Whether it is a forward cant or rearward cant is purely shooter preference. The only factor that I can think of that would affect direction and amount of cant, is actual holster position in relation to the body. If you wear your holsters at the 8 and the 4 o'clock positions (4 o'clock like the Duke), then a forward cant might suit you. However, if you were to wear those same holsters at the 10 and 2 o'clock positions (like many in SASS shooters here in the US are doing), a forward cant may be uncomfortable, and a negative cant, or no cant might be better suited to these positions. When I made my last rig, I designed them with a 15 degree rearward cant to be worn at the 9 and 3 o'clock positions, as this was comfortable for me. I have since moved my holsters to the 10 and 2 o'clock positions (I can see both holsters in my periphery at the same time with a slight head tilt down) , and the rearward cant makes for a more comfortable draw, at least for me. So I would figure out, if you don't already know, where you want to carry your pistols, and then determine if you want a cant or not. You can even hold an unloaded single action revolver with your off hand in the position you want, and and try changing the angle to see what works for you. By the By , If I remember correctly, the max cant allowed by SASS is 30 degrees from vertical. -
M Size Bobbin Center Hole Inconsistency Question....
RemingtonSteel replied to Bmwmoa67707's topic in Leather Sewing Machines
Thanks Wizcrafts. I have a light bulb moment every now and then. Bert, I agree! When you pay good money for something, you want it to work right out of the box... period. I am wondering how much of this is an issue with the aftermarket bobbins, and how much of it is an issue with the bobbin winder spindles on the various clone machines, at least on the 441 clones anyway? I purchased a bobbin for Cobra Class 3, and 4 machines from Makers Leather Supply, as I was buying some templates from them anyway. They sell Cobra machines, so I assumed that the bobbins they sell are the Cobra OEM bobbins (could be wrong as the bobbin is steel, not aluminum), and that they fit the Cobra machines perfectly. Yet the center hole is slightly too large for a friction fit on my Ferdco. So either the bobbin is not OEM and not sized correctly for the Cobra's, or there is a difference in the diameter of the bobbin winder spindle between the various 441 clone machines on the market. If it is the latter, that could make it hard to find bobbins that fit correctly without trial and error. -
Sorry all, I meant to post this under Holsters, not Sewing Machines. Maybe a moderator will see this and move it accordingly. Agree with the above on belt sizing. This is not my first belt by any means, but I have always spaced holes 1”, for regular belts and western gun belts. I was wondering how close I could make them before making the belt weak. Spacing on center is one thing, but the spacing between the holes is another depending on the size of the hole as well as round vs oval. At some point if the amount of leather between the holes is too small, I would imagine that it become susceptible to tearing out over time.
-
I am going to make a CCW belt. I want to design it so that it can be worn for either IWB or OWB use. I know that on a standard belt, the holes are usually spaced 1" apart. In my opinion, it is more crucial in a CCW belt that the belt fit snugly, but not overly tight, I am thinking that more holes spaced closer together will give a finer degree of adjustment. I know that if the holes are too close, I run the risk of the leather between the holes tearing out. I also believe that the thickness of the leather plays into this calculation as well. I have a 12 oz (3/16" thick) belt strap that I am going to use. I want adjustability without compromising strength. Any recommendations on hole spacing?
-
cowboy 45 lc sa
RemingtonSteel replied to Frodo's topic in Gun Holsters, Rifle Slings and Knife Sheathes
Generous offer Dwight, in helping Frodo out, and that is one very nice rig you made to boot. One of these days, I got to try making a money belt style gun belt. Frodo, I would stay away from toy/cap guns, as they are highly unlikely to be to the correct dimensions of an original SA Colt 45 firearm. Blue guns on the other hand are made from molds that are created with the actual gun and are true to dimension. -
M Size Bobbin Center Hole Inconsistency Question....
RemingtonSteel replied to Bmwmoa67707's topic in Leather Sewing Machines
My Ferdco 2000 Pro came with two bobbins, so I purchased an extra one to try out, before buying several, and encountered this same problem. The replacement bobbin purchased was too large for a friction fit on the Bobbin Winder Spindle. The solution, at least for me was a simple fix, and cost no more than a No. 1 paper clip. I cut the end of the paper clip that goes through the small hole flush with the inside surface of the bobbin side wall, so that it would not interfere with, or damage the thread. This solution did not involve any modification to the Bobbin Winder Spindle , and actually works well, at least for me anyway.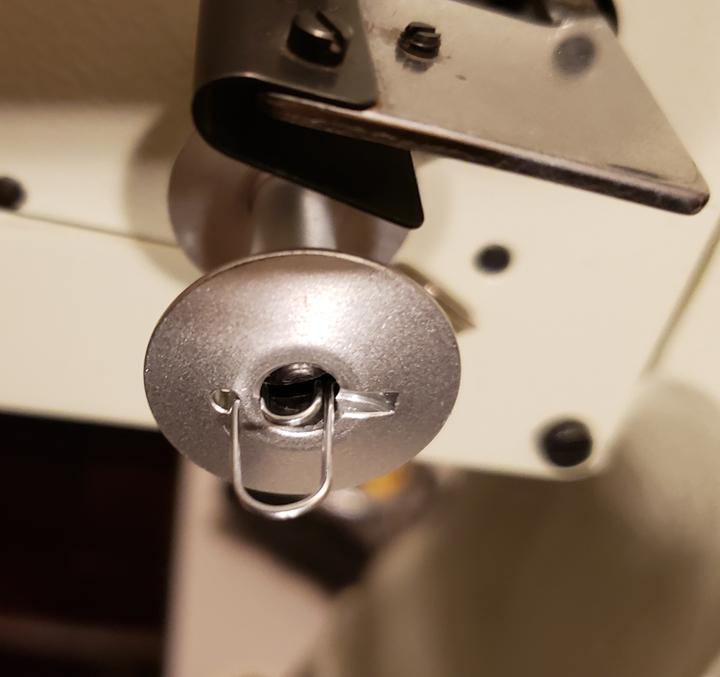
-
I wonder if the allergies are worse in part, because of all of the smoke in the air from the fires you guys have been having. Even if the smoke doesn't appear to be heavy near where you live, doesn't mean there aren't particles in the air. I hope you get some relief from the heat. We usually get at least one week a year where the temp here is 43+ degrees celsius, and it is not much fun to be outside, or worse yet, in a hot shed, so I feel your pain. Never really thought of it before, but I guess Australia and California are a lot alike... It can get pretty hot in areas during the summer months, and we seem to be on fire half the time.
-
I know the feeling. I think having a problem early on was the best thing that could have happened to me, as it forced me to learn how the machine works. Once I ran through UWE's video to re-time my machine, it ran smoother, and quieter. That is how I knew mine was dialed in. Except for the old clutch motor (which I am getting used to by the way) the machine purrs like a kitten. I am glad you have the kinks worked out of your machine. Now go sew something and give us a looksee.
-
@TDM, Wizcrafts makes some really good points, but I don't think he was saying you should stay away from Ferdco machines. I think he was promoting you to find out what the dealer will stand behind, as you should with any dealer. I would ask the dealer those questions that Wizcrafts poses, before I dismissed the idea totally. Just because Ferdco is no longer in business, does not mean that they are bad machines or a bad choice. I picked up a used Ferdco Pro 2000 several months back, as it was the only thing I could find that was in pick up distance, that allowed me to get a 16 inch arm 440 clone without paying shipping and tax. Not to mention that the price was right. I am extremely happy with the decision I made, as the machine sews great. Sure, I don't have dealer support, but I am very capable of fixing just about any type of machery, especially with the great help and information that I find here. You just need to weight the cost savings, against the value of local support, against your ability to work on machinery, and make your decision based on those factors. If the dealer is truly local, go down (take some veg tanned leather with you) and demo the machine, and get some questions answered. Once you have done that, then decide if you need to look elsewhere.
-
Yeah what dikman said. I have to say though, I really like the look. It's very clean looking with only the border creases and terminating seed stamp. The color and finish fits if perfectly. Looks like it came right out of Packing Iron, and reminds me of something that The Duke would have worn. I also like the long 7 hole tongue billet, makes for extra adjustment as one grows or shrinks. Once again my hat is off to you. Off topic: Josh, do you ever line your belts or holsters?
-
Bullet loop jig 44mag shown
RemingtonSteel replied to Samalan's topic in Gun Holsters, Rifle Slings and Knife Sheathes
Great Idea! Wish I had thought of that. The brass on the handle looks like the brass from a high base 12 gauge shotgun shell. Nice reuse of a spent shell if it is. Is the purpose of the spring to keep the tip off the leather until you are ready to make your mark? Do you also have a template to make your stitch marks on the leather used for the loops or do you just use a tape measure/ruler? Bottom line, nicely done. -
IWB Holster
RemingtonSteel replied to Hildebrand's topic in Gun Holsters, Rifle Slings and Knife Sheathes
My take FWIW, Just because a few people tried to make a wheel and failed, didn't mean that the wheel couldn't be made, as someone obviously thought they had a better idea and came up with the proper design. All kinds of products are constantly being improved upon by people thinking they have a better design than the original, and disregard those that say it can't be done. Hildebrand, you have a better idea of what you you want to accomplish than anyone else here. My recommendation is to get some thick card stock and work out a template of what you think the design should be. If you are on to something you will know quickly, and you can refine the cardstock template until your confident enough to make a prototype out of leather. If you are not on to something, the only thing you've lost is a little time and the cost of the cardstock, but you will still have gained from the knowledge you learn while experimenting. My two cents worth. -
Don’t be so quick to write off used sewing machines. First let me state that I am a new user of leather sewing machines, but I am also a firm believer in buying the best of anything that you can afford. If you can afford a new machine, get one for all of the reasons stated above. If you would like something better than you can afford, then either wait until you can afford the better machine, or look for a used one in good condition. Personally, I like the best (for my purposes), but didn’t want to spend the money it costs for a new Juki 441 clone so I found a used one with little hours of use for about half the cost of a new one shipped to my door. Like you, I do this more as a hobby than a business so I couldn’t justify the cost of a new one. A week into owning it, I had what sounds like the exact same problem you described above. But with the help of the community (see post below) I was able to get back up and running in 24 hours. The experience (although a little scary, because I thought I had just created an expensive boat anchor), forced me to learn how the machine works, and retime it myself. The machine now runs better than it did when I first bought it. If I could offer one piece of advise to someone who purchases a used machine, it would be this: “When taking the time to clean and lubricate your new to you machine, make sure to check to see that all of the screws are tight, in the event some may have come loose over the years, like they had on mine”. If I had taken that step, I may not have had a problem in the first place; but then again I am grateful for all of the knowledge it force me to gain!
-
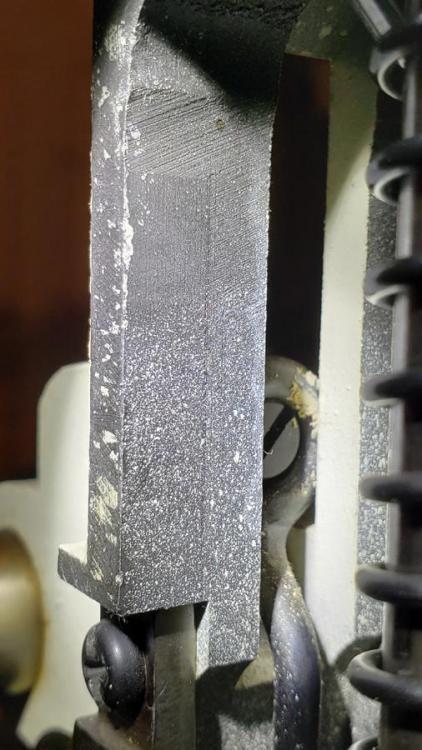
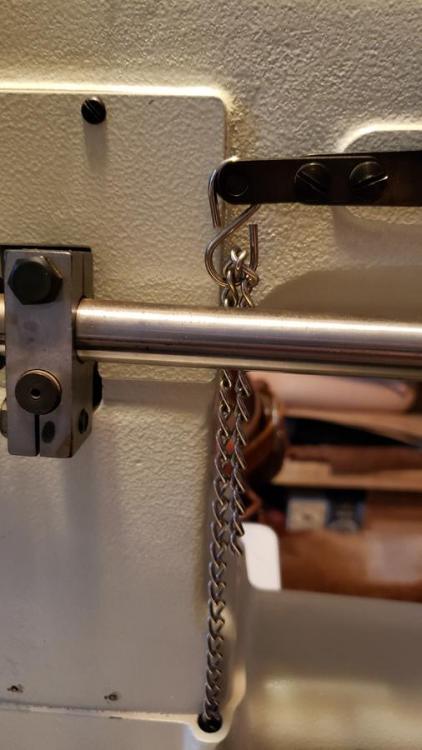
FWIW Ferdco Pro 2000: From the outside. From the inside I could see how having the loop hanging on the post on the other side of the bracket might cause binding, as that would make sense. What doesn't make sense is that it only binds when using the foot pedal, not when manipulating it with your hand. So I have to ask, do you have enough slack taken out of the foot pedal chain to allow the full travel of the foot pedal and thereby the full travel of the presser foot assembly? I know when I set mine up, I had to take up more slack on the chain to get the full travel on the presser foot lifter assembly. Have you tried shortening the chain by several links and see if that helps the situation?

-
Couldn’t agree more. I thought I turned my new Ferdco 2000 into an expensive boat anchor. Turns out that the two large allen screws holding the eccentric cam in place on the shaft were loose and the only thing really holding it in place was the small set screw. Timming got thrown off about 180 degrees when I tried to sew 5/8 inch of leather. Uwe’s templates and video got me back up and running in no time. Now the machines runs even better than it did, and I have a deeper understanding of how my machine works. In the future I will not fear expensive boat anchors again.
-
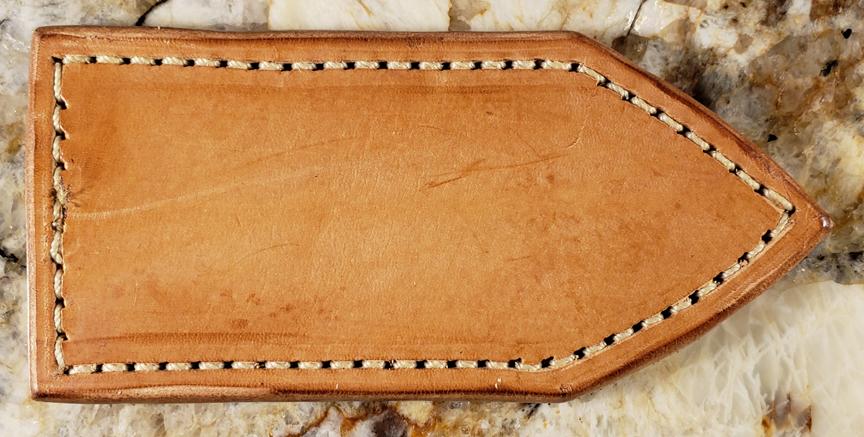
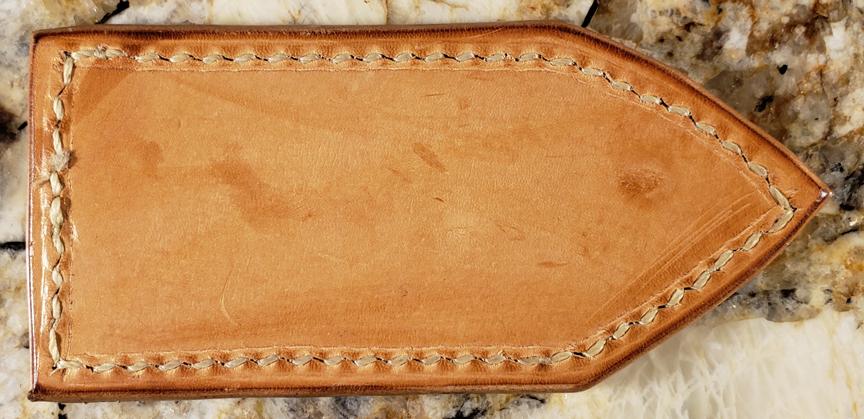
Tooled Make Up Bag
RemingtonSteel replied to Tim Schroeder's topic in Purses, Wallets, Belts and Miscellaneous Pocket Items
Boy I hope my wife never sees this or she'll want me to make one for her, and I don't think I could live up to these standards! Is there a liner and or divider in the case? -
Sissys new harness
RemingtonSteel replied to chuck123wapati's topic in Collars, Cuffs, Leashes and Leads
She looks damn proud to be wearing it! Nice job... Love the coloring. Did you use an existing pattern, or did you create you own? -
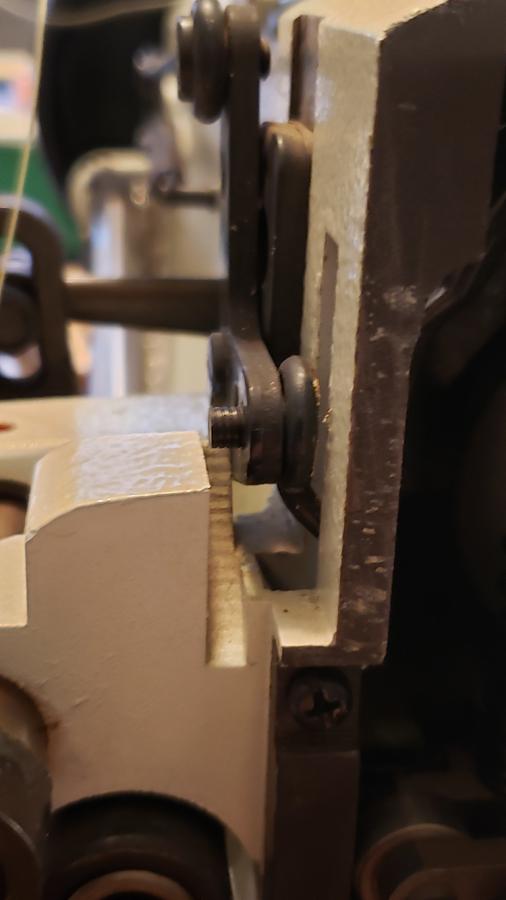
I have been playing around with the foot tension on my machine trying to get it adjusted correctly. Currently the presser spring regulator is backed off and is about 41mm or 1 5/8 inch. If I back it out even more, there will not be enough threads left on the regulator to hold it securely. I just sewed a mock billet tip made of two layers of 7/8 oz + veg tan at over 1/4" thick. Although the presser feet are still leaving marks on the top, they are minimal and I can probably rub them out some if needed. The bottom on the other hand is a different story. I have the narrow flat throat plate installed, and the leather is being pressed into the throat creating a raised/mounded stitch line. See photos below: TOP Bottom The presser feet are the original Ferdoc presser feet from 2000, and have very squared off edges. The grove edges in the throat plate are also pretty sharp. Would slightly rounding off the edges of both and polishing help with either of these issues? I am actually surprised that the piece being sewn is not lifting up off the throat plate on the needle upstroke, given the feet tension is backed off so far. The unit did not come with any feed dogs or throat plates for them. If I purchased a set, would a smooth feed dog help with the issue I am experiencing on the bottom of the piece, or would this still be caused by the needle opening in the feed dog? Would increasing the Upper feed connection rod from the middle 6 mm foot height position to the 8 mm position take any more pressure off the feet? I am open to any other suggestions to help eliminate or minimize these problems.
-
Any reviews on Eagle EA-750 servo?
RemingtonSteel replied to katit's topic in Leather Sewing Machines
Definitely out of China, but like most things form China, there are some really decent quality products, and there are __________ products. Some come out of the same factory as name brand quality products, just under a different brand, and some are just cheap knockoffs from a different factory. Then there are the forgery products that pretend to be the name brand quality product but are the very cheapest of low quality knockoffs. You never really know, so some first hand knowledge can be very helpful. I know that I should probably buy one form one of our site's sponsors so that I know I am getting a quality product that they will stand behind and support. I just happened to see this thread, while doing my research, and was curious what the outcome was. -
Any reviews on Eagle EA-750 servo?
RemingtonSteel replied to katit's topic in Leather Sewing Machines
@katit , Just wondering if you ended up buying this motor. If so, what are your thoughts on it? What machine are you using it on? Do you use a speed reducer with it? what is the thickest veg tanned leather you have sewn with it, if any?