RemingtonSteel
-
Posts
183 -
Joined
-
Last visited
Content Type
Profiles
Forums
Events
Blogs
Gallery
Store
Everything posted by RemingtonSteel
-
Needing suggestions! SMALL TOOLING STAMPS
RemingtonSteel replied to Sanch's topic in Leatherwork Conversation
I took a 2 day figure carving class from Jim Linnell at my local Tandy last August. Here are the figure carving tools he recommends: "For the Figure Carving part of the class (if you don’t have these tools and don’t want to purchase new ones – using something that is close to these will work, too.):" #6896-00 - F896 #6895-00 - F895 #6891-00 - F891 #6890-00 - F890 #6902-00 - F902 #6941-00 - F941 #6976-00 - F976 #6703-00 - P703 #6900-00 - F900 #6899-00 - F899 #6898-00 - F898 #6098-00 - A98 These are the catalog numbers, followed by the actual stamp number. I hope this helps. By the way, here is my feeble attempt from the class. It was my first time figure carving, and it is apparent, I need a lot more practice with the swivel knife.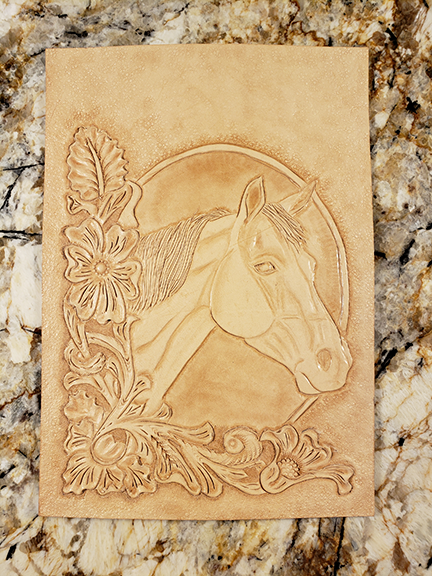
-
Thank you Josh!
-
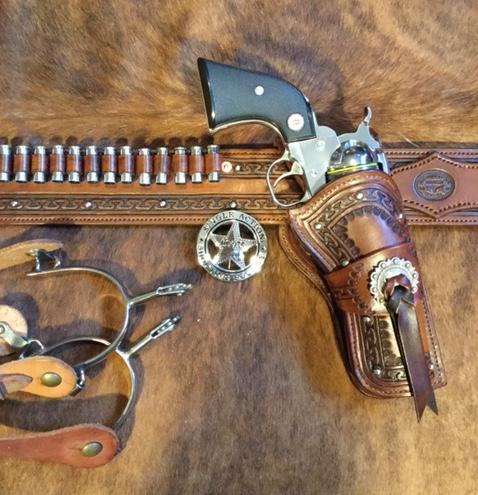
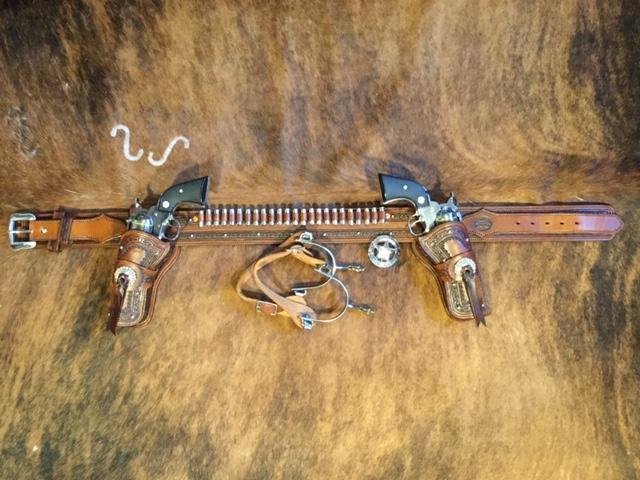
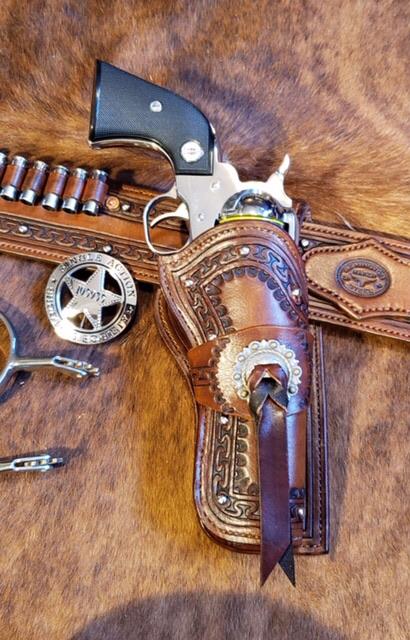
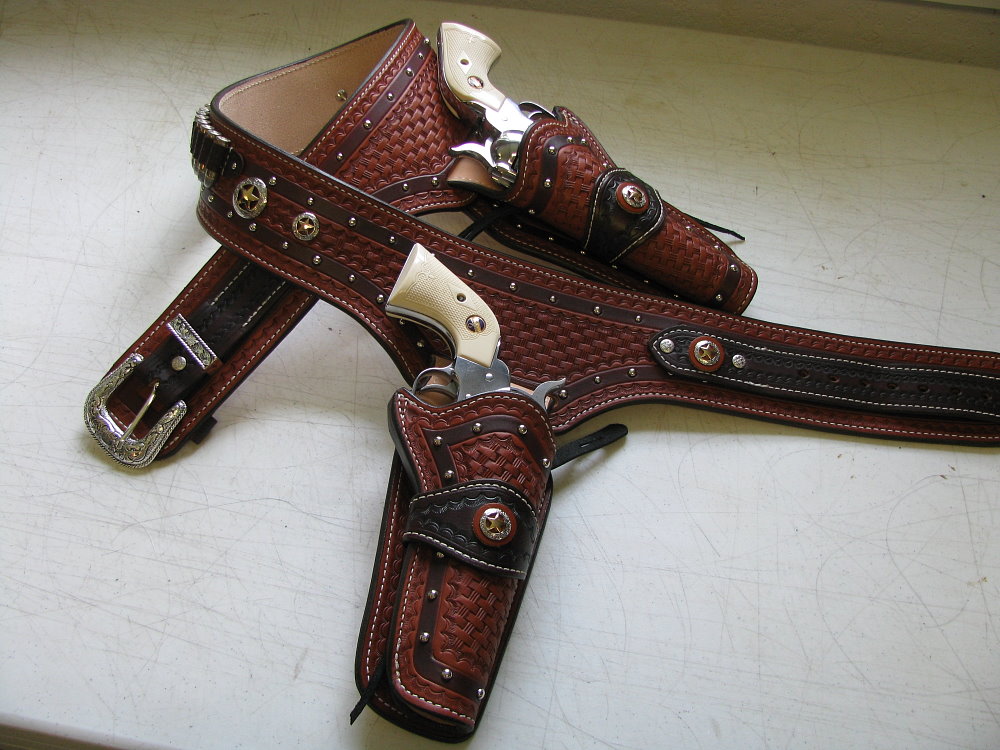
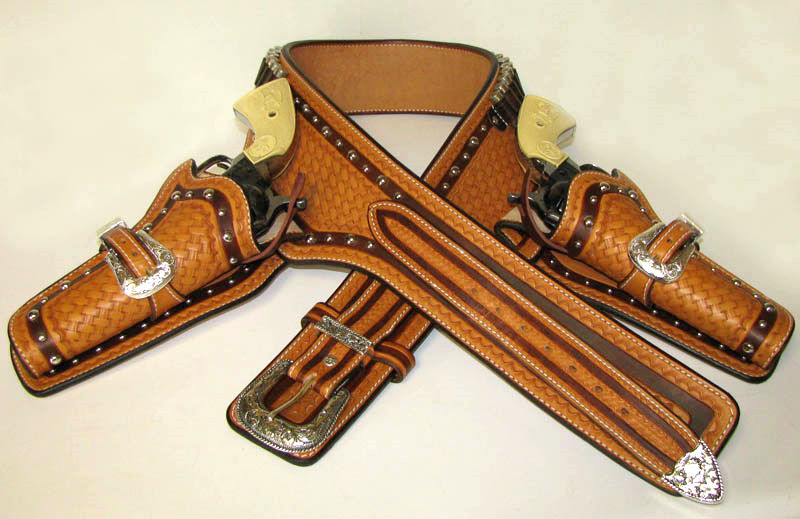
Josh, I recently got into Cowboy Action Shooting and wanted to make my own 2 gun rig. I poured through Pinterest for months pinning images of western holsters that I liked. I finally settled on one as the base for my inspiration. Having just completed the rig this last weekend, I posted my own photo on Pinterest. Not wanting to take credit for a design, that took most of the design elements from someone elses work, I decided to see if I could track down who created the holster so that I might give them credit. Well my search took me to this thread and you. I had no idea that we would both be members on this site. I hope you consider the old adage "Intimation is the highest form of flattery" as a true one, and are not offended by my similar but not exact copy of your work. I modified the shape of the holster itself to be more advantages to CAS. I also went with a riveted style loop as opposed to the Mexian loop. Here is my un-carved version you your Carved/San Carlos Rig. I really loved the work that you did on the holster and belt, (and I think similar ones) that it is the one that I kept coming back to when looking at rigs. Your work is beautiful and I admire it greatly. Best regards Steve
-
Noobleather, No time like the present. I have to say that it probably took me more time to decide on the style and look that I wanted, than it did to actually make the rig. Spent hours on Pintrest looking at different western holsters. Now its time to go shooting... Then maybe some spur straps. Wish I could edit the title, noticed I missed a T in belt.
-
Sheridan tote bag
RemingtonSteel replied to Rolandranch's topic in Purses, Wallets, Belts and Miscellaneous Pocket Items
So young... Yet so much talent. keep up the great work! -
This is my first attempt at a western style gun belt and two holster set. I shoot cowboy action shooting and wanted to make my own rig. Both the belt and holster are lined, and both layers are made from 7/8 oz. veg taned leather. I followd Jim Simmons tutorial on “Making the Cowboy Holster “ that I found on ths site - Thanks Jim! Lots of fun, but lots of work too. Plenty of mistakes for the first time,, but thats how you learn. If I am going to more of these, I am going to have to get a sewing machine!!!
-
Thanks guys! Just what I was thinking, but I just wasn’t sure if I was missing a compelling reason not to. I have a small leather spliter and will take off at least half of the thickness of each piece of the buckle billet where it folds back under the buckle to reduce bulk there. Dikman, I thought about the same belt style for the gun belt, but I think the Ranger style will keep belt from lateral racking at the buckle from the weight of two single action revolvers. Might not be a huge difference, but when making your own, why not go for the best!
-
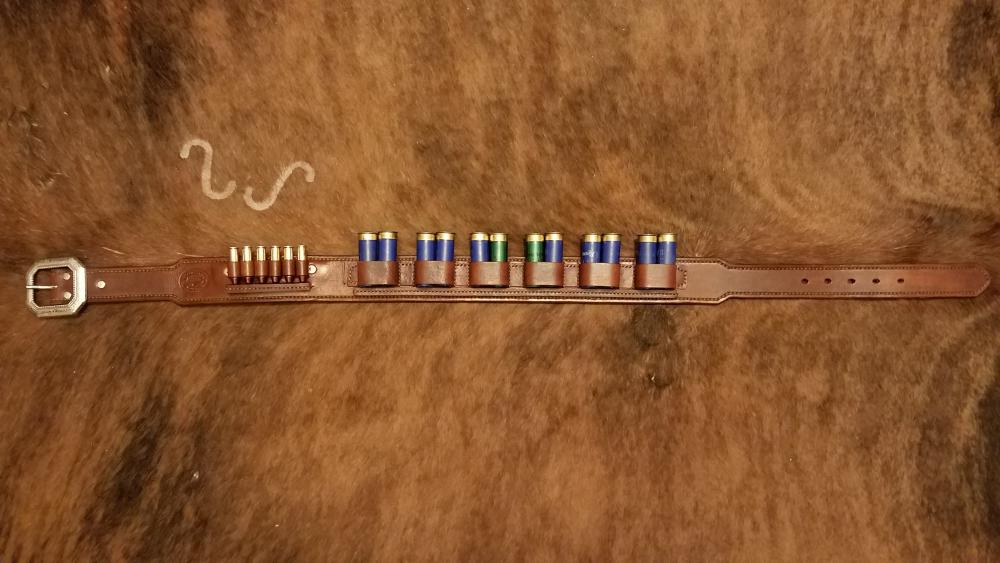
l followed Jim Simmons’ tutorial on making a Plains Gun Belt, but adopted it to be a shell belt for 6 pairs of 12 gauge shotgun shells and 6 .38 cal cartridges for Cowboy Action Shooting. The other alteration is that the belt is lined - made from two pieces of 7/8 oz. leather. Now I am making a pair of lined holsters and a Ranger style gun belt to go along with it. The belt will also be lined (made from 2 layers of 7/8 oz leather). My question is: Should the billets (both buckle and tongue) be made from 2 layers as well? I think yes for both strength and consistency, but is there a strong arguement for not doing so? Thanks, any input is welcome!
-
NewWork Belt
RemingtonSteel replied to Tim Schroeder's topic in Purses, Wallets, Belts and Miscellaneous Pocket Items
I'll be happy when my front side cuts look as good as your back side cuts. Beautiful work, and a belt I would be proud to wear. -
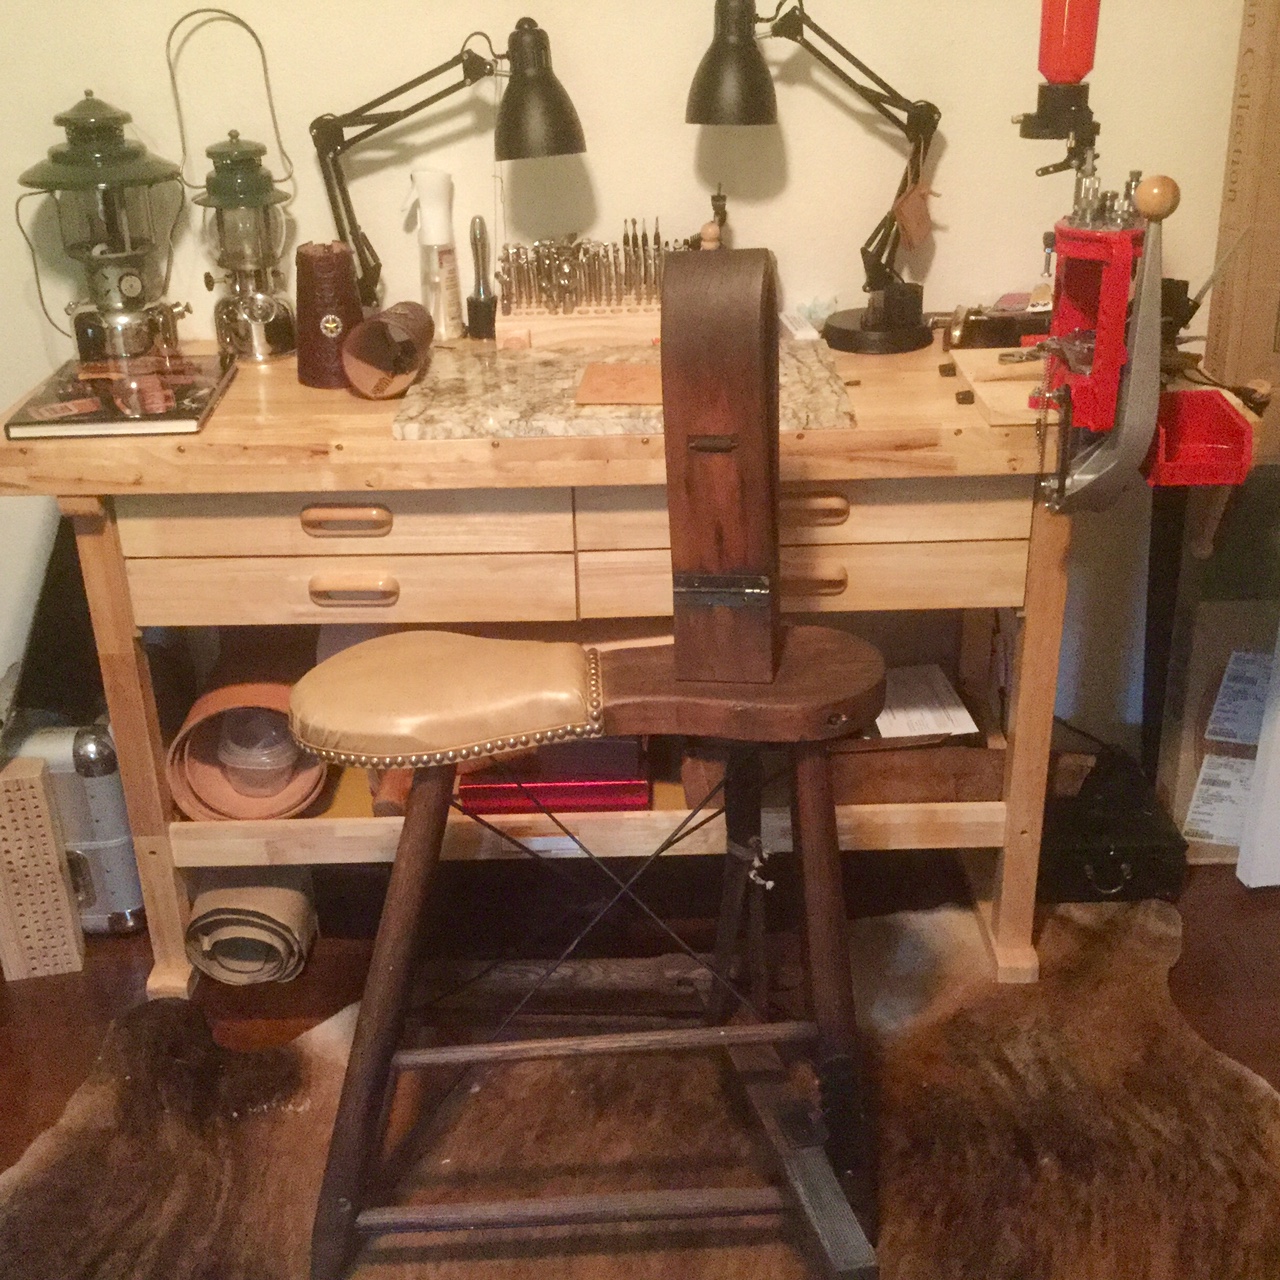
Been rebuilding old Coleman lanters for awhile, and the old pump cups are made from leather. we just soak them in neatsfoot oil for a bit, and the old stiff leather is like new again. When I found my stitching horse, the leather was also dried and cracked. Didn't soak it in neatsfoot oil, but applied several liberal coats. Althogh still cracked, the leather is no longer stiff, and I am not afraid that it is going to snap when applying pressure with the foot pedal. +1 for pounding small dowels into the stripped wood holes and using the original screws. Keep your stitching horse as original as you can for as long as you can. But most of all enjoy! FWIW, a photo of mine. The end of the strap forms a loop with a metal rod throgh the loop which then rests in grooves in the jaw. I think this was done by a previous owner. I believe the original design had the strap nailed to the jaw as I can see some holes where the nails would have been. .

-
Hey, it's me— a new member, why don't you click this and say hi!
RemingtonSteel replied to JW's topic in Member Gallery
JW, Nice work. For me, basket-weaves are not as easy as they look. Keeping the lines straight in both directions of the weave can be tricky, but you did a wonderful job of keeping it all lined up. Only criticism that I have, would be directed near the bottom of the holster. It looks like the basket-wave stamp was either faded out too soon, or that you lost some depth to your impressions when you wet molded the holster near the end of the barrel, as the camo stamp does not appear to be as deep there either. Regardless, I really like the deep mahogany color on the holster, and the stitching is nice and clean. I'd be proud to have made it. If you really want to make a career out of leather working, I would encourage you to do it right out of college. Take it from someone who is a bit older, it is hard to make a career change once you have bills, a mortgage payment and other obligations that make switching careers later in life a riskier proposition. So I say go for it! -
My First Project
RemingtonSteel replied to RemingtonSteel's topic in Collars, Cuffs, Leashes and Leads
Thanks all for the kind words. I do need to practice more with my swivel knife as my corners could be better. I also have to learn how to place my border stamp close to my border cuts without stamping into the cut. I did learn a lot though with this project, and a few of the things I learned are: Good lighting! Maybe it's just me and my getting slightly older eyes, but there can never be too much lighting, as it is essential to accurately follow tracing lines when cutting with a swivel knife, and for accurate stamp placement/alignment. I am going to purchase two swing arm lamps to mount one on each end of my workbench to help with this. You Need to be aware of where your no stamp areas are with each stamp placement. I was too concerned about lining up one side of my basket-weave stamp, that I didn't notice that the other side was protruding into my makers mark border. Keep you fingernails cut as short as possible. I noticed some marks in the unstamped leather near my serpentine border after I finished stamping. It took me awhile to figure out that they were caused by my fingernails digging into the leather when I was firmly holding the stamp getting ready to strike it. Although my fingernails were not long, they could have been shorter to avoid this problem. Don't be too worried about perfection, and just have fun. -
My First Project
RemingtonSteel replied to RemingtonSteel's topic in Collars, Cuffs, Leashes and Leads
Thanks Latigo. I hope your home was spared. My and my wife's thoughts and prays are with everyone who lives in the Santa Rosa area. Stay Safe. -
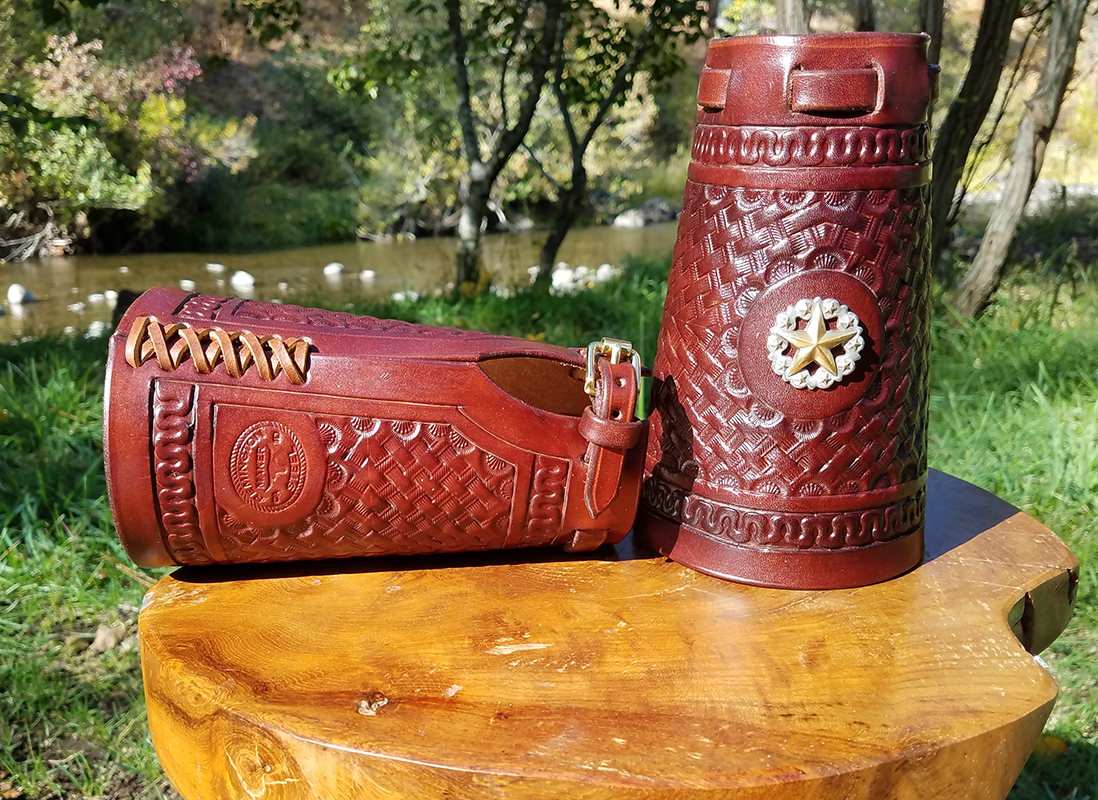
So I finally took the plunge and created my first (well first one since Jr. High 43 years ago) leather project, a pair of cowboy cuffs. Although I am fairly pleased with the way they turned out, they are far from what I expected from myself. I probably shouldn't be too critical of myself as I didn't start with something simple, but I had to do a four quadrant basketweave as well as a serpentine border. Both of which were much harder than I thought they would be. I am the one of those guys that can do just about anything and do it well, so I am somewhat humbled by this experience, but it has given me a whole new appreciation for those you you who are expert leather craftsman!

-
Satchel
RemingtonSteel replied to kncorey's topic in Purses, Wallets, Belts and Miscellaneous Pocket Items
Great Job, Love the look and the leather. Do we even want to know how many hours you have in just the hand stitching alone? -
I am having a little difficulty pulling the eye of a size 2 John James harness needle through 14/15 oz of leather, and thinking of using a smaller needle. 1) Ritza supposedly recommends a size 1 harness for their 1.0 mm thread and I am using a size 2 harness needle. So my main questions is: Are there any drawbacks/problems associated with using a smaller needle than recommended, or is it just a matter of if you can get the thread through the eye of the needle you are good to go? 2) Looking at John James website, they list the following sizes for harness needles: Size 1 55mm length x 1.02mm diameter Size 2 55mm length x 1.02mm diameter Size 3 55mm length x 1.02mm diameter Size 4 48mm length x 0.86mm diameter Size 18 (1/0) 57mm length x 1.09mm diameter Size 17 (2/0) 60mm length x 1.42mm diameter Size 16 (3/0) 62mm length x 1.63mm diameter I am wondering since the length and diameter of the size 1, 2, and 3 needles are exactly the same, could the difference between them be the size of the eye (size 3 having a smaller eye than size 2)? 3) Lastly, Is anyone using a size 3 or 4 needle with Ritza 25 1.0 mm thread?
-
I agreed with Mattsbagger. Tiger works well for me. I use the 1.0 mm thread with a John James size 2 harness needle. Even though it is waxed, you don't get that waxy buildup when hand stitching. I also sung up my stitches pretty tight and haven't broken the thread yet. If you aren't ready to buy a 500 meter spool, you can get 25 meter mini spools (29.5 yards) for $6.99. Rock Mountain Leather Supply sells them on amazon in 16 colors. https://www.amazon.com/1-0mm-Ritza-Tiger-Thread-Polyester/dp/B01MS5HKS3/ref=sr_1_3?ie=UTF8&qid=1504885683&sr=8-3&keywords=tiger+thread. It is a little more than your paying now, but cheap enough to afford to give it a try, and you can buy multiple colors without breaking the bank. If you like it, you could then buy the 500 meter spools and really save. EDIT: Forgot to mention they also sell 0.8 mm and 0.6 mm threads as well
-
In other photos of this holster in the Journal, the dark border doesn't look recessed as it does in this photo. I found Gene's website (he operates under Indian Creek Leather) where he has photos of additional holsters that he makes. Here is another version of the holster in darker colors. It looks like the border is created by two parallel creases or cuts, and is flush with the rest of the leather. Also the color of the billets and holster loops is darker than the border. Would you still concur that the body is stained first and then the border is stained darker by using a brush?
-
Stohlman Holster
RemingtonSteel replied to CowboyCurry's topic in Gun Holsters, Rifle Slings and Knife Sheathes
Cowboy, Thanks for these! I used Photoshop to compile these into one pdf, and re-scaled it to what I believe is close to actual size. The pdf fits nicely and will print on an 11x17 inch sheet of paper. Craftaid-2819.pdf -
I came across an older issue of the Leather Crafters and Saddlers Journal (Mar/Apr 2009), where Gene Weishuhn had written an article titled "Make Your Own B Western Holster". It is a very nicely written article/tutorial, but he neglects to mention how he does the dying and finishing of the rig. If you look closely, the holster lining is more of a natural color and the outside is what looks to be Saddle Tan. This leads me to believe that he dye's the holster pieces separately before gluing and assembly, Is that about right? My second question though, is the one that I would really like answered. How is the darker boarder done? Would the whole piece be dyed Saddle Tan, and then once allowed to dry do you come back with a brush and hand dye the boarder the darker color? Or would you dye the holster minus the boarder Saddle Tan, and then come back and dye the border the dark brown? I think it is a cool effect, but would be concerned that my hand would not be steady enough to get the clean lines between the two different dye colors that he has achieved.
-
Stohlman Holster
RemingtonSteel replied to CowboyCurry's topic in Gun Holsters, Rifle Slings and Knife Sheathes
CowboyCurry, Very nice work. Really like the way it turned out. I see you took the basic pattern and made it your own with some cleaver deviations. I wouldn't mind having a copy of that craftaid as well. -
Even better!
-
Wow, looks fantastic. I do see what you mean by the streaking. Now I am no expert, as a matter of fact far from it, but I have done a lot of research. It is my understanding that water based dyes have that tendency. Many leather workers that I respect, recommend Fiebing's Pro Dye, (which is an alcohol based dye) as it tends to give you more of an even coat. Kind of a bummer though, for those living in California, as it has to high of VOCs to be allowed in the state. Also the quality of the leather can affect how it accepts different types of dyes. Several experts also recommend that you dip your leather into the dye to help get an even coat. What are you making there? kind of looks like a leather sword scabbard. Regardless, you should be proud of your work for only being at it for two weeks! Love the owl... great job on the eyes and feathers.
-
Dragonfly, Turned out really nice! I'd be nervous when using new dyes or finishes for the first time. I plan on always experimenting with some carved scrap leather to make sure I can get the right color, evenness and overall look, before I applied it to a finished project. It's great that you were able to save your piece.
-
A few of the top holster makers for Cowboy Action Shooting, such as Mernickle ( http://www.mernickleholsters.com/qc/bm_qc.html ) use double 6/7oz (same as their holsters) for the belt leather and then add an additional lining of sued. The reason: "Suede lining secures the belt to the body." which helps it from slipping down on the hips or twisting when moving from station to station on a stage. Keep in mind that this is for competition shooting, and that CAS rigs are two gun rigs i.e. two strong side holsters, or one strong side holster and a cross draw holster.