-
Posts
183 -
Joined
-
Last visited
Content Type
Profiles
Forums
Events
Blogs
Gallery
Everything posted by RemingtonSteel
-
Gregg of Keystone Sewing Machine
RemingtonSteel replied to CowboyBob's topic in Leather Sewing Machines
Speechless. He will be missed. -

My second padded dog collar for a customer
RemingtonSteel replied to benlilly1's topic in Collars, Cuffs, Leashes and Leads
My compliments on a job very well done! I like the burnished look for the lettering... very natural, but really stands out. The font used is perfect, but I have to ask, is that a stamp set, and if so where did you find it? Doesn't look like any Tandy/Midas set that I have seen. All in all a very classy dog collar I would buy if my dog's name was Mavis.. -

Latest Holster
RemingtonSteel replied to JWheeler331's topic in Gun Holsters, Rifle Slings and Knife Sheathes
Yeah, but not a single Oak Leaf on the ground or in the carving. Seriously though, that is a nice California Pattern holster. The carving reminds me a little of one on a Mexican Loop holster on page 112 of Packing Iron. You got me inspired, as I have a Remington 1858 New Model Army just itching for one of these. -

New holster rig
RemingtonSteel replied to corkscrew's topic in Gun Holsters, Rifle Slings and Knife Sheathes
Corkskrew, Compliments on a job well done from a west coast SASS member and leather worker. I really like the 3D printed conchos, and I agree, a clever logo for the alias. Keep them coming... the new members and the rigs. -

Kobe 1341 not bringing up knots.
RemingtonSteel replied to pattysoup's topic in Leather Sewing Machines
Although my fellow colleagues above know far more about various sewing machines than I ever will, I have a question I would like to interject. I could be way off base here, but are you sure you are adjusting your tension discs and not the switch length dial? The reason I ask is, when looking at your photos, I see that the stitch length is changing not the tension? Just an observation. -
Puuh....my school english is too lousy to catch up in full what You wrote. Or is it Your PC ??;)) Can You say it in other words please ? I think what chrisash is trying to say is that the Eastern countries like China, are not know for providing service, parts, or expertise. You should be prepared to provide/obtain those on your own. So, it may be worthwhile to spend the extra money and buy a machine locally as you will get those with a local dealer. I think we are all eager to know what you decide to do. If you import the machine, keep us posted as we would all like to hear how the process goes, and the condition of the machine when it arrives. Oh, and photos are always most welcome. Good Luck.
-

Tandy Cowboy Outlaw Sewing Machine.
RemingtonSteel replied to JayEhl's topic in Leather Sewing Machines
Jay, I was looking at the Tippman Boss and the Cowboy Outlaw. People either love or hate the Boss, and I don't think the Outlaw has been around long enough to find enough people that have had/have one to get a good sense of its functionality, reliability, and stitching quality. I believe that Cowboy, took a hard look at the Boss, and took into account all of its strengths and weaknesses, and tried to minimize/eliminate the weaknesses to produce a better machine. Whether or not Cowboy achieved this or not, I can't say, but I personally was leaning toward the Outlaw as it appears to be really well made, with a similar shuttle/bobbin assembly to that of the 441 clones. Here is the irony of it all... I took so much time researching and agonizing over which one to buy in addition to the desire to have a powered machine, I ended up saving even more money over that time frame that I could put toward a used powered machine. Maybe I can be of a little more assistance here. As far as the clones go, if you stick with Artisan, Cobra, Cowboy, Ferdco, SewPro, or TechSew (alphabetical order, no preference), you won't go wrong. All have clones that are based on tried-and-true name brand machines like the Juki 441, or other models. They have been around for years and are used by many members of this forum. From what you have stated above, it sounds like you are going to mainly be sewing veg tanned leather. So, start by narrowing down your search by determining 3 main spec that your sewing machine will require in order to sew your projects, and the are: Presser Foot Lift, Sewing Thickness, and Arm Length. Presser Foot Lift and Sewing Thickness (essentially, but not the same) will be determined by the thickest piece of assembleed leather that you intend to sew. Arm length is determined by the largest pieces you intend to sew and how easily it can be maneuver in the space the machine's arm length offers. Although all of the clone manufacturers may offer machines that look the same such as a 441 clone with a 9" arm, you might find that if you look at the specs, they may have different presser foot lift and sewing thickness limitations. If buying new, you would then narrow down your search to those manufacturers that have a machine that meets your requirements, and then it may just come down to who offers the best price, or service, or be local enough for you to pick up and save shipping on, etc. However if buying used, those don't factor in, and you end up just getting whatever brand becomes available near you, when you are ready to pull the trigger on a purchase. In the meantime, keep a eye out on Craigslist and other classified sites, and don't narrow your search in the keywords you choose or the distance from your home. I drove 2 1/2 hours each way to pick up my machine, but it was well worth it. Good Luck. -

Chest rig for a Glock 19
RemingtonSteel replied to Hags's topic in Gun Holsters, Rifle Slings and Knife Sheathes
@Hags Your making some pretty nice chest rigs for Glocks. Never made a checst rig before, but after looking your last several post about them, I might just have to try making me one. I gotta ask though, for the chest strap, whay nylon and not leather? Is it purely for better adjustability? Also on left O Ring (as your wearing it) there is a nylon strap and a leather strap, does the leather strap have a belt loop on the end to anchor the reverse draw side? Anyway, thanks for sharing and nice work! -

Tandy Cowboy Outlaw Sewing Machine.
RemingtonSteel replied to JayEhl's topic in Leather Sewing Machines
Jay, this is not as simple as this sounds. It is not the size ot the product that will be the determining factor in the type of machine you buy, but rather the thickness of the leather of your projects. While wallets and knife sheaths can both be thought of as small projects, they are very different. With a wallet. the combined thickness of all of your layers may be 1/8 inch or less. You would most likely want thinner thread with smaller needle/holes. The sheath will consist of the top and bottom pieces as well as a welt. If you are using 8 oz of veg tanned leather (1/8" thick) with 3 layers, that is 3/8" total thickness. It will require a much thicker needle (and more power) to punch through that much leather as well as thicker thread for strength. which creates bigger holes which might not look so good on a wallet. Machines designed for lighter leather products may not have the power or presser foot lift to sew through thicker leather projects, while machines capable of sewing through 3/4" veg tanned leather such as the 441 clones, will generally not work well with thinner needles and threads needed for lighter weight leather products. We all want one machine that will do it all well, but I have yet to see that machine. Your situation is not unique. I, like many here, was in the same boat as you not that long ago. My suggestion is to first figure out what you really want to be making with leather, or what your highest priority for a stitcher is, and use that as a guideline. For me, I don't mind hand stitching that much, as I kind of find it relaxing, but doing belts can get a little monotonous. So, I ended up with a 441 clone with a 16” arm (bought used from craigs list for $300 more than the Outlaw) to sew the heaver weight and longer projects like holsters and belts. Journal covers and lighter weight projects still get hand sewn, so it is the best of both worlds for me. I did look at the Outlaw, and although sold by Tandy, it is not made by them. It is made/imported by HighTex which is the maker/importer of the Cowboy line of industrial/leather stitchers, as sold by our sponsor Cowboy Bob of Toledo Industrial Sewing Machines. Like any hand stitcher, you would want to mount it to a solid work surface. Here is a video by HighTex on the Outlaw, mounted to a rolling tool chest, which might not be the best installation method for production use: If you still like the idea of a portable stitcher, see if the Tandy nearest to you has both the Outlaw and the Tippman Boss. If they do take the drive and compare them both side by side. Good luck and have fun with whatever you decide. -

FESM-550S w/ reducer vs SP-1100-NPFL
RemingtonSteel replied to hanns's topic in Leather Sewing Machines
Looking at Keystone's website, it looks like the Juki 1541S with the SP-1100-NPFL lists for about $550 more than the 1541S with the FESM-550S motor. Get the one with the FESM-550S, and if you are still concerned about torque, get a speed reducer for $180 dollars. You will still be approx $370 ahead of the game, and you can spend that money on other accessories that will make more of a difference, unless you really want the needle positioner. I was looking at both motors, and I just added the 550S to my 441 clone (already had a speed reduce with a clutch motor), and it will punch through 4 layers of 20 year old 11oz leather (that’s almost a full 3/4 inch thick), at a snail’s pace. That is slightly more than twice the thickness of what 1541S is capable of sewing through. Oh, and by the way, turning up the speed dial to its max will run this machine far faster than I would be comfortable sewing veg tanned leather at, so a speed reducer does not translate to too slow a top end speed with this motor. -
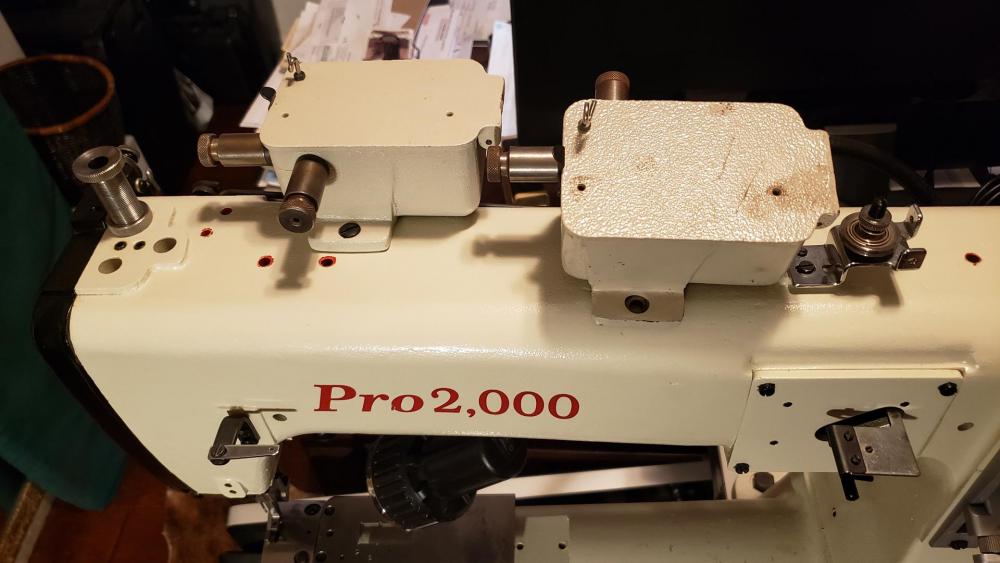
I have the original Ferdco Pro 2000 Owner’s Manual that came with the sewing machine and decided to read it from front to back. The only mention in the entire manual on the wax pot is what is listed below and is found in the accessories list. So, I can only conclude that the metal cylinders coming off the front and left side of the wax/lube pot are indeed wipers to remove excess wax/lube from the thread as it passes through the pot. The one on the left is obviously for sewing, and the one on the front is for winding the bobbin. Unfortunately, this still does not explain why the second one has a stripper coming off the back and not the front. The only thing I can think of is that this was an error in manufacturing. When the original owner installed it and noted the stripper was on the wrong side, Ferdco sent him a replacement with the correct orientation, although the spare with the wrong orientation is the only one that looks used.
-

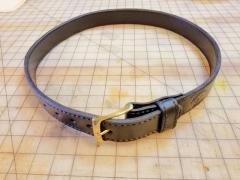
ted scott belt small.jpg
RemingtonSteel commented on Dwight's gallery image in Gallery- Our Leatherwork
-
-

Another knife sheath
RemingtonSteel replied to WyattEarp's topic in Gun Holsters, Rifle Slings and Knife Sheathes
WyattEarp, very nice. I am sure your friend just loves it, I know I would. Good Job. One question "WatherStain" ... Did you mean water stain? If so what brand are you using? -
Yes, most likely you can easily mount one on a pedestal stand. However I have an older 441 clone on a table and wanted to put it on a pedestal style table/stand as well. However when I priced them out, I almost choked. Too cost prohibitive for me.
-
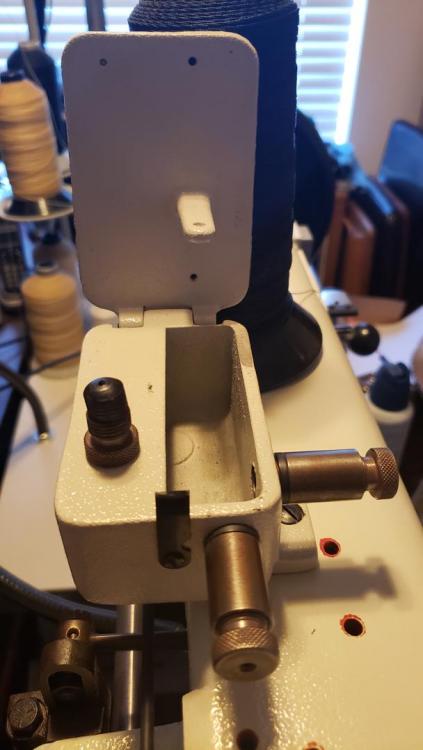
Lots of views but no replies. Are people as stumped as I am? I was able to finally find a photo of how these are threaded, but it still leaves questions. From what I found, looking at the photo below, the thread comes off the spool on the spool stand through the hole at the bottom of the lid, through the hole in the stem that protrudes from down from the lid and then out the hole at the top of the lid. From there it goes through the eyelet on the top of the lid and then is threaded normally. So what are the machined metal cylinders that protrude from the front and the side of the pot? I unscrewed the cap from one of the pots and placed it in the photo. You can see a rubber cone shaped grommet on the part the sits inside of the cylinder. I would think that these are rubber wipers and that the thread should come out of these instead. Once again one for sewing, and one for lubing your bobbin thread. If that is the case, why does the second pot (one on the right in the first photo above) have a cylinder that comes off the back of the pot and not the front? Surely someone has to know.
-
Couldn't agree more. Welcome back. I have not been able to put in as much time as I have wanted this last year as well, so I feel your pain. I find the pro dyes work very well for me, but I live in California, and you cannot buy them here anymore. I must buy them when I am out of state if I want to use them.
-

Nylon or polyester thread
RemingtonSteel replied to ps0303's topic in Gun Holsters, Rifle Slings and Knife Sheathes
I am surprised that no one has addressed this issue in response to this question. Although what feeds through your machine may have some bearing on making a decision, there is a more important factor to consider. IMHO, the product being made and its intended use should be the major consideration in making that decision. Nylon is an excellent thread, is very strong, has some flex/stretch to it, but is not UV resistant, or as weather resistant as Polyester thread. Although strong, Polyester thread is not as strong as Nylon (in the same thread size) but has far superior UV and weather resistance than Nylon does. So, if you are making concealed carry holsters that will rarely see the light of day or be exposed to the elements, and someones life may depend on the strength of the stitching, then Nylon would be the best choice. If you are making Cowboy Action Shooting (CAS) holsters, where the holsters are exposed to sunlight and the elements, you may want to use Polyester for better longevity. If using Polyester, and your are still concerned about strength, you could always use one size heavier thread. Having said that, I make CAS rigs and use #277 Polyester thread top and bottom with a size 24 needle (I know spec say size 25 but I like the smaller holes) and have never had a problem with the thread feeding through my machine. Nor have I had any issues with thread breaking on my rigs. If I am overly concerned about strength on a particular rig, such as where the tongue and billets are sewn to the belt, I may (not always) use #346 thread. Bottom line if your item is going to get a lot of exposure to the sun and elements think Polyester before Nylon thread. -

Double Buscadero Belt Sizing
RemingtonSteel replied to Forester's topic in Gun Holsters, Rifle Slings and Knife Sheathes
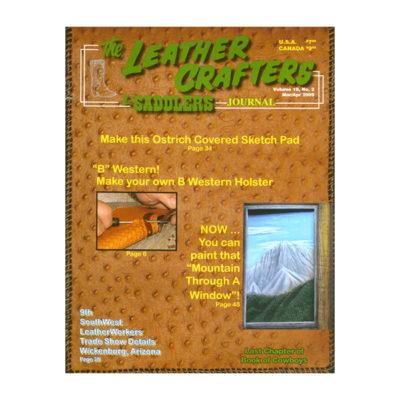
@Forester, In The Leather Crafters & Saddlers Journal (Volume 19, No. 2 Mar/Apr 2009), Gene Weishuhn, of Indian Creek Leather, had a fantastic article that not only walks you through all of the ins and outs of making a Buscadaro Rig, but it also contains full size template in a pullout in the center fold of the magazine. Gene covers the subtlies of sizing the belt, positioning of the holster slots, as well as billet and tongue placement, in order to get a good fit. Gene covers all other aspects of the rig such as bullet loops, holster assembly, forming, sewing, etc. He has some great techniques, and is an excelent leather craftsman. I know it may be a little late for your project, but It is a really good read, and worth the price of the journal. You can order back issue of The Leather Crafters & Saddlers Journal, and this issue is still availible. Click on the journal below if interested in ordering. The price is $4.50 plus $4.00 USPS shipping. And no, I am not affiliated with the Journal in any way. -
So when I purchased my Ferdco Pro 2000, it came with 2 lube pots. I thought one was maybe a spare, so I left it in the garage as I hadn't gotten around to cleaning it. last weekend, while cleaning the garage, I came across the spare lube pot and brought it into the house. I was just looking at it, and noticed for the first time that they are not identical, but more like mirror images of each other. Having never used a lube pot, I can only make a wild guess... One was used for sewing, and the other was for lubing the thread while winding the bobbin. How far off am I? What is each pot really used for? Also if anyone has any good links to how the lube pots are used, I would be interested.
-

My 1st western style holster
RemingtonSteel replied to cbossio's topic in Gun Holsters, Rifle Slings and Knife Sheathes
From another western rig maker... Very nice, cant wait to see the next one. -

First Shotgunbelt
RemingtonSteel replied to caperseven's topic in Gun Holsters, Rifle Slings and Knife Sheathes
Nice job on the shell belt as well. I am sure your customer is going to love it. Is he/she left or right handed? Although I am right handed, I hold the revolver in my left hand and use my right hand for the reloads, as the loading gate in on the right side of the gun. So for me, I prefer the cartridges on the right side of the shotgun shells so that I have easy access with my right hand. Also in the future you might want to add another two to three cartridge loops. Not that you would have more than one or two reloads on a stage, but I have seen (and done it myself) quite a few times where shooters forget to replace the used reload cartridges at then end of a stage. Nothing worse than reaching for a reload only to find empty loops.


