Danne
Members-
Posts
772 -
Joined
-
Last visited
Content Type
Profiles
Forums
Events
Blogs
Gallery
Store
Everything posted by Danne
-
I would rather spend 180usd (2+8 3mm/spi) from Ksblade. Where I know I get good steel quality.
-
My experience with splitting machines is "I have seen a machine one time" But I have worked a lot with old machines with high tolerances, and also worked as a CNC-programmer. And I hope to find an old Fortuna splitting machine. Preferably something broken that needs repair. (I don't need one, since this is my hobby, and I'm looking for a bell knife skiving machine too, which is a lot less complicated and would work as a splitter for my smaller projects (Wallets, watch straps) So the time it would take me to repair it and "figure out" the machine doesn't matter. When I read your answer to Matt, it's clear you have good knowledge of these machines. Your machine work because you understand HOW it works. Of course what you say make sense. why should he have someone to manufacture those "adjustment parts" for him? A better solution would be to ask a shop to regrind his wear guides together with a surface grinder when needed? If you have a user manual and/or parts list/exploded view of any band knife splitting machine it would be very interesting to look through them if you want to share. Btw, thanks for sharing your knowledge here, I find it very interesting.
-
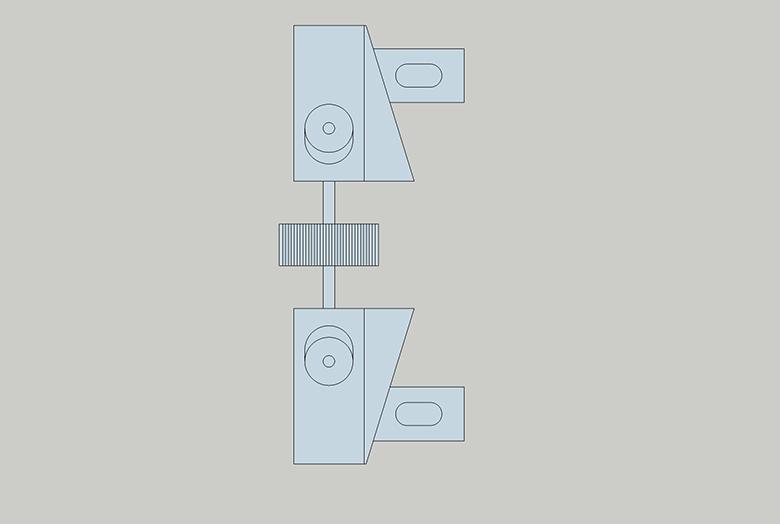
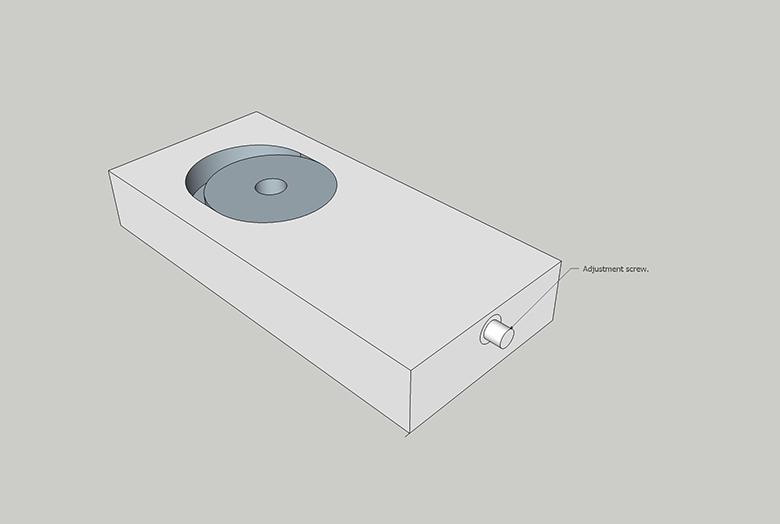
I really like to follow your work on this splitter, and I'm looking forward to updates. Do you have an exploded view/parts list of the gibs and "guides" It would be nice with individual adjustment for the gibs. I'm thinking something like this (If i understand the construction correctly.) This way you could regrind your "guides" individually if needed.
-
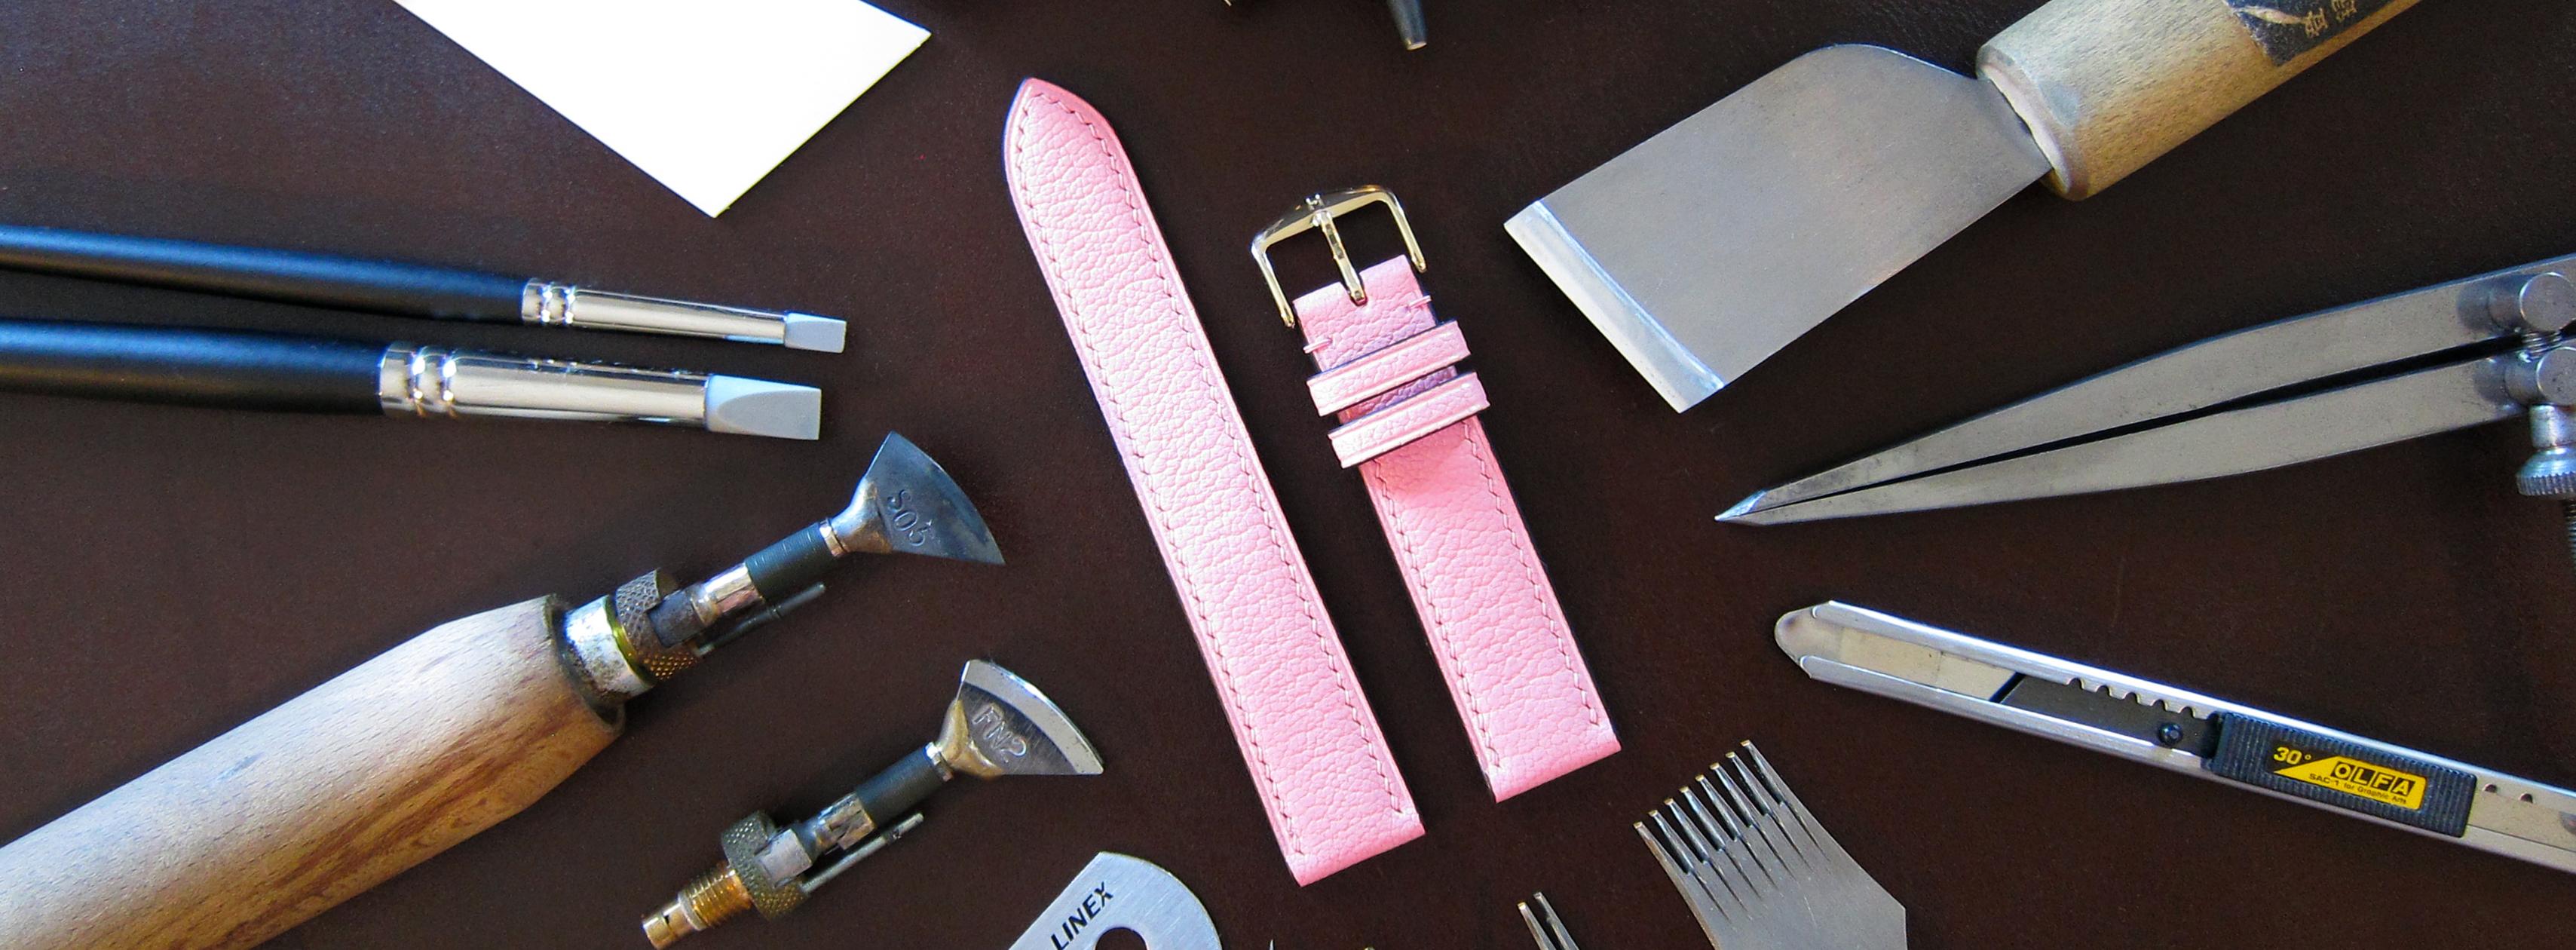
I bought a machine from Mando around 2 years ago. M3000 transformer + handle was around 270euro (+vat if you live in Europe) And of course you need some irons too. S05H (For smoothing edges and melting wax?) and a versatile creaser is FN2.
-
What's your favorite skiving tool?
Danne replied to strathmoredesigns's topic in Leatherwork Conversation
The tools you have is not going to work on most skiving knives. Your wood chisels have straight edges, most skiving knives don't. Your tool clamps the edges, the tool from Etsy clamp on the flat surface of the blade. Regarding the grits, it's not that important in my opinion. If I sharpen my skiving knife with 1000 - 2000 - 2500 I can skive my edges without a problem, but if I go higher in grits it's less friction when I skive. "My head is already so full of new leather knowledge that I can't even sort out the sharpening tools" Yes I can see that in your profile picture :D -
What's your favorite skiving tool?
Danne replied to strathmoredesigns's topic in Leatherwork Conversation
Or maybe something like this? https://www.etsy.com/listing/225648750/skiving-knife-sharpener-toolleather I'm planning to buy something similar and three stones. One SK11 150-600 (For restoring edges) and two Shapton Kuromaku 1000 and 5000 Cry once? -
I think I did a tutorial like this a couple of years ago, but I've learned a lot since then. There are no correct way to paint edges, but there are some DON'TS. What you shouldn't do 1. Burnish edges with Tokonole or similar agents before painting. You can dry burnish before paint but you have to sand before applying paint. 2. Make too large bevels on really tight folds (Your paint will stretch until it cracks) 3. Paint a new layer on a surface that's not flat (Except the first layer) TOOLS/MATERIALS 1. Edge paint: This is Fenice, good alternatives are Uniters, Giardini, Stahl, Vernis 600, Beraud CT. Especially Uniters seems very popular, but I stay with Fenice since I'm used to this paint, and I get good results. 2. Edge beveler: This is a Kyoshin Elle size 0. 3. Creaser: This is a Fileteuse from Regad, and a FN2 iron for creasing, and S05H for heating/smoothing edges, and melting paraffin. A Fileteuse is a big investment and manual alternatives (Heat over alcohol lamp) like Wuta works really good for both creasing and smoothing edges. If you don't have anything of this, you can skip this step and use friction with a heavy cloth after the first layer of paint. 4. Paraffin wax: You can use either paraffin or beeswax. 5. Sandpaper 400: This is wet and dry from Mirka. (Glued to a piece of rubber mat) 6. Sandpaper 800: This is wet and dry from Mirka. (You can go to a higher grit if you want) 7. Burnishing cloth: (Clean) 8. Burnishing cloth: (Paraffin/Beeswax) 9. Awl: For applying edge paint. Some use edge rollers or brushes, but this is my preferred method. (10. Crepe Rubber optional:) For cleaning the edge transition if needed. STEPS FOR PAINTING EDGES 1. Cut edges flush and or sand them. 2. Bevel the edges (optional) 3. Paint first layer. Paint a relatively thin layer of paint. 4. Crease the edge on both sides. If you have a large contrast between leather color and edge paint, it's important you didn't use to much paint in the last step. 5. Smooth edges This promotes adhesion of paint and also removes the line between layers of leather. I use a high temperature here (7 on Regad) If you use the iron Wax spatula from Regad use a lower temperature because your tool could break. 6. Dry burnish Lay you leather flat on your desk and burnish edges with a clean cloth (Not used with wax) Do this with both Chrome/combination tanned and vegetable tanned. 7. Sand the edge Use 400 grit. Don't stop sanding until your edge is good, if you sand through a lot (especially in folds) I would recommend heating the next layer of paint also. 8. Paint edge A thicker layer this time. 9. Proceed with painting and sanding edges until you are happy with your edge. There is no need to heat/smooth with Fileteuse/heated creaser apart from after the first layer of paint. When your edge is perfect, sand it with 800 grit (or go higher if you want) 10. Rub paraffin on your edge and melt it with Fileteuse or heated creaser. (I use temp 3 on my Regad, you don't want to melt your edge paint here) 11. Burnish your edge with a have cloth. 12. Edge is finished, now you can have a beer or a coffee and show your edge in this thread. (Sorry for the photo, I'm no photographer and struggle to get a nice photo of the edge. (Edit. Sorry Uk friends. Of course Tea is okay too :))
- 13 replies
-
- fenice
- edge paint
-
(and 1 more)
Tagged with:
-
What's your favorite skiving tool?
Danne replied to strathmoredesigns's topic in Leatherwork Conversation
I have a solution for this, it's not a professional way to do this, but it works. My guide is two small pieces of a cutting mat. A better choice would be something with a little lower friction. Maybe you have one of those small glass burnishers in combination with something to get the right height. I use wet & dry sandpaper, it sticks to my granite plate if wet. (In my picture the sandpaper is dry, just took the picture to show) I hold my sandpaper with my left index finger and my guide with my thumb. Something like 1000 - 2000 - 4000 grit and you have a nice edge. If your guide gives you a small secondary bevel it's okay, and it's quicker to sharpen your knife. -
What's your favorite skiving tool?
Danne replied to strathmoredesigns's topic in Leatherwork Conversation
Some people who struggle with skiving blames the tool. (I did too) A better skiving knife won't give you better results. (Maybe your first projects if it's sharpened.) Is it hard to skive edges? Yes with a dull knife it's impossible to get good results. I have two Japanese skiving knives from Kyoshin Elle (cost around 40usd/knife) and one china knife (cost 2usd) Both Japenese and Chinese knife work good, the downside with the Chinese knife is that it won't hold an edge very good. I wouldn't say I'm good at sharpening knives, but I can get them really sharp after a lot of practice. -
That hammer works good if you modify it slightly. Take a file and round off the edges. And sandpaper from low to high grit until you have a really nice finish. And of course, because of the small diameter, you have to be a little careful.
-
I often hear people complaining about how hard it is to skive with consistent results. I think those people would think it's quite easy if they used a really sharp knife and skive with the bevel down. (I don't say it's the wrong way to use the flat side down, but I think most people would think it's easier with the bevel down.) I use sandpaper for sharpening. But I plan to buy one SK11 150-600 for reshaping bevels and flattening whetstones, and two whetstones (Shapton Kuromaku 1000 and 5000) I just had to comment on this "I'm not paying 80 bucks for a belt!!! It's a strip of leather." I don't think people in general understand that 80 bucks is not that much money for a belt, compared to the cheap belt for 15 bucks, which you throw in the trash after a couple of years. (split leather with a finish.)
-
When I started with leathercraft I couldn't sharpen my knives, and I needed a lot of force to skive. Now I have learned how to sharpen and not only did it give me more consistent results, It also gives me more possibilities to skive at "awkward" angles. Sometimes I hold my leather down and skive between thumb and index finger. Which would be really dangerous with a blunt knife.
-
I never had any problems with edge paint. And in basic, this is what I do. 1. cut/sand edge, bevel, crease. 2. Paint edge. 3. Heat paint with heated creaser (electric or manual) or with friction (canvas) 4. sand edge with 400 grit, until perfectly flat. 5. Paint edge 6. Sand with 400 grit, until perfectly flat. 7. Proceed painting and sanding until you have a perfect edge. 8. Finish with 800 grit (or higher if you like) 9. Melt Paraffin (or beeswax) onto the edge. (Use electric creaser or heated creaser if you have.) 10. Burnish the edge with canvas. 11. Finished. You see examples of my edges if you look through my posts (For example the dark brown wallet)
-
Thank you (and the other people who commented) I'm happy with the result on this wallet, there are always a couple of flaws with new templates, but very little to adjust on the drawings. The only thing I'm not 100% happy with is the weights of leather. I would like the outer piece to be a little thicker. Not much, maybe 1.3-1.4mm instead of 1.2mm the card pockets a hair thinner. I wish I had a skiving machine, so I could split leather myself.
-
Black watch strap with red stitching
Danne replied to Danne's topic in Purses, Wallets, Belts and Miscellaneous Pocket Items
Thank you, When you go through with your needle (before you tension the thread) you either go over the loop (not casting) or through the loop (cast) You find some good tutorials on Youtube. For example Armitage Leather and Ian Atkinsson. And here are good pictures on casting the thread. http://andersenleather.blogspot.com/2015/10/sewing-leather-using-saddle-stitch.html -
Thank you. Leather weights. Outside is 0.6+0.6mm. The interior is 0.5+0.5mm and credit card pockets 0.9mm Card pockets are not lined because I don't own a splitter. With a splitter I would probably go for 0.5+0.3 and skive the bottom part of the pocket as I do now before I line them with 0.3mm (see my picture, from another project. And I also skived the "pocket ears" at the edge down to 0.5mm, which I wouldn't do with veg tan leather. This leather have good enough tensile strength.) there are also a lot of skiving done on other places. I used Fil Au Chinois 632/0.51mm, I recommend Meisi 40 instead. Smaller spools and thread is very consistent. (You can also buy this thread as YueFung button. But stay away from Amy Roke, they have changed manufacturer) Needle size is John James size 4 https://www.meisithreads.com/waxed-linen-threads
-
Black watch strap with red stitching
Danne replied to Danne's topic in Purses, Wallets, Belts and Miscellaneous Pocket Items
Thank you. I find stitching to be one of the biggest challenges when it comes to leathercraft. Glue two stiff 2mm/5oz pieces together, and practice and soon you get a decent result. Stitch a wallet where you have mixed stiff and soft leather, a different thickness in "every corner" in some places you cast, in other places you don't. You can't do a practice stitch on scrap pieces, because you have skived edges and a lot of layers of leather. Regarding the angles. When you have /// on your right side, and stitch towards yourself. The most common way is to pull the thread left upwards and away from yourself. Right thread downwards and towards yourself. I don't get good results this way on thinner softer leather. (around 2-2.5mm in total thickness.) Moderate angles: Left hand straight out, right hand follows the hole (down and towards myself.) Heavier angles: Left hand slightly upwards, right hand follows the hole (down and towards myself.) This is what works for me, it might be different for you, but give it a try. The most important thing isn't to get the perfect "slant". consistency is. -
Black watch strap with red stitching
Danne replied to Danne's topic in Purses, Wallets, Belts and Miscellaneous Pocket Items
Yes exactly. With thin soft leather both tension and tension angles are very sensitive. Thicker leather is more forgiving. And a straight stitch (no cast) on the back side of a strap or a bracelet doesn't have to look bad. -
Black watch strap with red stitching
Danne replied to Danne's topic in Purses, Wallets, Belts and Miscellaneous Pocket Items
The tools and materials used for stitching. Irons: Ksblade 3.0/9SPI, Awl: Kyoshin Elle diamond Small, heavily modified from a diamond to flat (2mm). I almost always use an awl to open the holes from 1.6mm to 2mm width, the only time I don't is when I stitch a really thin watch strap without cast, then I prefer a smaller hole because the backside looks better. Thread: Meisi 40 lin thread (0.45mm) I often choose Meisi instead of Fil Au Chinois even if I have the same color of both brands. Meisi is more even and no lumps in the thread. And they have smaller spools.) And the stitching. I cast the thread with moderate angles here. There are a lot of information and tutorials for saddle stitching, but very little information around stitching really thin leather. (This watch strap have 2mm thick edges) From analyzing others work and tests I've done this is my conclusion. There are four ways to saddle stitch this thin leather with thread size around 0.4-0.5mm, and one of them give perfect results (But close to impossible on a strap with padding. 1. Punch from both sides with the same iron: You punch the top //// and the lining //// before assembly which results in a hole looking like an X and you stitch without cast, this result in an even nice slant on both sides. 2. Stitch without cast: Front side looks really good with a nice slanted stitch line. But the back side gets straight. 3. Stitch with cast and moderate angels. Both front and back side looks good, but front straightens a bit (I prefer a little gap between stitches) 4. Stitch with cast and heavier angels. The front side looks good, but the back side often looks uneven (Might be because I'm inexperienced.) And of course it also depends on the type of leather. A stiffer leather is a lot easier to stitch with an even result. Tools/materials. Ksblade irons: http://ksbladepunch.com/product/pricking-irons Kyoshin Elle awl: https://www.goodsjapan.com/kyoshin-elle-leathercraft-stitching-awl-for-sewing-leather-diamond-point-small-438-p.asp Meisi thread: https://www.meisithreads.com/waxed-linen-threads If you don't feel comfortable reshaping awls then I would go for an awl from Palosanto Factory. And even though I really like Ksblade. They cost a lot. People seem very happy with pricking irons from Kevin Lee. -
Looks like a perfect workspace. Jäger looks awesome in his new collar


