
Danne
-
Posts
772 -
Joined
-
Last visited
Content Type
Profiles
Forums
Events
Blogs
Gallery
Store
Everything posted by Danne
-
Since my experience is limited to smaller test pieces, I can't really answer your questions. When I did my test pieces, I was very careful to start punch from the same corners. The biggest reason I don't punch from both sides is that then I have to make all parts to exact dimension before gluing. I feel like I have better control when I can trim pieces after glue.
-
First time edging with a Fileteuse: What am I doing wrong?
Danne replied to Largo's topic in How Do I Do That?
What edge paint are you using? And why do you let it dry over night? from the look of your edge paint, you use to much heat, too much paint, or move your tool to slow. paint is boiling from the look of your pictures. Have a look at my tutorial here. https://leatherworker.net/forum/topic/85026-finishing-edges-tutorial-with-edge-paint/ -
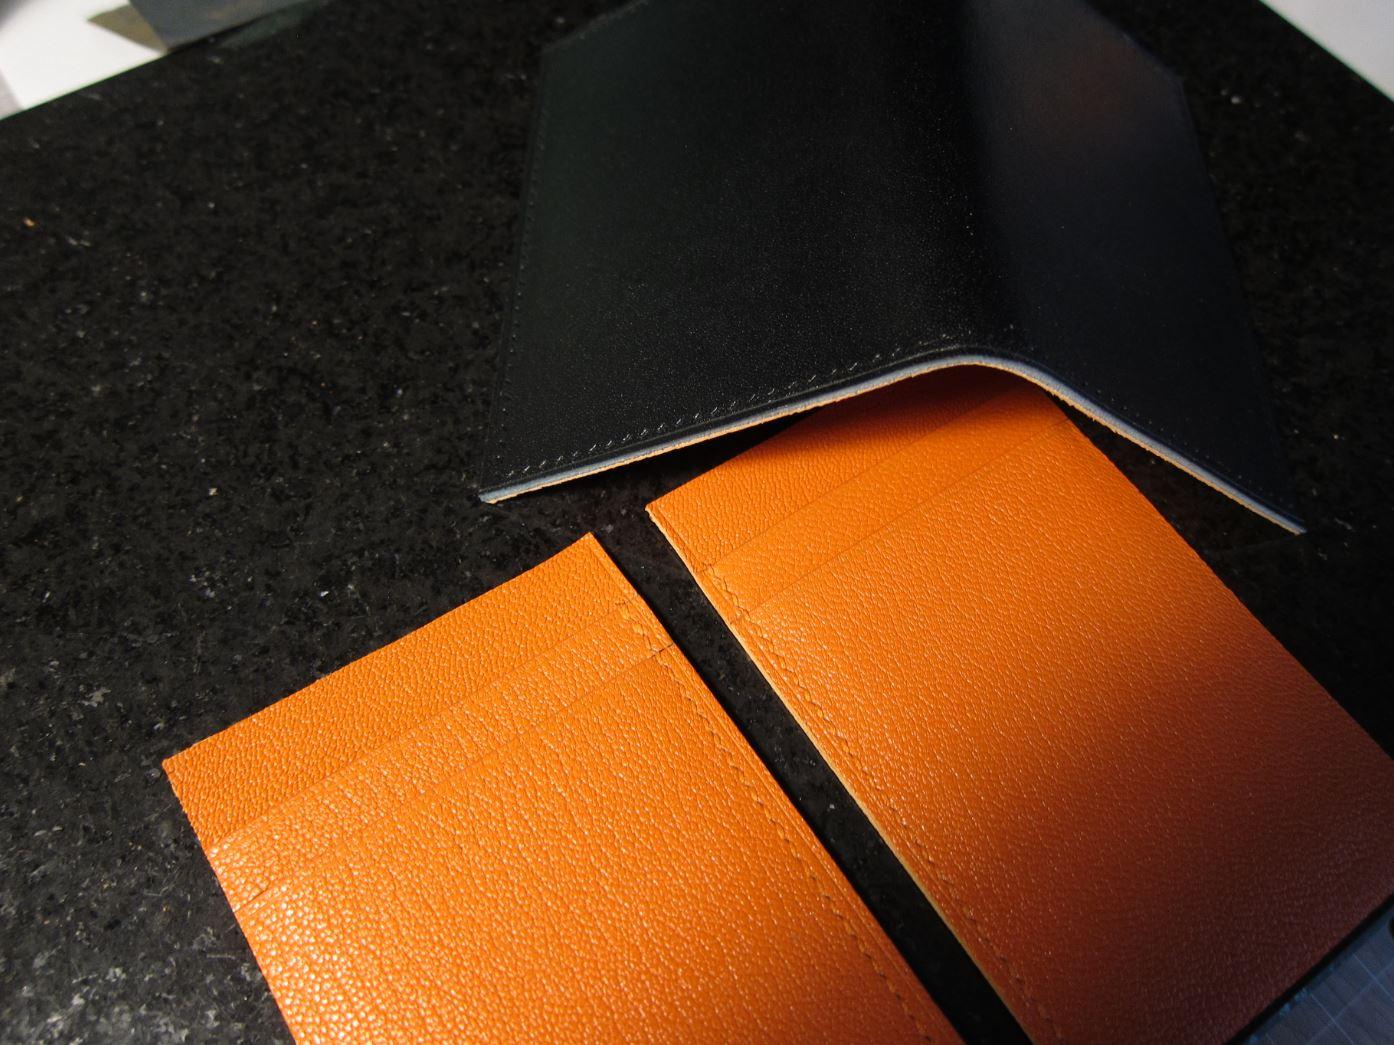
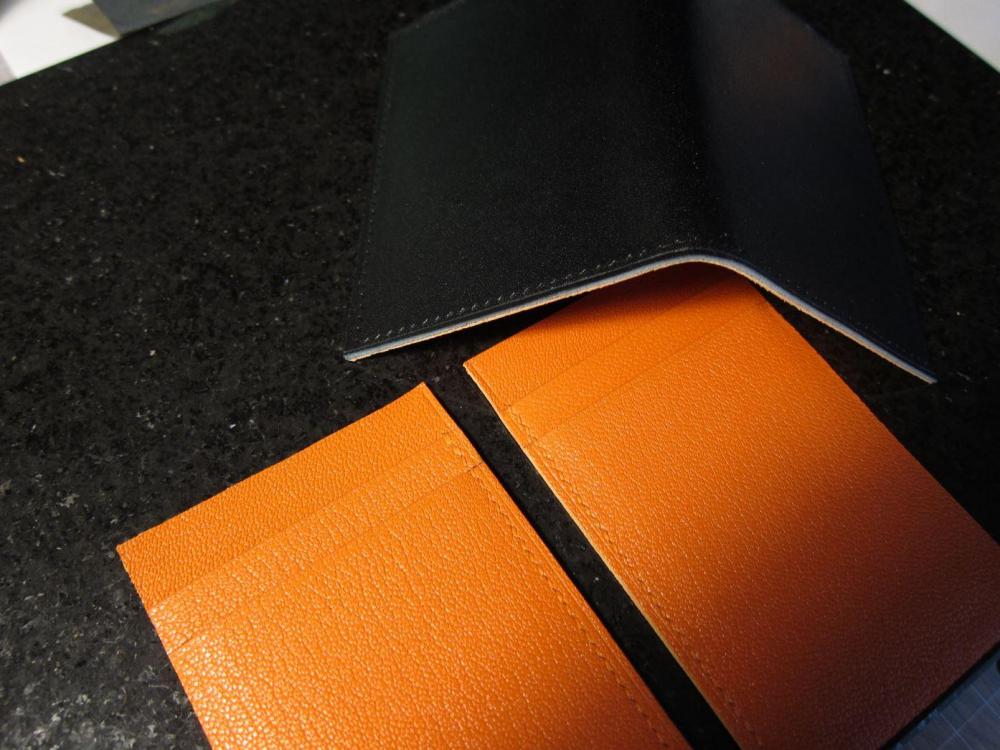
My answer is probably nothing you like to hear. I struggled a lot with the same problem, I couldn't find a good solution for stitching holes on wallets where I skived edges. Finally, I decided to learn how to use an awl. It's actually quite easy if you have a sharp awl. And also I find it easier to open the holes with my awl before I start stitching. (Some people open the hole with their awl, stitch, open next hole and so on.) So when I do a wallet and stitch from the outside (Which side depends on where I have the largest contrast between leather and thread.) I pre-punch outer leather all the way through before I glue to inner parts of the wallet. You get best results if you pre-punch both outer and inner parts before assemble (with the same iron /// which result in an X when assembled.) and stitch without a cast. If you would like to see examples of this you can check out Chestermox or Shiang_lifetime_leather_craft on Instagram, personally, I haven't used this method yet, but I have done some test pieces and it's a really good solution for thin leather if you want a nice result of both sides. Here you see an example where I pre-punched the outer leather before assemble.
-
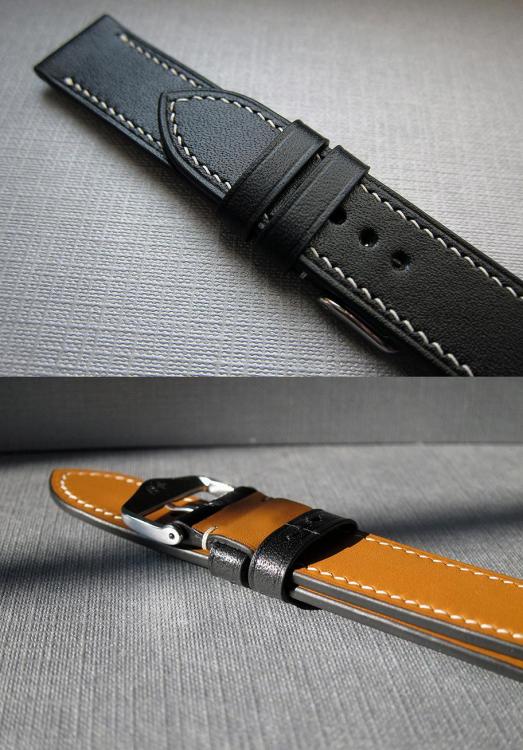
I'm far from an expert, I'm probably somewhere in between beginner and intermediate. But I have improved a lot since I started this craft around three years ago. I have three things to share (I think more people here have some things to share) 1. When I do a project, let's take a watch strap as an example. When finished, I look for things to improve for the next strap. It could be the distance between crease and stitching, edge paint, maybe the shape of the padding or construction in general. Okay, let's just try to improve those things when I do my next strap? No, this is not a good solution from my experience. Why? because with a changed technique you tend to do mistakes. Instead, I do small test pieces where I refine the technique for different tasks until I'm satisfied with the result. When I make my next strap I feel confident in what I do. 2. Plan your work before you start. Sounds obvious, but an example what I see very often is card pockets where the distance between pockets doesn't match up with pricking irons spi. If you are going to spend five hours on a wallet, why not put that extra hour on planning the construction? (Of course, you can't plan everything, some things require a test prototype to figure out things.) 3. Learn from experienced crafters. Instagram is a gold mine for learning techniques and especially construction. Follow ALL good crafters who do similar work to what you want to do. There is so much free information out there. No, you rarely find a tutorial on how they make something, but they show pictures of half-finished products, after a while, you can "connect the dots" and you know how it's made.
-
You have to start with a uniform edge (Sanded or flush cut) Also it's important to let the glue dry, otherwise you are going to push in the edge between layers, and never "get rid" of the glue line.
-
I use a Blanchard round awl (Not the same one I use for round holes)
-
Found this also. Lower shipping if he can buy in the country where he lives. http://www.fortuna-gmbh.de/EN/WORD_OF_FORTUNA/REPRESENTATIVES/EUROPE/content.php
-
I add a link too. http://www.fortuna-service.com/en/spare_parts/spare_parts_skiving.html
-
Heat works very good for screws too. (Not only nuts) Yes, heat makes the steel expand. What you want is movement. Also, you are going to get a difference in thermal expansion between the two "steels" (The screw, and where it's attached) Let's just assume the two "steels" would expand with linearity to each other, then the threads would also expand and you get the movement you want for the screw to loosen. Ps, I live in Europe and I have worked a decent amount on old cars, here in Europe they tend to rust EVERYWHERE so heat is used very often to break loose screws.
-
"Of course it's ready to send, I deliver it in person in a couple of hours. I just wrote 3-4 weeks to boost sales" :D
-
This is maybe going to make you (or other angry) First just to clarify I don't sell leather goods myself. Do you use Instagram? Do you sell anything through Instagram? If not, you have to ask yourself a couple of questions. 1. Why should anyone buy your products? Do you have a unique design? if not a unique design, is your finish better than other sellers? 2. Are your prices too high? or too low? (Yes too low prices can be bad) 3. Decent photos of your products? Because why should someone buy your product if there are hundreds of other sellers with the "exact same" product? And yes, of course, if more people see your products, more people buy them. But if you have Instagram and no/few sells, then something is wrong. Edit: After I wrote this I looked through your posts, and came to the conclusion that your products are very well done. (Some people don't sell because their products are substandard (They need more practice) You are certainly not one of them. You have to reach your customers (People with bikes) Become a member on mc-forums, take good photos and share on Instagram and tag and follow "mc-people" Visit motorcycle fairs to show your products? Targeted Facebook ads to reach people with certain bikes (If possible and not crazy expensive?)
-
Wallet in progress.
Danne replied to Rolandranch's topic in Purses, Wallets, Belts and Miscellaneous Pocket Items
"so any tips/advice is appreciated." No need for advice, this is awesome. I've never tooled anything, but I wish I could. -
Yes, It's probably the only good solution here, I have thought a lot about this.. Maybe I should make a test piece with a lot of loops with glue and see how they hold up when I try to force the thread apart. Thank you for your input.
-
Really nice wallets. The Patina on the first wallet is beautiful.
-
This is probably a long shot, since I have found questions like this before but not a satisfying answer. I prefer to stitch in my buckle with a double loop on each side. I understand I can use other methods like stitching in the keeper (Downside to this I can't crease the edge after stitching, because I have to paint before stitching for a consistent result. I also could stitch across the strap at the edge. I don't think it looks good. What I've tried without a result I like. 1. end with both threads under the lining right next to the keeper, and finish with a knot. This doesn't work for two reasons (The lining is quite thin and usually soft, which result in the thread knot visible through) And second thing is the edge, I wan't a tight fit of my lining around the keeper. If I push my needle through I get a gap in the edge. 2. Finish the loop with a knot in the hole. (Not enough space, and it looks awful.) 3. Finish with some glue on both threads and twist the thread before tension. Solution 3 is the best so far. But I feel like I don't really have control over if I get the adhesion I need. I've tried both water based white glue, solvent based glue, super glue. Super glue seems like the most reliable glue here, BUT not so clean, I get glue on the lining, even if it's very little.. I know master craftsmen have some good technique for this, I also know a lot of strapmakers have problem with this from the complaints around watch forums. PLEASE READ everything here before you answer. Thanks in advance. To mod: Why "Pending approval!" ?

-
I wrote "you can't stitch it in the middle of the bottom part." and I should have expressed it a little different. I haven't made a construction where I stitch the inner section all the way, but I do stitch my lining (which is shorter) all the way both glued around large curves and tight curved without glue in the middle (Except edges) And depending on the leather weights used by nokiddin it would require different length on the inner section, If he doesn't stitch the middle part it's easier in my opinion. Btw, do you have a picture of your wallet stitched all the way, it's not so common so hard to find when I Google.
-
Need advice on sewing across transitions
Danne replied to KennethM's topic in Leather Sewing Machines
Do you mean the stitch that goes over the edge straightens? I shouldn't say I do this perfect. (Keep in mind I do my holes from the outside, and go through with an awl. But you see the stitch on the right pocket is longer where it goes over the edge. Now the leather I use have high tensile strength so I could adjust my holes a little. But on veg-tan you don't wan't to go to close to the edge. edit: Your wallet is machine stitched? (Going away to hide in the corner)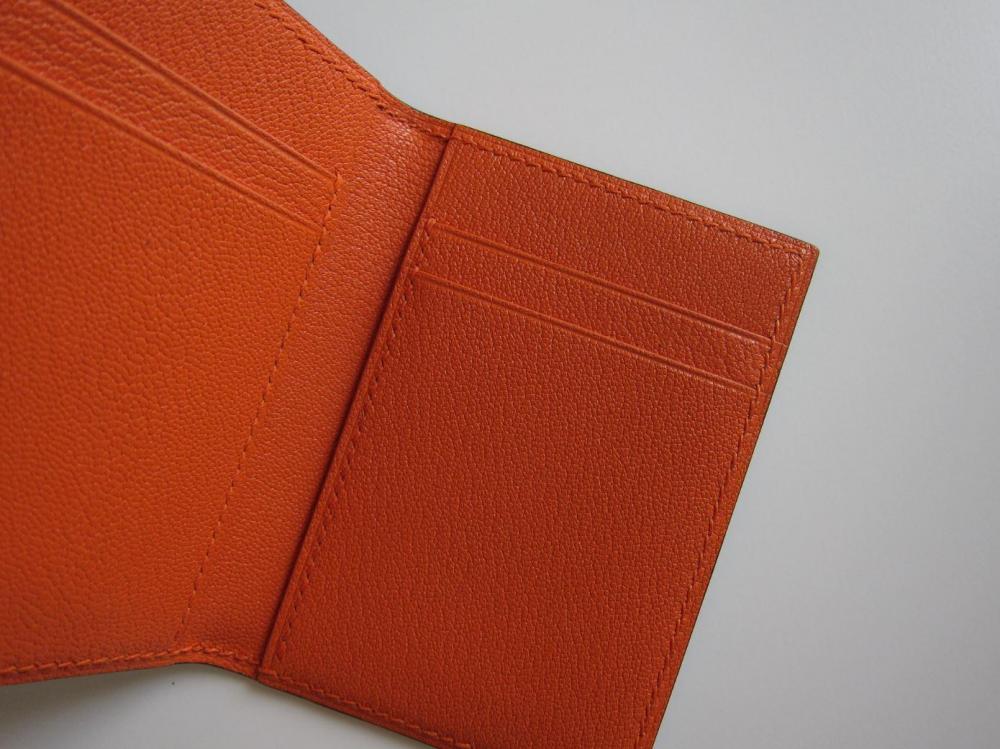
-
Need advice on sewing across transitions
Danne replied to KennethM's topic in Leather Sewing Machines
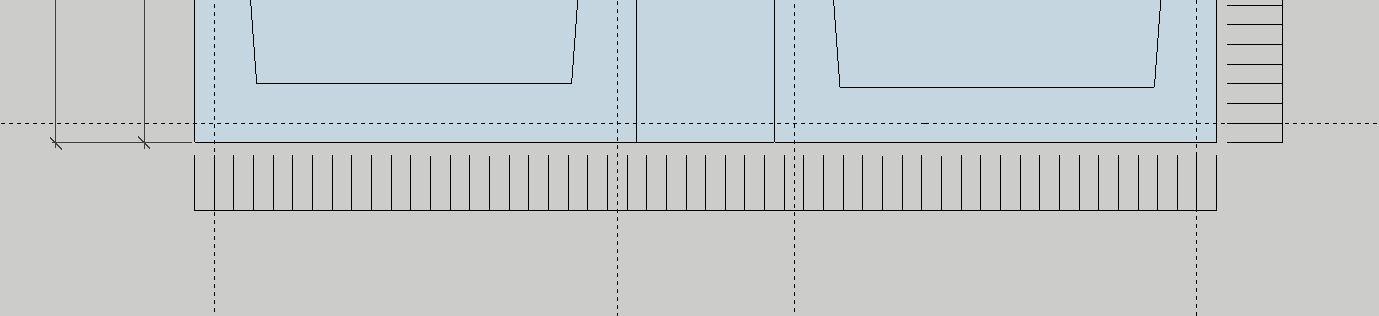
You have to make your templates to match up with the stitching lengths (Here you have an example from one of my drawings.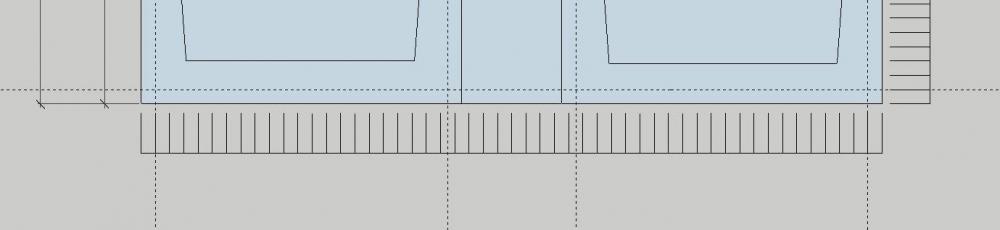
-
Also, you can't stitch it in the middle of the bottom part. I have not picture of this. But googled
-
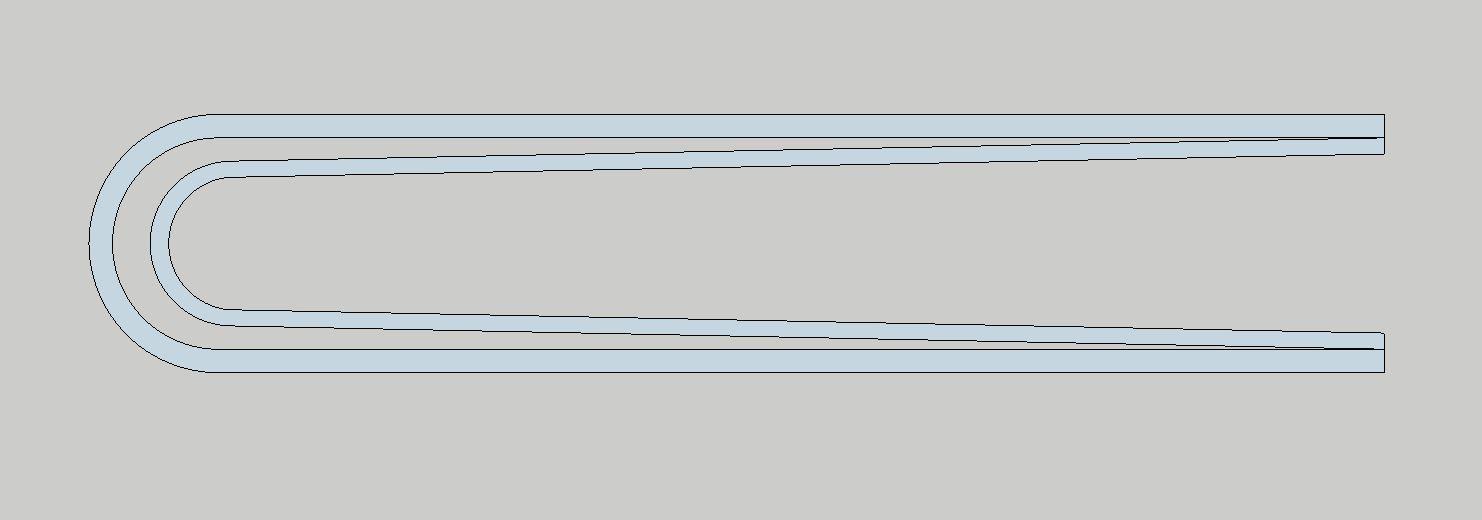
Yes it's correct. The easiest way to determine the length of your next wallet. Make your interior and cut the leather for your exterior to long. Fold them together, and leave a gap (Otherwise it's going to be a problem when you put your bills in the bill compartment. And you can make a mark where to cut. You want it too look something like this when folded.
-
Not Lin cable 832, but equivalent from Meisi (Slightly thinner Meisi M30/0.35mm) and I used KevinLee 2.45/11spi and JJ4 needles. But I use JJ4 with 9/10/11 spi and thread from 0.35mm up to 0.51mm (Lin cable 632)
-
Those look good. And since the ”shank” is round they are easy to sharpen in a lathe or drill chuck.
-
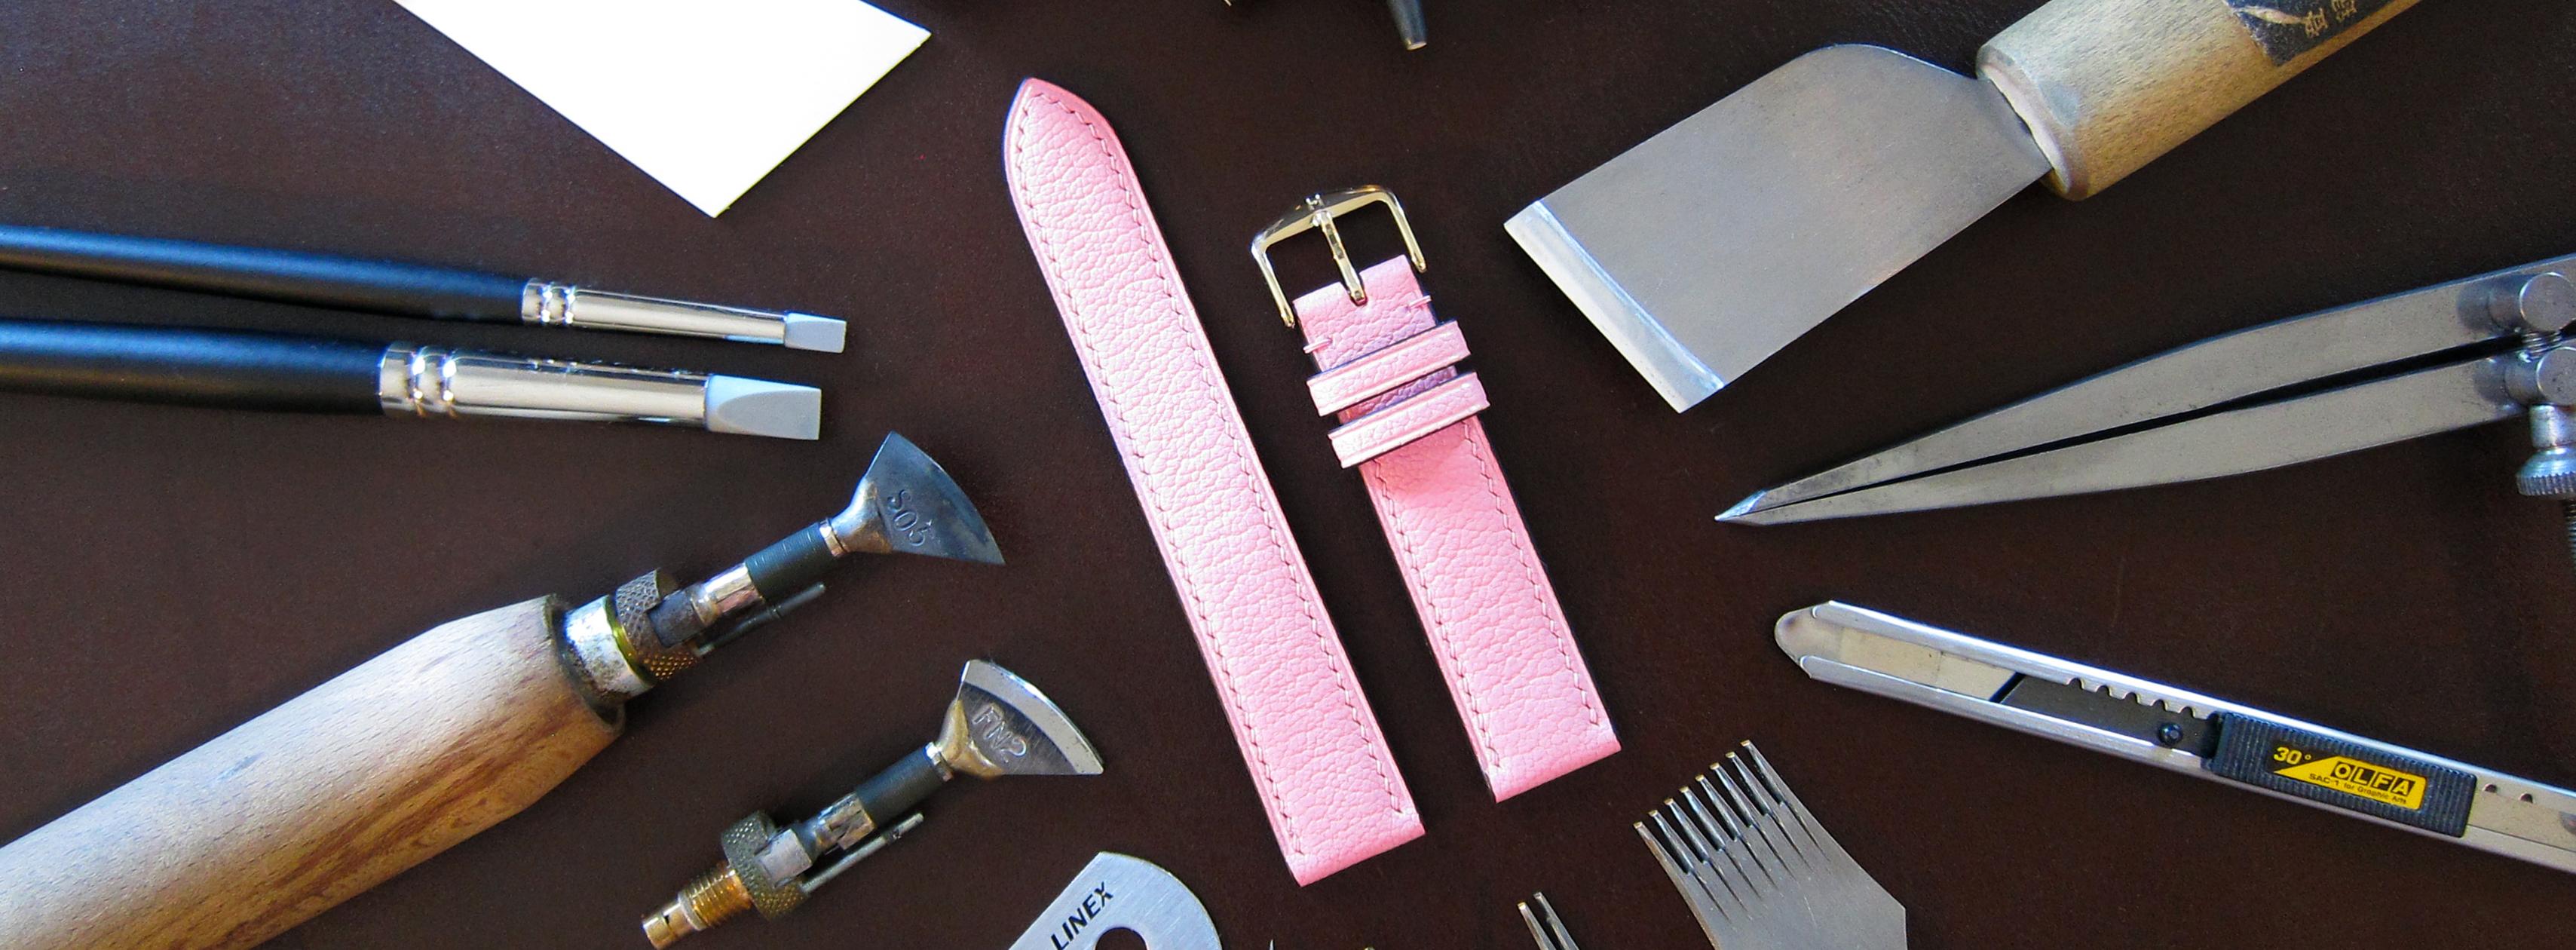
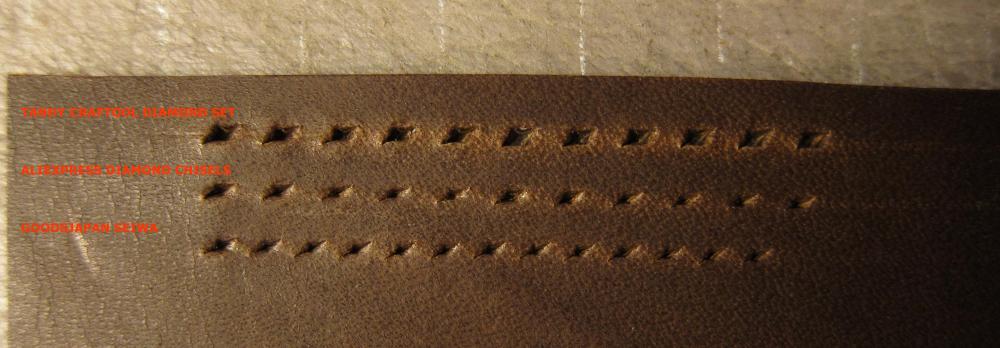
A couple of additions to my comment. I fully understand not everyone has the budget for buying Ksblade punches, handmade edge bevelers, fileteuse and such. There are no need to buy really expensive tools. Let's give a couple of examples on good hole punches. I have a set of something similar to this and they produce nice holes. https://www.aliexpress.com/item/Adeeing-4pcs-White-Steel-Leather-Craft-Tools-Hole-Chisel-Graving-Stitching-Punch-Tool-Set/32845153542.html?spm=2114.search0104.3.153.28b5726e2RwX5L&ws_ab_test=searchweb0_0,searchweb201602_10_10065_10068_319_10059_10884_317_10887_10696_321_322_10084_453_10083_454_10103_10618_10307_10820_10301_10821_10303_537_536,searchweb201603_6,ppcSwitch_0&algo_expid=9ab37b6b-6456-4456-acdf-6258da8fe393-20&algo_pvid=9ab37b6b-6456-4456-acdf-6258da8fe393&transAbTest=ae803_5 A step up would be Lc Diamond from Leathercrafttools (Same tool as Seiwa?) Kyoshin Elle edge bevelers from Goodsjapan is in my opinion really good, and I'm happy with them. I have also seen people doing really good creases with Wutas manual creasers (Heat over alcohol lamp) Here I compare those stitching tools
-
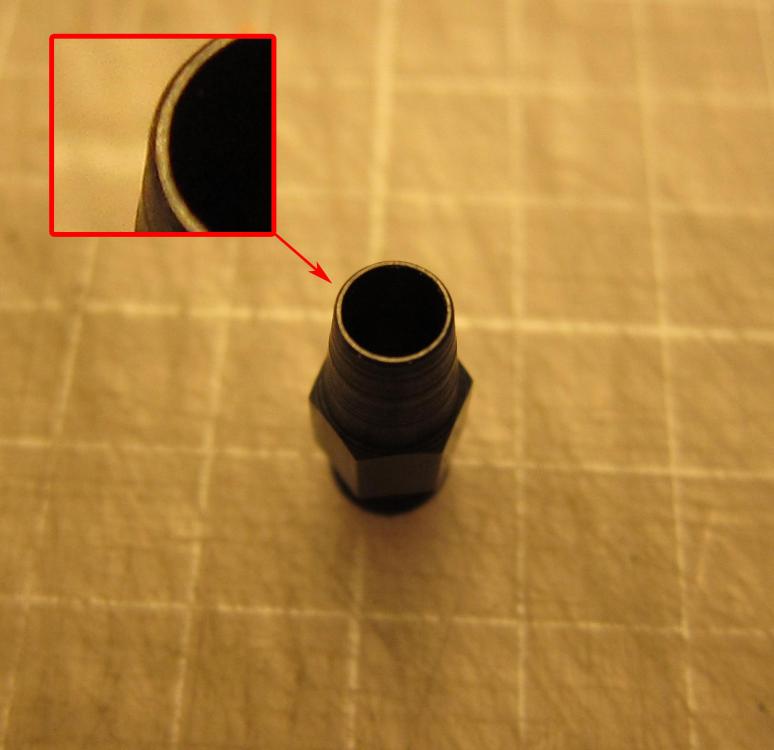
Just to avoid misconception here Tandy is certanly not high quality tools, I wouldn't even say mid-grade. At least not the things I bought, which was far from cheap. Diamond hole chisel set = THICK prongs coated in paint, and so far from sharp it can be. Maybe they work if you do holsters or larger things with really thick thread (After you removed the paint from prongs and sharpened them. Mini leather punch set = Took a lot of time to reshape them and make them cut. The "cutting edge" is around 0.3mm (Bad picture, but it's not possible to use without sharpening. Unless you punch like crazy and the hole would look awful. This is the smallest, and look at the size of the secondary bevel I hade to make before it was sharp. (Yes I could spend more time and polish for a better cut, but I don't use these tools.
-
You get four condoms in that kit too :D