AndyL1
-
Posts
814 -
Joined
-
Last visited
Content Type
Profiles
Forums
Events
Blogs
Gallery
Store
Everything posted by AndyL1
-
Try these guys out... Maybe they could make it for you? I bought the Jack Sparrow buckle (one with the shells) and it is very cool. http://www.treasurecast.com/index.php?l=product_list&c=11 Andy
-
Nice work! And on behalf of the kids of Earth: Thank you! Haha! Andy
-
I'd say you did a great job! The patch looks like it came that way. Cheers, Andy
-
I guess I'm a little late to the party but I just found out the Hide House in San Dimas has closed its doors. I went to the parking lot sale a few months back and if I had known that was the last time I'd get to hand pick some leather I would have bought more! Shoot. Very sad right now. They had a great collection of hardware and the staff was always cool too. Guess it's ordering online now! -Andy
-
Looks like I'm another one that needs fixing. USA and corresponding flag. Seems odd I can't change the country myself? -Andy
-
giggle.
-
Step 1. Go to the hardware store. Step 2. Locate a large fender washer, close to 2 or 3 inches in diameter. Step 3. Cut your leather out with square corners. Step 4. Lay the washer on the leather so the edges meet up side and bottom. Step 5. Cut the leather off using the washer as a guide. Step 6. Sit back and smile at your perfect radius results. For Step 7 I usually go have a beer. If you hit up a specialty hardware store they usually have washers in a lot of diameters. Cheers, Andy P.S. I also do as Art suggested with french curves and drawing it out on paper. I then transfer my drawing to stiffer illustration board and use that as a rigid template to transfer the pattern to the leather. The washer method I use on the bottom corners of the bag.
-
Very nice effect you got there. I like the texture you get out of that alot.
-
I don't know how missed this post from back in March. Just beautiful work you have here Tina! Thanks for sharing. And thanks too for the link on the tool Spinner. I've been wanting that set for quite a while. Cheers, Andy
-
Fantastic work! Great photos too by the way. Welcome to the forum! Cheers, Andy
-
That is seriously cool! Great shape, colors, and construction. Nice job man.
-
I would think it would be fine. Look up decoupage in Google for the proper glues and finishes to use.
-
Thanks! Can't wait to give it too them and see how they dig it. Oh yeah, forgot to mention I did apply a coat or two of super sheen on just the painted bit before antiquing. This way the paint wouldn't wipe out accidentally. I let the antique stain the background areas though. Thanks!
-
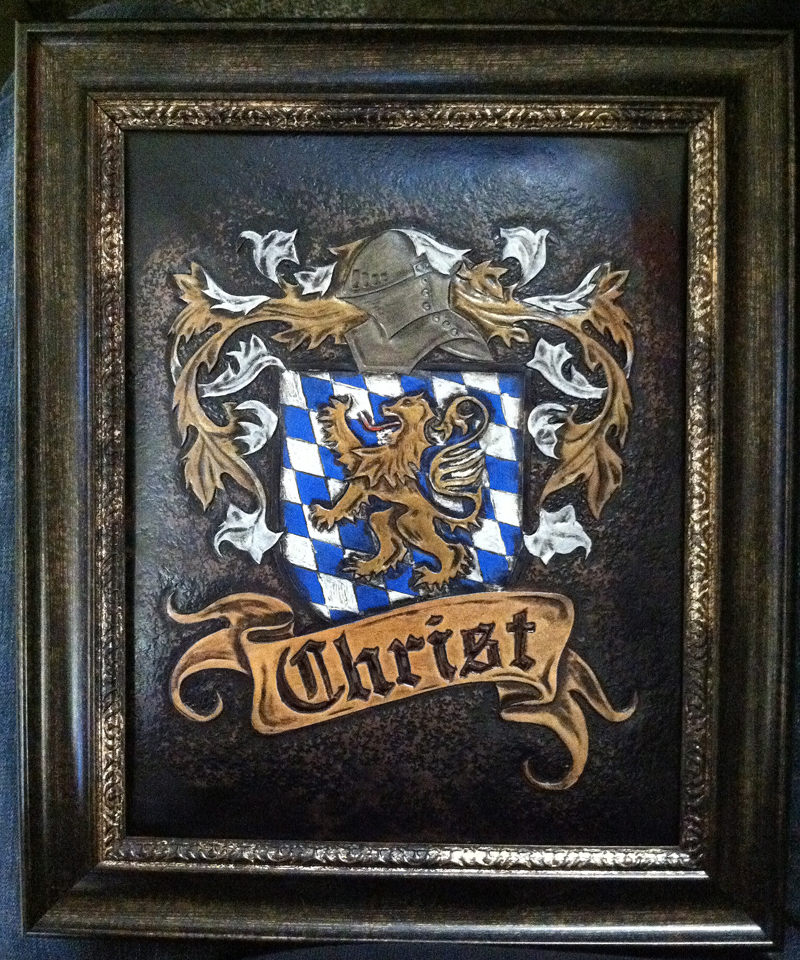
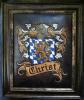
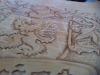
Hey gang, So here is the final version of the coat of arms I've been working on. It's for my Mother-In-Law's family as a surprise for them as they are visiting from Germany. Christ is their last name (possible relation?) It's done in 5/6 veg tan, painted with acrylics and antiqued. Anyway, check out the step-by-step in this thread: http://leatherworker...showtopic=34110 Thanks all! Andy
-
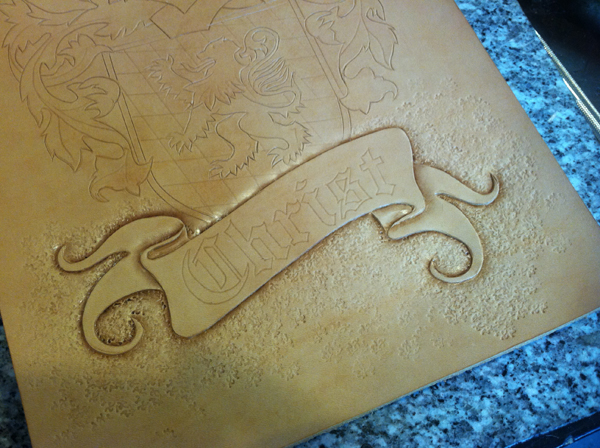
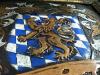
And here she is! Finished the tooling this afternoon. This came out better than I thought... I was a bit intimidated with beveling the tiny details but I think overall it came out really cool. My plan now is to paint in some color with acrylics. I want to make it appear old so muted colors and a final antiquing. Cheers, Andy
-
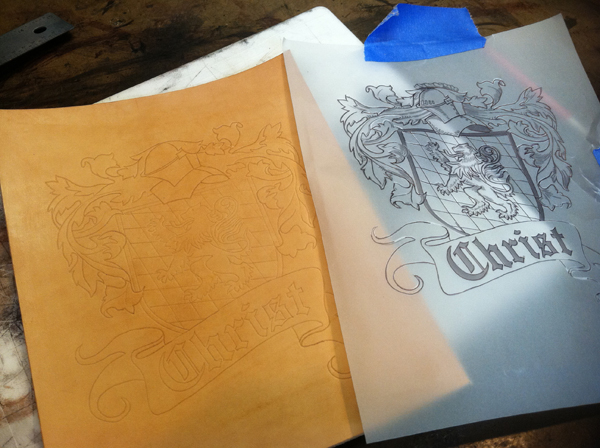
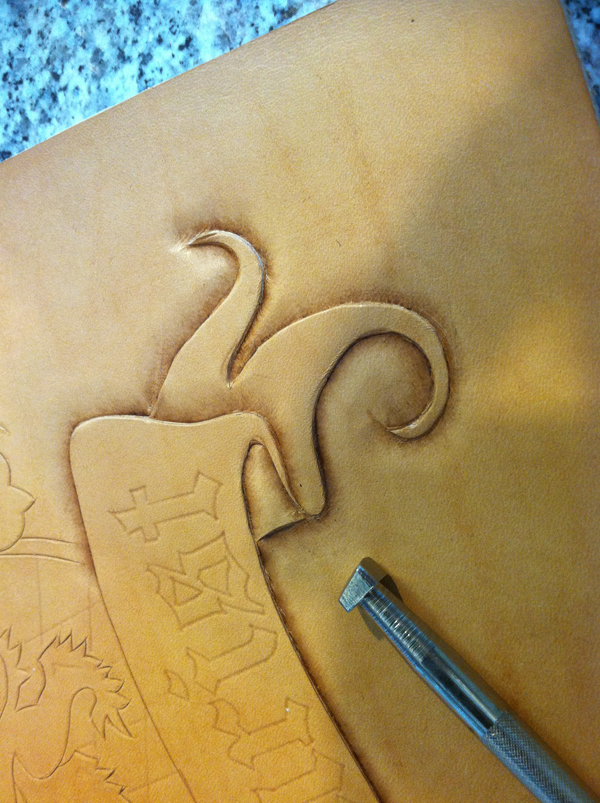
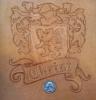
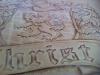
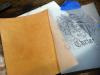
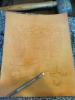
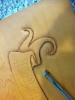
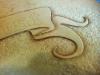
Hey all, So I've been working on this Coat of Arms for my Mother-In-Law's family... just so happens they may be related to some dude named Jesus? Here's a bit of a step-by-step. Enjoy. I won't be getting into too much detail as this is just meant for someone who already knows the basics. Also, there are a ton more people out there that are better at tooling than I am so... First my artwork is printed out on velum and transferred to my lightly cased leather. I generally bring the linework down to about 30% black so I can see where I've traced. I happen to use a ball point pen as I like how it glides across the vellum and it leaves a line so I know where I've drawn. All the lines are then cut in with my swivel knife. Then the beveling starts. Beveling the cuts as well as adding a bit of texture with a backgrounder. More beveling! Also started adding some inner contours with a modeling tool.


-
Dude that is awesome! Love the cracks, the color, the lining, the stitching... everything! Good work (as usual). ;-) Andy
-
Wow dude! Got some cool stuff going on there (as usual). Thanks for sharing! Cheers, Andy
-

Bracelet
AndyL1 replied to LeatherLegion's topic in Purses, Wallets, Belts and Miscellaneous Pocket Items
That is very cool looking! I love the color and the stitching is a nice detail. Congrats! Andy -
Oh man!
-
HAHA! Nice work too by the way! -Andy
-
Messenger Bag
AndyL1 replied to AndyL1's topic in Purses, Wallets, Belts and Miscellaneous Pocket Items
Hey thanks a ton! And congrats on the new baby! I have another one on the way. This bag came in very handy on my first... perfect size for just the essentials and a quick few hours out. I use it everyday for work now, keep my iPad, phone, wallet, keys, etc out of my pockets. A real Man-Bag! Sure my buddies at work call it a murse but I know they want one! HAHA! Check out my Facebook page for some other bags or even my Deviant Art page: http://l1andy.deviantart.com/gallery/ I look forward to seeing yours... be sure to post it up when you're done! Cheers, Andy -
Glad I could help in some small way. I love all the info I get from this board. I learn something new everyday! Cheers, Andy