Search the Community
Showing results for tags 'vegtan'.
-
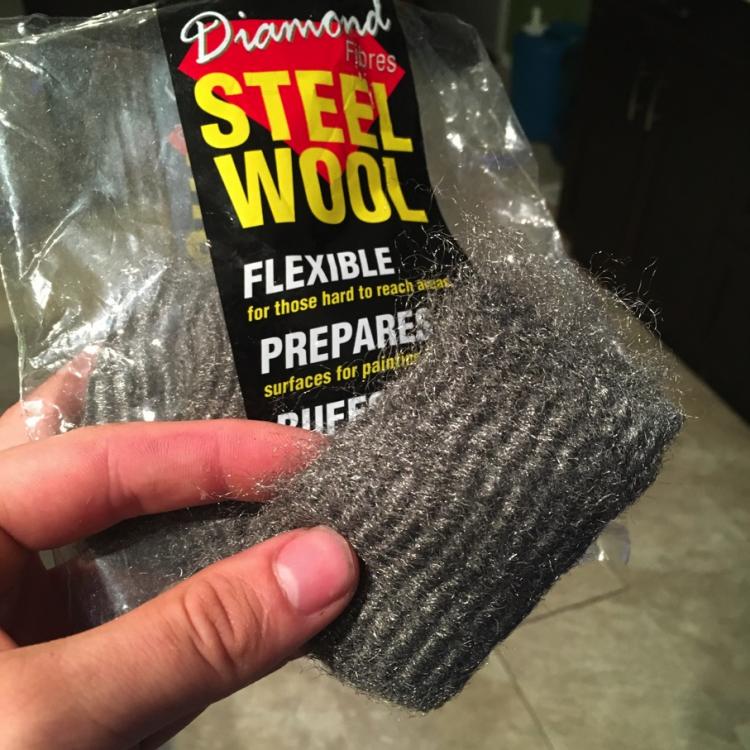
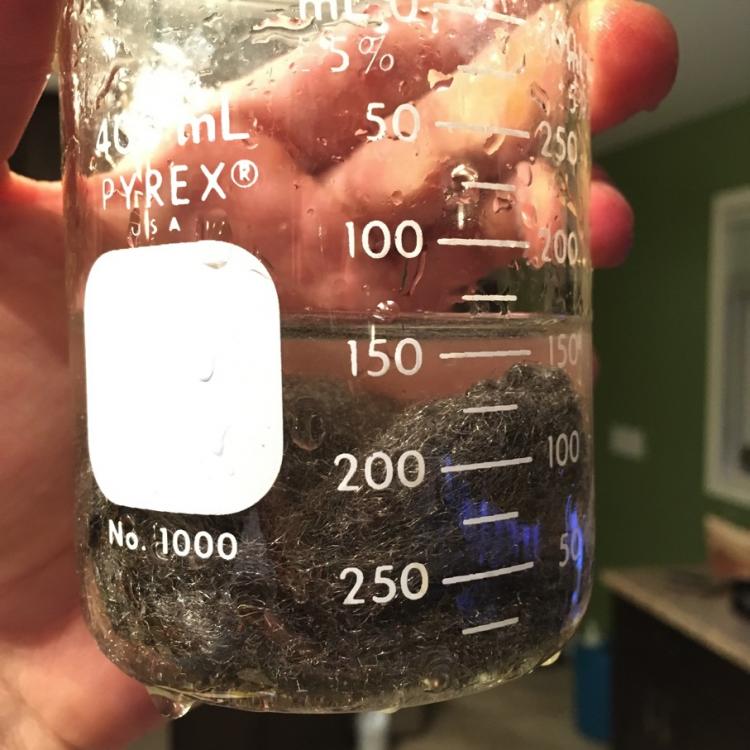
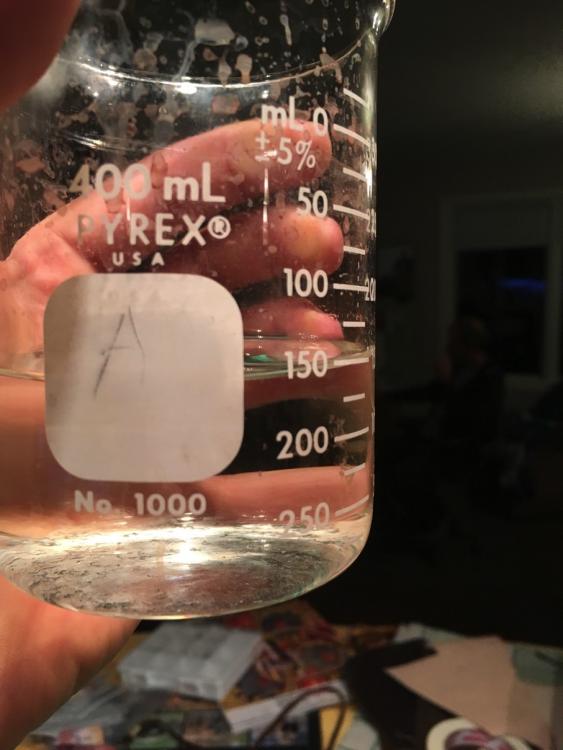
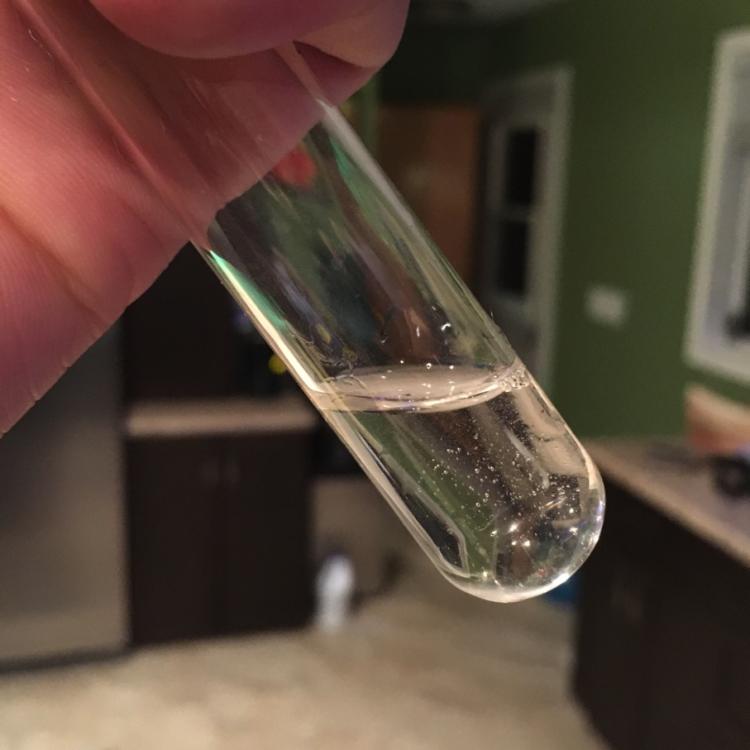
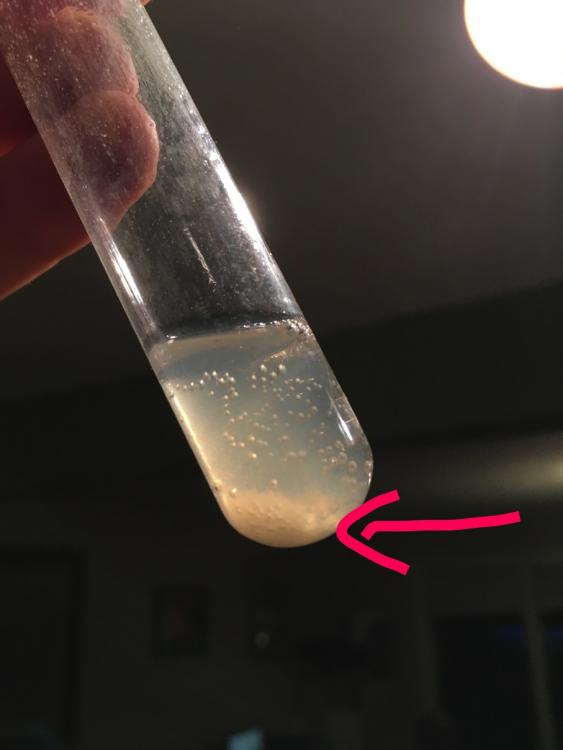
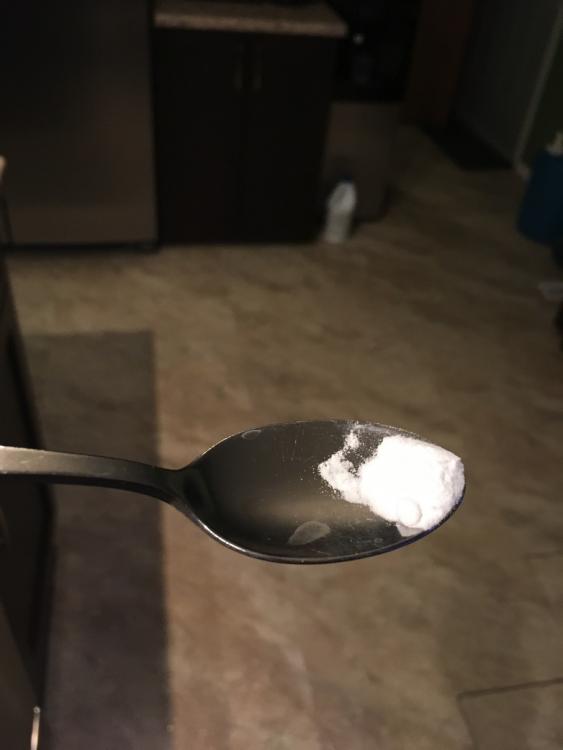
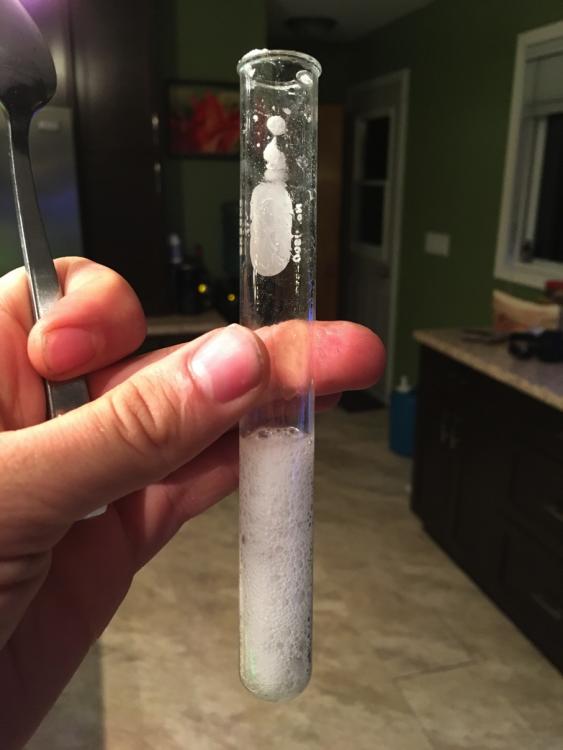
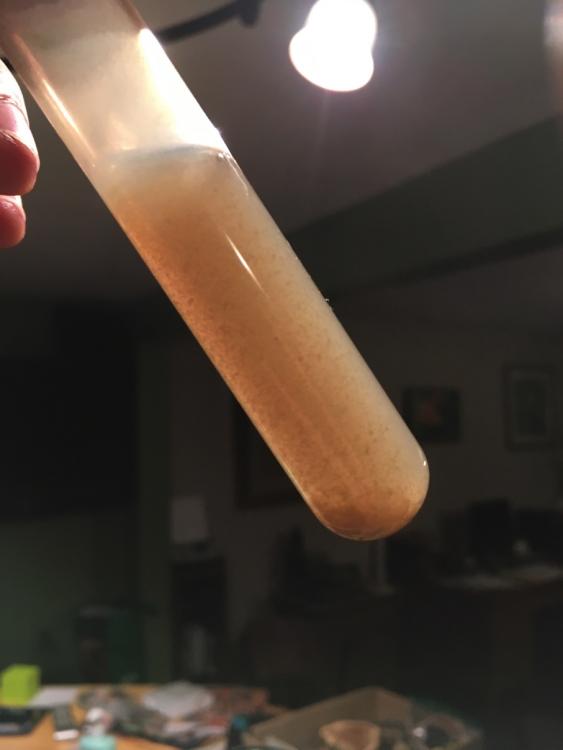
My all in one guide to Vinegaroon Hey everyone. I’ve been lurking around these forums for a while now and haven’t posted much, so I thought I’d finally make a contribution. I’m going to University for a Chemistry degree, and surprisingly some of the things I’ve been learning in my labs are actually applicable to my leatherwork! I thought I'd write up some of my observations and experiments with vinegarroon, to try and help shed some light on what is actually going on in the reaction. Please, read through and share any knowledge you have working with this stuff! (I know this is a lot. I was bored just typing it. You can skip to the bottom if you don't have time to read it all) Background Vinegaroon, or ‘roon, is a homemade black ‘dye’ that has been used by leatherworkers for centuries. It is also used by woodworkers to ‘ebonize’ wood, and was used since the 5th century as ink, called ‘iron gall ink’. It is not actually a dye, but a reaction between ferric acetate and the tannins that naturally occur in leather and wood. Tannins content varies between hardwoods and softwoods, and can be boosted by brewing a strong black tea and wiping it on the wood. I assume that this is also true of leathers. I have a few junky tandy's sides that are pale in appearance, and they seem to be low on tannins because roon has less of an effect on them. ‘Roon is used by many leather and wood workers but understood by few. It can be very useful alternative to commercial black dye in areas where dye is unavailable, too costly, or undesired because of environmental reasons. Also, because it is fundamentally different than other dyes, it will not bleed or crock (rub off) onto fabric. Pros: -easy to make with household materials -available in places where dye is not, or shipping is too expensive -nearly free -does not bleed or crock like other black dyes Cons: -often does not make a deep enough black colour without lots of neatsfoot oil added afterwards -can make your product smell like vinegar -acidic nature can cause issues with metal hardware in contact with the leather, might also degrade then leather after long periods of time Typical Recipe: (not recommended by me) Put some old rusty nails into a jar of vinegar and let it sit for a week, or a month. Filter it through cheesecloth and wipe it on your leather. This produces a nasty, smelly mixture of a whole bunch of iron complexes and compounds. The active ingredient, iron acetate, is in there, but along with a whole bunch of other junk you don’t need. It doesn’t have to be this way. With some chemistry and a little bit of research into the mechanism here, I’ve made a crystal clear, mostly odourless solution that only takes half a day to make. How I did it: I bought fine steel wool from the dollar store, which came in small bats. Any steel or iron will do, but fine steel wool has the greatest surface area so it will react the fastest. Metal shavings/powder would also work, but I’d think they would just clump on the bottom of the jar and prevent the vinegar from reaching the bottom layers. I washed one bat in soapy water to remove any oils left over from manufacturing. Some people have used acetone, which would work well, but seems a bit over the top when soap is cheaper. I pulled it apart and placed it in a beaker of regular vinegar, so that all the wool was submerged. You don’t need very much steel wool at all, even a quarter of the amount I used would be enough. The amount of metal actually being dissolved is in the order of milligrams or even micrograms. You probably shouldn’t keep a lid on it, because you are producing gas in the reaction. After a few hours, small bubbles form on the steel wool, causing it to rise to the top of the solution. I would mix it gently to dislodge the bubbles and keep it submerged. Every few hours I would use an eye dropper (so that I didn’t have to pour it out) to take a bit of the solution and test it on some leather. The darkening effect increased slowly over time until full strength was reached after about 12 hours. Still, I left the wool in there for 2 days to see if it got any stronger. Next time I won’t leave it in so long. After 2 days, I removed the wool. Since none of the wool was ever exposed to the air above, there was no rust in the beaker and I was left with a nice clear solution that didn’t smell much worse than straight vinegar. This is my vinegaroon solution. It turns leather black, is fairly stable, and is still acidic. The final product: a clear, nearly odourless solution of vinegaroon. Neutralization (optional): Next, I tried to neutralize the solution with baking soda to see if that changed the effectiveness of it at all. I took a small test tube of the ‘roon solution and put a spoon tip of baking soda in it. Obviously this will make it fizz up like your kid’s science fair volcanoe project, so I added it slowly. I didn’t have any pH paper to test the acidity so what I did was add an excess of baking soda (seen on the bottom of the tube), and then re-added the acidic ‘roon solution dropwise until there was no excess left. These images show the neutralization process, if pH paper is unavailable. A base (sodium bicarbonate/baking soda) is added in excess, which is seen in the bottom of the test tube by the red arrow. Then, the acidic vinegaroon solution is re-added slowly until this excess base disappears. The resulting solution is assumed to be neutral. This neutralized roon solution has the exact same reaction with the leather as the acidic solution. However, it was not as stable. After a hours sitting or a few minutes shaking, the solution turned into a cloudy grey-orange sludge. This is because the oxygen in the air oxidized the Fe2+ ions into Fe3+ ions, which are not soluble and have a rusty colour. Neutralized roon is good for immediate use, but turns nasty after a while What is happening? (skip this section if you don’t like chemistry) The iron is dissolved by the acetic acid and becomes a free-floating iron ion, in the +2 oxidation state, called Fe2+ or Iron(II). Hydrogen gas is produced in the dissolution process but in such small amounts that there is nothing to worry about. This ion is colourless and soluble in water, which is what we want. Furthermore, when this ion is in an acidic solution, like vinegar, it is relatively stable. Some of the ions complex with the acetate, which further increases its stability. When this mixture is applied to the leather, the iron ions interact with the tannins to form an iron-tannin complex, which is black. Oxygen messes with this system. Obviously there is oxygen in the atmosphere and dissolved in your solution, and this can oxidize the iron ions – it will take them from the 2+ state to the 3+ state. Fe3+ or iron(III) is NOT what we want, because it is orange and gross and not soluble in water. If this forms, it creates an orange/brown powdery solid that sinks to the bottom of the jar. To prevent the oxidation of the iron in solution, we need to keep the pH LOW and keep the oxygen out of the system as much as possible – by not pouring or shaking the solution. Now, the acidity of the solution is what keeps it stable – I’m assuming that you could store vinegaroon for a few weeks or months if you kept a lid on it. But the acidity is also what makes it dangerous for using with metal hardware. So what I’ve done is neutralized the solution with baking soda, just before applying it to the leather. The neutralized solution is just as effective, but noticeably less stable. The nice clear solution will turn orange overnight if untouched, or in seconds if shaken. So there you have it. Here’s a summary of what you SHOULD do: -keep the oxygen out of the system. Oxygen is your worst enemy, and turns this pure, clear solution of iron acetate into a sludgy, brown, stanky mess. -keep the solution acidic until you need to use it, then neutralize it if you need to before applying -use steel wool, as it has way more surface area than the same mass of solid iron And what you SHOULDN’T do: -don’t use rusty metal. It wouldn’t make a huge difference, it would just be introducing iron(III) into the solution which you don’t want. -don’t stir vigorously or pour the solution if possible -don’t use lots of metal, cause you only needs a little -don’t wait for a week, cause full strength is reached in less than a day -don’t put a lid on it until you’ve removed the iron, cause you’re building up gas in that jar -don’t worry about anything exploding either, there’s not that much gas -don’t filter it! Pouring it would introduce too much oxygen into the system. If you have stuff that you need to remove, it would be better to suck the ‘roon out with a turkey baster or something. What you could do differently than me: -using stronger vinegar, ie pickling vinegar, would speed up the reaction slightly and probably produce better results, since the pH would stay lower. Normal vinegar, however, is fine for most uses. -If you want to ensure that you have neutralized the solution, or gain a greater insight into the reaction process, pH paper would be very useful. -The solution could be neutralized with other bases, I only used baking soda because it was within an arms reach of the vinegar. Using sodium hydroxide, for example, wouldn’t cause it to bubble so much. -The solution can also be heated to speed the reaction, although I personally wouldn’t bother -Perhaps the best thing you could do is to calculate just how much iron will react with the vinegar and use slightly less than that amount of steel, to ensure that you have vinegar in excess. This will keep the pH from rising as vinegar is consumed by the reaction. This could be calculated stoichiometrically, or possibly by weighing accurately the mass of steel wool before and after to find out how much was consumed. I would assume that it wouldn’t be very much at all. Resources: The main reason why I found it so hard to find information on this reaction is because I initially had no idea what to search for. “vinegaroon” only can up with a few result, and most of them were not scientific explanations. I soon found out that it is more commonly used for “ebonizing wood” and that yielded a few more results. Finally I came across some scientific papers for Iron-acetate and iron-tannin complexes. Here are links to most of the pages I found helpful in my search: http://chemistry.stackexchange.com/questions/35351/iron-chemistry-acetates-for-ebonizing-wood http://chemistry.stackexchange.com/questions/5027/how-does-the-mordant-ferric-acetate-interact-with-tannins-when-ebonizing-wood https://en.wikipedia.org/wiki/Iron_gall_ink https://pubs.usgs.gov/wsp/1459d/report.pdf Thanks a lot for reading that, if you made it all the way through! Ask me any questions or share your experiences with roon below!
- 54 replies
-
- vinegaroon
- roon
- (and 10 more)
-
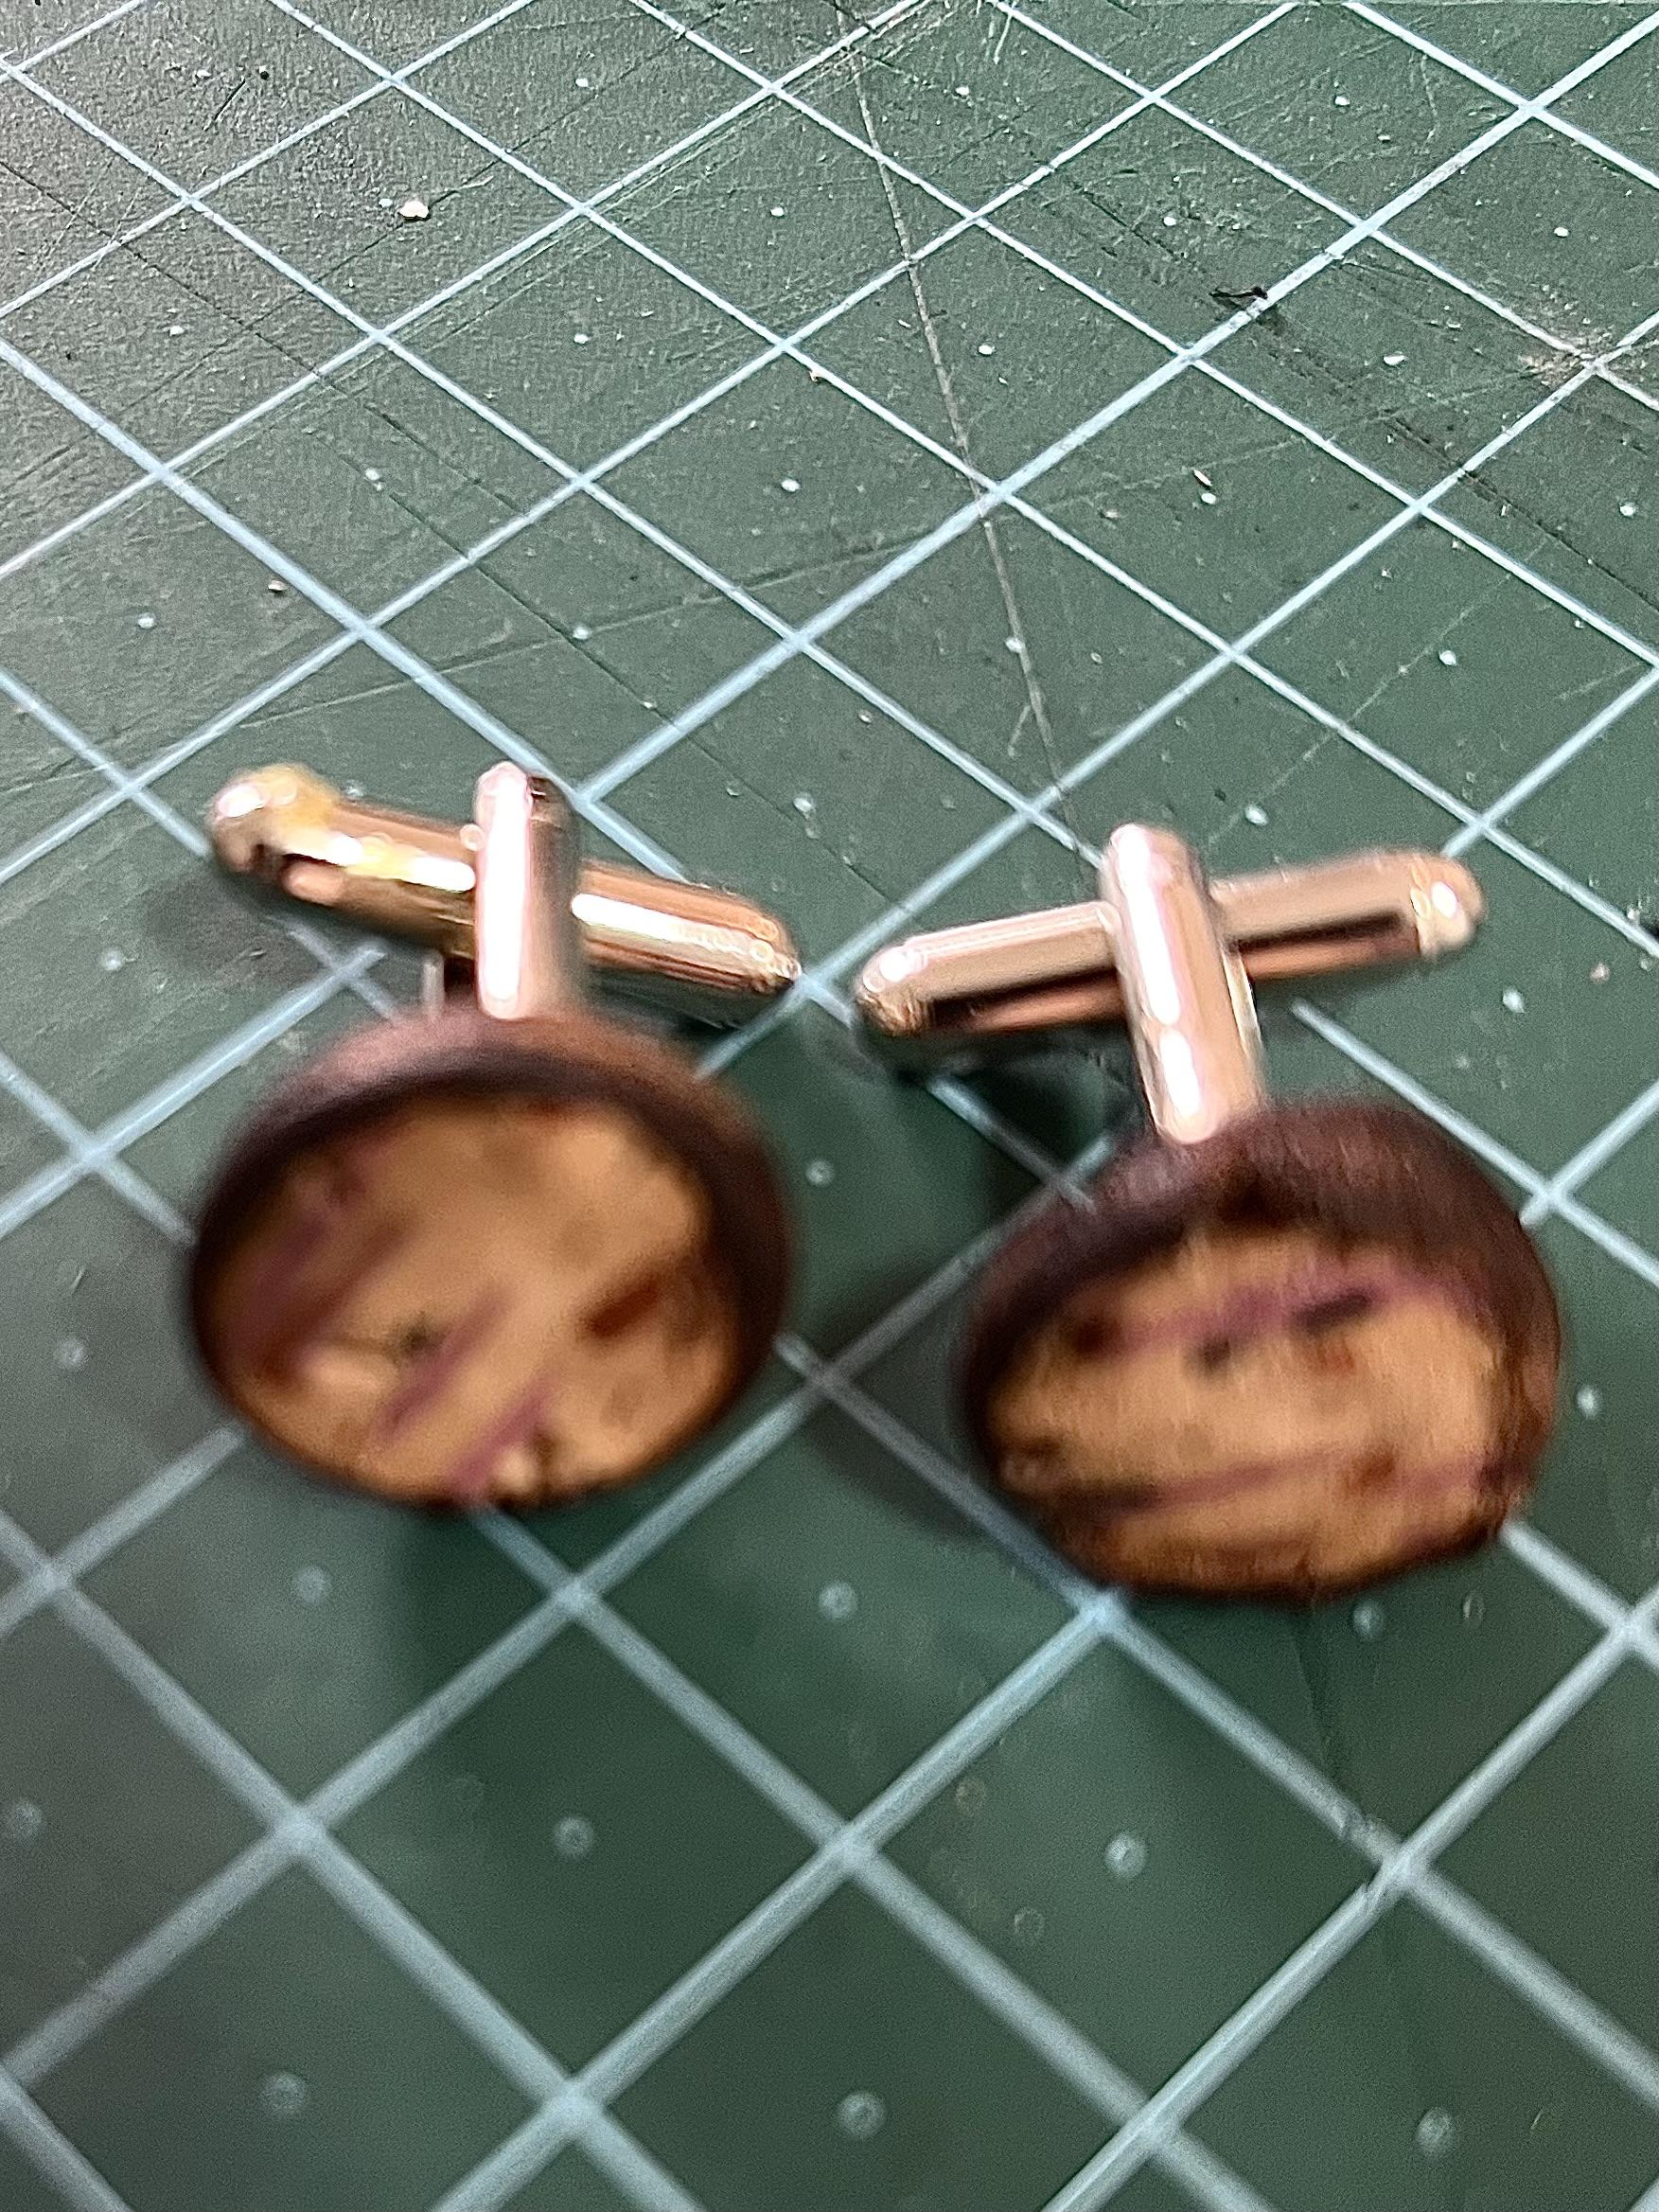
In honor of Passover, I made these cuff links in the form of hand made (round) matzoh. I tooled some veg tan vachetta to create the texture, used a diamond stitching punch to simulate the perforations, then colored them with a combination of acrylic and alcohol-based markers. The edges were singed to simulate the burnt edges of the matzoh, then burnished with Tokanol. Not bad for a one-afternoon project.
-
Hi I would like to greet everyone first. I am a leather master's degreed engineer and engage in Leathercrafting as a hobby. I have been working with vegetable-tanned leather for more than 15 years. I would be happy to answer any questions or address any issues you may have related to vegetable tanning. Regards...
- 7 replies
-
- vegetabletanned
- vegtan leather
-
(and 4 more)
Tagged with:
-
Great quality veg tan belt blanks for a steal! 1.5 inch width. ~55 inches long. 8-9 oz Asking $60 for 10. sell one belt and the lot pays for itself If you want more message me and I can cut a deal. I have a lot available Smooth black grain with no blemishes. The underside has no loose grain and is finished brown I’ve made a listing on my site here to keep things all in one place https://laszlosleather.shop/products/1-5in-belt-blanks-10x
-
Hi all, I have a friend who wants me to re-do the leather on these chairs (only one shown but he has 2) using tooled vegtan. Could you all chime in with your opinions on the weight of the leather I should use to withstand daily use/the weight of average sized people.
-
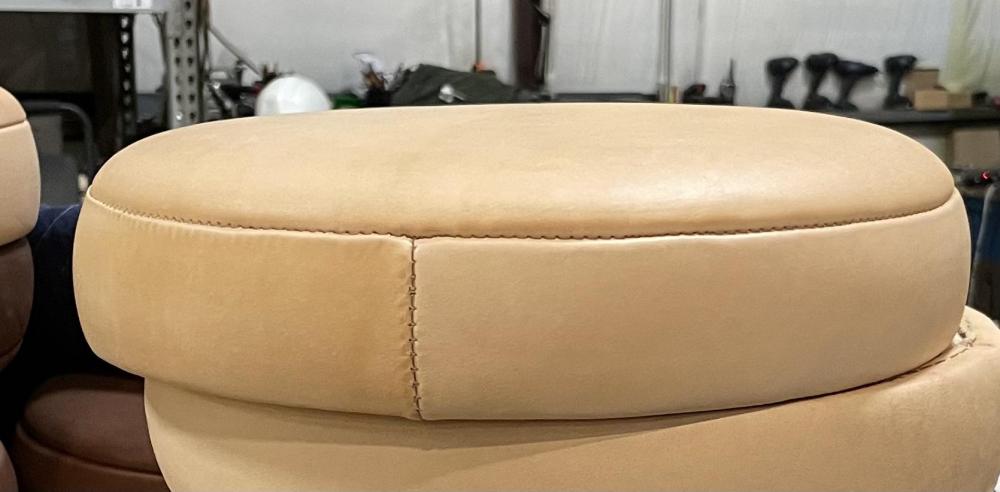
anyone have experience with veg tan leather discoloration from exposure to moving air while drying? I’ve been working with a very pale veg tanned leather, wet-stretching it around stool cushions. I have a sort of “drying box” with a fan that I put the cushions in to dry to protect them from dust and such in my work space. I’ve noticed that when placed too close to the fan or a small gap inside the box, the leather can develop a dark discoloration as though a wind burn. Anyone know why this happens or how to better prevent it? Thanks!
-
Hello, live been looking into making a proper pair of above the elbow 1880s evening gloves— which are consistently described as being kidskin. The issue is that the only kidskin I can find is chrome tan, which will not work for a variety of reasons (lack of stretch, lack of dye ability, horrible sensory to touch, ethical objections on my part, etc). Tawed seems to have been in some degree of use as well, going by trade journals and descriptions, but veg tan seems much easier to find and to work with. I’ve not been able to find either, however, and was wondering if anyone had ideas of where I might find some.
-
Hello everyone, new member here I'm on the hunt for some lovely dyed-through veg tan leather. I make dog accessories and bags too, so I need something fairly thick. does anyone have their go-to shop for veg tan? it seems to be trickier than I thought it would be.. unless im searching in the wrong area of the internet! TIA pic for attention..
-
From the album: Greg Hurley
- 2 comments
-
- hand stiched
- vegtan
-
(and 1 more)
Tagged with:
-
First time using this forum. I have some questions concerning the color variations of natural veg tan. Is there a gradient scale as to the quality of the leather with regards to it's color? Or a rule of thumb even, personal opinion...? For instance, I saw some pieces of veg tan yesterday most where's the average pinkish color and a few of them were very light like a matte eggshell. It didn't look very good but obviously I don't know good or bad. Any help is appreciated. Hope you all are having a good one.
-
Progress photos wallet
Danne posted a topic in Purses, Wallets, Belts and Miscellaneous Pocket Items
Took some photos during the making of a wallet. So thought I share it here. Feel free to ask questions, or give critique. Parts cut and ready to be skived. Card pockets edge painted and creased (Regad FN2) Pocket sections assembled and lined and ready to be trimmed. Trimmed Pocket sections and finished lined exterior ready to be assembled. Top of exterior stitched. Stitching card sections in place. Exterior edges creased (Dupin G1) and ready to be edge painted. First layer of edge coat applied and drying. Waiting for the edge paint to dry and then heat, sand and repeat five/six times before melting wax to edges and polish. And some cleaning and it's finished. -
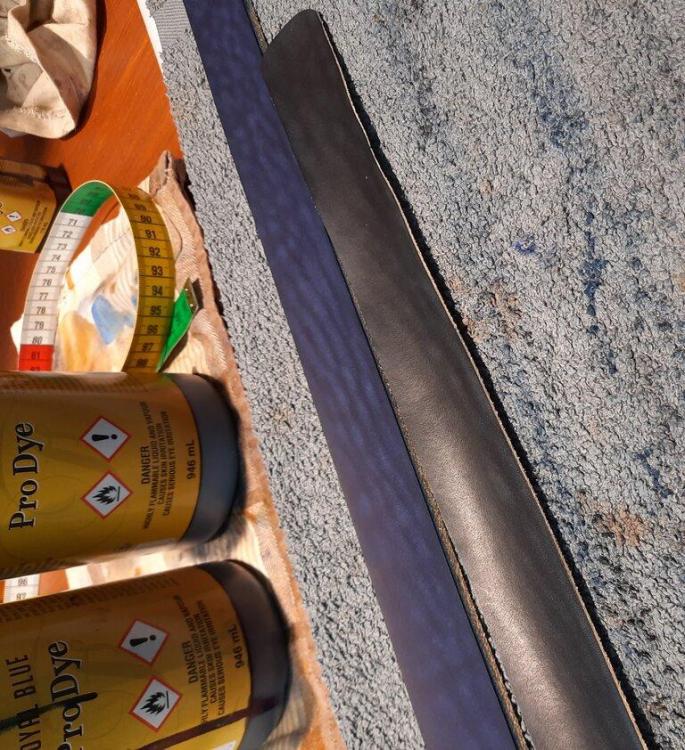
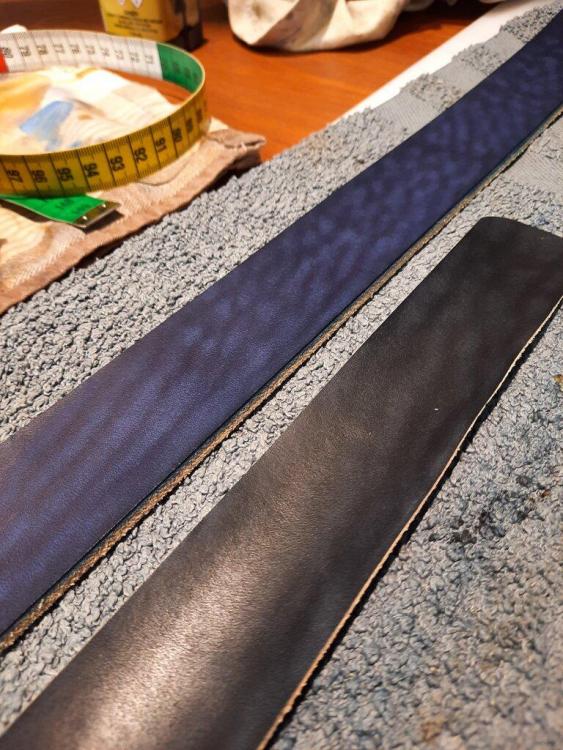
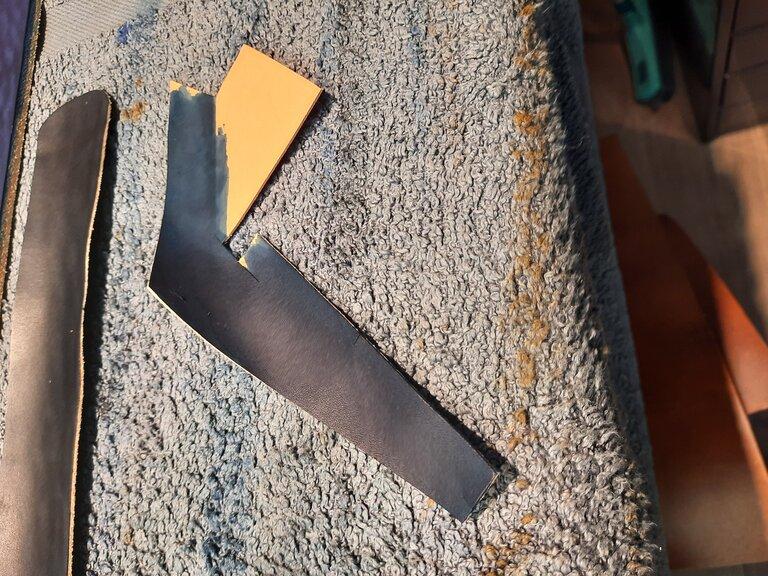
Right then, ordered some vegtan butt, which arrived this morning. It appears spot on and I've never had an issue with this tannery before. I cut off two strips for a belt in the making and dyed both. I immediately noticed an odd colouring and marbling. I just completed a dark blue belt about two weeks ago without issue using a different leather. It near on appears purple and this marbling effect... I did a test piece of the blue and it looks as it should. I need to contact the tannery, obviously. This marbling effect... is that from the tannage or the bull itself? The fact that dark blue (Pro Dye) is leaving this a slight purple, it makes me wonder on the tannage. I am unsure what caused this, hence asking here. Cheers!
-
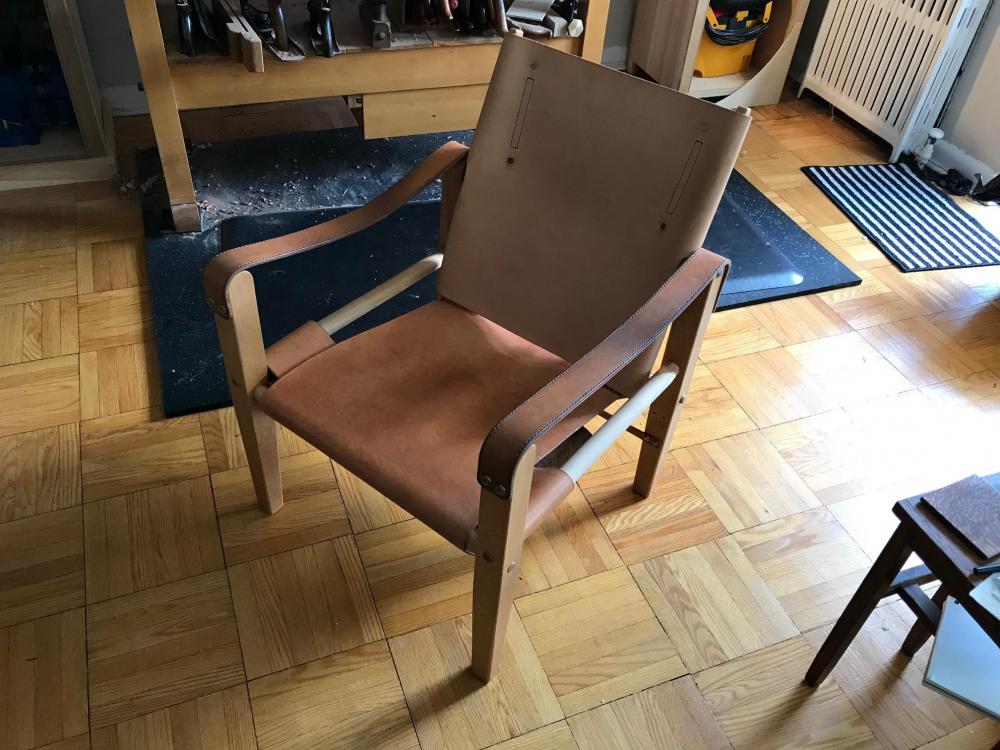
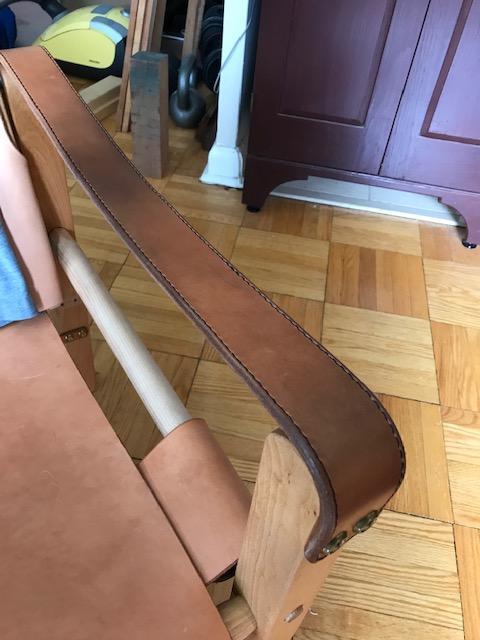
Hi, I'm having a problem with discolouration of my first leather project. It's a leather sling/safari/campaign style chair made with Tandy's 9 oz Oakleaf veg tan. I gave the seat and arm straps a coat of neatsfoot oil but haven’t got around to doing the back yet. After using it for a couple months, I'm finding that the areas my skin contacts the leather are turning an ugly, grimy grey. I've been hand washing even more than regularly due to the pandemic, so I have a hard time believing that dirt is being transferred from my hands and elbows. It seems more like a chemical thing. I'm totally new to this and had noticed that slicking the edges would often turn them greyish pink but didn’t know if that was normal. So I'm trying to figure out a simple way of darkening it all and thought I'd ask here before putting money towards experiments. I'd be willing to go all the way to black if needed. I'm wondering if the neatsfoot oil is going to be an issue. Thanks, Paul EDIT: just to be clearer, I'm happy that it's getting darker and patinated but want the ugly grey tone to be less noticeable.
-
I'm new to leatherworking. I recently purchased a 2-3oz half cowhide from Tandy but the leather arrived with a lot of cracks on the back. I had previously purchased a 5-6oz half cowhide that was stiff/dry but didn't have this cracking issue. Is this amount of cracking just in the nature of the lighter leather or should I message Tandy and file a complaint? If it is just in the nature of the product, what can I do to fix the cracking so that my projects aren't filled with these ugly lines? Here's a photo of the cracking:
-
Hey folks, I came here in the fall and asked some big questions, as this was an ambitious project. First time carving (the coaster in the album was my practice run) and first time stitching. I also hand-drafted the pattern (why make things easy?). I made tons of little mistakes (like why, or why, didn't I use an awl?). I also learned a lot, and I'm very happy with the overall results, and so was my niece! (it was a present for her). Thanks for all the help! The Making-of album: https://ibb.co/album/bbvb1X
-
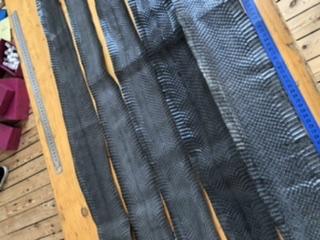
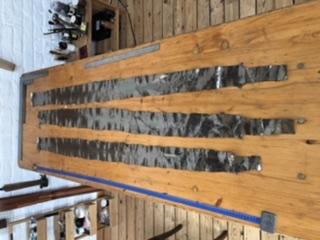
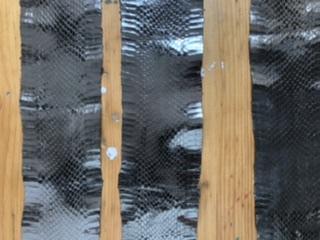
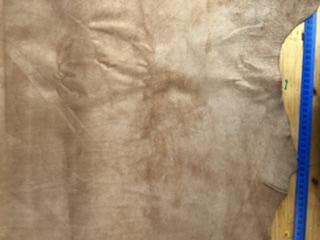
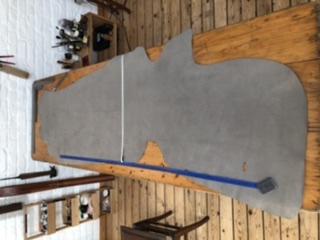
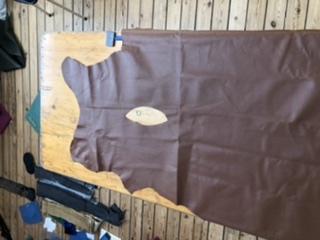
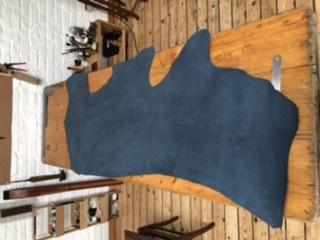
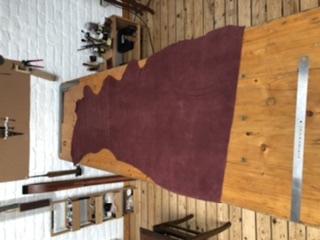
Hello all I’m getting rid of of some leathers that I don’t use during this confinement period and because of Corona it’s been quite hard making sales as I’m sure it’s impacted everyone in the leather-working community. So for sale I have 3 Nubuck skins from Tannerie masure in Grey, dark blue and Bordeaux they are around 12-13sqft each and a thickness of about 2-3mm I’m selling each hide of Nubuck for 45$ I have one remaining Brown calf skin lining used for the insides of shoes from tannerie Masure in Belgium. As you can see in the picture it has one hole in the middle and is around 13sqft. The flesh side is ultra soft and has a lovely suede feel and is being sold for 30$ then I have a selection of remaining vintage snake skins from an Italian tannerie dating around 1983-5 they are in grey, beige and a polished silver look. The grey and beige skins are 5€ each and the silver are 12€. i ship internationally from Belgium and if there are multiple purchase I can definitely work out a discount! any and all questions are welcome!
-
Hey y'all, my name is Brian, owner of Upstate Handmade. Thanks for accepting me to this channel. I want to show off some of my work but my photos are to big. Please findme on instagram: https://www.instagram.com/upstatehandmade/ Would love to hear what y'all think!! Thank you all
-
Hello! Extreme newbie here. I'm wondering if there is a difference between using a few coats of oil or using a brown dye to achieve a dark brown look than the original veg tan natural color. Is one a superior method? Thank you for any and all help.
-
Hi all, lost my old account. I used to post under Swivelspoons. I am looking for a new supplier of smaller pieces of veg-tan. I used to use Tandy's higher grade shoulders but they quit using American hides and switched to Brazilian stock. I need it to still be semi-affordable though.
-
Hey guys, I am in need of some advice, I have been working on a 22 x 22 chessboard for a buddy of mine. I am using Chahin Weaver veg. tan 5-6 oz. leather. I went ahead and used clear packing tape on the back and now I have cut all my lines and cut a 1 1/2 rose border. but now all of the edges and borders are beginning to warp or curl up. Honestly, its beginning to look like a giant valet tray lol. I still have a lot of stamping to go, should I just continue with tooling or should I remove tape and glue it to cardboard? I would appreciate the help? What would you guys do in my situation? Frank
-
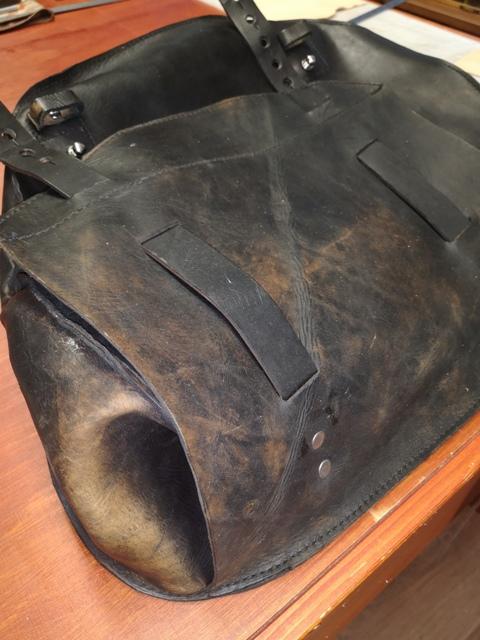
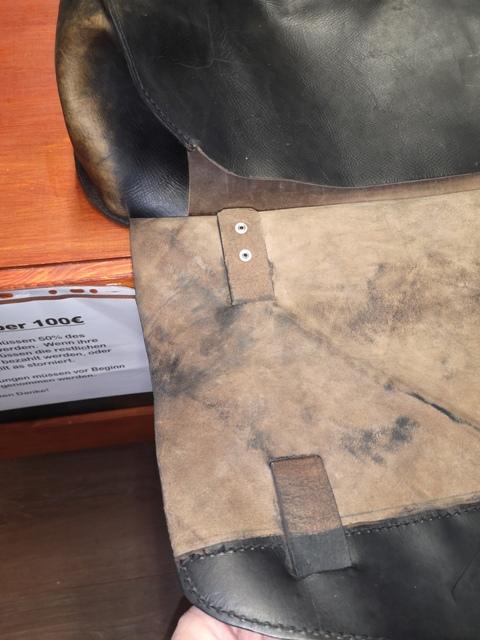
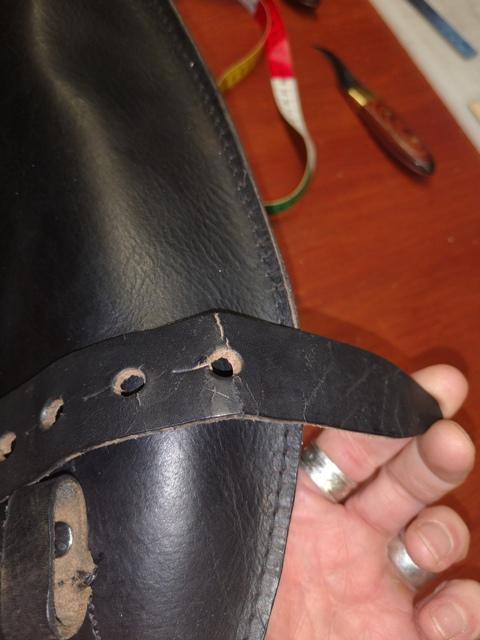
Good morning, last year a new client spoke with me quickly on restoring old saddle bags for his bike. At the time, he had a few moments and I noticed the straps cracking due to the buckles. I tossed on some proper screw rivets and removed the buckles to take some pressure off the straps. There was no time to use NFO on the straps due to weather and the bike was parked outside. Well, he returned. He wants the bags restored, but doesn't want the straps replaced just yet. Unsure why. He just wants the bags dyed. The leather near on feels and looks like a 2,5mm pull up leather. Quite waxy, but also harder than the pull up leather I normally use. Could be there is much change to the leather from exhaust and weather. They stink like an exhaust pipe! I plan on using NFO on the straps. Won't help the cracks much, but better than nothing for now. The question: On redying this leather. As I am unsure exactly what type it is and don't want to hurt the structure of the leather. I am thinking to saddle soap both bags (no the straps) to remove the 'gunk' and to prepare them for dyeing. When dry, dye and top coat. Obviously no dye to the insides. Thoughts, ideas or critiques would be appreciated. Cheers!
- 2 replies
-
- restoration
- redye
-
(and 1 more)
Tagged with:
-
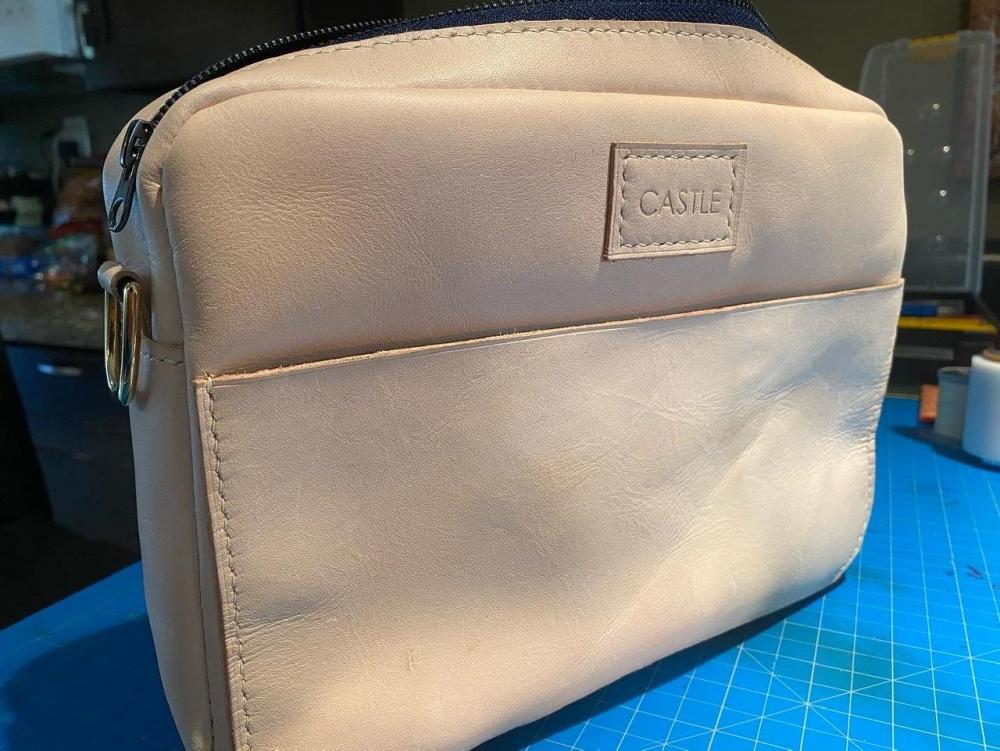
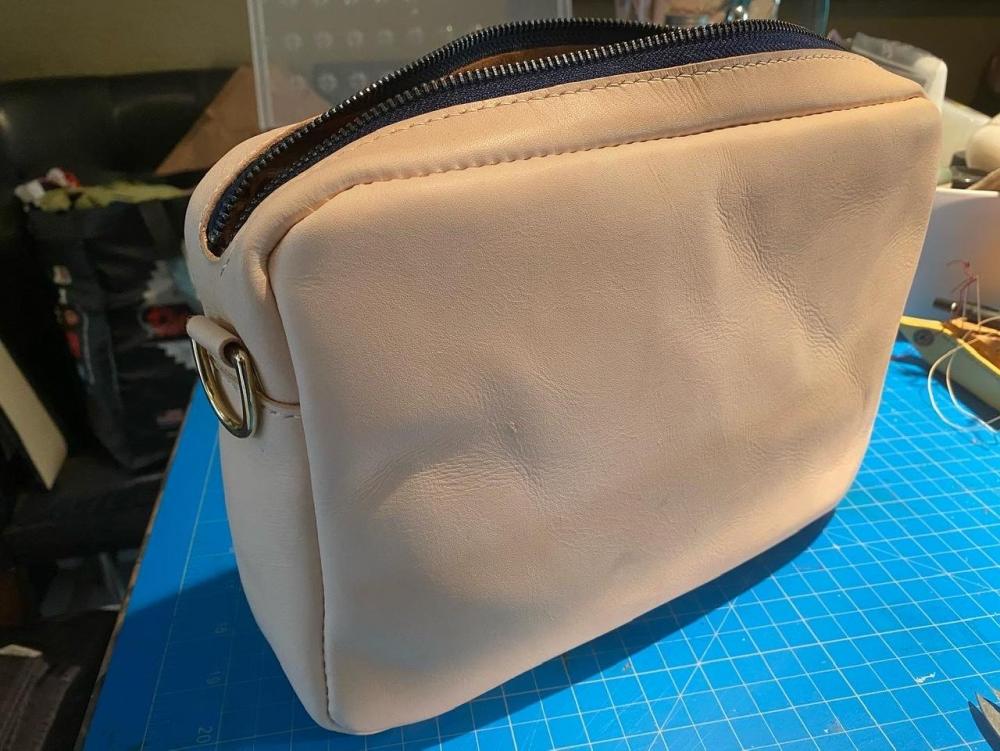
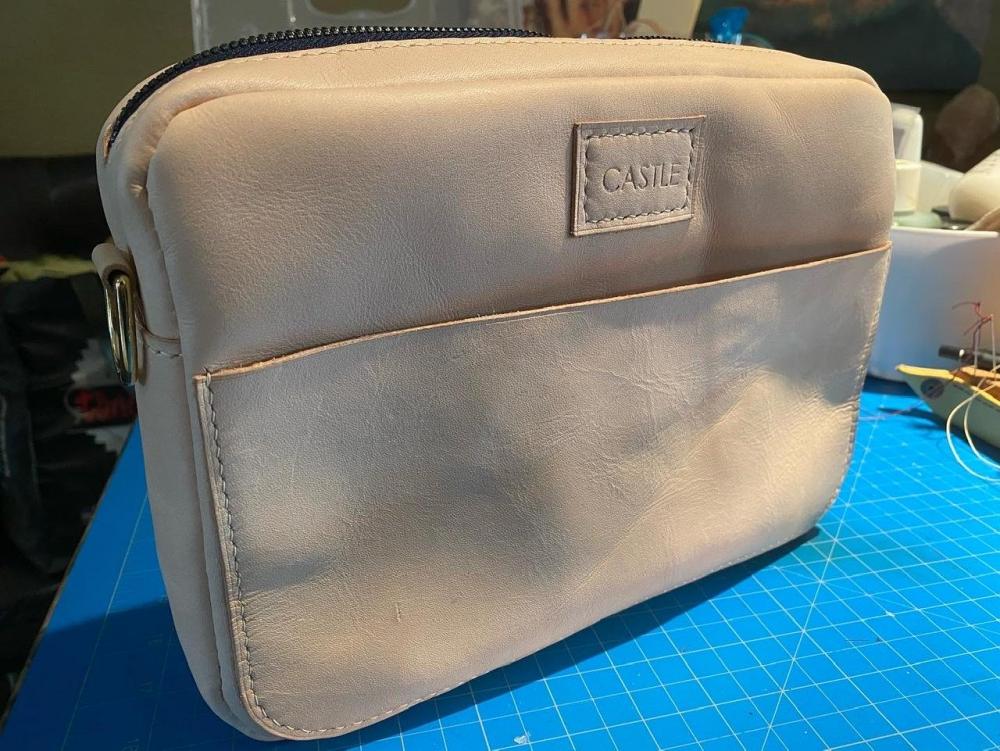
So this is my first attempt at making a bag of any sort. I’m actually really pleased with how it turned out. I’m calling this a prototype because I plan on making more with nicer leathers. While this looks pretty decent there’s quite a few scars on the leather and while it worked for this bag that’s not really the look I’m going for. Also I need to tweak the pattern a bit. And I need to make a strap just waiting on some leather to come in. The bag is made of 2.5/3.0oz European veg tan from Tandy. Stitched with twist 0.45 cream linen thread and I used some cheap 5mm pricking irons from Amazon. The liner is some sort of suede from an old jacket liner I believe (my aunt gave it to me when I told her I was making leather goods) I got the gold hardware from sav-more leather in Downtown LA. I’d really like to hear what you think or maybe offer some insight. I wasn’t sure if I was supposed to glue the seams before sewing ( I didn’t ) also I forgot to undo the zipper A little bit before closed it up so that was a total pain trying to get the zipper open so I could flip it. Here’s a lot of pics =) Thanks for looking !
-
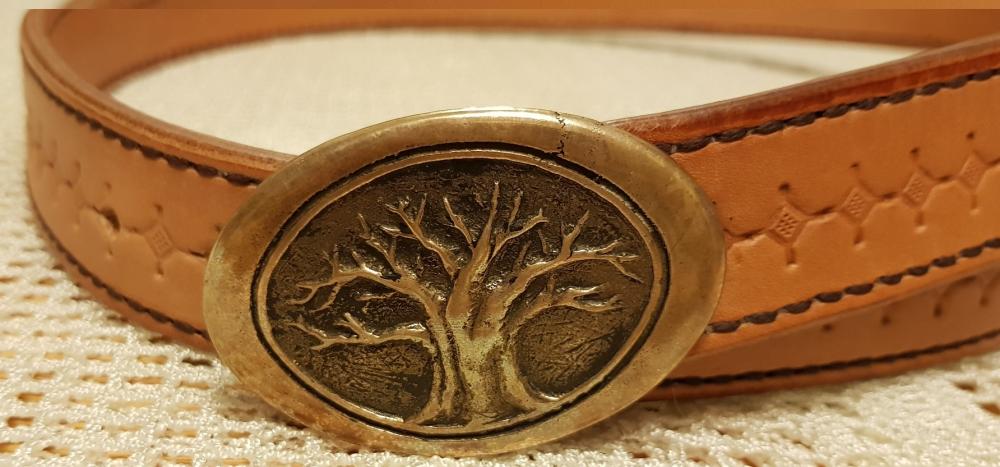
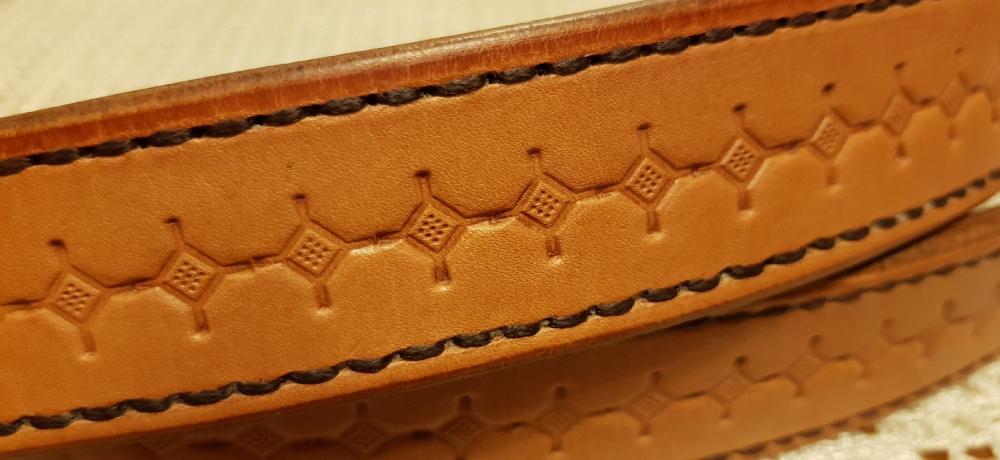
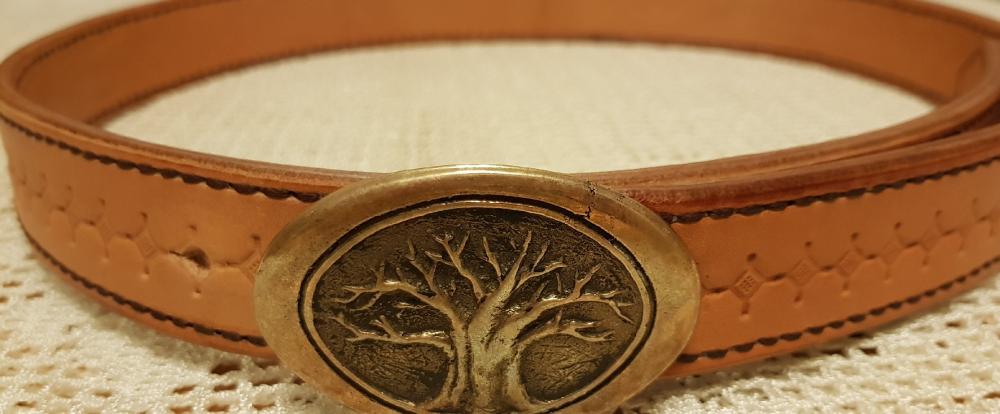
Hi all. I recently decided to make a belt for a buckle I bought some time ago. It's a double layer of vegtan, handsewn all round, and what a mission that was! It gives me new respect for all the folks here on the forum. Made plenty of mistakes along the way, but it is around my waist as I write this. I cheated slightly, once the stitching holes were marked with a wheel, I used a tiny drill bit in a dremel stand to drill all the holes, and then opened them up with a diamond shaped awl. The reason for this was to try to ensure that the stitching on the inside stayed relatively even. I'm very glad to have made this belt, but my hands reckon that it will be a long time before trying another one. Thanks for having a look, and any advise would be welcome.
-
This question started as a result of having some not-so-high-quality leather, that has some soft dirt marks, but now I’m curious about general prep practices before cleaning the leather. I was considering using denatured alcohol to wipe the leather with a sponge, before doing any cleaning. I understand this is effective, but also that it may dry the leather out. So, is it better to water down the leather first? Will that help to prevent the drying/hardening provided by the alcohol? I was then curious about the wetness of just water, since that tends to be used to help mold/form leather. Wouldn’t the water also cause hardening? Should the process be to: 1. sponge water and remove most dirt that can 2. use a light amount of denatured 3. add water 4. mold to final state 5. dye I’m considering something like making 3-piece gussets, where the molding may be important, yet hard to dye after molded (without dipping). I know it’s not ideal (or as affective) but can the leather be re-watered and molded after being dyed for those pieces? I also use denatured alcohol for cutting my Pro dyes, so there’s a lot of potential for drying out. I’m not sure what the best process should be to clean and dye. I would like to add a cleaning process, regardless if the vegtan leather seems to need it or not, just for consistency between final products.
- 5 replies
-
- leather
- preparation
-
(and 3 more)
Tagged with:
-
Hi all, I'm currently searching for a source of vegetable leather for wallets and belts. I need 2-3 oz for the wallets and I'd prefer 10 oz for the belts. I've found some places that have sides of 10 oz for around $230, but I'm just a beginner and although I'd like a full side for belting, this is out of my price range. I've also been able to find 2-3oz shoulders and remnants but I've been unable to find a full side yet. If anyone can point me in the right direction here it would be greatly appreciated. Thanks, Sam
- 5 replies
-
- vegetabletanned
- vegtan
-
(and 7 more)
Tagged with:


