


Ferg
-
Posts
2,274 -
Joined
-
Last visited
Content Type
Profiles
Forums
Events
Blogs
Gallery
Store
Everything posted by Ferg
-
I think you knew the answer to your question before you asked it. LOL You would need a 441 clone at the least. Cowboy, Consew, etc. Expect to pay no less than $1500 to $2500 for a machine that will likely outlast you. Some folks have good luck on CL & E-Bay. I personally bought one machine from a so-called reputable E-Bay dealer. The machine was okay but any further service from them simply cost me more money and much aggravation. Please tell your wife you need the machine to make some money with your craft, then start saving your pennies. You will be glad you did. ferg
-

Tiger Thread In The U.s. At Windmill English Saddle Supply.
Ferg replied to Dangerous Beans's topic in Suppliers
Not much of a site unless you want DVD's and books on saddle making. ????? ferg -
Max Usable Thread Size On Seiko Stw-8B
Ferg replied to Undeadzombiehunter's topic in Leather Sewing Machines
It will sew 207 with some difficulty although on occasion 207 on top with 138 in the bobbin will work. The 138 both top and bottom makes the best "heavy" stitch for these machines. ferg -
Singer 111W155 - Larger Pulley On Clutch Motor?
Ferg replied to cmantz's topic in Leather Sewing Machines
Your machine will run slower with a smaller pulley on the motor than the machine head. Call Bob Kovar at Industrial Sewing Machine. He has the servo you need. ferg -
Great read Eric. See!! Folks are interested in what you do and say. ferg
-
Lou, Try modifying the angle of the blade so it rests perfectly flat with no angle at all. ferg
-
Get a good knife skiver. You will throw the "Quickies" away after you learn to use the knife. ferg
-
Explain what skiver you are using. Strop the blade and keep doing that every once in awhile. ferg
-
You will need to sew the suede. Use some paste wax carefully on the edges. Helps some but as was mentioned, Chrome Tanned will not burnish. ferg
-
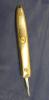
I may as well jump in here I made the handles. Knife maker on the forum made the blades for me. Pic one of them: ferg
-
A couple sources: http://parts.singerco.com/IPinstManuals/95-10.pdf http://velohobo.com/2010/12/18/singer-model-95-10/ ferg
-
I have a LOGO stamp made that is 2 1/8" x 1 1/8" I done make the impressions with a mallet. ferg
-
All of us get confused sooner or later. The reverse is used to sew 2 or 3 stitches over ones already sewn to "Lock" the stitch. I like to start a distance equal to three stitches away from beginning point. Put machine in reverse, stitch three stitches then go forward to complete your stitching. When the machine is adjusted correctly the stitches will fall in the same holes. ferg
-
Nothing is impossible, just takes a little longer. LOL I added to the first post I made, check it out. Using paper as a template is the way to learn this technique. ferg
-
If you have a sewing machine this is fairly easy. If you are sewing by hand I wouldn't try it. Google "Accordion Wallets". You may get some You Tube vids but there are many instances of this style. That is a good photo of them you have. Use that with any others you can find, you will be able to figure it out pretty quickly. I might suggest you cut a piece of paper approximate size, fold it similar to the photo along with the separator piece. This is rather difficult to do on a flatbed machine. A patcher works the best but you can do some of the stitching by hand, finish with a cylinder arm machine. ferg This may help you: http://www.ehow.com/how_12030401_make-accordion-style-credit-card-wallet.html
-
I Need To Know A Few Very Important Things To Get Started...
Ferg replied to Peppercorn's topic in Leatherwork Conversation
Peppercorn The Kangaroo is incredibly tough. I have made a couple dozen cases for Nail Clippers from this leather. I carry one myself. It becomes the shape of the tool inside it without molding. I find no discoloration on any thing I have made a case for from the Kangaroo. ferg -
I Need To Know A Few Very Important Things To Get Started...
Ferg replied to Peppercorn's topic in Leatherwork Conversation
Yes. Kangaroo is obviously from "Roos", is very nice and luxurious to the touch and eye. It is chrome tanned, dyed at the tannery, and averages 1.5oz. to 2oz. That makes it a shade less than 1/32" in thickness. I have made a number of change purses/wallets and lined belts and shoulder straps with the Kangaroo. You can get it in a number of colors. I tend to stay with brown or black, using the colors for ladies articles. Not a cheap leather. Skins are small, seldom exceeding 6 square feet. Baby American Bison/Buffalo skins are fabulous leathers also. The feel, texture, and wearability is similar to Kangaroo. Slightly heavier than the "Roo". ferg -
Thinning at the bend in a wallet is not such a good idea but if you wish to do a perfect job buy a "French Edge Skiving" tool. Several widths available. They aren't cheap but a good one is a blessing to use. ferg
-
You have a good start. Since you don't wish anyone to be mean,,,,,, you need to work on burnishing your edges. ferg
-
I Need To Know A Few Very Important Things To Get Started...
Ferg replied to Peppercorn's topic in Leatherwork Conversation
Peppercorrn I believe the leather you show in the photo is Kangaroo. Definitely some of the best leather I have ever used. ferg -
The foot with no left side foot or right side foot, whichever direction you prefer to go, will follow the line of snaps with the stitch line approximately 1/8" outside of the studs. You would normally have at least 1/8" to 3/16"between the stitch line and the right foot. It will land on the outside edge of the strap. I have done this, it works. ferg
-
I agree the folks have a great talent. I would like to see something, not quite so "Ghoulish". ferg
-
I said, "I also have a foot set with no left foot at all." I am reasonably sure you could get a foot set with the right foot ground off. I personally tend to use the one with the left foot removed. You would possibly need to alter the width of the collar slightly. The stitch line would be about 1/8" from either left or right side next to the studs. ferg
-
craftsman827 Did you not read my previous post? ferg
-
Do you line your collars? If so you will, of course need to install the hardware first. There are feet for most machines that have left or right foot ground very thin. I also have a foot set with no left foot at all. Some leathers do not sew well when you use very narrow feet. I would try a walking foot machine with the left foot ground off before making any decisions. If you can visit a dealer take some of your leather with you. You would do well to take one of your collars with the studs but not sewn of course. ferg
