Billsotx
-
Posts
533 -
Joined
-
Last visited
Content Type
Profiles
Forums
Events
Blogs
Gallery
Store
Everything posted by Billsotx
-
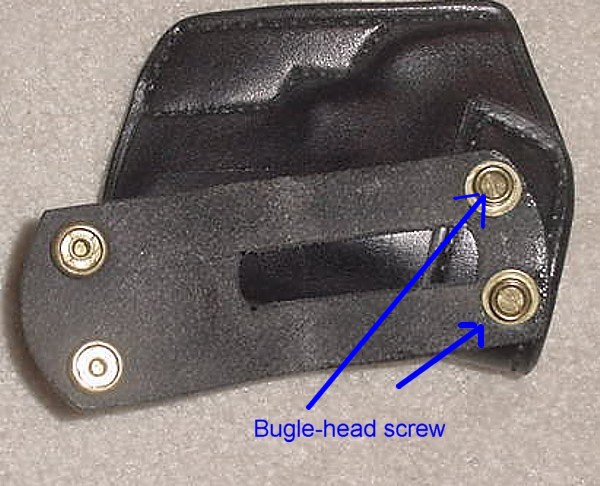
T-nuts are used widely in gun leather. An example would be interchangeable belt loops on an IWB, allowing changling for wear with a 1 1/2" belt to a 1 3/4" belt and/or other combinations. (I try to attach a pix.) I use the tool kit you linked to for all my snap setting. If you can afford it get both lengths, if you can't get the long ones. There's lots of ways to trim them. I usually do it with nippers; like you trim horseshoe nails with, because they are handy. You may wanna see Stolhman's book on using and maintain leathertools for some good info and pix. The book is an education in leathercraft tools to say the least.

-
Thank ya ma'am, that helps; ten's better than the way it wuz.
-
the most annoying words to hear from a customer
Billsotx replied to The Major's topic in Leatherwork Conversation
Pink and purple ... hmmm ... What kind of bike does this guy ride? A Mo-Ped? ... lol -
When I click on links, say one that is in someone's post, the browser window that opens from that link opens one the left side of my desktop - way over on the left side - I can barely see that window, but can manage to run my cursor over the edge of it and get a double-headed arrow and drag it open and then enlarge it so I can work with it. This just started occuring about a week ago, it hasn't always done that. I probably didn't something unknowingly and dumb. I don't know that I need to know or will understand why, but I'm curious as to what has happened. Can you explain it in Dummy's terms? More importantly, is there a way to correct this and get these windows back towards the center of the desk top? Thanks is advance for replies. ~Bill
-
sewing in a toe plug for a holster
Billsotx replied to John Wiley's topic in Gun Holsters, Rifle Slings and Knife Sheathes
Gary is right on, on his sewing instructions. Some holsters should be plugged. A plug will keep debris out of the holster if you are out in rough terrain - sitting, squatting, kneeling and crawling around. I always wear a handgun even when I carry a shoulder weapon. Guns are tools and they don't always work - have a backup. Clean your plugged holster on a regular basis with a shop vac or vacuum cleaner. A small hole through the plug will let rain (water) drain should you get drenched or dunked. -
best liner for a gun case?
Billsotx replied to Oscar B's topic in Gun Holsters, Rifle Slings and Knife Sheathes
Leather pulling oil away from the gun. Never heard that one before. The problem is leather attracts moisture - hence rust. Never store a firearm in a leather case or holster. The worst damage that I've seen due to neglect were handguns that were left unattended or stored in leather holsters. Leather is heck on ammunition too - brass and leather do not like one another. -
I've used Coats and Rice and I prefer Coats. Coats makes every kind of stitching and sewing thread extant. In short, yeah, it's reputable.
-
I'd ask the Zack White people for a sample and see if you can tell about the quality from that if you want dbl. shoulders, but Johanna is right on the side being the better choice, especially if you're going to make gun belts. Cut your belts long wise with the back and your holsters and support accoutrement from the rest. Some suppliers will remove the belly, but I get the whole side. The belly is good for practice carving if nothing else. I have a personal holster that I made from the belly and the comments are always something to the effect - "How many miles you got on that thing." Like Jo said, scars, brands, sag can make for an interesting piece. The attach rig is what some call pasted leather; others call it gummed. It's hard on blades, but it wears well. The client supplied the buckle; it's by Montana Silversmiths as I recall.
-
I have compiled the steps I plan on using
Billsotx replied to Regis's topic in Leatherwork Conversation
*Suggestions; I've only done one purse so I'm no expert; this is sort of like building a holster, at least in my mind. 1- cut-out all leather and liners to pattern *2- completely carve and tool leather (if hand sewing cut sew line) *besure to glue the pieces you're going to stamp/tool to something to prevent them stretching; or tape them. *3- dye leather base color you want *test your dyes and color stuff on some of your scrap before you apply to your project. Leather is like hands - all the same but different. 4- apply any coloring (dye or paint) and/or mask to specific areas (e.g. scene, figure, etc) 5- apply antique and wipe off immediately *6- burnish edges and apply edge treatment * burnish the edges you will not be able to get to easily after assembly (e.g. steps 8&9, but not all of the edges. Some of the edges that you glue together and stitch, front and back panel and gussets, will look better if you edge bevel, sand, color and slick, etc. after they are stitched. 7- Apply a coat of finish (e.g. Super Shene) 8- glue liner to body and gussets (silk in this case) 9- sew/attach any internal parts/pockets (closing latch and elastic strap for BlackBerry in this case) *10- glue gussets and body togather *these are what I mentioned previously. Easy to get to and finish after stitching. If they are not then finish before assembly. 11- attach D-ring (glue, sew, rivet, etc) 12- sew sides/seams if applicable 13- attach strap (glue, sew, rivet, etc) 14- Apply 2nd finish coat over all leather and buff *the edge finishing probably would fit in right before the finish coats are applied; except for those internal, hard to get to and the compartmental pieces like the Blackberry case. 15- Give purse to waiting daughter * bet ya she'll like it better than any store bought purse. -
Hey Bill the Kid you ol' leatherworker, glad to see you're over here. We notice you were awful quite. Hang around and you may pick up some of Jo's unburnt energy. Gosh, what a worker that gal is! Sorry to hear you're a bit down, Billy Boy; hoping you get back in the saddle soon. We'll say some words for you when we say our evening prayers. Hope to get a peek at those projects you're working on. Hang tough amigo. And thanks to Johanna and the Monkey and those others behind the scenes. I agree with the others. EXCELLENT to OUTSTANDING - job well done. best regards, ~Bill
-
Take a look at this stuff Ed: http://www.dyo.com/retail_catalog.html
-
On your working pattern spray it with laquer - neatlac - or similar to stiffen the edges and you'll get more mileage from them.
-
Marie, I started with TLF and figured out I needed a round bottom the most and on Bruce's advice I bought J. Watt and I'm please with it. I called and talked to Watt and told him what I wanted to use it for and he sent me his #0 and told me if that was too big or too small he would exchange it. It was the right size. It requires to stropping once in a while. I use a piece of denim impregnated with rough wrapped around a small steel rod to strop it. As I recall it cost $45 plus shipping - a few bucks. I recently bought 2 drom Duey Peters. They are very utilitarian - plain jane - and they work. They are very inexpensive - $12 to $15 plus shipping. Strop them the same as above. As far as description they look like a Bissonnette edger with the end cut out. They are not fancy, but fancy don't make them work. Since I got the Peters I turned my TLF into round bottom edgers. All you need to do that is a round needle file, some 400, 600, 2000 grit wet or dry emery cloth or sandpaper wrapped around a small steel rod and a piece of denim or light canvas covered with rouge and you can modify what you have to work well. I nubbed the toes back a bit to. You can blunt the toes a bit so they don't bite you, but it's best to get your personal gear behind the cutting edge. To me that's just good habits. Whether it a head knife or a whatever - keep your stuff behind the cutting edge. I think folks get hurt with head knives because they don't use them all the time. If there's an edgee tool with a learning curve that's the one. If we don't put in time with it, we'll never master it. Sure there's other tools that'll do the job, but the round knife will do almost any cutting task and do it well if we spend the time to learn that skill. Same with those edgers. I'd bet you can turn any or all of those you've got into round bottom edgers if that's what you need and want. I don't have much doubt in your skills to do that from the conversations we've had. Just take your file and do one of those TLF for a starter and see how that goes. If you mess it up, try again. There's a bunch of metal there you can reshape. Worst case you're out 15 or 20 bucks if you get too ham handed. If I knew what I know now I'd would have just modified the TLF edgers and been done with it, but I'm one of those who learns by seeing. I had never seen a round bottom edger or knew they existed until Bruce referred me to J. Watt. Make no mistake about it - the J. Watt is one nice looking tool and it holds a keen edge. I also liked what he told me about exchanging it if the first one wasn't the right size. Sort of like the dog here chasing his tail - right? Bottom line - all the tools in this thread can and will work and I know you're capable of using them. Good luck which ever way you leap. 'til later ......
-
Romey, I'll be glad to read and study any information you're willing to share. Thanks for spending your time at this.
-
Romantic? ... you must have some French blood ... lol!
-
Whinewine, thanks for researching it. I appreciate you giving us feedback. It may indeed be a hoax. When I searched for HR1022 which took me to a site GovTrack.US and I found that Rep. Carolyn McCarthy is sponsoring the bill. It does not appear to have no co-sponsors, so it may indeed be false. Here's a little of what I found. Statement from Rep. Carolyn McCarthy on the Shootings in PA and UT Tuesday February 13, 2007 Yesterday we learned of more unnecessary deaths from gun violence in Philadelphia, PA and Salt Lake City, UT. I am saddened to hear of these events and have introduced legislation that if enacted will prevent further violence. In Philadelphia, a gunman opened fire on his colleagues using an AK-47 assault rifle he legally purchased. These dangerous weapons, which are intended to hit multiple targets in a short period of time, were allowed back on our streets when the federal ban on assault weapons expired in 2004. The deaths in Philadelphia could have been prevented if Congress had done its job of protecting the homeland and renewed the assault weapons ban. I have again introduced legislation to permanently ban assault weapons. These weapons have no practical use. They are not used by hunters for sport or by individuals for self-defense. They are intended to kill as many individuals as possible in a short amount of time and have no place on our streets. The unfortunate situation in Philadelphia could have been avoided if Congress stood up to the gun lobby in 2004. In Salt Lake City, a young man opened fire in a crowded mall, killing more than 10 individuals. It appears the shooter was not mentally stable and police are still investigating how he obtained the weapons. It is vital that the background check records are current and comprehensive. I have introduced HR 297, the NICS Improvement Act that would strengthen the National Instant Criminal Background Check System. These records let gun dealers know when an individual should not be allowed to purchase a firearm. Improving the quality of these records will keep guns out of the wrong hands and make our country safer. I am deeply saddened by yesterday’s events. I remain committed to passing common sense legislation to prevent further acts of gun violence. http://www.govtrack.us/congress/bill.xpd?bill=h110-1022 http://www.govtrack.us/congress/billtext.xpd?bill=h110-1022
-
They are at it again... http://www.govtrack.us/data/us/bills.text/110/h/h1022.pdf I almost NEVER send anything like this out. However, it would probably be wise to contact your congressman and tell him/her you expect them to vote against this bill. Even if you don't own or shoot these type rifles, every one of the shooter who do, will without fail back your right to own and shoot the guns YOU enjoy. Also, letters work much better than emails.
-
If you'll call Judith at HO and ask her for some sample swatches you can get an idea what HO has to offer. I have both WC & HO bridle and the WC is drier like you mentioned. The HO is somewhat waxy feeling in comparison. I haven't tried to tool it so can't help you with that one. I think you'll have to antique it or get creative because the dye doesn't penetrate very deep. I think the only though and though dyed leather is their Harness grade and "I think" it's only available in black. As for a sample of that too. They have an 800 number on their website and the swatches should give you an idea what they've got. Hope this helps.
-
What we got on our hands here is a toe to toe... with Mars! - Col. Helmut Jitters You're quite the artist Kate! Real cool!
-
Romey, Very useful info, thanks for sharing. Lookin' forward to Part 2.
-
Now you've done it Marie. You let the cat out of the bag. My ol' Border saw that collar you posted and now I have to make him a new one ... lol! Nice work and welcome. Thanks for sharing; looking forward to your next.
-
What about the cork in that jug of vino you got hid out in your saddle bags? ... tastes better than chewing on a pencil, especially the ones with lead paint on them ... lol
-
What ya lookin' for Romey? ... lol!
-
I had to bug-out for awhile, but I as hoping I'd get back here and add some more to the above post, but it won't let me edit it. Too much of a time span I guess. Anyway, when applying the antique over the resist, concentrate on getting it well down into the impressions you want to color (or discolored) and wipe it away from the high spots pretty quickly - as you go if you will. On a small project you can cover the whole thing and then go right back to wiping it away on the high spots, but on a larger one you'll have to remove it as you go. (Incidentally, I believe paste is more forgiving time-wise, than liquid. I haven't tried gel, but I understand that's available. Seems like someone put that in another thread.) Gettin' back to it - work randomly and backtrack at bit so you don't end up with a patch-work look, i.e. overlap where you stop & start again. Not unlike the resist, you can always add on more antique and that's easier than taking it off if it sits too long. If you hit a high spot that's holding too much antique try using water to remove it'; depending on where and how big a spot; that might be a damp piece of cloth wrapped around your finger like when we spit-shine boots or just a damp q-tip. Have that handy when you start the antique application. Dampen with water, as Johanna mentioned you can wash it off and water will remove - "somewhat" - almost, for all practical purposes (is there a lawyer in the house) ... lol! Maybe Johanna or one of the other moderators can cut 'n paste this post into my earlier piece. Let me know Bum if you have questions and if you try this I'm open to feedback. Everytime someone asks me something, I learn something. Buena suerte amigo...... Bill- I'm just letting you know I'm paying attention, but I'm not going to bother editing you. You explained all of that really well, thanks for helping!~Johanna
-
Delrin swivel knife blade?
Billsotx replied to Regis's topic in Purses, Wallets, Belts and Miscellaneous Pocket Items
I was thinkin' what Dan said when I read your opening post. It's one of those why didn't I think of that things. Sounds to me like you've got a free-hand creaser! Get those stitches below surface level so they don't abraid and you don't gouge into the strongest part of the hide grain side. A file and an inexpensive TLF swvl/knife blade and I've got one too. I guess you can blunt one of those Henley blades too ... lol!