Mark842
Contributing Member-
Posts
557 -
Joined
-
Last visited
Content Type
Profiles
Forums
Events
Blogs
Gallery
Store
Everything posted by Mark842
-
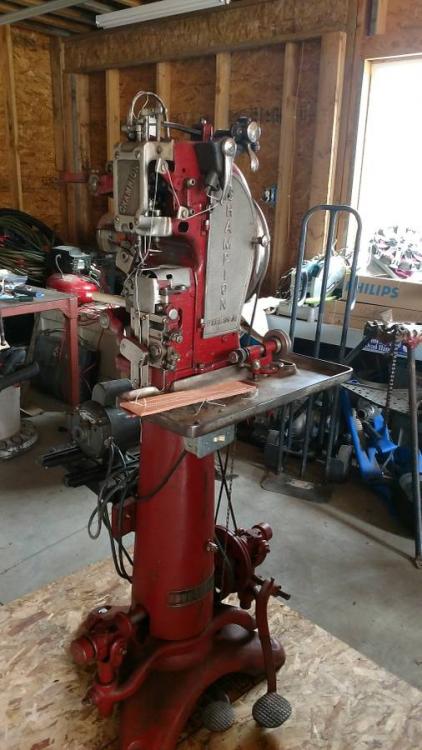
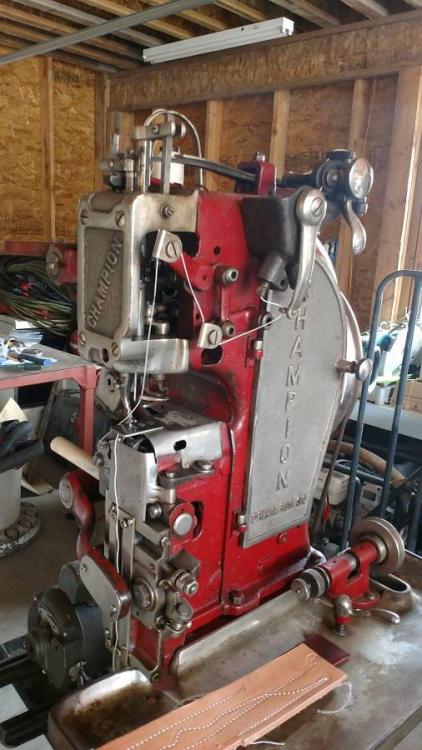
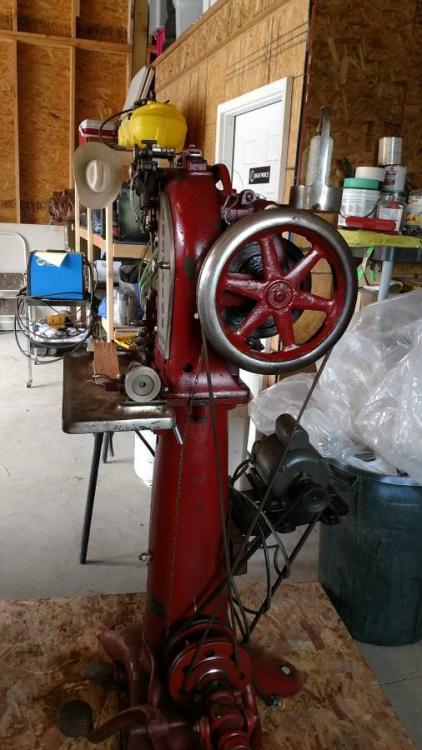
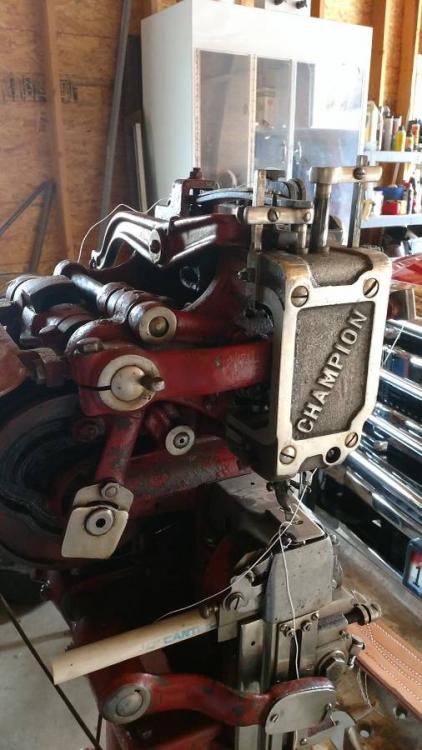
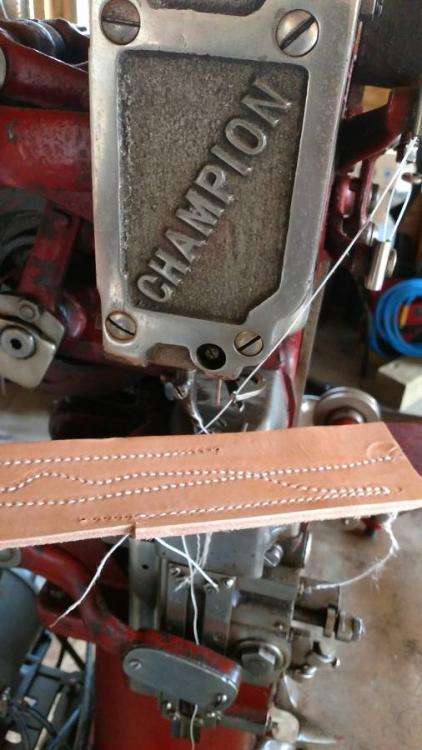
Hi Folks, I've been looking for a harness stitcher to add to my shop. This machine has popped up in my area. he wants $1800 for it. From a little research it looks like needles and awls are still available for it but I can find nothing in this condition to compare prices to. This seems a little steep to me but it I can't find any in this condition. Advertisement reads: Champion Harness/Saddle Lock Stitch sewing machine. Been rebuilt. Sews awesome. Has bobbin winder, easy to thread. Mounted to pallet for shipping. I can deliver. you will be extremely happy with its condition.
-
photo HELP!!!!!
Mark842 replied to stoney327's topic in Gun Holsters, Rifle Slings and Knife Sheathes
I'll second Irfanview editor. Nice free photo editor that's simple to use. -
Looking back at when I bought my first machine....half the previous post would be greek to me. Do you know anyone that sews that you can bring with you? if not, at least bring a sample of what you want to sew on it and have the seller sew with it so you can make sure it works. At minimum listen and look. It should not miss any stitches and it should have a steady smooth sound. Reverse should be able to stitch back in the same exact holes that it just stitched forward in.
-
Might help to show what border stamp you will be using. My method depends on the stamp.
-
I'll second the grab it quick for that price but I guess that only works if you have the budget. that machine is a steal at $200 and even if you can't use it, resell it for a profit to buy what you need. I would check it out real good though. At that price you either have a friend deal, someone not knowing what they are selling, or there is a major issue with it and they are just unloading it. It is a patcher. It won't sew thick stuff but for bags, putting patches on jackets, etc and doing hard to reach repairs and projects they are fantastic machines!
-
Pfaff 335 binding attachment on Seiko CW-8b(consew 227)
Mark842 replied to Jordanball33's topic in Leather Sewing Machines
I'm curious to see what you got and how it works also. I have a Suisei Top Bottom double fold that I use with my Cobra 4. Works great with canvas and vinyl. Hasn't worked too good with leather as it can't handle the thickness. It's been sitting on the shelf waiting for me to put on my gee whiz hat and rebuild it to handle 2 oz...Unless I can find one that will out of the box for a reasonable price. -
I personally consider jiffy rivets for show only. I use tubular or copper rivets if they have to hold anything.
-
In the spirit of a picture is worth a thousand words, a good video is worth a million...
-
I've found Liquitex Varnishes to be excellent sealers for dyed leather. It's flexible and waterproof when dry. It might work and it's not very expensive.
-
I really dig the dragon flesh!
-
I've found the "Ignore user" on my profile useful. I've ran into the same opinions the Nstar has mentioned. I just figure we all have our own ways and needs. Actually had a fella in here tell me we would never sit down and have a beer together and be friends because my goal is to put out a quality product and make a living and his goal (which is the only worthy one according to him) is to only make high dollar hand made items. I agree with Mike. I $200 wallet is fine and dandy. So is a fine quality $25 wallet, and a lot more people can afford them. I know which one feeds my family. Mark
-
I've never had to email admin to have access. The Adult section is listed on the Home screen for Forums on this site about 3/4 of the way down the page. Maybe something I did a long time ago granted me access, who knows...
-
Have you tried contacting Artisan yet regarding a spare board? The PDF you linked has a reference to "One circuit board (No.: 02E03947)" that it recommends having for a spare.
-
Yep, hands down one of the best time savers we ever purchased for our shop. What used to take 2-3 hours a day for two people is now done in less than one hour for the entire week.
-
Advice wanted for leather on outer garments.
Mark842 replied to mggrraanntt's topic in How Do I Do That?
Try Liquitex Varnishes. Flexible and extremely water resistant with zero dye bleed. Been using it for 25+ years on leather. Never threw any veg in the washer but I've been washing a denim jacket that I painted a Jethro Tull Aqualung album cover on in probably 72 with acrylic paints and sealed with liquitex. Probably been laundered 20-30 times over the years and the only part of the jacket that isn't worn out and faded is the painting. -
Starting and finishing the stitch at a specific point (machine stitching)
Mark842 replied to jakc3's topic in Sewing Leather
Depending on the type of leather you are sewing, mark your stitch lines either with a silver pen or a stitch groover. Silver pen for leathers like chrome tanned that tannery dyed and sealed and the groover for veg tanned. Line your needle tip up with your starting point and follow your line towards your next way point that you have to hit spot on. When one or two stitches away turn the machine by hand. As your dropping the needle on the stitch for your way point, lift your presser foot and line the leather up so the needle hits your point. If this will be on a corner in the stitching, take the needle down through your leather to bottom dead center and then up 25% of the length of your needle. Then with the needle still in that position turn your leather to the new direction you want to sew and stitch away to the next way point, repeat. This will insure the top thread hooks the bobbin thread and you will get perfect turn. When do your last few stitches, since we didn't start with a back stitch, hit your way point using the turning by hand method and then stitch the next three stitches in the same holes you started in. This will lock your stitches in. Two other methods are to start with a back stitch and end with a back stitch. For me, on small items like watch bands I don't like this method as no matter how perfectly you hit your holes you have the double the thread and it shows. The other method I do use a lot on watch bands that I will be lining, is to not do any back stitches, nor do I sew over my first three stitches. Instead sew your project and end in the hole you started in. Grap your bottom thread for the first stitch and pull it till the knot for the lockstitch pulls through the bottom of the leather. Use an awl to grab that loop and pull the top thread through to the bottom and tie a knot between the top and bottom thread. repeat for your last stitch. -
Unless I missed it, I didn't notice what type of dye you used. If using a fiebings pro dye you need to take a cotton cloth, I like white T-shirt material so I can judge progress, and start buffing. About the time your arm is going to fall off switch hands and keep buffing. After awhile you will get the impression that the dye will never stop coming off on the white cloth. This is pretty much true. I buff to the point where I am just getting a trace of dye and then seal it. I'll get to what I seal it with in a moment. If your using an antique dye you will need to buff after its dry also but much less than the pro dyes. You will notice in short order dye will stop coming up off the leather after a minute or so. Antique dye items I buff, give them a coat (or several depending on items use with regard to weather) of Obenuaf's LP. After the obenuafs dry I seal with Acrylic resolene applied by airbrush in several light coats. Pro dyes, alcohol, oil dyes (all pretty much the same beast), after buffing and treating with obenuafs..If this item will see hard use, rubbing on clothes like a belt, holster etc or other application where zero dye bleed is an absolute need I seal with Liquitex pro varnish. I've tested a bunch of different stuff over the years and have found this stuff to work great. Its flexible, durable, never discolors even in heavy UV apps and best off all you can rub that leather till your blue in the face and lift zero dye! All that being said, there are a million ways to skin this cat and I'm sure others have ways that will work equally as well. Have fun!
-
Yep, my next thought after posting my thoughts on this were to just take my dremel and cut off the protruding part of the blade and them figure out how to attach the blade permanently. Then I thought, hell, why not go see my buddy down at the machine shop with a few ideas... Will have a prototype in a couple of weeks.
-
Thanks for posting this. I've been curious about this lace cutter and how it works. This demonstration will save me some money. We use the Tandy plastic lace cutters right now and they work fantastic. My only complaint with them is if you cut a lot of lace it literally wears away the plastic opposite the blade until it eventually breaks. It takes about 80 sq ft for me to wear one out till it breaks, not to mention as it is wearing out it allows a wider gap making the lace thicker. The pros that I think the Tandy lace cutter has over this cutter: Inexpensive. They are $5.99 unless you can arrange a bulk deal like I can with my local manager. I buy 25 at a time for $3.50 a piece. The blade is completely enclosed so it is impossible to cut yourself while cutting your lace. That blade hanging out the top of this one looks like a blood letting waiting to happen. Blade is held in place by the handle which allows for very fast accurate lace cutting. I can hand cut 25 sq ft of 7 oz chrome tan in about 2 hours making roughly 1400 ft of lace. Cons: Width is only adjustable by using one of four different slots on handle. The bottom 3 slots are too thin for anything I would use it for. Sure wish someone would take the design of the Tandy cutter and machine it out of metal! I was hoping that was what this Osbourne was. Watching this video, I think I'd be dead from blood loss in about an hour. I d don't like that you have to hold the blade in the cutter. I do like that it is adjustable. Just my 2 cents for what its worth.
-
A little trick I use when I have manuals in other languages. I tried it with the manual for this and it does allow copy and paste on the PDF so you might consider giving it a try. I copy and paste the original language in the sections that don't make sense into Google translate. You will find that 90% of the time the translation will be close but not the same and it has helped me make sense of stuff in the past. Just to give you an idea, your manual starts with the English Title "For Safe Operation". If you copy and paste the Chinese text directly under into Google translate it reads, "Important Safety Matters". Says the same thing..differently and sometimes its all in the syntax. Hope this helps!
-
I've done 3/8" before with no issues. I have about 1/2" lift but I've never tried thicker, have other machines for the thicker stuff.
-
How can I adjust a cowboy bench spitter/skiver?
Mark842 replied to ADDgirl's topic in Leather Machinery
I agree with Dwight. You probably moved the roller on its front to back plane. For the record, I own a bunch of splitters, many different brands. I've have never owned one no matter the make that had a blade so evenly honed that the spacing between the blade and roller was perfectly even across the entire edge. IMO its the nature of the beast and has never mattered to me as the widest items I skive on it are about 2-3" wide. I've never owned a Cowboy brand skiver but I've used one on a friends bench and it was definitely a quality tool. Mark -
Of course. I expect no less! I've just bought a couple new machines, some new dies, and worst of all, the tax man cometh next weekend. if its still available in July I'll yell at you and we will work it out. Thanks, Mark
-
I'm interested but it would have to wait till July for me. Been buying and the budgets a little thin right now. That being said, I know this is a great deal. If I could now I would. If it is still available come July I'll be contacting you. Thanks! Mark
-
Payment sent...thanks!


