
Constabulary
-
Posts
5,803 -
Joined
-
Last visited
Content Type
Profiles
Forums
Events
Blogs
Gallery
Store
Everything posted by Constabulary
-

Do I Have A "complete" Busm / Pearson #6 - Or What?
Constabulary replied to Constabulary's topic in Leather Sewing Machines
Hey amuckart - thanks for jumping in. Yes, I was amazed when I was unpacking everything. Yet I don´t know if I will keep the machine when I´m done with the repair. So in case of keeping it I will probably restore and give it a new paint job . You also have restored a BUSMC #6 right? -
Do you have a parts list for your machine? There is a tiny pin inside the tesion unit that pushes agains a small bar on the tension release disc when you lift the foot. You usually can adjust the small bar a bit toward the machine so the tension releases a bit earlier but be carefull do not brake it. Or check if the tiny pin inside the tension unit is probably missing.
-
Do I Have A "complete" Busm / Pearson #6 - Or What?
Constabulary replied to Constabulary's topic in Leather Sewing Machines
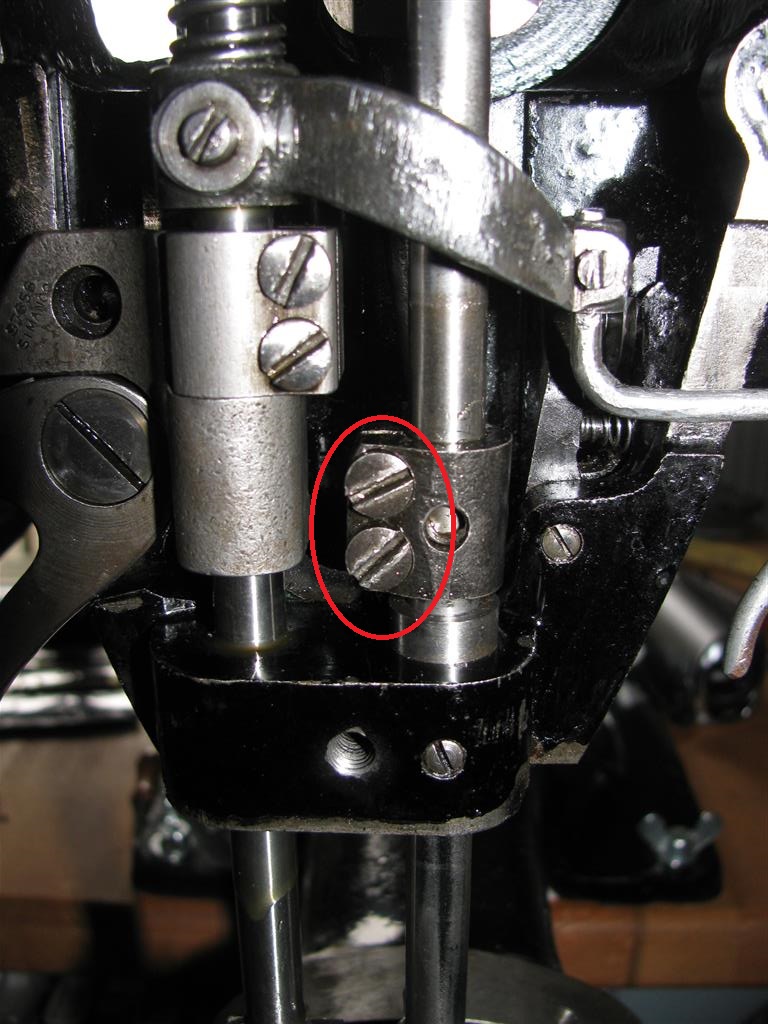
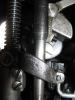
got it - the long "presser feet" are needle guides -
Do I Have A "complete" Busm / Pearson #6 - Or What?
Constabulary replied to Constabulary's topic in Leather Sewing Machines
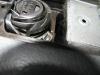
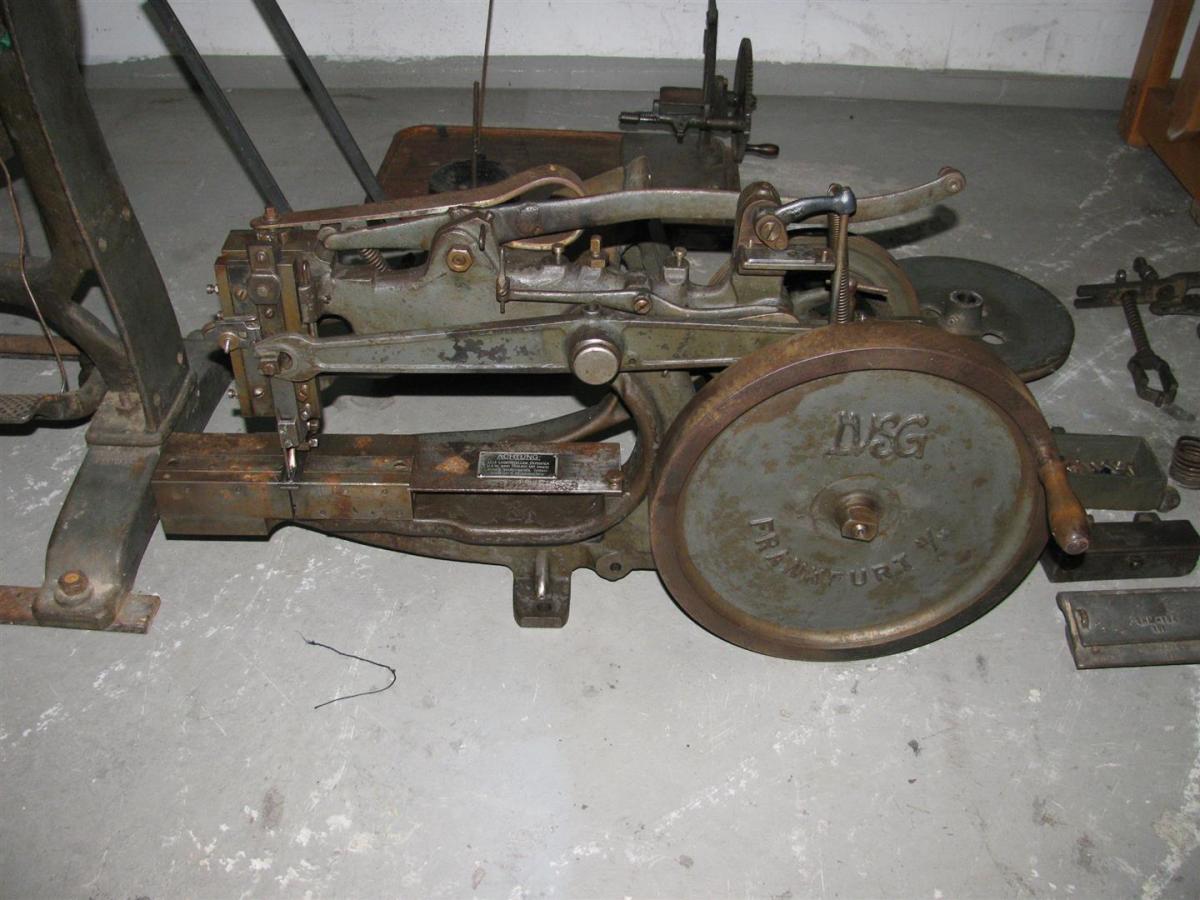
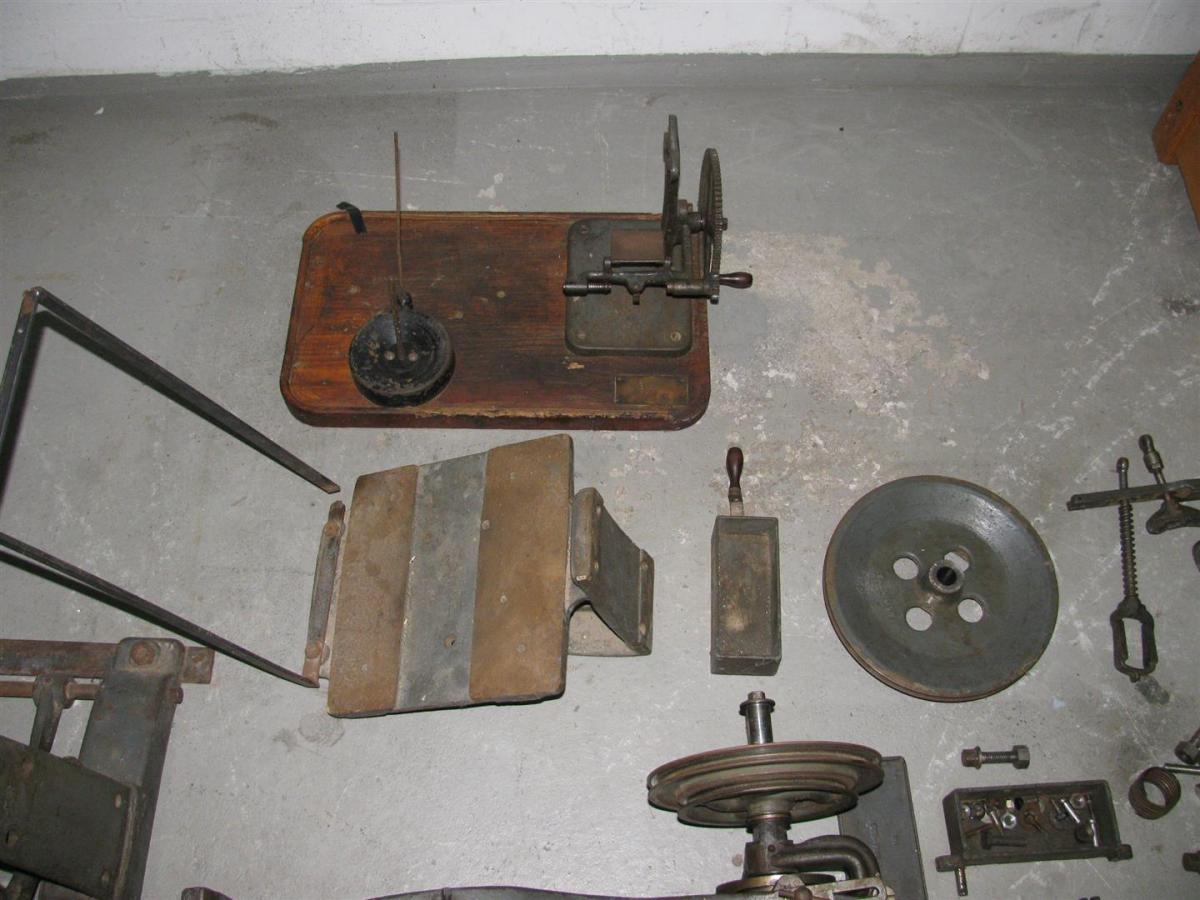
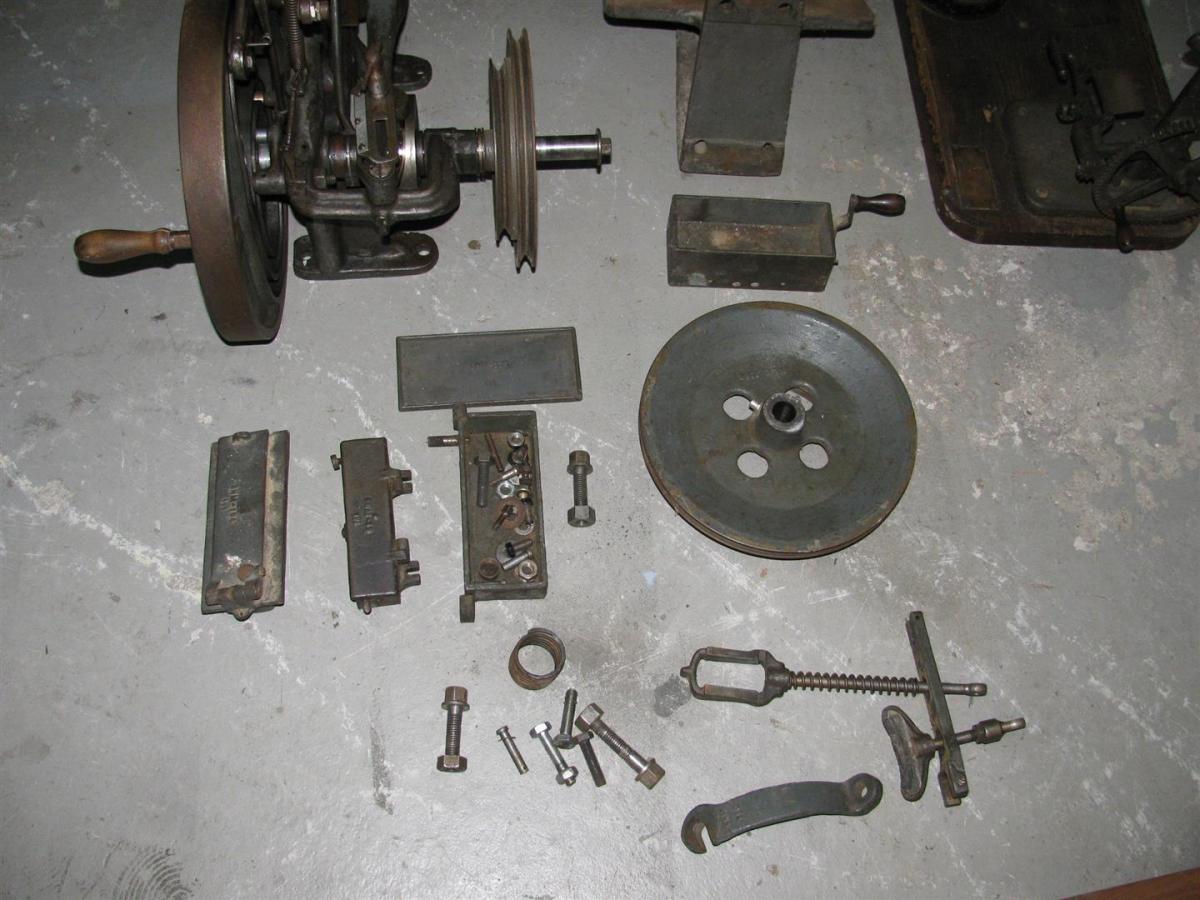
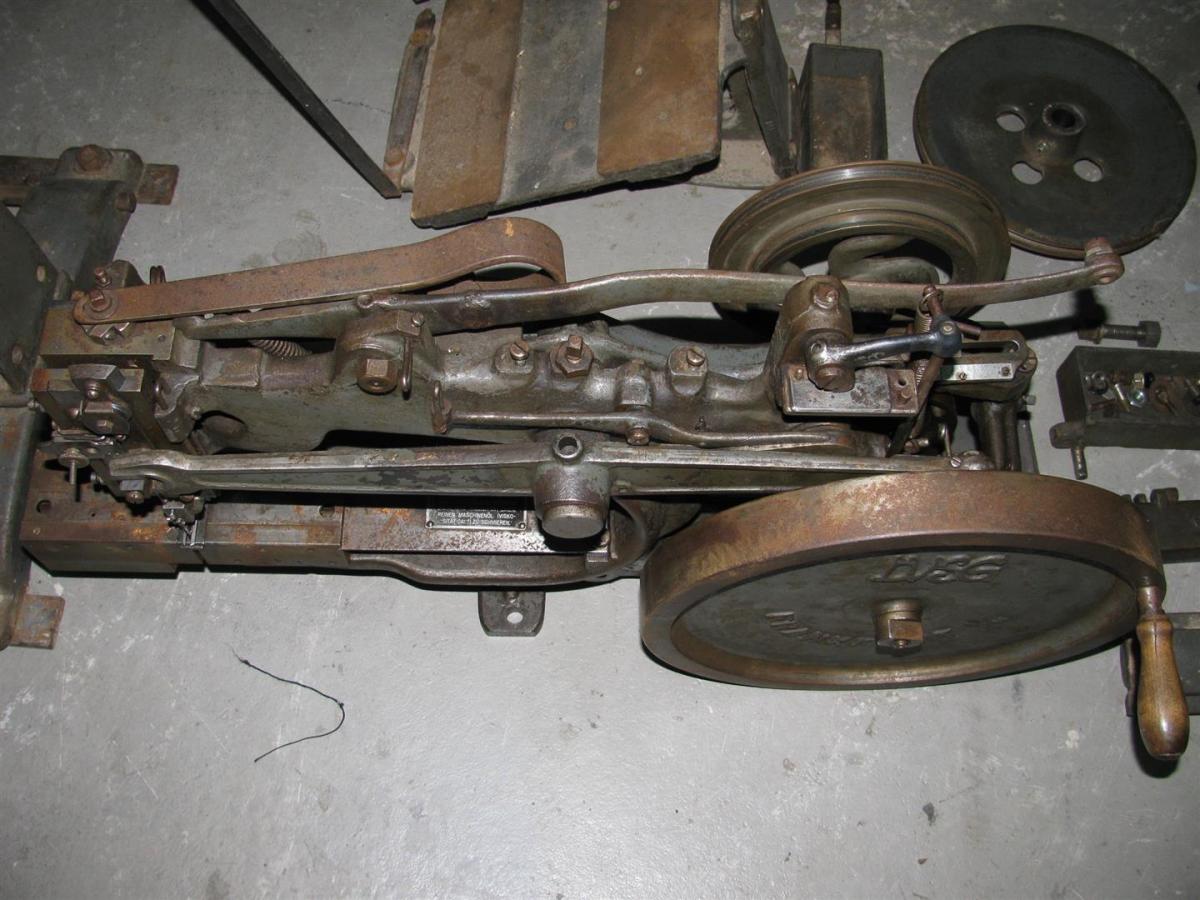
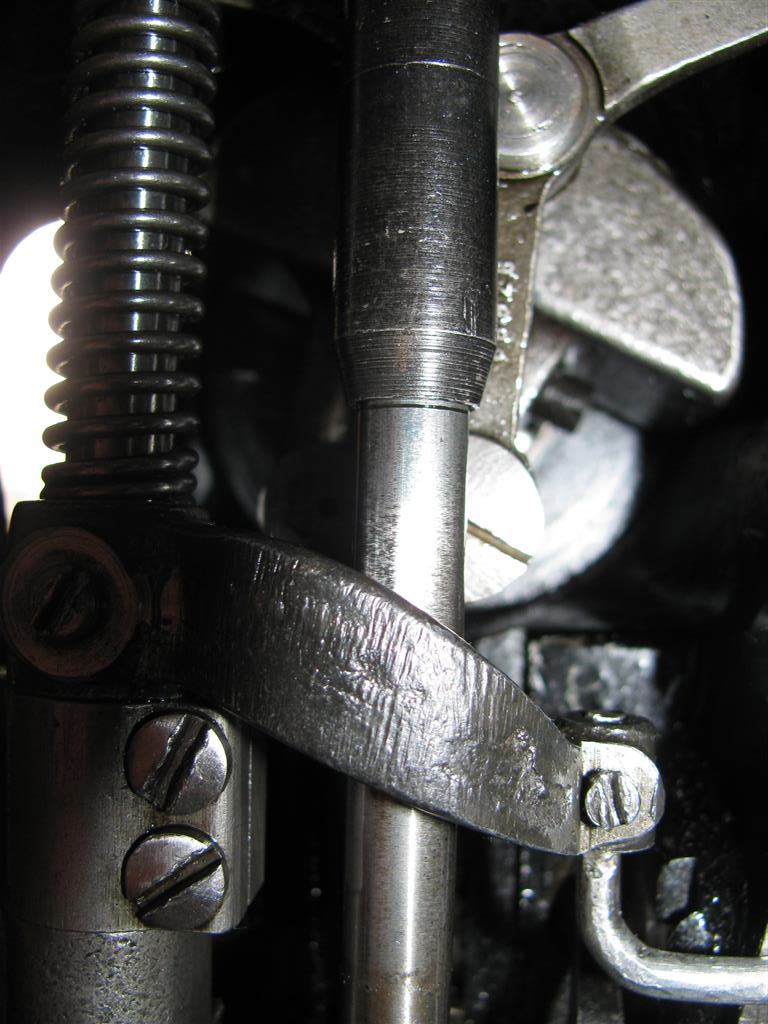
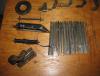
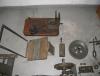
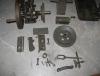
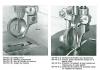
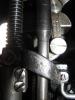
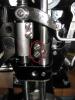
Due to the gray paint job (German field gray?) I would guess it has a military background but don´t know for sure. Maybe its just the standard paint for the German distributor. Some pictures of the accessories that came with the machine. Nice bunch of needles & presser feet and even some longer presser feet which not belong to this machine afaik - or do they?

-
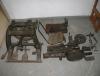
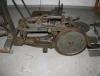
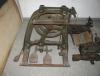
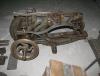
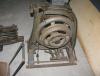
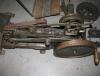
I have to do some repairs on my and a friends army tent but these canvas monsters are heavy and I don´t want to rip apart my Singer 133K carry it downstairs reassemble everything just to find out that the machine can´t do the job. So in the recent days I was hunting for a proper "tent repair machine"... I´m sure flat bed machines are better for the job but I stumbled over this one by accident and by the Lord I could not resist buying it and so picked it up today. So from what I can tell it is a BUSM / Pearson #6 but (maybe) made in Germany or "relabeled" BUSM for a German distributor. I will do some research to find out more... Anyway - here are some pictures for the cast iron lovers out there:
-
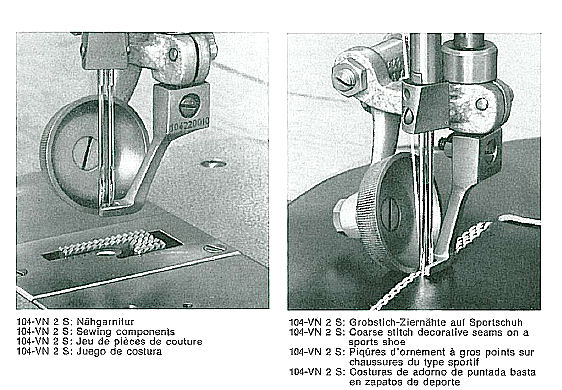
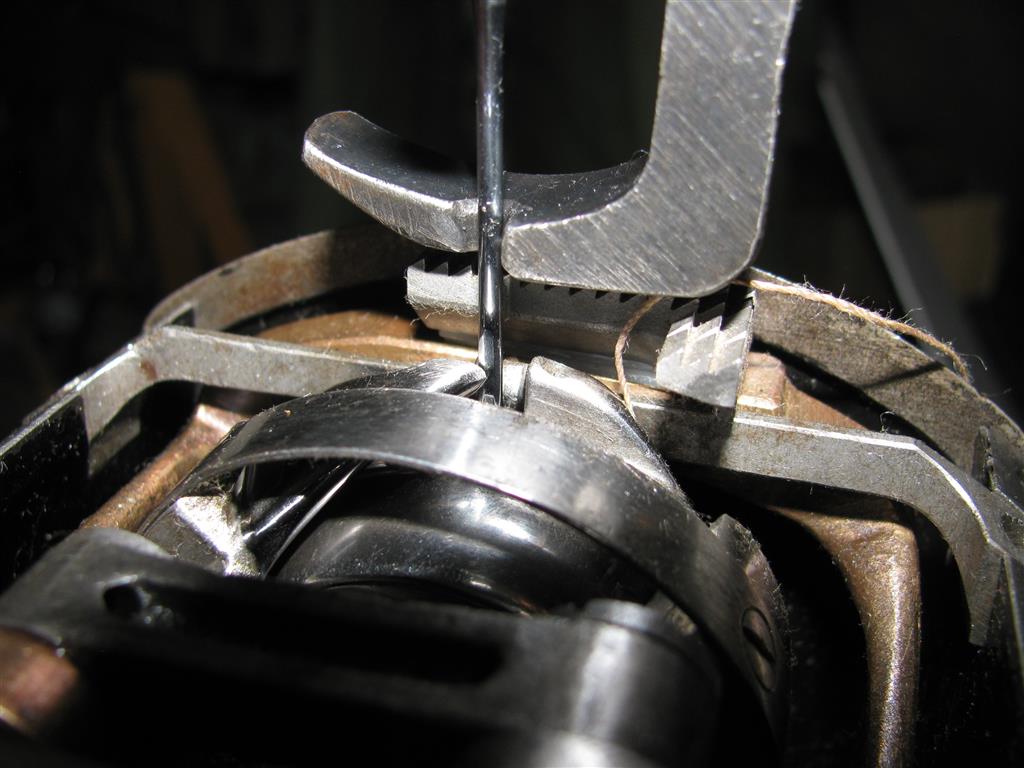
Al - sorry for not responding your Email. The 2 rollers are for sewing raised seams. The 2 needles are for decorative stitching.This must be something for the shoe industry or heavy duty upholstery. I`m sure Adler produced a wide range of sewing machine accessories for the shoe industry for several application one "simple human being" like us would not even think of.
-
Check if the needle scarf is facing straight right and has no angle and if the needle / hook timing is correct. Maybe you have to lower the needle bar tiny bit. Try a new needle or a needle one size bigger. Thats at least something I´d try.
-
@ Evo160 I recently have found an application in an Adler 104 brochure where they use a presser foot in addition to a "fixed foot". I never thought of this but here is a picture. But I would assume the fixed foot is not touching the material. It seems to be slightly above the material. The fixed foot is for preventing the material to lift up when the needle is rising. But thats just a guess. The brochure comes for the from the Duerkopp Adler Blog http://sew24.blogspot.de/2012/02/vintage-leaflets-for-adler-sewing_23.html
-
Pictures are always welcome since there is not much documentation for these nice old machines. Always good to see details :-)
-
No - the Adler 269 does not take 111 feet. It takes the feet of the Adler 67, 167, 267, 269, 69, 169, 269 compound feed machines (and maybe some others). Maybe there are clones but I know of non. Most clones take Singer 111 type feet. College Sewing in the UK has a wide range of feet for the Adler machiens but since you are in the US I´d contact some of the dealers who have banners on the top of this website first.
-
Caught Out By A Smart Servo Motor
Constabulary replied to amuckart's topic in Leather Sewing Machines
Sorry Darren but are you sure about these prices? -
Caught Out By A Smart Servo Motor
Constabulary replied to amuckart's topic in Leather Sewing Machines
Sorry to hear this. As I said earlier I´m done with these NPS on servos. My work is too simple and I figured I don´t really need it at slow speed. College Sewing offers a "new" servo for "Heavy Duty" machines. https://www.college-sewing.co.uk/SV71-650-WATT-220V-0.87-HP-SERVO-MOTOR-WITH-NEEDLE-POSITION See attachment for a brochure for this motor. Seems the accelerator unit is attached to the control box - I don´t think thats clever but thats how they make it. Not sure if this is really an alternative... SV-71.pdf -
Wrong description Darren, the 45K69 is a sole stitcher machine! We have compiled a list of subclass descriptions here: http://leatherworker.net/forum/index.php?showtopic=61619&p=397944
-
It´s so nice to see that there are still a bunch of "cast iron" lovers out there Simran - in case your machine has the same presser foot bar like the 45K25 (for instance), then you could use the presser feet of the modern GA5-1 sewing machines or Cowboy 2500 from Toledo Sewing Machines Could you post a picture of the bobbin winder? Looks interesting....
-
left side of your bench!
-
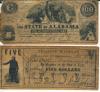
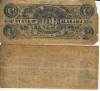
100 Dollars 1864 + 5 Dollars 1862 - Are They Real?
Constabulary replied to Constabulary's topic in All About Us and Off Topic
I once bought a big bunch of manuals form all eras from collector and Living History buff and I don´t know where he got the stuff from - I don´t expect too much... Maybe they were just used as bookmarks. -
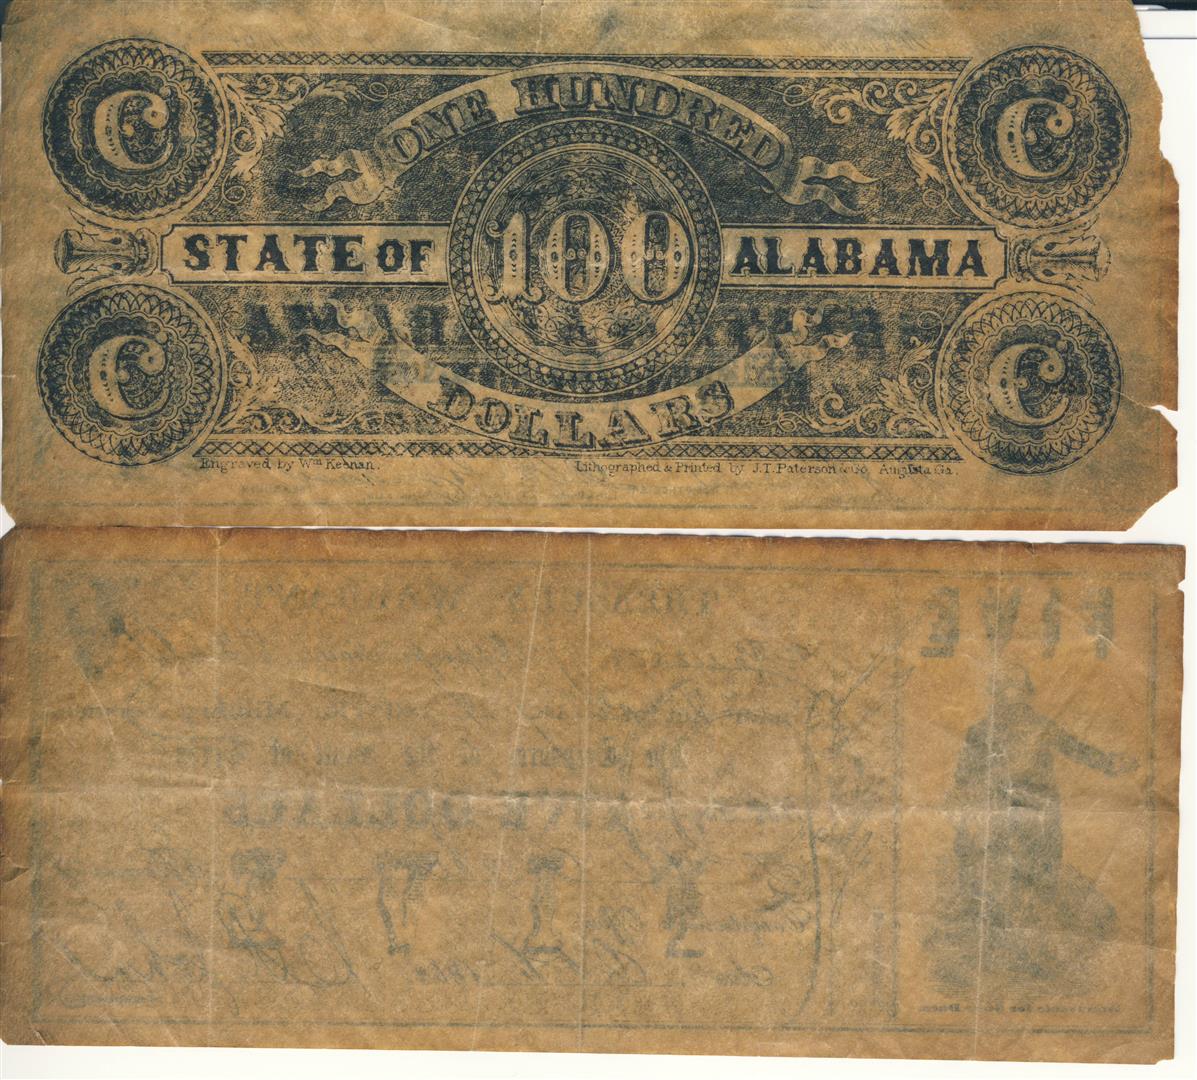
A couple of years ago I found two old Dollar bills from the 1860´s in WWI era Army manual (I´m collecting US Military items). And ever since I kept them but never did some research so I wonder if someone can tell me more about them. See attached pictures
-
Recommendation - Jack Jk-561A-1 Servo Motor
Constabulary replied to Constabulary's topic in Leather Sewing Machines
Sorry - seems I missed this. My speed reducers are custom made and have 2 ball bearings. http://leatherworker.net/forum/index.php?showtopic=53689&p=351899 -
That seems to be an old parts number. I´d contact one of the dealers who have banners no top of this page. Or check with this guy here: http://drdanessmh.com/pfaffindustrialparts.html Thats the only I found online.
-
Yet I have not used 216x1 needles, I´m using 328 (214x1) needles and I honestly do not have #19 needles for my machine.The smallest size I´m using with my 133K is #24. Mine is set up for using #25 METWAR needles (old brand) but when I switch to #24 SCHMETZ needles the hook is rubbing on the needle though the needle size is smaller. Its just a tiny tiny bit but it is rubbing. Not sure if this happens with #24 METWAR needles as I don´t have them. I think it is just because of using different band needles.... The 214x1 needle system is a bit different as the shank thickness varies - the larger the size the thicker the shank. And when I remember correctly the 216x1 has the same shank diameters so it could be possible that you have to adjust the hook when you are using thicker needles but I´m honestly not 100% sure
-
what part is it?
-
Not everybody is in the comfortable situation of being able to pay any price at all times. And I´m sure you know that if you don´t run around blindfolded. "Beating down the price" is a common term or isn´t it? I consider it as an acronym for "negotiating the price". If I used the wrong term - my fault (probably). You really pay any price because of earning respect? Come on... What is a private deal? Some one has something for sale - you need what he has (or just like to have it) - you drive 100 miles - pay the money - drive away - you will probably never see him again - do you really think a private seller cares about who you are or pays you respect because you paid his price? Not really! Within a week or so he even forgot your name! Well - I think its a point of view. There is no right or wrong. You like to pay the full price for some reason - others like to "beat down a price" for some reason. You made your statements and others made theirs. Not worth making a lot of words and TOSSIK already bought a different machine...
-
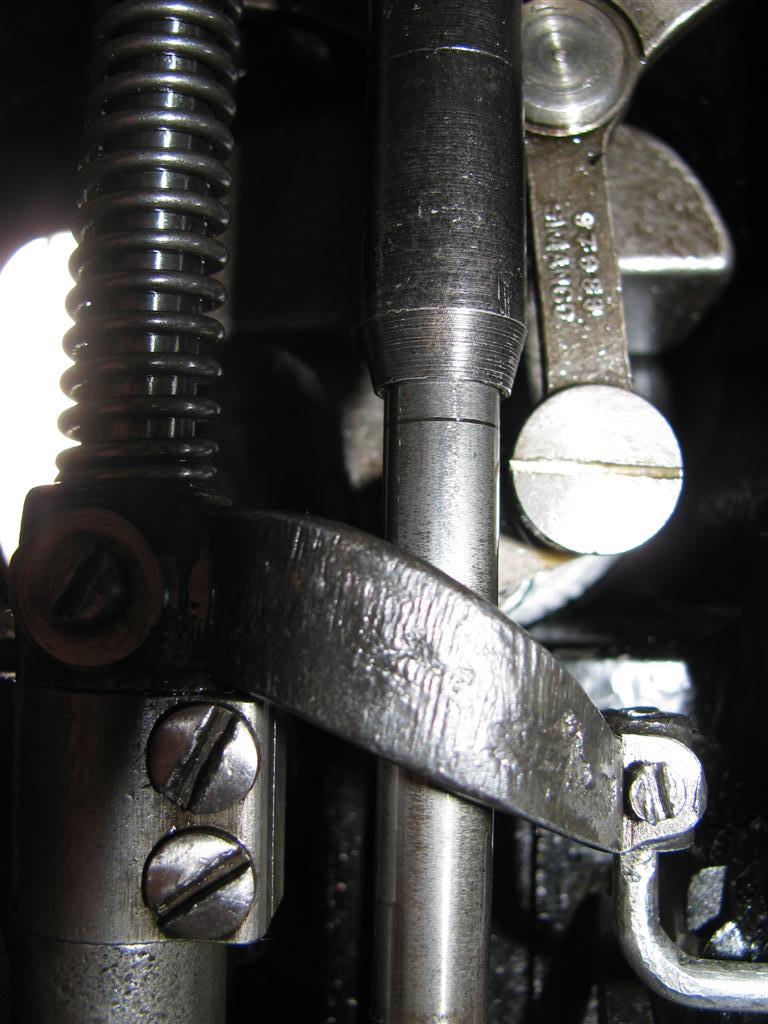
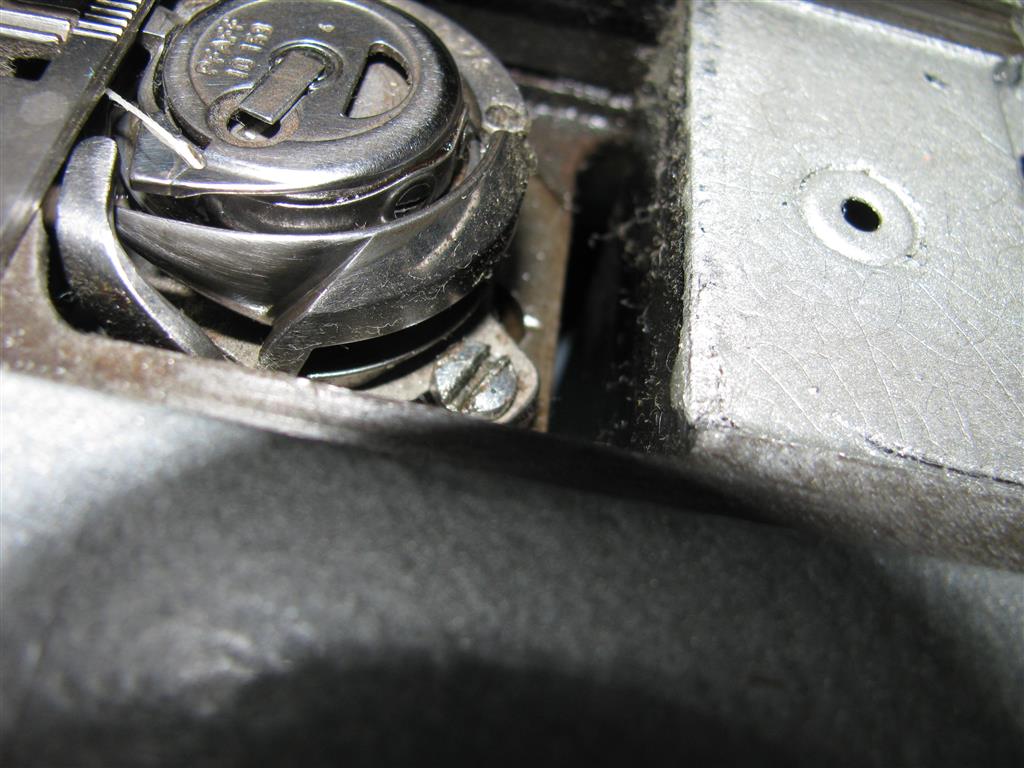
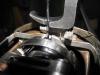
Oh - I forgot to mention that the needle bar has two timing mark (I hope yours has them). The upper mark should be barely visible in the lowest position of the needle bar and the lower mark should be barely visible when the hook tip meets the needle scarf. But some additional fine tuning may be necessary. Picture 1 shows the lower timing mark in the lowest position of the need bar - upper mark is barely visible (you cant see it on the picture). Picture 2 shows the lower timing mark when the hook meets the needle scarf. Thats the timing my machine works fine with. Hope this helps. Too bad you areon the other side of the pond (I guess) otherwise I´d buy your machine
-
Thanks for your PN but I reply here. Usually you just have loosen the 2 screws on needle bar clamp and adjust the needle bar the way that the hook meets the needle scarf when the needle bar is in the upwards movement. My needle bar moves up approx. 2.5mm - 3mm before the hook tip meet the needle scarf right in the middle of the scarf. Distance between needle and flat side of the hook tip should be as close as possible. At my 133K it is approx. 0.25mm The 133K looks a bit different behind the faceplate but the needle bar should be the same. My 133K was a bit tricky to adjust properly. I just bought it last year and it needed a lot of fine tuning on the distance between hook and needle. I had to adjust some bushings and gears but now it sews very well considering that this beast was made in 1932!!!
-
Looks like a Pfaff 145 or 545, right? There is a screw on the lower right that holds the lever (bobbin case opener). Just loosen it and adjust the lever a little bit. Here is a pic of a 145 I guess your is a 545 with larger hook but it should look the same. Hope this helps