silverwingit
-
Posts
537 -
Joined
-
Last visited
Content Type
Profiles
Forums
Events
Blogs
Gallery
Store
Everything posted by silverwingit
-
How Exactly Do You "dip" Dye Your Leather?
silverwingit replied to Sixer's topic in How Do I Do That?
I think we see dip dyeing a bit differently. My goal in dip dyeing is to completely saturate the leather with the dye, through and through. I make sure that no bubbles rise from the leather while it is submerged. I often have to run the workpiece through the tank of dye more than once to achieve this. The final shade is determined by diluting the dye, where the dilution factor is determined experimentally on a piece from the same part of the same hide as the workpiece. (This is important as sections from different parts of the same hide can take the dye differently.) If you fully saturate the leather, it shouldn't matter if the holes are punched first or not. If the dye is struck through and through, a cut will have uniform color from the grain to the flesh sides. At least that's the way I see it. -
Slippery Needles Makes Hard Hand Stitching
silverwingit replied to Horny G Leather's topic in How Do I Do That?
I just use secretary's thumb cots. The rubber ones with the bumps on them. Work great. -
I have a really nice photographer's loupe that works very well for examining knife edges, since I no longer develop film. Works great. I too find that 3.5x is too much for general viewing on my optivisor. Intead I prefer 2x lenses with the 10x swing-in auxilliary lens. Makes a good combination. Some folks in the folding and fixed blade knife sharpening community use USB microscopes to really zoom in on their edges. Very revealing and not too expensive. Michelle
-
You don't mention what kind of hide, what kind of tanning method produced it or what your intended use is. Some oil-tanned leathers will smell bad forever but the strength f the odor may diminish over time. Probably your best hope is to hang it vertically and let it air out. If that doesn't work, you might try putting it in a large enough fairly air tight container like a garment bag with something pleasant smelling and see if the leather doesn't absorb some of its odor. Good Luck, MIchelle
-
How to stitch leather letters to a beanie????
silverwingit replied to Wulfing's topic in How Do I Do That?
The proper method is to stitch all the way around the perimeter of each letter. To do that with letters that would fit on a beanie, you would need very small thread and very tight stitch spacing. I hope your hand stitching is up to snuff. MIchelle -
I never trace anything. I scan it and create a precise pattern on my vector drawing program. Works great and you can print any number of copies. I don't even bother with Saran wrap, just place the regular computer paper directly on the cased leather. It's easy to see where I've transferred the pattern onto the leather and I don't care if the pattern gets destroyed. I print out another whenever I need a fresh copy. I have a 13" x 19" printer that encompasses almost all my patterns. If needed I cut and paste more sheets together. Michelle
-
You should get Al Stohlman's 3-book series "The Art Of Making Leather Cases." Packed with information that will help you make box-style cases like you are undertaking as well as many, many other types cases. Volume One is the one that details how to make a box-style case to specific dimensions, to fit specific items perfectly. But the other two Volumes contain useful tips throughout so I'd advise that you get all three. The aren't expensive. And, while you're at it, get a copy of Stohlman's "The Art Of Hand Sewing Leather," similarly packed with excellent information. https://www.amazon.com/Art-Making-Leather-Cases-Vol/dp/1892214946/ref=sr_1_3?s=books&ie=UTF8&qid=1488044546&sr=1-3&keywords=al+stohlman The answer to your question is the rule of thumb is that you need to add two thickness along each bend. Good Luck, MIchelle
-
Dart Carrying Case
silverwingit replied to Bob Blea's topic in Purses, Wallets, Belts and Miscellaneous Pocket Items
I like it a lot! In fact, if anything it's too nice for darts. The only thing I waffle about is your use of elastic strips. I wrestle with this sort of thing all the time. My prediction is that the rest of the case will just be getting a nice patina when the elastic loses its elasticity or rots. I have the same problem with Velcro. I cringe when a client requests Velcro closures over my usual solid brass snaps. I tell people that they will hand my leather products down to their next generation. Not so if they use Velcro closures. Velcro, and other plastic/rubber man-made materials I'm aware of like it that can be used as closures wears out. It gathers detritus that cogs the loops and the hooks gradually straighten out with use. I wish I had an alternative. I suppose leather loops are the only other means of holding the shaft of the dart that will last as long as the rest of such a case. That's what I use for pens when I make a portfolio or loops for shotgun, pistol or rifle shells. I'd be delighted if anyone can suggest a better loop material than elastic strips and an alternative to snap-type closures other than Velcro. Thanks! Michelle -
It also looks like a product called round leather lace. Available at most leather supply houses or on ebay. Michelle
-
I think you'd be better off using 0.8 mm or even thicker on a heavy-use item like a gun belt. The thread the lady is using in the video is probably 1.0 mm in diameter. Michelle
-
My apologies. I saw that comparatively tiny balisong swimming in that first sheath and wondered what was going on. Michelle
-
Barry King makes excellent swivel knives at very reasonable prices. His blades are equally excellent. Here's a better workflow. - tool - round edges with edger (Barry King also makes excellent edgers) - sand edges smooth - dye leather (you can use alcohol to dilute many dyes; I prefer Feibing's Professional Oil Dye. I dilute it 1:1 or 1:2, dye:alcohol) - condition leather (I use neatsfoot oil and then carnauba cream -- don't condition before dyeing as it will foul the leather for absorbing the dye) - moisten edges, slick with gelatin saddle soap - burnish moist edges with burnishing tool, allow to dry - dye edges, allow to dry - apply beeswax to edges - polish edges with duck canvas (I sometimes re-burnish first to help shape the edges) - finish leather (I like Bag Kote on the grain side and Tan Kote on the flesh side; some refer acrylic resolene) Works for me. Michelle
-
If you were a baker would you charge your first customer for your oven? IMO, blue guns are part of the cost of doing business -- CODB. It's a common term in the business world. Calculating your CODB is a very valuable exercise. Understanding CODB is essential to a business owner's success. You should look it up if you haven't already. There are many examples on the web. You will be surprised at how much it costs to run a profitable business, even a part-time one. Of course, there are many ways to start a business. Unless you're rich or have outside funding, you're stuck with what's called "bootstrapping" your business, another term common in business parlance. There are many ways to bootstrap a company. Funding it off your own back is usually an essential element. In this example, you need to "procure" by any means necessary the tools of the trade, leather and supplies. You will likely have to donate your own time and expertise and take money from your day job to but any necessary missing components. All the while so you can act like yours is a "real" company. There are resources available to help you start your business. Many cities have business incubation "tanks," entrepreneur and venture capital clubs. There are organizations like SCORE (Senior Core Of Retired Executives) that donate their time to budding entrepreneurs. And last butnot least is the Small Business Administration. Your local SBA office has free counseling and referral services. It's easy to think that all you need to make money doing leatherwork is a few tools and a little experience. But making money doing leatherwork is just like any other business. You need to learn how to be a businessman (woman) if you want to be successful. At least that's the way I see it. Michelle
-
My pleasure, Chief. And thanks for the complement. Michelle
-
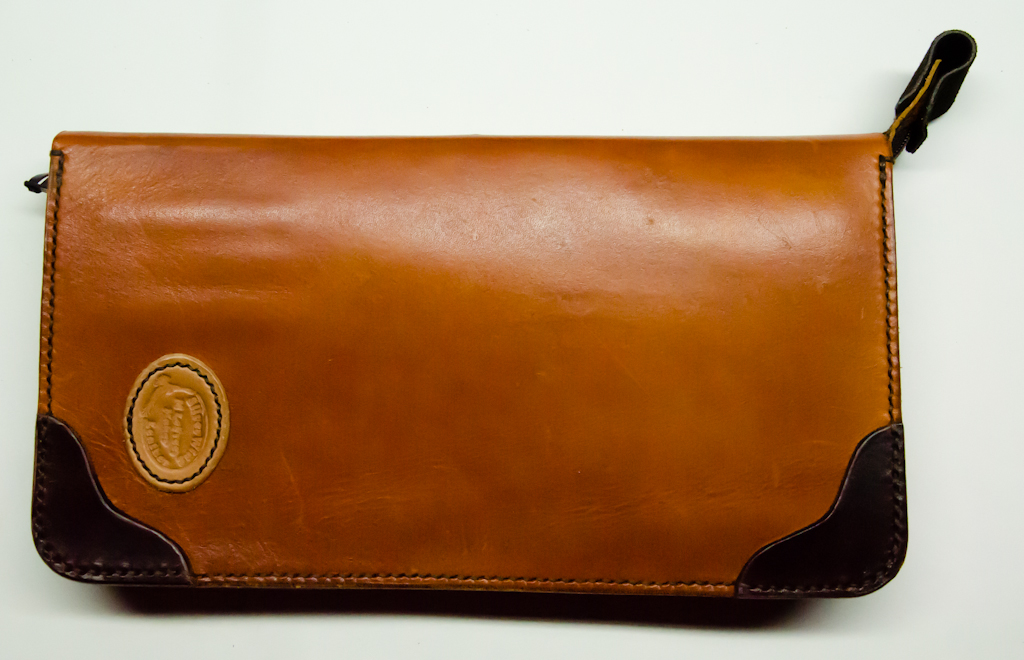
Here's a zipper case that I block dyed. I hope you can see the natural features I was talking about. MIchelle

-
Some people call this a serpentine border. Bruce Cheaney shows several examples of how to make them with a serpentine stamp. Here's a god start. Michelle
-
Getting An Even Finish Using Fiebings Dye
silverwingit replied to wvcraftsman's topic in How Do I Do That?
I love the organic look and feel of fine leather. I feel that spraying or dipping it produce results that are actually too uniform and fail to bring out the beautiful grain, barbed wire scars, insect bites, brands, and natural non-uniformities in a good piece of vegetable tanned leather. Therefore I prefer block dyeing because it enhances these natural marks. I use 1:1 or 2:1 alcohol to Feibing's Pro Oil dye dilutions. Wrap a piece of 2x4 with several layers of strips cut from an old t-shirt and staple them so there are no seams or wrinkles on the bottom surface. Dip in the diluted dye until it's saturated and pass it over the leather with overlapping strokes using light pressure. You'll see the natural organic beauty enhanced as you go. Stop when you have the desired shade. Of course the dye will lighten up significantly when it dries. If you haven't over done it and wanted it darker you can go back and repeat the process. So it's better to be conservative the first time. Try it -- you'll like it! Michelle -
I'm glad you achieved your desired effect. I just wanted to add to the texturizing and antiquing thread. Antiquing isn't the only way to go. Antiquing leaves the ridges light and the depressions dark. Sometimes you want the opposite effect. You can achieve some very interesting results using block dying instead of antiquing. Take a piece of 2x4 and wrap it in lengths cut from an old t-shirt. Staple the ends of the strips to the sides of the wrapped wood block so there aren't any exposed edges or wrinkles on the bottom of the block. Then dip the block in dye until it is saturated and with light pressure pass it over the leather such that it hits the "lands" and not the "grooves." You can take as many passes, overlapping them as you go until you get the desired shade. This is also a great way to apply an even coat of dye on a large piece of leather. Michelle
-
Just thought I'd post a packing tape finding
silverwingit replied to Timbo's topic in How Do I Do That?
More often than not the fussiness caused by tape is too non-uniform or inappropriate for the projects I tool and I can't leave it visible. So regardless of whether I use tape, rubber cement, or shelf liner I plan on lining the project. I take it as a fact of life in leatherwork. Michelle -
First holster sold!
silverwingit replied to Sphinx's topic in Gun Holsters, Rifle Slings and Knife Sheathes
That's such a terrific feeling! Congratulations and I hope you continue on to great success. Michelle -
Critique my holsters please
silverwingit replied to justingschneider's topic in Gun Holsters, Rifle Slings and Knife Sheathes
Your edges are too wet no matter what you use to slick them. I've tried every method or applying dye or paint to edges I have come across. Small brushes are way too hard to keep right on the edge. I have the Angelus refillable markers but I've found them likewise dangerous and risky to use because it is so easy to have that small pointed applicator to fall off the edge onto the leather's surfaces. It's very difficult for me to get a uniform coat with metal spatulas. Tandy and others market roller-type applicators that you dip into the paint and roll over the edge. These don't suffer from the tendency to fall off the edge but the deep grooves leave marks along the edges. Those roller applicators with a tank of paint underneath them seem way too messy and troublesome to use and really only work for belts or other linear items. Don't try one on a holster! So I have gravitated back to the old-school method of applying paint or dye -- a piece of very heavy felt held with a clothespin. I buy lengths of 1/2" x 1/2" industrial felt from Grainger and cut them into 1" pieces. Dip them in the dye/paint and daub the extra on the back side of a piece of scrap leather and I am good to go. They're long enough and stiff enough that they're easy to keep perpendicular to and right on the edge and to thereby avoid slipping off it onto the surface of the leather. With a little practice you quickly figure out how much dye/paint to daub off so that there isn't a great glob of paint or big drop of dye that will wick onto the surface leather. My paint brushes, Angelus pens, spatulas and Tandy roller sit. And I don't ruin any more projects by slipping off the edge and putting a nice streak of dye across their surface(s). Works great for me. Michelle -
Cool looking collars and a novel fastening idea. I guess I must be becoming Grumpywomann, though, as I do share Grumpymann's concern about the first one's security, especially assuming the name "Diesel" befits the dog. I also wonder what the other pairs of Sam Browne studs are for? And I realize that the second is decorative but I don't see any way to attach a leash or tags to either one, generally one of the principle reasons for putting a collar on a dog. Michelle
-
Legal issues aside, I agree that the sheathes are visually quite appealing and show a high level of skill and creativity by the maker. However, they both seem way too large relative to the size of the knives they hold, especially the first one. I'd be concerned that they would provide little to no retention to keep the knife inside if the owner bends over or otherwise tips the sheathes from vertical. This, to me at least, is one of the primary functions of a well-designed and executed knife sheath. As a result the sheathes seem more platforms to display your skills rather than functional ones that will protect your customer's investments. Sorry, but that's the way I see them. Michelle
-
+1 with Weaver Master Tools. Excellent quality. Wide Range. Sharp enough to use them out of the box. I'd have many more if I could afford them.
-
I want to expand on JLSLeather's recommendation to use a transparent ruler because it is a very important one. There are a handful of tools I find myself reaching for constantly. Tools that I'd be absolutely lost without. My little $3 Osborne awl, utility knife, bone folder, Osborne rotary punch, steel ruler with a Veritas ruler stop and so on. Speaking of rulers, I have to give Arthur Porter (many excellent Youtube videos) credit for turning me on to those transparent rulers with rectangular grids printed on them. The kind that seamstresses use. They are absolutely the cat's meow for working with any project that involves any sort of straight line. I use mine dozens of times a day. They've become indispensable to me. I've tried several brands and I've settled on Olfa's Frosted Acrylic rulers. They are superior for three reasons. One, is that the markings are black and very thin and unobtrusive compared to some others that have thick, garish colored lines and tick marks that obscure the details of whatever is underneath them. Olfa's lines are also printed on the bottom of the acrylic, eliminating any parallax error due to the thickness of the plastic. Finally, as the name suggests, Olfa's rulers are frosted on the bottom, which gives them a little "tooth" that helps a lot keep the ruler from slipping. They are inexpensive and durable and come in a number of sizes. I have several sizes but find the 6" x 6" and 6" x 12" ones the handiest for the size of my typical projects. https://www.amazon.com/OLFA-1071819-QR-6x12-12-Inch-Advantage/dp/B000PD0DWM As I said they are useful any time I need to draw or cut a straight line. They're particularly handy when you need to draw or cut parallel straight lines. You just register a line or row of tick marks the desired distance on top of a previous line and the edge is automatically exactly where it needs to be. Next to that $3 awl and my $10 Stanley utility knife, these babies are the best money I've spent on my leatherwork tools. Try one and you'll see what I am talking about. Your straight line issues will be a thing of the past. Michelle